In this section we will present the common setup of Jenkins for any platform. We will also provide answers to most frequently asked questions.
.
├── declarative-pipeline
│   └── Jenkinsfile-sample.groovy
├── jobs
│   ├── jenkins_pipeline_empty.groovy
│   ├── jenkins_pipeline_jenkinsfile_empty.groovy
│   ├── jenkins_pipeline_sample.groovy
│   └── jenkins_pipeline_sample_view.groovy
├── seed
│   ├── init.groovy
│   ├── jenkins_pipeline.groovy
│   ├── k8s
│   └── settings.xml
└── src
    ├── main
    └── test
In the declarative-pipeline you can find a definition of a Jenkinsfile-sample.groovy declarative
pipeline. It’s used together with the Blueocean UI.
In the jobs folder you have all the seed jobs that will generate pipelines.
jenkins_pipeline_empty.groovy- is a template of a pipeline with empty steps using the Jenkins Job DSL pluginjenkins_pipeline_jenkinsfile_empty.groovy- is a template of a pipeline with empty steps using the Pipeline pluginjenkins_pipeline_sample.groovy- is an opinionated implementation using the Jenkins Job DSL pluginjenkins_pipeline_sample_view.groovy- builds the views for the pipelines
In the seed folder you have the init.groovy file which is executed when Jenkins starts.
That way we can configure most of Jenkins options for you (adding credentials, JDK etc.).
jenkins_pipeline.groovy contains logic to build a seed job (that way you don’t have to even click that
job - we generate it for you). Under the k8s folder there are all the configuration
files required for deployment to a Kubernetes cluster.
In the src folder you have production and test classes needed for you to build your own pipeline.
Currently we have tests only cause the whole logic resides in the jenkins_pipeline_sample file.
All the steps below are not necessary to run the demo. They are needed only when you want to do some custom changes.
It’s enough to set the ARTIFACTORY_URL environmental variable before
executing tools/deploy-infra.sh. Example for deploying to Artifactory at IP 192.168.99.100
git clone https://github.com/spring-cloud/spring-cloud-pipelines
cd spring-cloud-pipelines/
ARTIFACTORY_URL="http://192.168.99.100:8081/artifactory/libs-release-local" ./tools/deploy-infra.sh
![[Tip]](images/tip.png) | Tip |
|---|---|
If you want to use the default connection to the Docker version of Artifactory you can skip this step |
So that ./mvnw deploy works with Artifactory from Docker we’re
already copying the missing settings.xml file for you. It looks more or less like this:
<?xml version="1.0" encoding="UTF-8"?>
<settings>
	<servers>
		<server>
			<id>${M2_SETTINGS_REPO_ID}</id>
			<username>${M2_SETTINGS_REPO_USERNAME}</username>
			<password>${M2_SETTINGS_REPO_PASSWORD}</password>
		</server>
		<server>
			<id>${DOCKER_SERVER_ID}</id>
			<username>${DOCKER_USERNAME}</username>
			<password>${DOCKER_PASSWORD}</password>
			<configuration>
				<email>${DOCKER_EMAIL}</email>
			</configuration>
		</server>
	</servers>
</settings>
As you can see the file is parameterized. In Maven it’s enough to pass
to ./mvnw command the proper system property to override that value. For example to pass
a different docker email you’d have to call ./mvnw -DDOCKER_EMAIL=[email protected] and the value
gets updated.
If you want to use your own version of Artifactory / Nexus you have to update
the file (it’s in seed/settings.xml).
If you want to only play around with the demo that we’ve prepared you have to set ONE variable which is the REPOS variable.
That variable needs to consists of comma separated list of URLs to repositories containing business apps. So you should pass your forked repos URLs.
You can do it in the following ways:
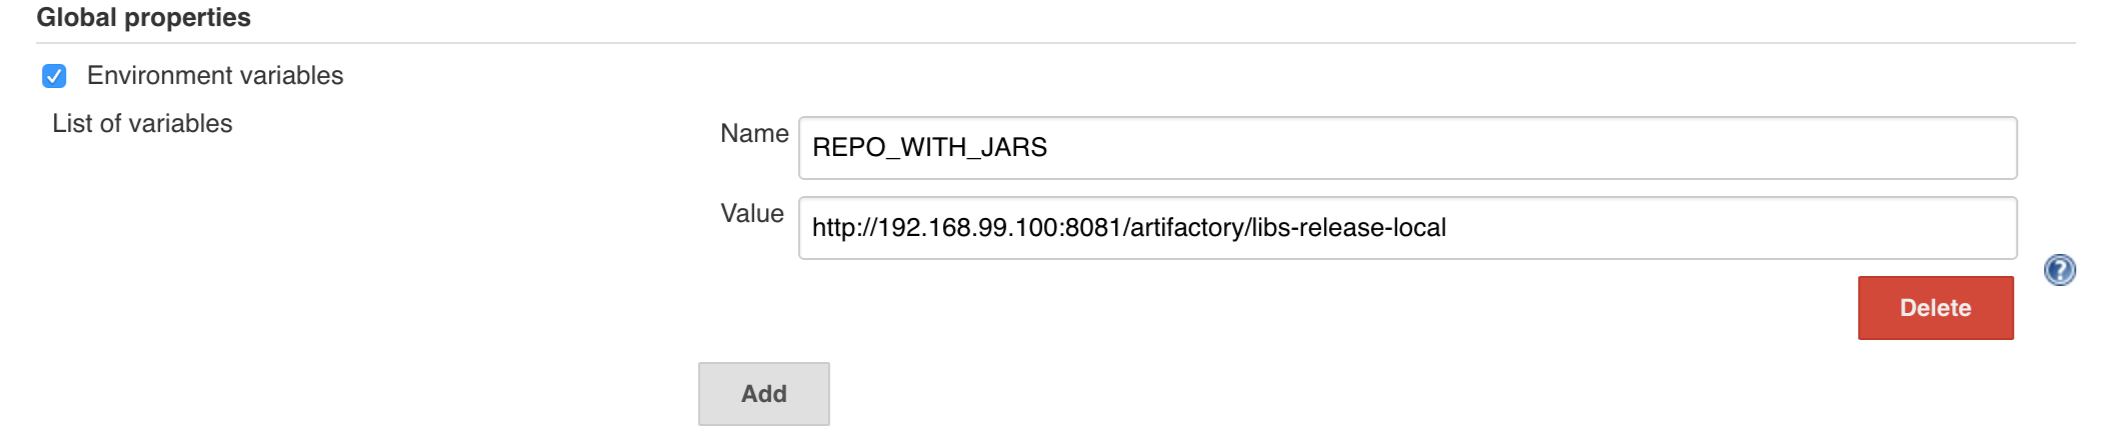
- globally via Jenkins global env vars (then when you run the seed that variable will be taken into consideration and proper pipelines will get built)
- modify the seed job parameters (you’ll have to modify the seed job configuration and change the
REPOSproperty) - provide the repos parameter when running the seed job
For the sake of simplicity let’s go with the last option.
![[Important]](images/important.png) | Important |
|---|---|
If you’re choosing the global envs, you HAVE to remove the other approach
(e.g. if you set the global env for |
Click on the seed job and pick Build with parameters. Then as presented in the screen below (you’ll have far more properties to set) just modify the REPOS property by providing the comma separated list of URLs to your forks. Whatever you set will be parsed by the seed job and passed to the generated Jenkins jobs.
| Tip |
|---|---|
This is very useful when the repos you want to build differ. E.g. use
different JDK. Then some seeds can set the |
Example screen:
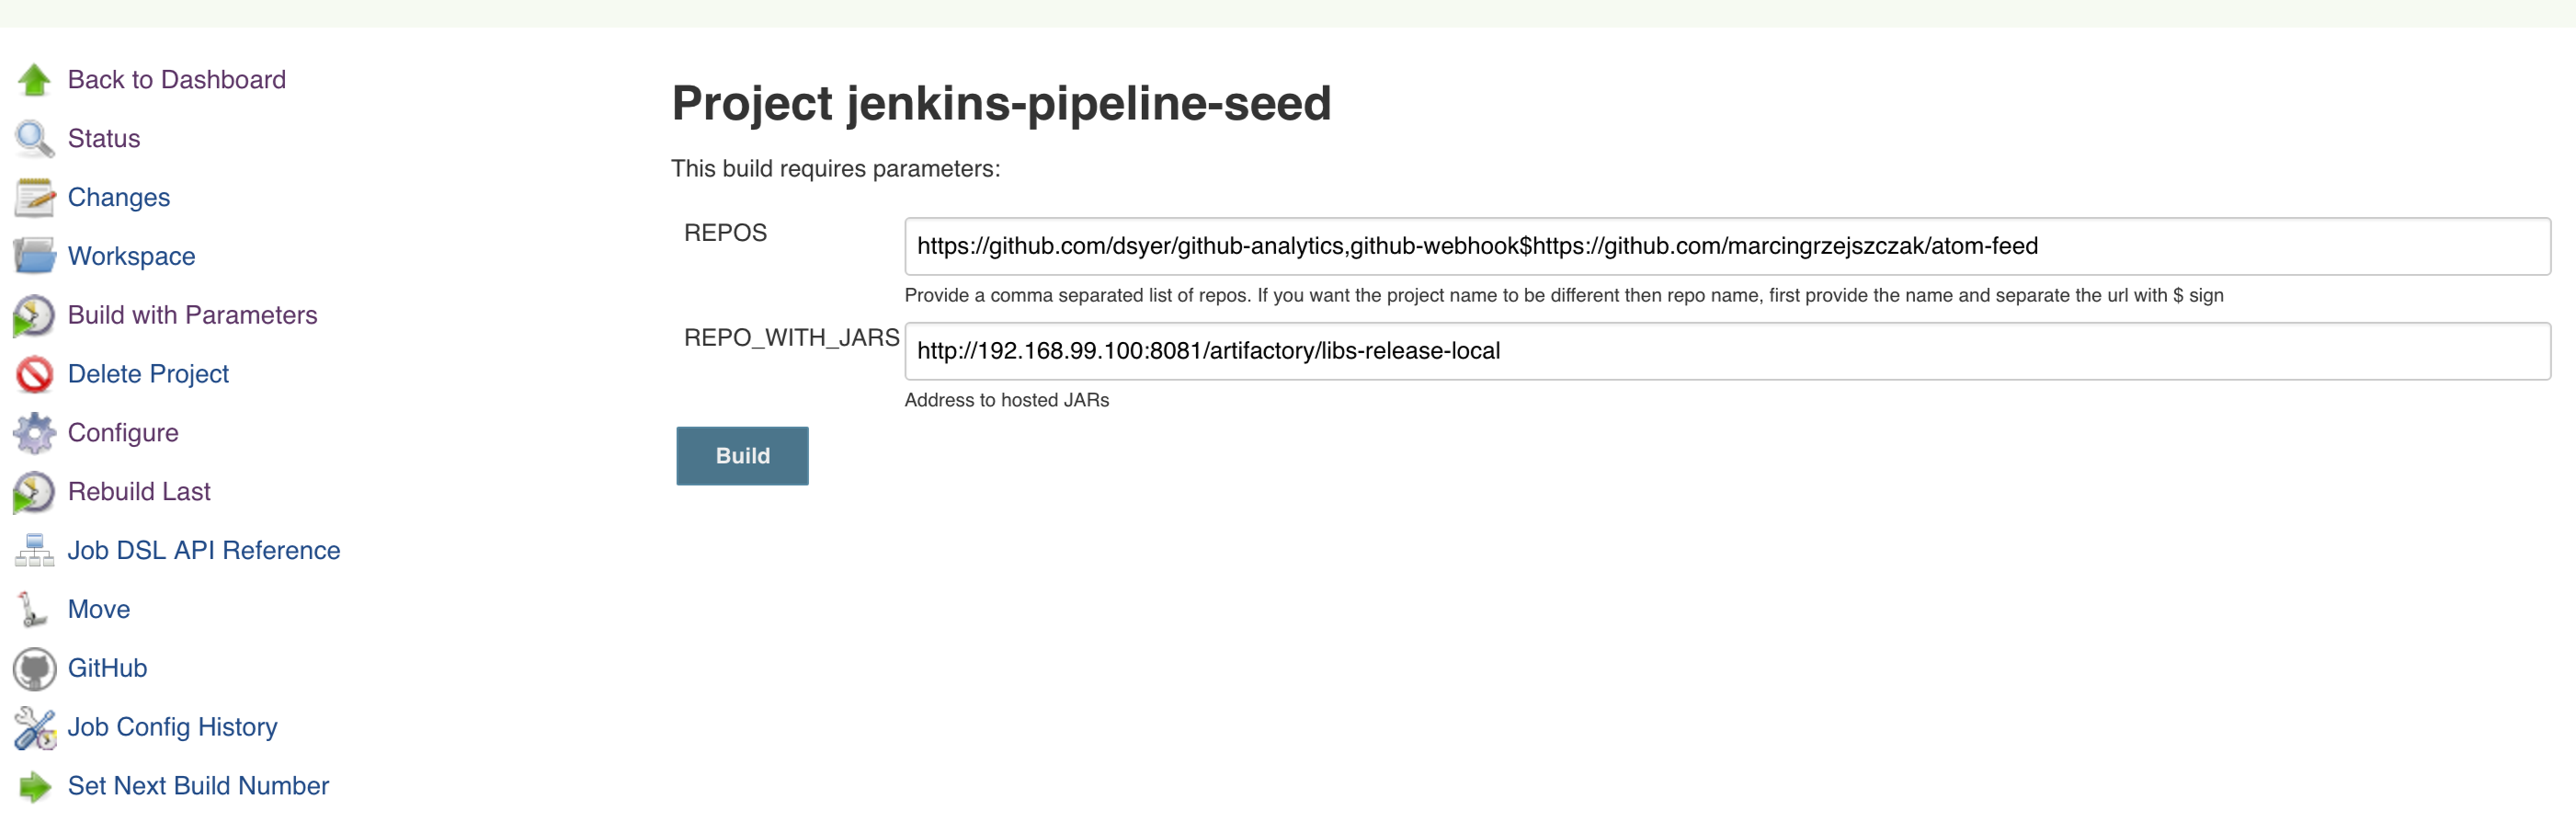
In the screenshot we could parametrize the REPOS and REPO_WITH_BINARIES params.
Since our pipeline is setting the git user / name explicitly for the build step
you’d have to go to Configure of the build step and modify the Git name / email.
If you want to set it globally you’ll have to remove the section from the build
step and follow these steps to set it globally.
You can set Git email / user globally like this:

The scripts will need to access the credential in order to tag the repo.
You have to set credentials with id: git.
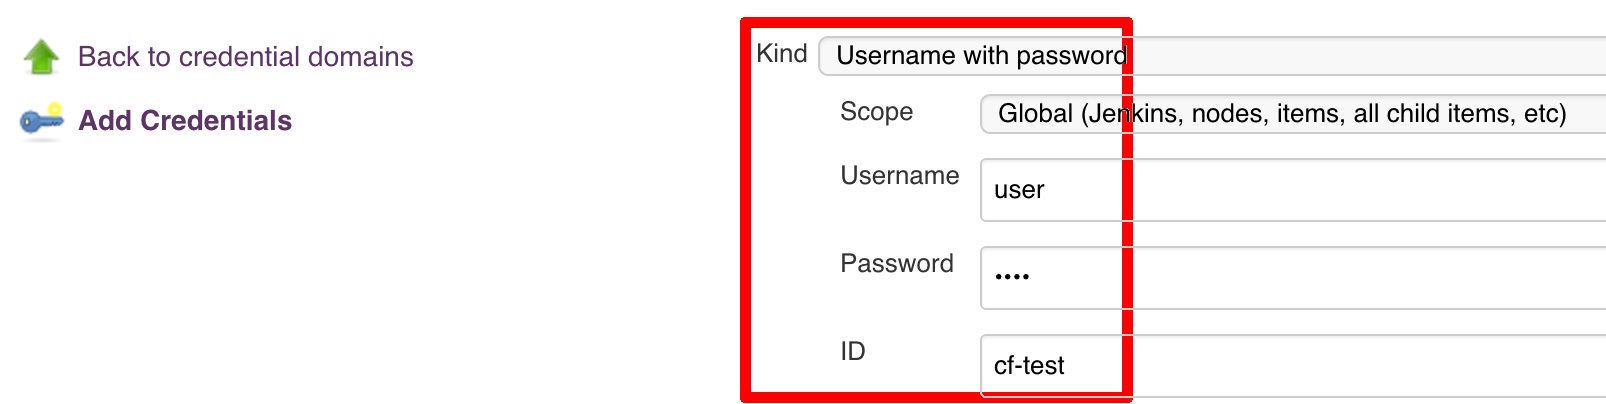
Below you can find instructions on how to set a credential (e.g. for Cloud Foundry cf-test credential but
remember to provide the one with id git).

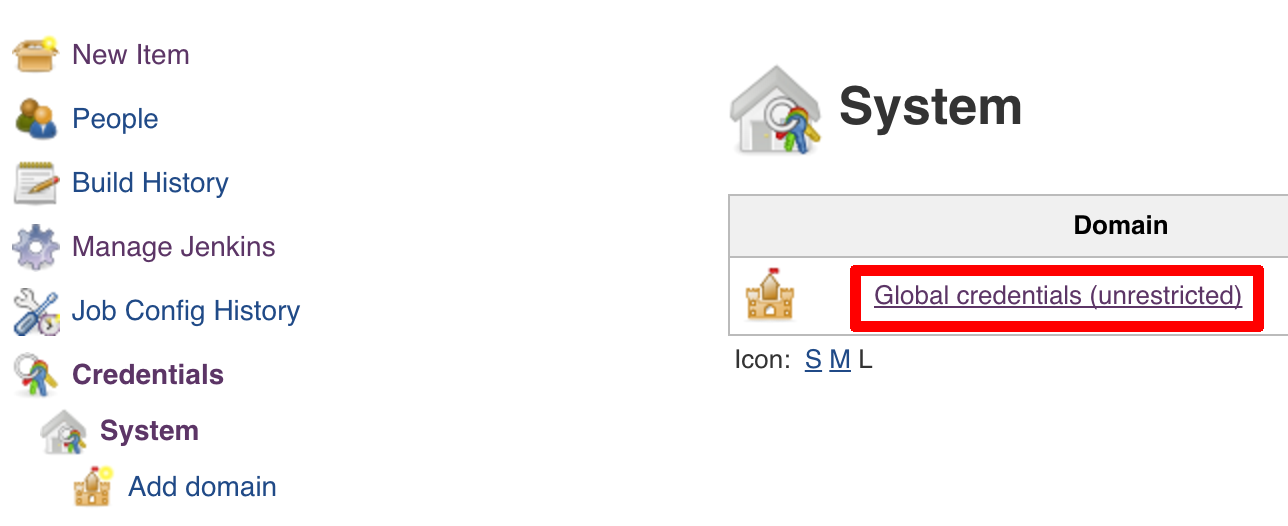

Figure 7.7. Fill out the user / password and provide the git credential ID (in this example cf-test)
./gradlew clean build
![[Warning]](images/warning.png) | Warning |
|---|---|
The ran test only checks if your scripts compile. |
Check out the tutorial. Provide the link to this repository in your Jenkins installation.
| Warning |
|---|---|
Remember that views can be overridden that’s why the suggestion is to contain in one script all the logic needed to build a view
for a single project (check out that |
If you would like to run the pre-configured Jenkins image somewhere other than your local machine, we
have an image you can pull and use on DockerHub.
The latest tag corresponds to the latest snapshot build. You can also find tags
corresponding to stable releases that you can use as well.