![[Important]](images/important.png) | Important |
|---|---|
In this chapter we assume that you perform deployment of your application to Kubernetes PaaS |
The Spring Cloud Pipelines repository contains job definitions and the opinionated setup pipeline using Jenkins Job DSL plugin. Those jobs will form an empty pipeline and a sample, opinionated one that you can use in your company.
All in all there are the following projects taking part in the whole microservice setup for this demo.
- Github Analytics - the app that has a REST endpoint and uses messaging. Our business application.
- Github Webhook - project that emits messages that are used by Github Analytics. Our business application.
- Eureka - simple Eureka Server. This is an infrastructure application.
- Github Analytics Stub Runner Boot - Stub Runner Boot server to be used for tests with Github Analytics. Uses Eureka and Messaging. This is an infrastructure application.
This is a guide for Jenkins Job DSL based pipeline.
If you want to just run the demo as far as possible using PCF Dev and Docker Compose
There are 4 apps that are composing the pipeline
You need to fork only these. That’s because only then will your user be able to tag and push the tag to repo.
Jenkins + Artifactory can be ran locally. To do that just execute the
start.sh script from this repo.
git clone https://github.com/spring-cloud/spring-cloud-pipelines
cd spring-cloud-pipelines/jenkins
./start.sh yourGitUsername yourGitPassword yourForkedGithubOrg yourDockerRegistryOrganization yourDockerRegistryUsername yourDockerRegistryPassword yourDockerRegistryEmail
Then Jenkins will be running on port 8080 and Artifactory 8081.
The provided parameters will be passed as env variables to Jenkins VM
and credentials will be set in your set. That way you don’t have to do
any manual work on the Jenkins side. In the above parameters, the third parameter
could be yourForkedGithubOrg or yourGithubUsername. Also the REPOS env variable will
contain your GitHub org in which you have the forked repos.
You need to pass the credentials for the Docker organization (by default we will search for the Docker images at Docker Hub) so that the pipeline will be able to push images to your org.
When Artifactory is running, just execute the tools/deploy-infra.sh script from this repo.
git clone https://github.com/spring-cloud/spring-cloud-pipelines
cd spring-cloud-pipelines/
./tools/deploy-infra-k8s.sh
As a result both eureka and stub runner repos will be cloned, built,
uploaded to Artifactory and their docker images will be built.
| Important |
|---|---|
Your local Docker process will be reused by the Jenkins instance running in Docker. That’s why you don’t have to push these images to Docker Hub. On the other hand if you run this sample in a remote Kubernetes cluster the driver will not be shared by the Jenkins workers so you can consider pushing these Docker images to Docker Hub too. |
We already create the seed job for you but you’ll have to run it. When you do run it you have to provide some properties. By default we create a seed that has all the properties options, but you can delete most of it. If you set the properties as global env variables you have to remove them from the seed.
Anyways, to run the demo just provide in the REPOS var the comma separated
list of URLs of the 2 aforementioned forks of github-webhook and `github-analytics'.
Figure 9.1. Click the 'jenkins-pipeline-seed-cf' job for Cloud Foundry and jenkins-pipeline-seed-k8s for Kubernetes

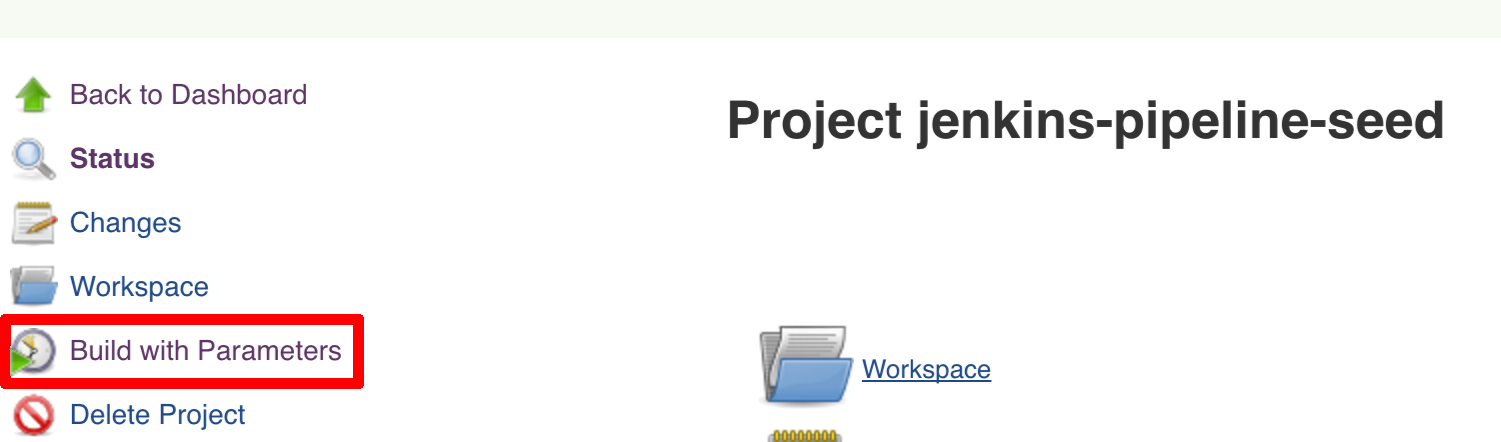
Figure 9.3. The REPOS parameter should already contain your forked repos (you’ll have more properties than the ones in the screenshot)
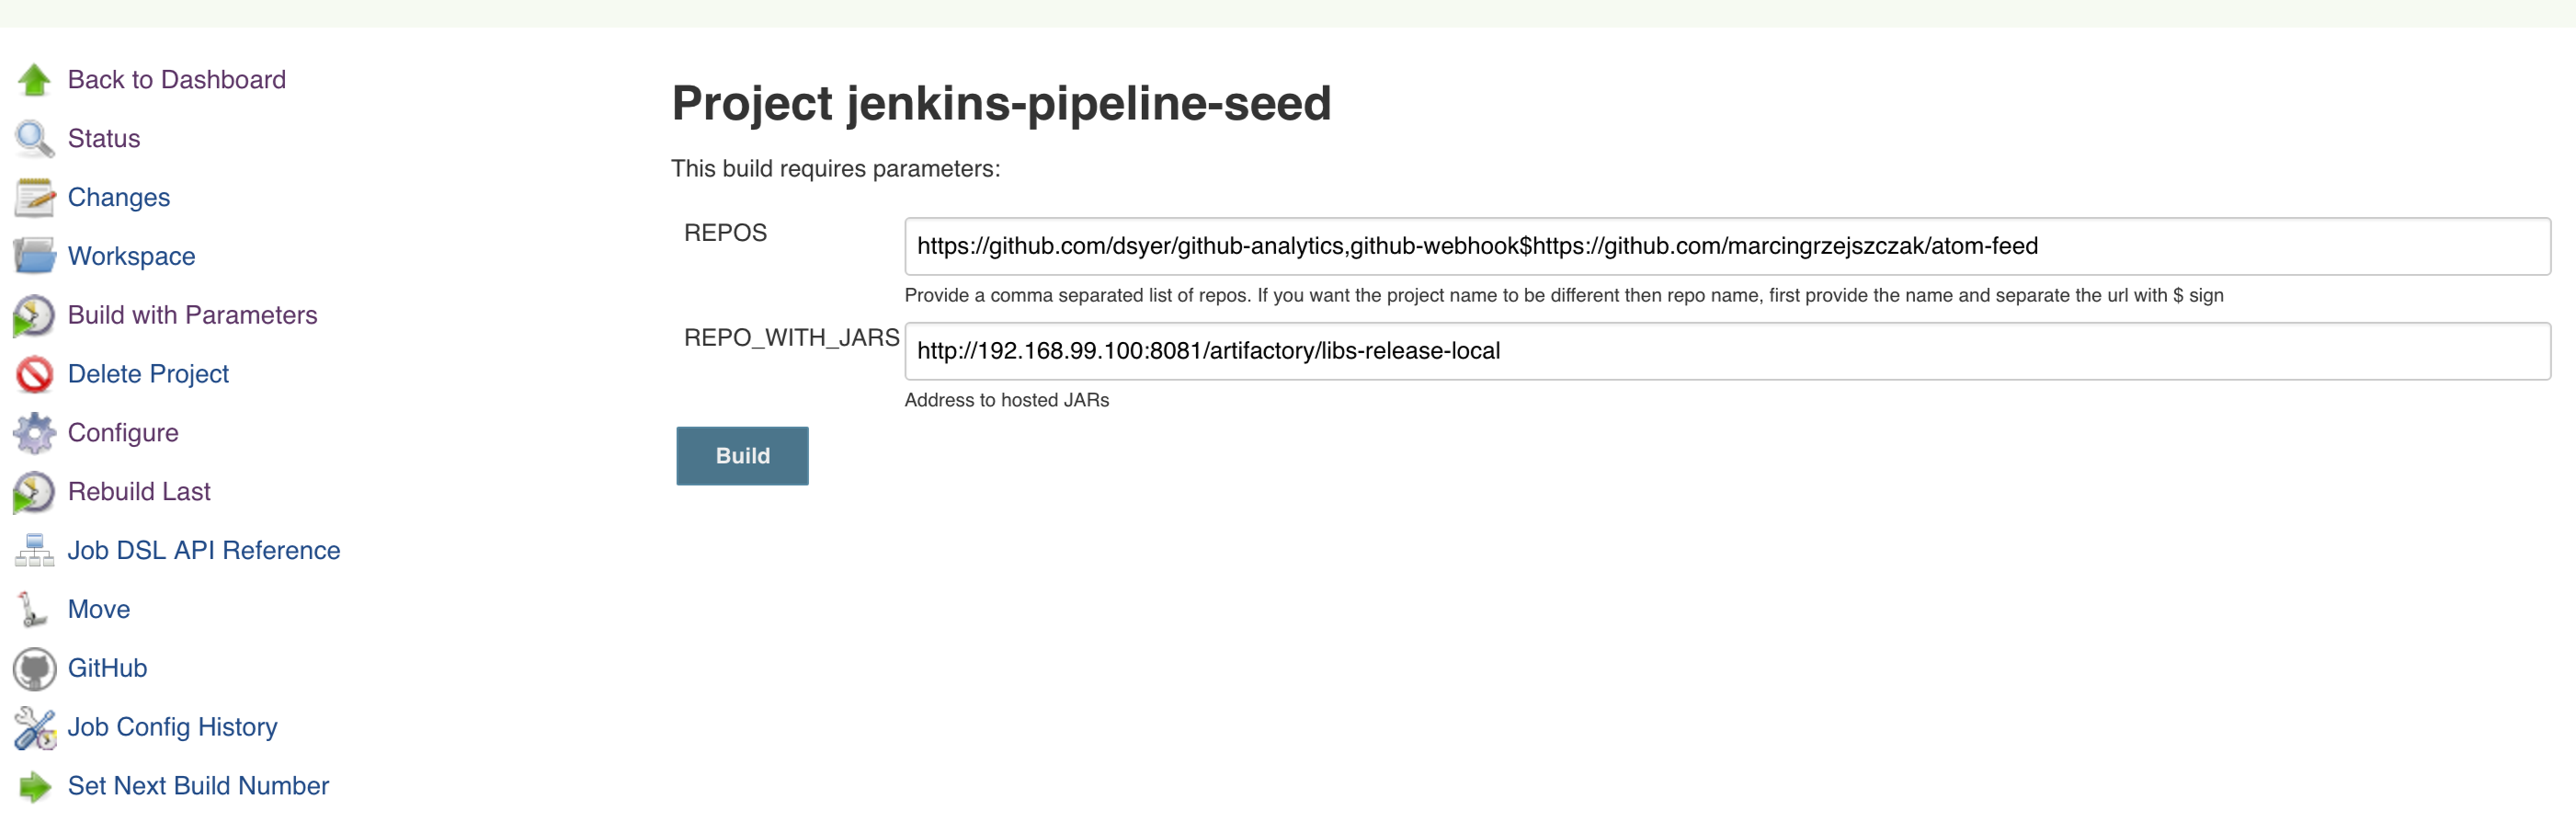
We already create the seed job for you but you’ll have to run it. When you do run it you have to provide some properties. By default we create a seed that has all the properties options, but you can delete most of it. If you set the properties as global env variables you have to remove them from the seed.
Anyways, to run the demo just provide in the REPOS var the comma separated
list of URLs of the 2 aforementioned forks of github-webhook and github-analytics.

| Important |
|---|---|
If your build fails on the deploy previous version to stage due to missing jar, that means that you’ve forgotten to clear the tags in your repo. Typically that’s due to the fact that you’ve removed the Artifactory volume with deployed JAR whereas a tag in the repo is still pointing there. Check out this section on how to remove the tag. |
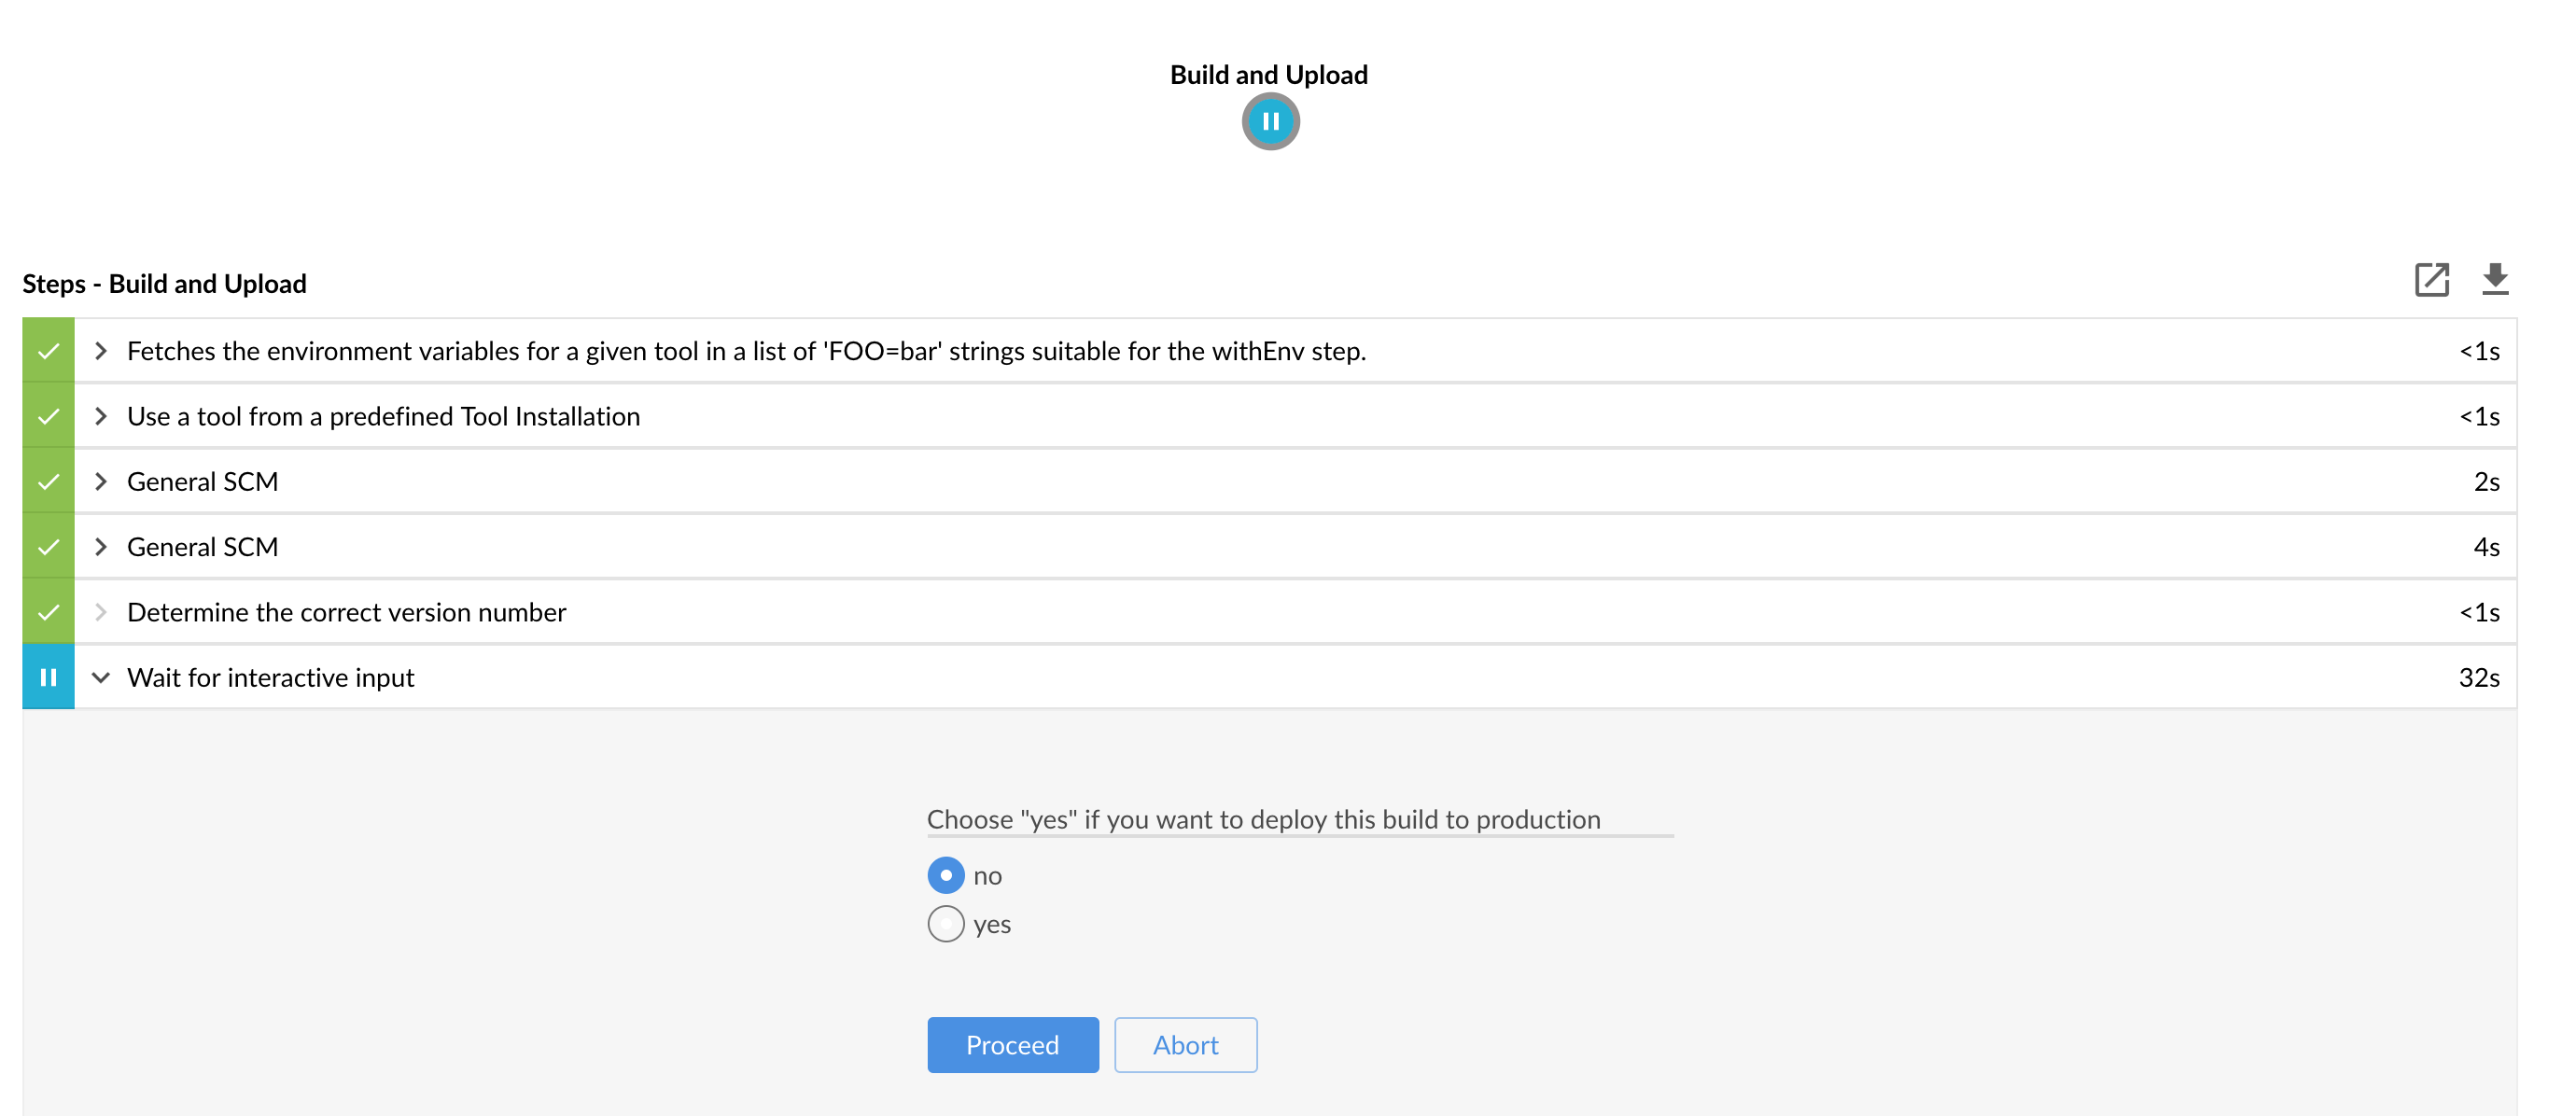
Figure 9.7. Click the manual step to go to stage (remember about killing the apps on test env). To do this click the ARROW next to the job name
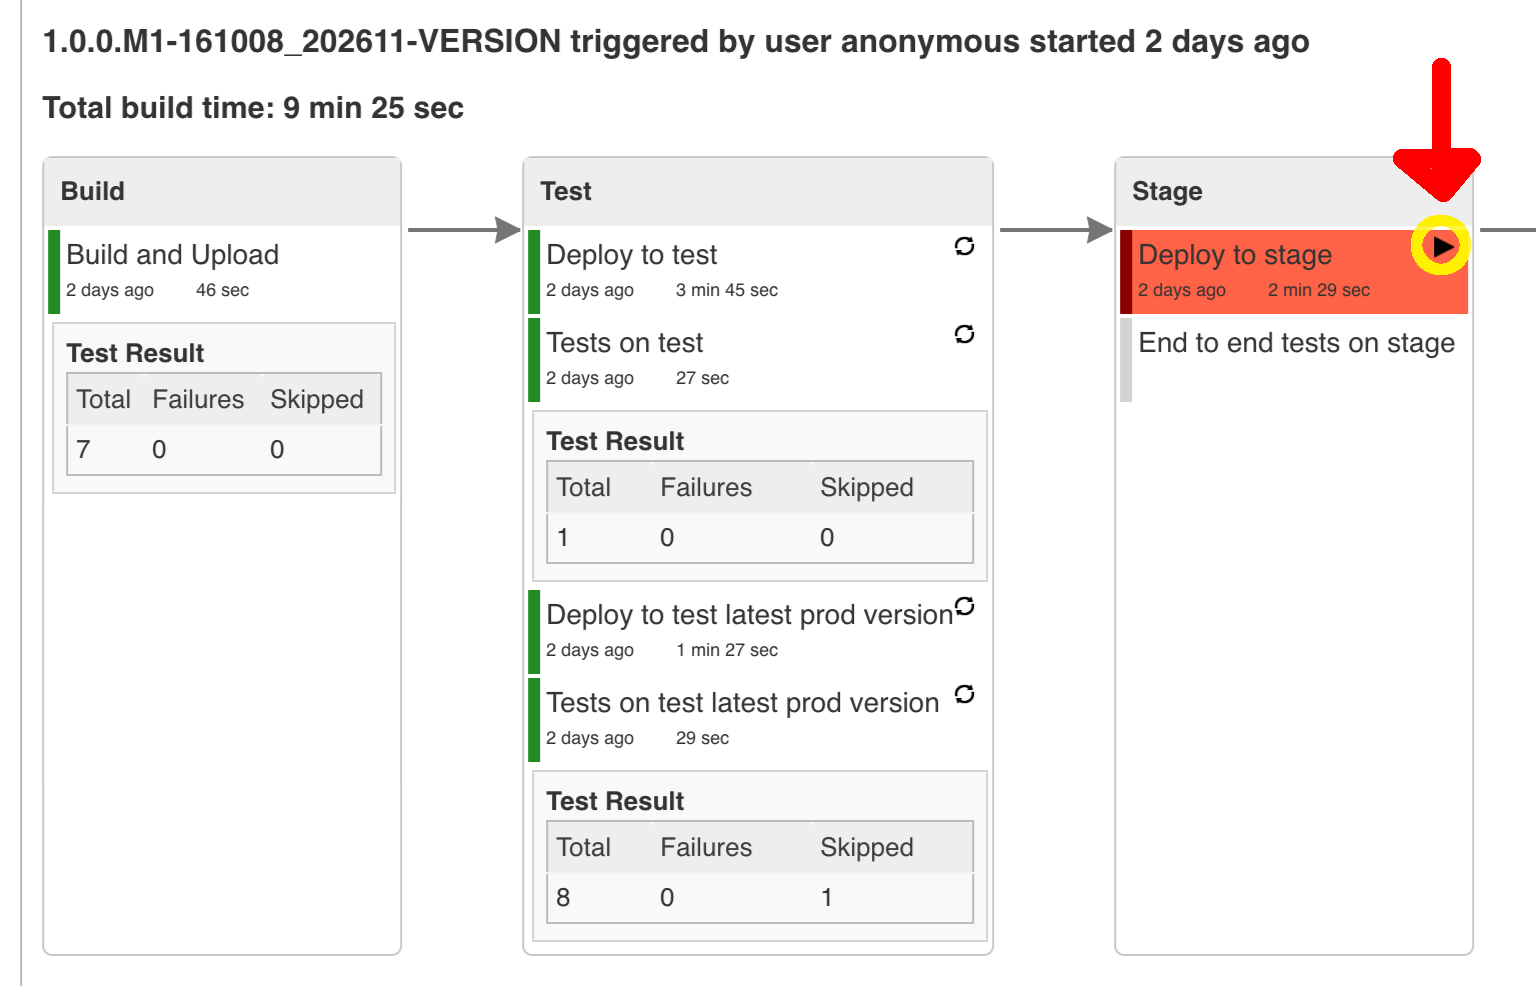
| Important |
|---|---|
Most likely you will run out of memory so when reaching the stage environment it’s good to kill all apps on test. Check out the FAQ section for more details! |
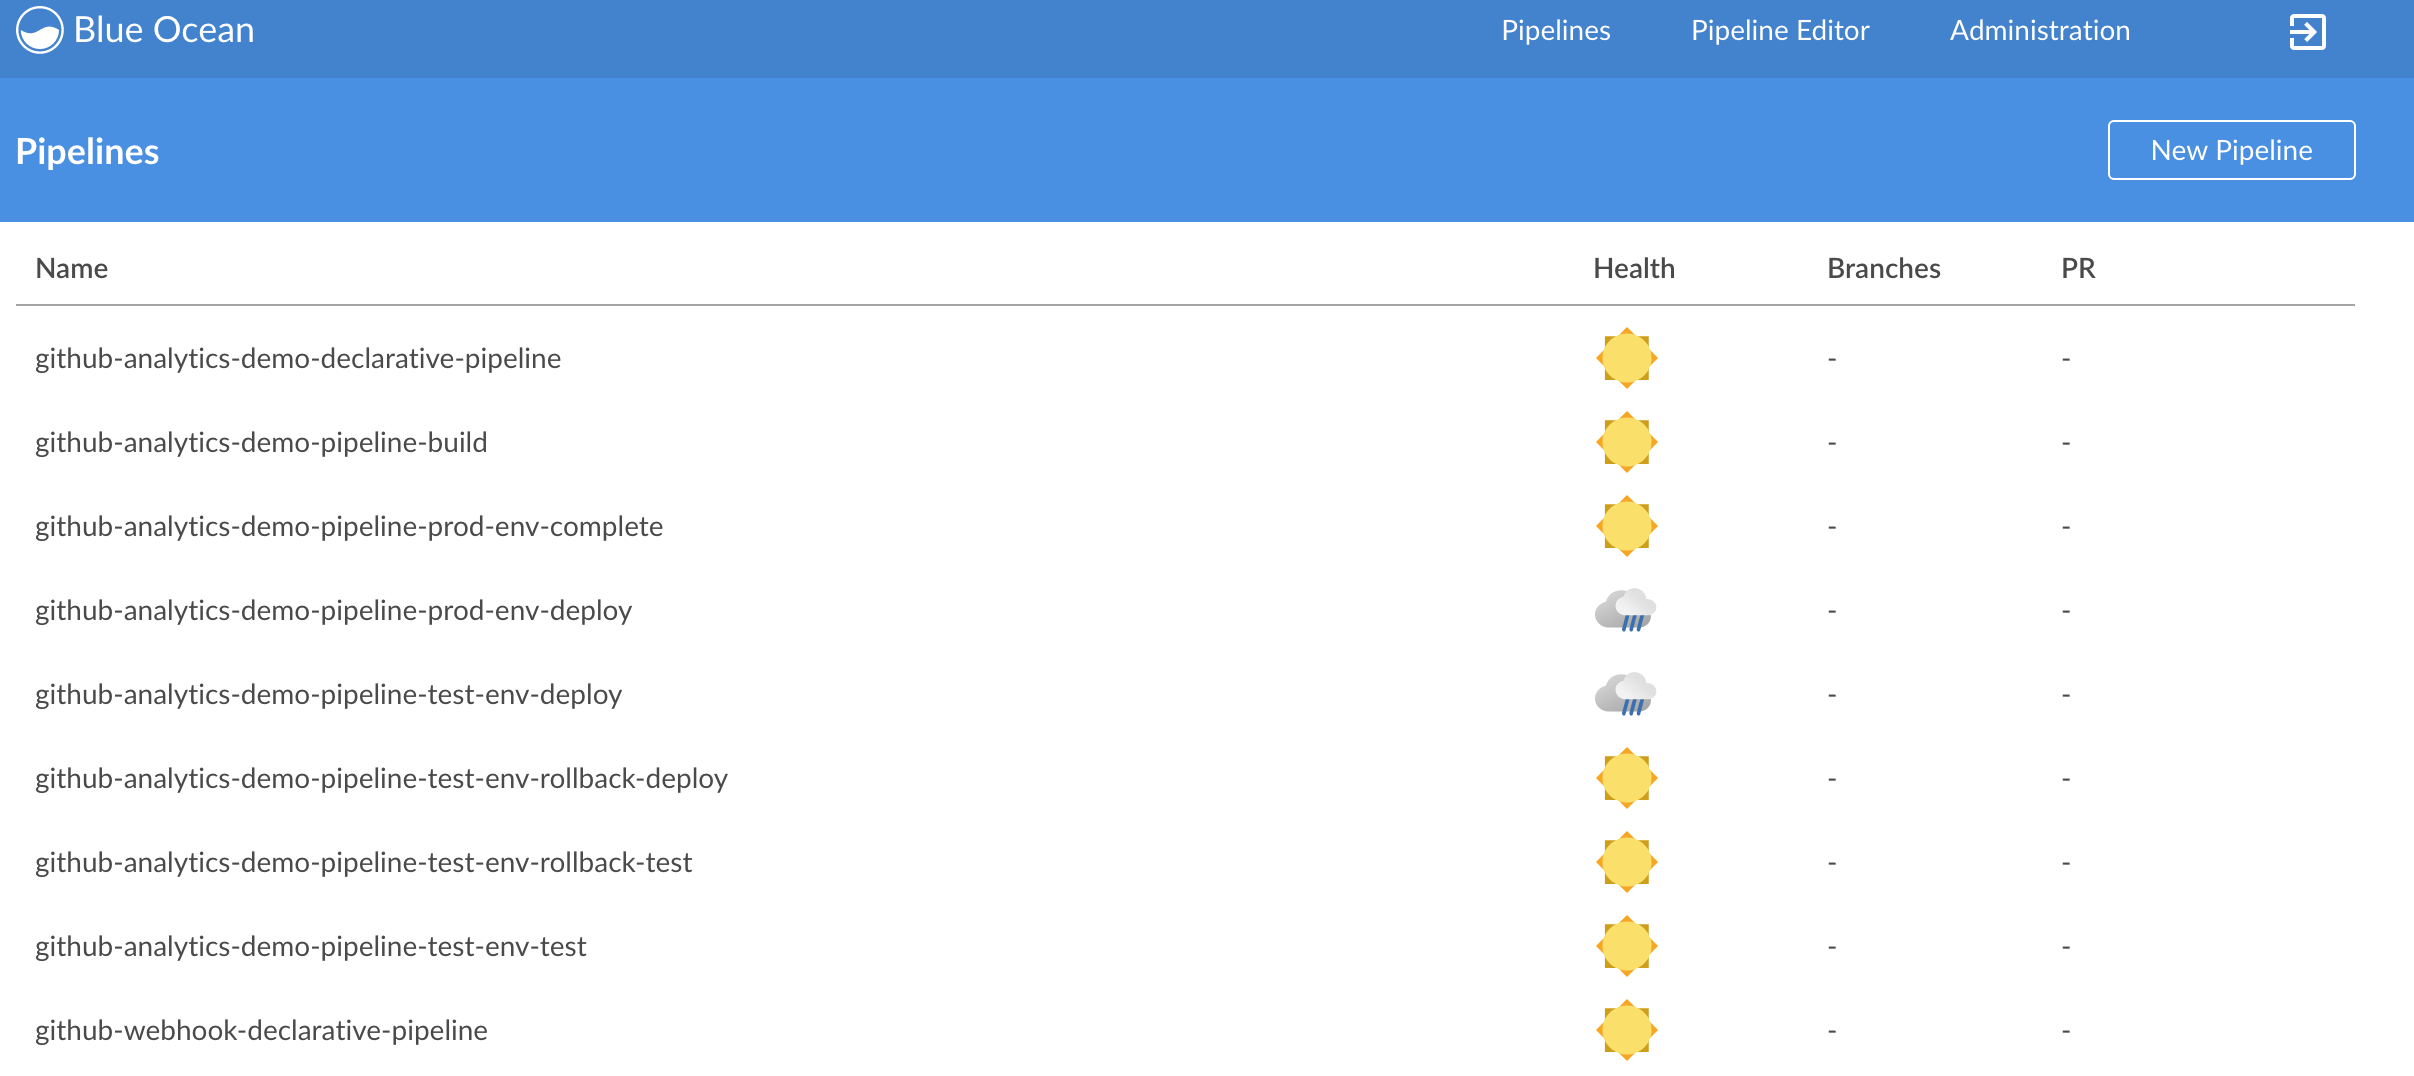
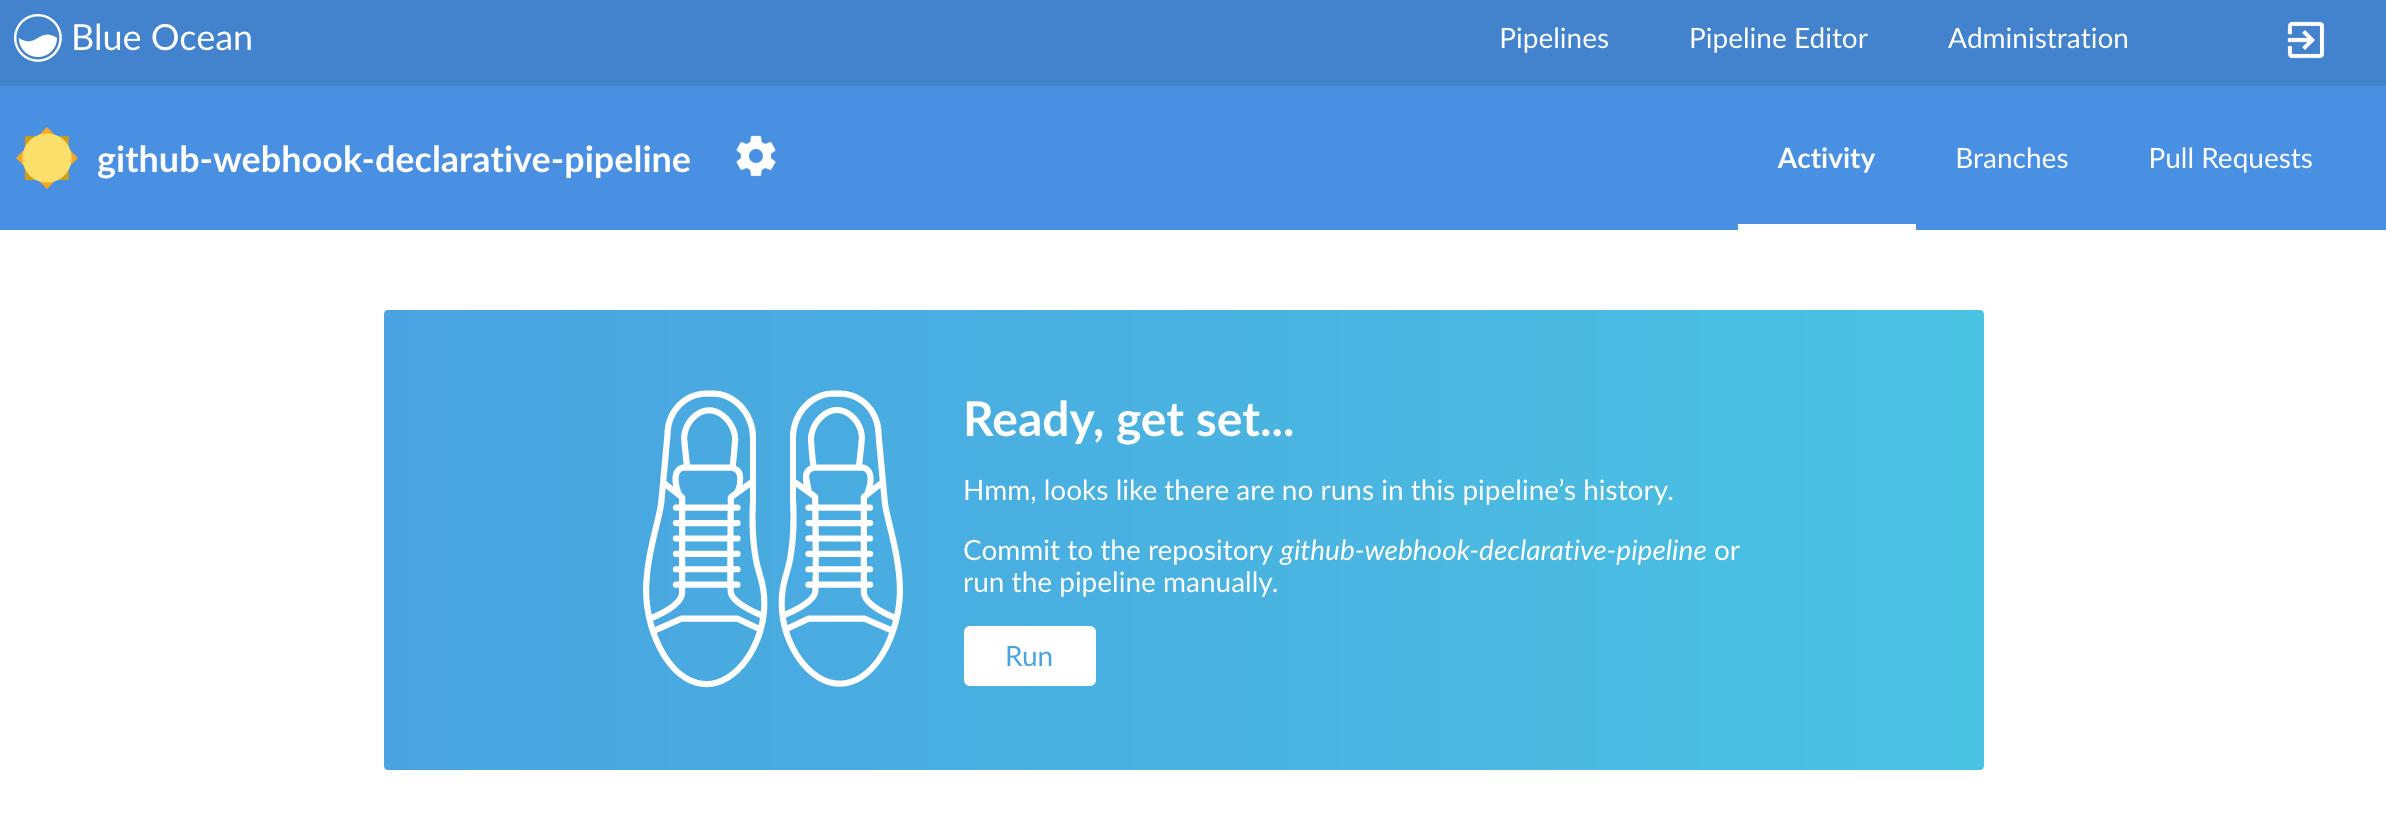
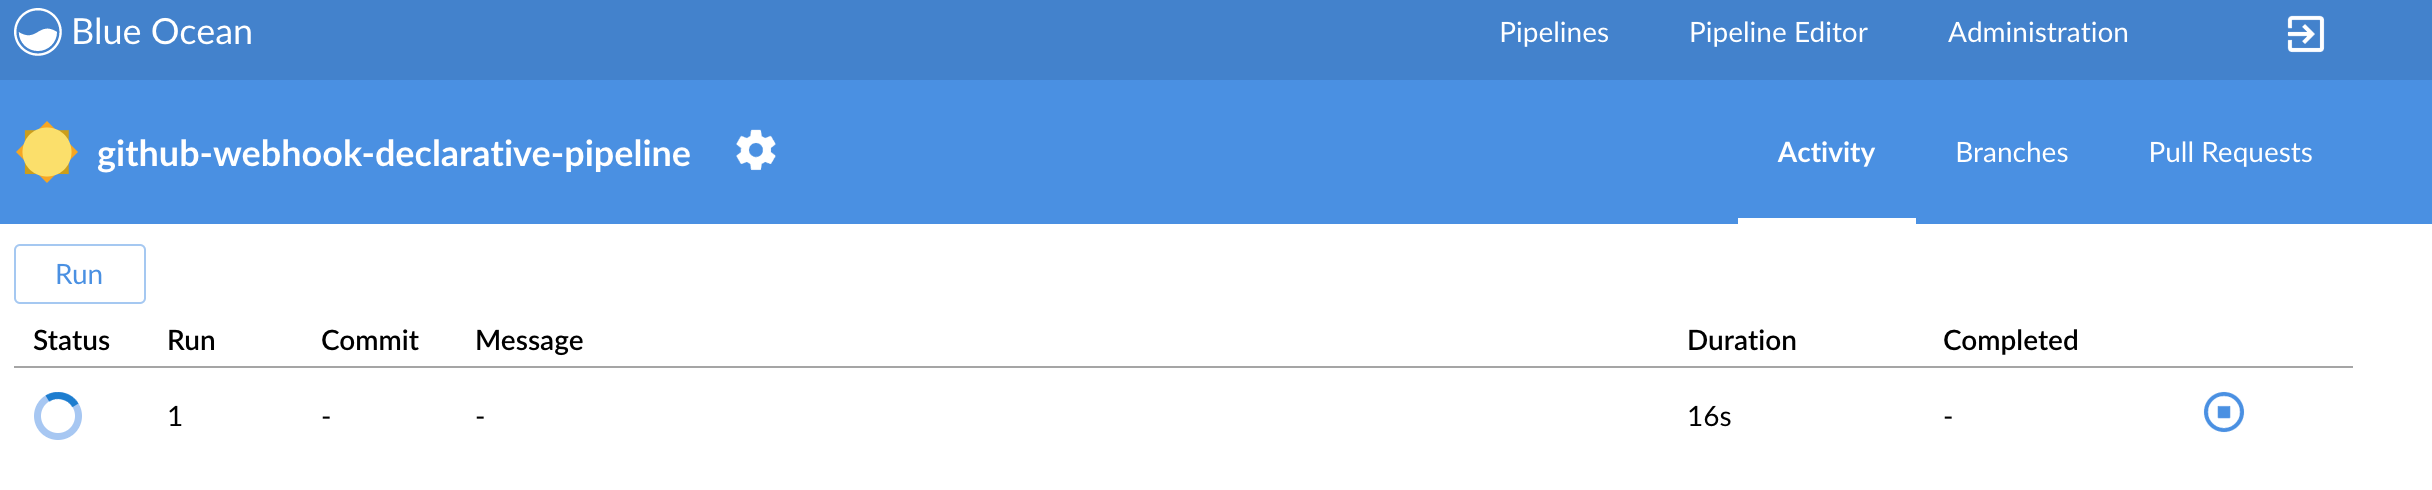
You can also use the declarative pipeline approach with the Blue Ocean UI. Here is a step by step guide to run a pipeline via this approach.
The Blue Ocean UI is available under the blue/ URL. E.g. for Docker Machine based setup http://192.168.99.100:8080/blue.

| Important |
|---|---|
There is no possibility of restarting pipeline from specific stage, after failure. Please check out this issue for more information |
![[Warning]](images/warning.png) | Warning |
|---|---|
Currently there is no way to introduce manual steps in a performant way. Jenkins is blocking an executor when manual step is required. That means that you’ll run out of executors pretty fast. You can check out this issue for and this StackOverflow question for more information. |
| Important |
|---|---|
All the steps below are not necessary to run the demo. They are needed only when you want to do some custom changes. |
The env vars that are used in all of the jobs are as follows:
| Property Name | Property Description | Default value |
|---|---|---|
BUILD_OPTIONS | Additional options you would like to pass to the Maven / Gradle build | |
DOCKER_REGISTRY_ORGANIZATION | Name of the docker organization to which Docker images should be deployed | scpipelines |
DOCKER_REGISTRY_CREDENTIAL_ID | Credential ID used to push Docker images | docker-registry |
DOCKER_SERVER_ID | Server ID in | docker-repo |
DOCKER_EMAIL | Email used to connect to Docker registry` and Maven builds | |
DOCKER_REGISTRY_ORGANIZATION | URL to Kubernetes cluster for test env | scpipelines |
DOCKER_REGISTRY_URL | URL to the docker registry | |
PAAS_TEST_API_URL | URL of the API of the Kubernetes cluster for test environment | 192.168.99.100:8443 |
PAAS_STAGE_API_URL | URL of the API of the Kubernetes cluster for stage environment | 192.168.99.100:8443 |
PAAS_PROD_API_URL | URL of the API of the Kubernetes cluster for prod environment | 192.168.99.100:8443 |
PAAS_TEST_CA_PATH | Path to the certificate authority for test environment | /usr/share/jenkins/cert/ca.crt |
PAAS_STAGE_CA_PATH | Path to the certificate authority for stage environment | /usr/share/jenkins/cert/ca.crt |
PAAS_PROD_CA_PATH | Path to the certificate authority for prod environment | /usr/share/jenkins/cert/ca.crt |
PAAS_TEST_CLIENT_CERT_PATH | Path to the client certificate for test environment | /usr/share/jenkins/cert/apiserver.crt |
PAAS_STAGE_CLIENT_CERT_PATH | Path to the client certificate for stage environment | /usr/share/jenkins/cert/apiserver.crt |
PAAS_PROD_CLIENT_CERT_PATH | Path to the client certificate for prod environment | /usr/share/jenkins/cert/apiserver.crt |
PAAS_TEST_CLIENT_KEY_PATH | Path to the client key for test environment | /usr/share/jenkins/cert/apiserver.key |
PAAS_STAGE_CLIENT_KEY_PATH | Path to the client key for stage environment | /usr/share/jenkins/cert/apiserver.key |
PAAS_PROD_CLIENT_KEY_PATH | Path to the client key for test environment | /usr/share/jenkins/cert/apiserver.key |
PAAS_TEST_CLIENT_TOKEN_PATH | Path to the file containing the token for test env | |
PAAS_STAGE_CLIENT_TOKEN_PATH | Path to the file containing the token for stage env | |
PAAS_PROD_CLIENT_TOKEN_PATH | Path to the file containing the token for prod env | |
PAAS_TEST_CLIENT_TOKEN_ID | ID of the credential containing access token for test environment | |
PAAS_STAGE_CLIENT_TOKEN_ID | ID of the credential containing access token for stage environment | |
PAAS_PROD_CLIENT_TOKEN_ID | ID of the credential containing access token for prod environment | |
PAAS_TEST_CLUSTER_NAME | Name of the cluster for test environment | minikube |
PAAS_STAGE_CLUSTER_NAME | Name of the cluster for stage environment | minikube |
PAAS_PROD_CLUSTER_NAME | Name of the cluster for prod environment | minikube |
PAAS_TEST_CLUSTER_USERNAME | Name of the user for test environment | minikube |
PAAS_STAGE_CLUSTER_USERNAME | Name of the user for stage environment | minikube |
PAAS_PROD_CLUSTER_USERNAME | Name of the user for prod environment | minikube |
PAAS_TEST_SYSTEM_NAME | Name of the system for test environment | minikube |
PAAS_STAGE_SYSTEM_NAME | Name of the system for stage environment | minikube |
PAAS_PROD_SYSTEM_NAME | Name of the system for prod environment | minikube |
PAAS_TEST_NAMESPACE | Namespace for test environment | sc-pipelines-test |
PAAS_STAGE_NAMESPACE | Namespace for stage environment | sc-pipelines-stage |
PAAS_PROD_NAMESPACE | Namespace for prod environment | sc-pipelines-prod |
KUBERNETES_MINIKUBE | Will you connect to Minikube? | true |
REPO_WITH_BINARIES | URL to repo with the deployed jars | |
REPO_WITH_BINARIES_CREDENTIAL_ID | Credential ID used for the repo with jars | repo-with-binaries |
M2_SETTINGS_REPO_ID | The id of server from Maven settings.xml | artifactory-local |
JDK_VERSION | The name of the JDK installation | jdk8 |
PIPELINE_VERSION | What should be the version of the pipeline (ultimately also version of the jar) | 1.0.0.M1-${GROOVY,script ="new Date().format('yyMMdd_HHmmss')"}-VERSION |
GIT_EMAIL | The email used by Git to tag repo | |
GIT_NAME | The name used by Git to tag repo | Pivo Tal |
AUTO_DEPLOY_TO_STAGE | Should deployment to stage be automatic | false |
AUTO_DEPLOY_TO_PROD | Should deployment to prod be automatic | false |
API_COMPATIBILITY_STEP_REQUIRED | Should api compatibility step be required | true |
DB_ROLLBACK_STEP_REQUIRED | Should DB rollback step be present | true |
DEPLOY_TO_STAGE_STEP_REQUIRED | Should deploy to stage step be present | true |
| Important |
|---|---|
Skip this step if you’re not using GCE |
In order to use GCE we need to have gcloud running. If you already have the
CLI installed, skip this step. If not just execute to have the CLI
downloaded and an installer started
$ ./tools/k8s-helper.sh download-gcloud
Next, configure gcloud. Execute gcloud init and log in
to your cluster. You will get redirected to a login page, pick the
proper Google account and log in.
Pick an existing project or create a new one.
Go to your platform page (click on Container Engine) in GCP and connect to your cluster
$ CLUSTER_NAME=...
$ ZONE=us-east1-b
$ PROJECT_NAME=...
$ gcloud container clusters get-credentials ${CLUSTER_NAME} --zone ${ZONE} --project ${PROJECT_NAME}
$ kubectl proxy
The Kubernetes dashboard will be running at http://localhost:8001/ui/.
We’ll need a Persistent Disk for our Jenkins installation. Let’s create it
$ ZONE=us-east1-b
$ gcloud compute disks create --size=200GB --zone=${ZONE} sc-pipelines-jenkins-disk
Since the disk got created now we need to format it. You can check out the instructions on how to do it here - https://cloud.google.com/compute/docs/disks/add-persistent-disk#formatting
| Important |
|---|---|
Skip this step if you’re not using Kubo or GCE |
In this section a description of steps required to deploy Jenkins and Artifactory to a Kubernetes cluster deployed via Kubo.
![[Tip]](images/tip.png) | Tip |
|---|---|
To see the dashboard just do |
- Log in to the cluster
Deploy Jenkins and Artifactory to the cluster
./tools/k8s-helper.sh setup-tools-infra-vspherefor a cluster deployed on VSphere./tools/k8s-helper.sh setup-tools-infra-gcefor a cluster deployed to GCE
- Forward the ports so that you can access the Jenkins UI from your local machine
$ NAMESPACE=default
$ JENKINS_POD=jenkins-1430785859-nfhx4
$ LOCAL_PORT=32044
$ CONTAINER_PORT=8080
$ kubectl port-forward --namespace=${NAMESPACE} ${JENKINS_POD} ${LOCAL_PORT}:${CONTAINER_PORT}
- Go to
Credentials, clickSystemandGlobal credentials
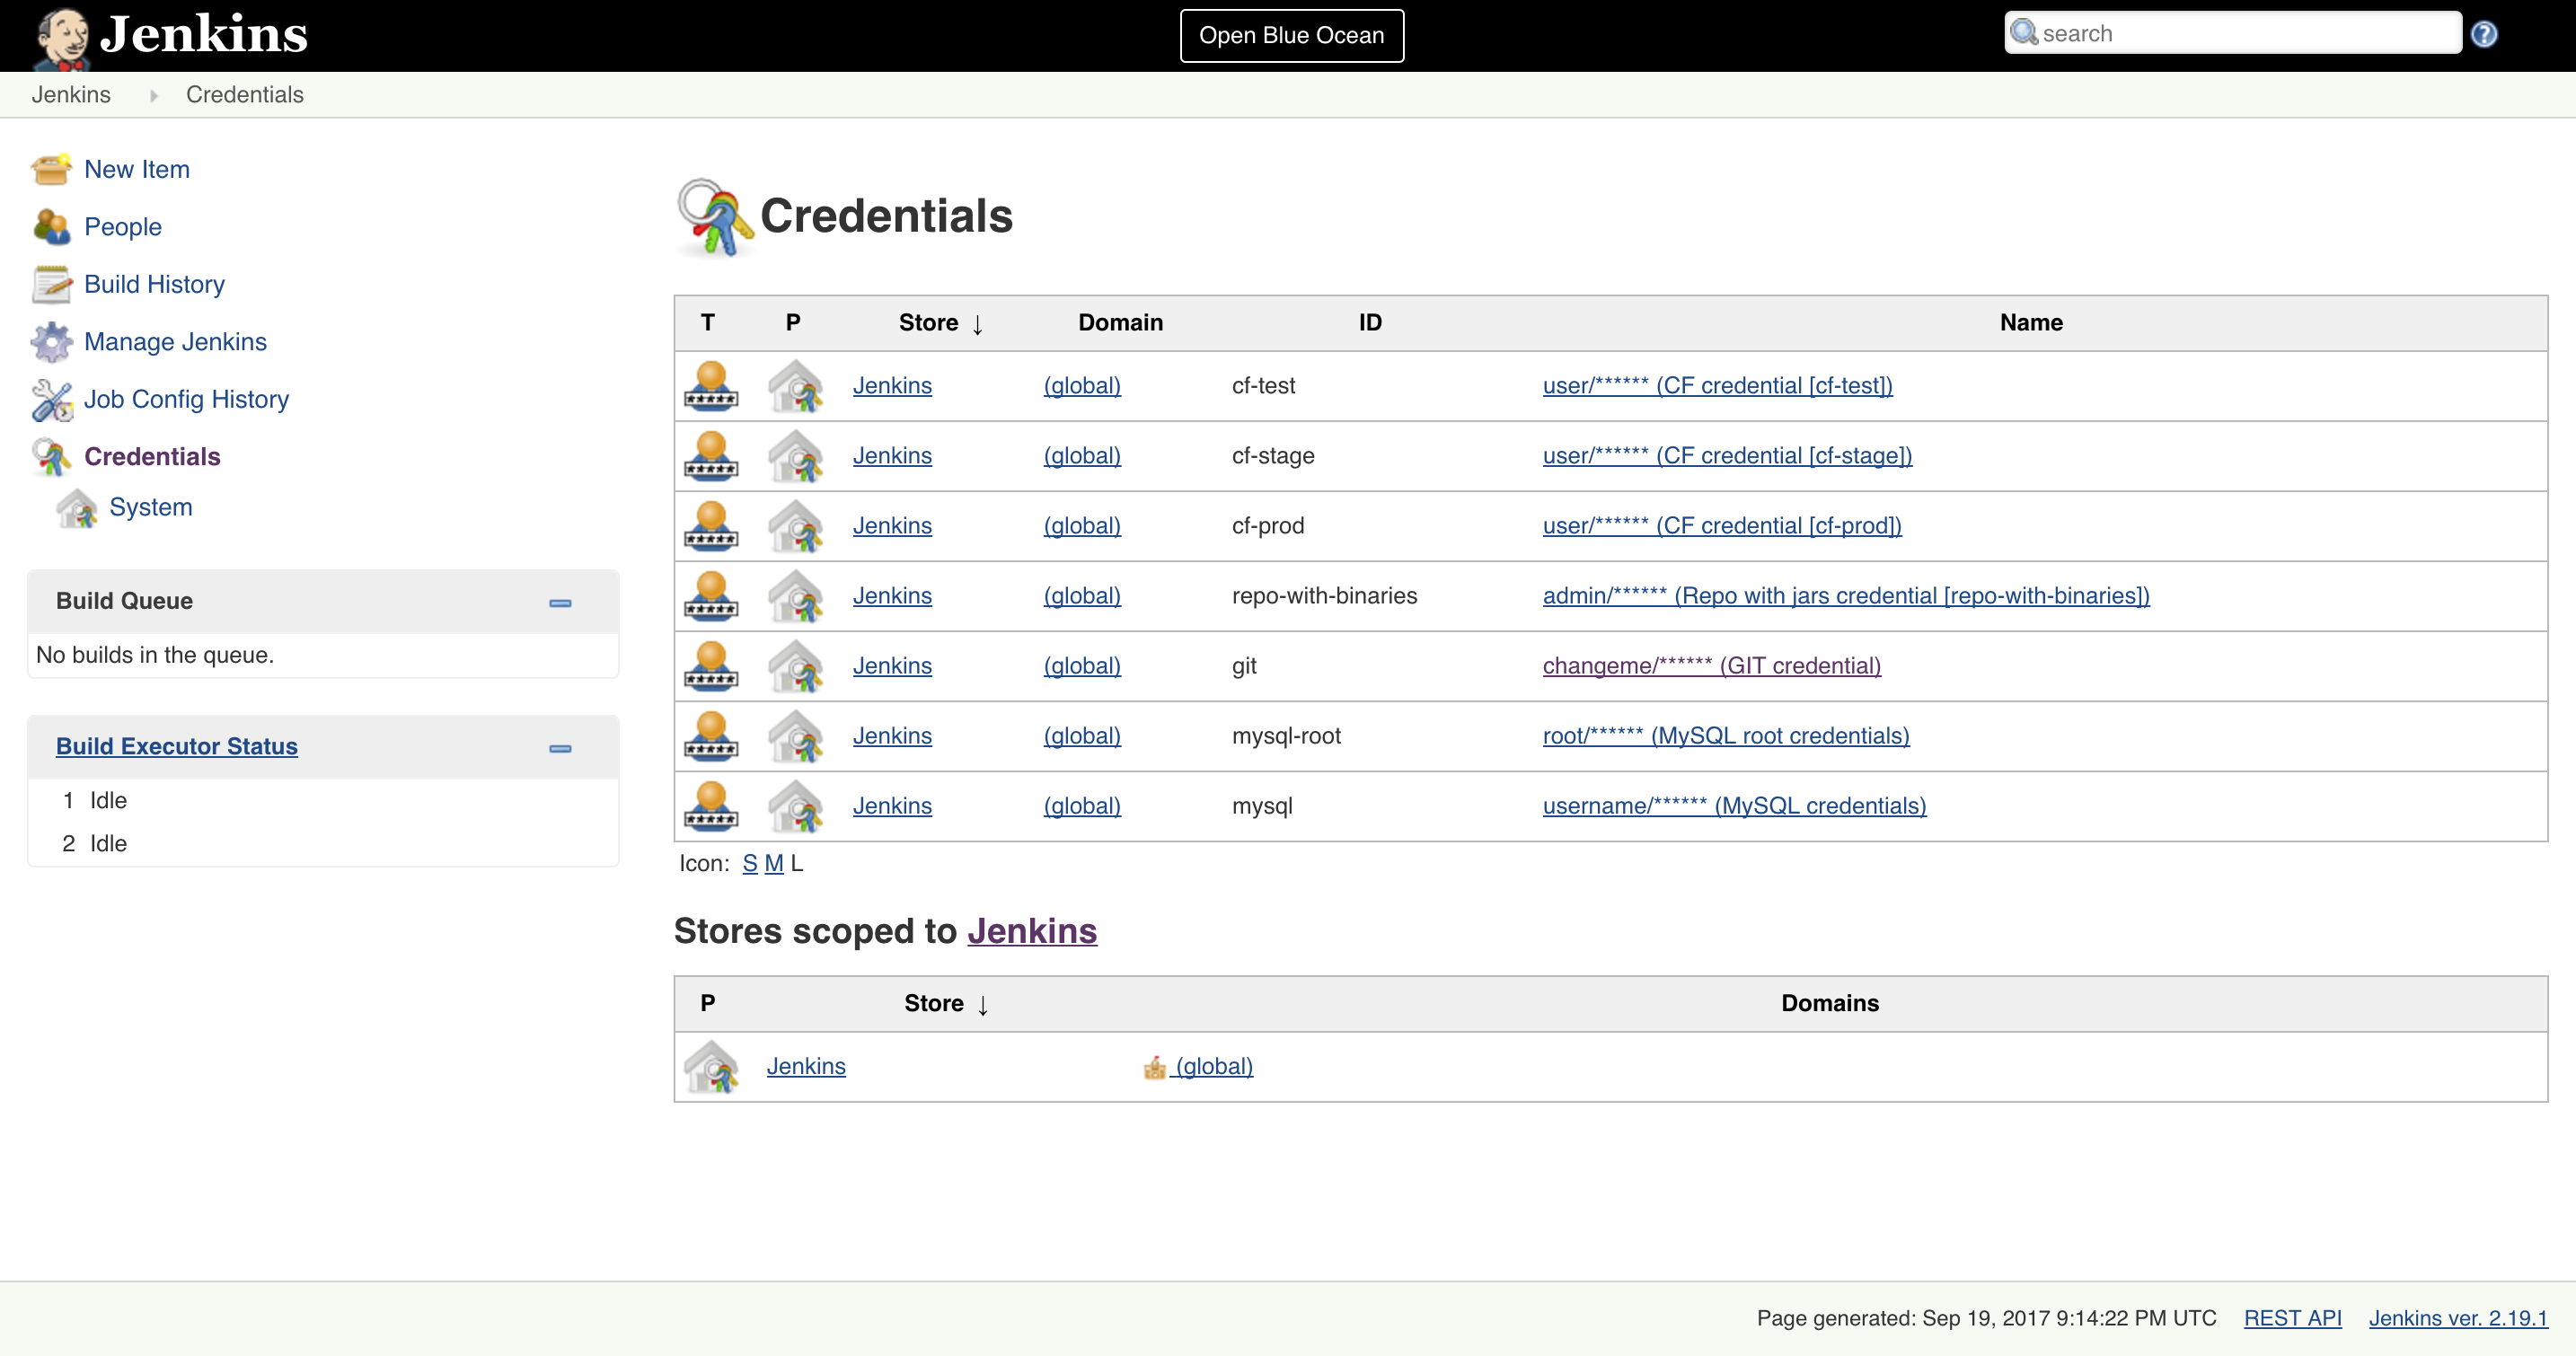
- Update
git,repo-with-binariesanddocker-registrycredentials Run the
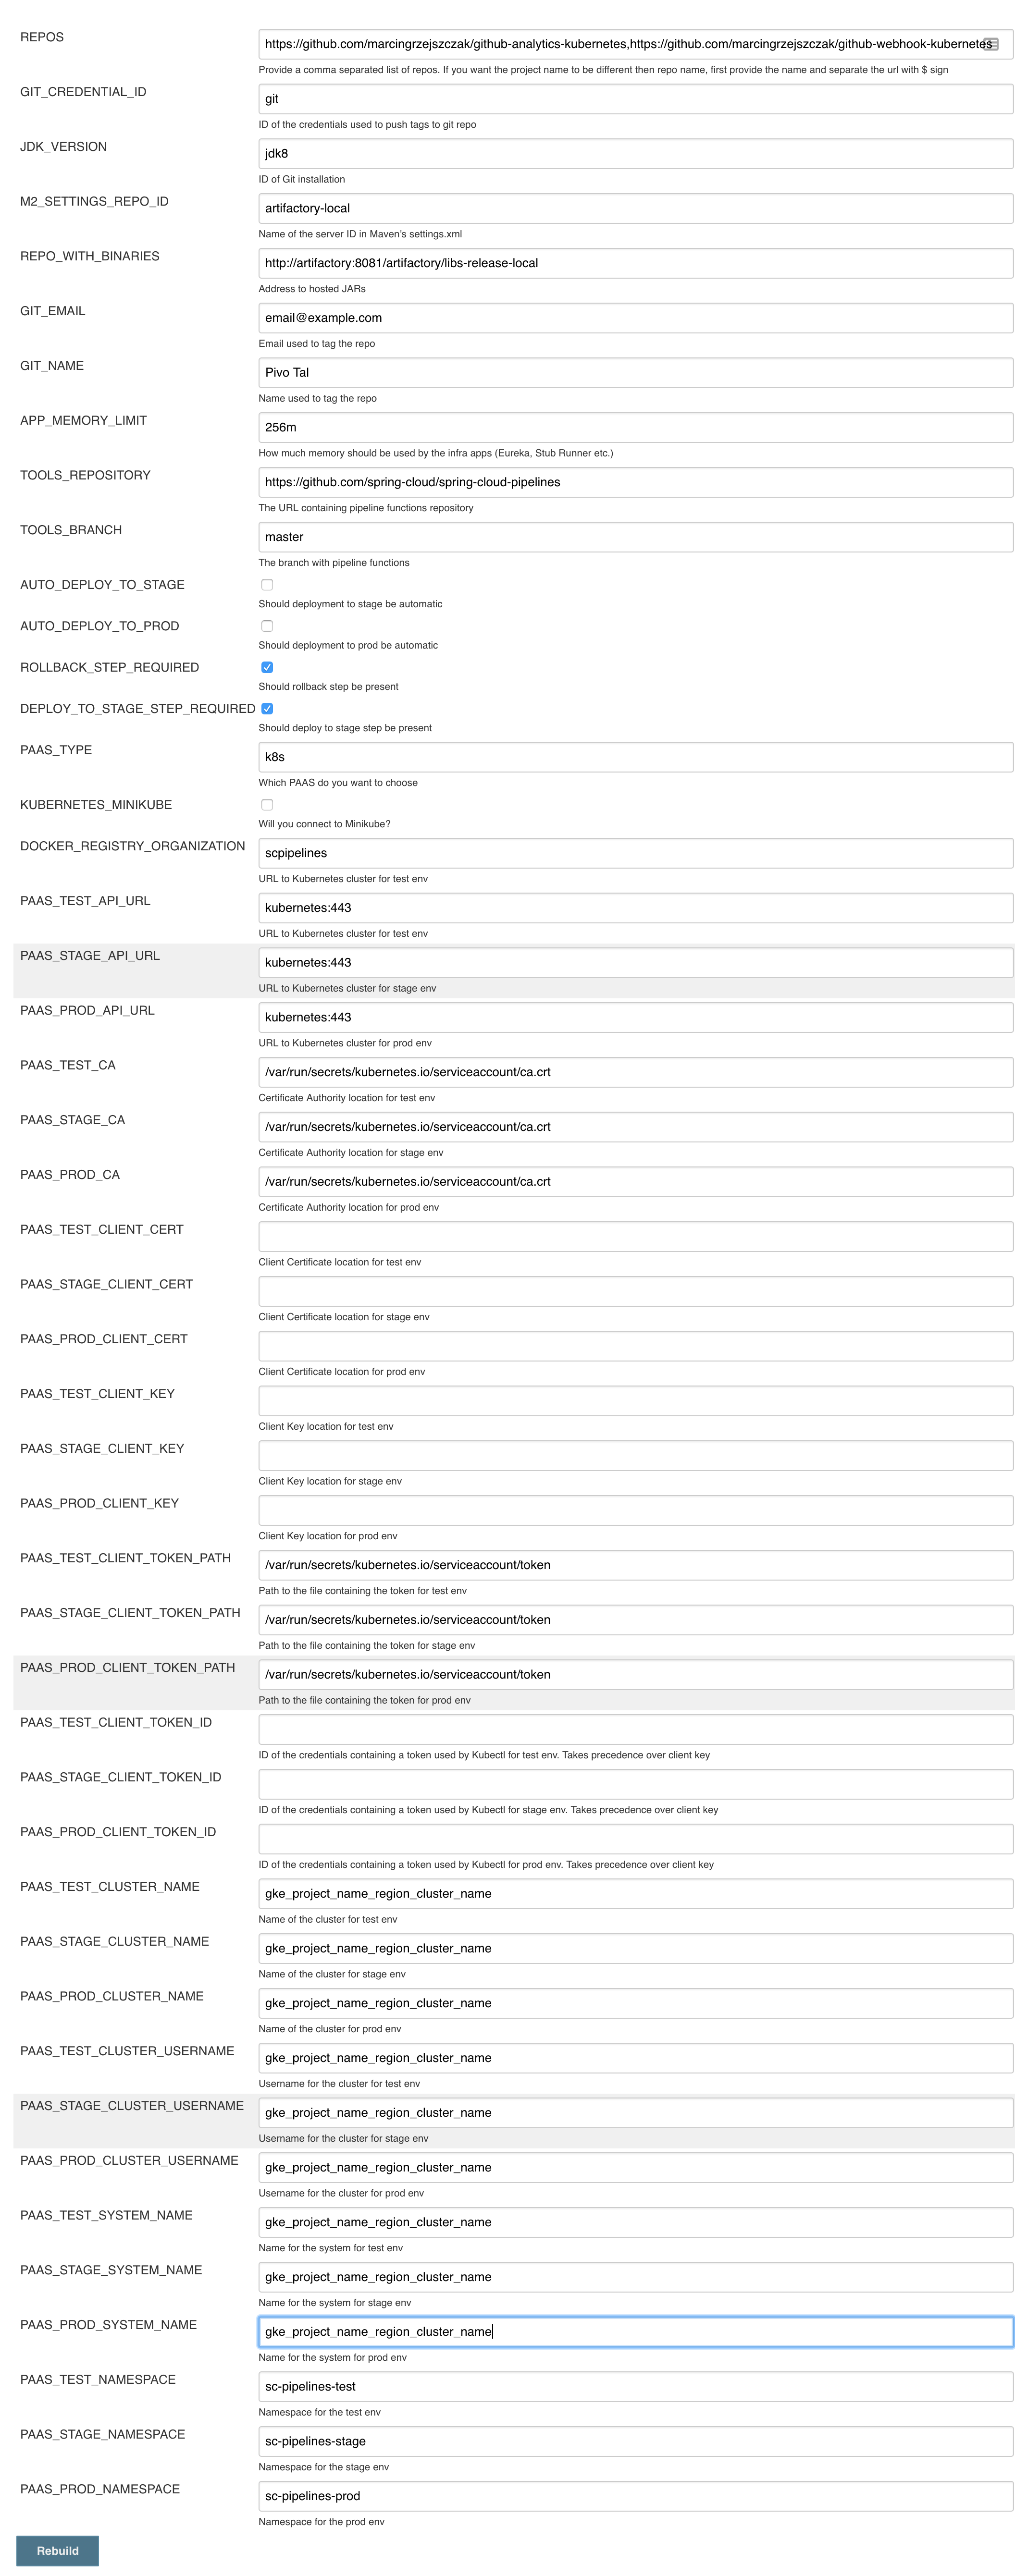
jenkins-pipeline-k8s-seedseed job and fill it out with the following dataPut
kubernetes.default:443here (orKUBERNETES_API:KUBERNETES_PORT)PAAS_TEST_API_URLPAAS_STAGE_API_URLPAAS_PROD_API_URL
Put
/var/run/secrets/kubernetes.io/serviceaccount/ca.crtdata herePAAS_TEST_CA_PATHPAAS_STAGE_CA_PATHPAAS_PROD_CA_PATH
- Uncheck the
Kubernetes Minikubevalue Clear the following vars
PAAS_TEST_CLIENT_CERT_PATHPAAS_STAGE_CLIENT_CERT_PATHPAAS_PROD_CLIENT_CERT_PATHPAAS_TEST_CLIENT_KEY_PATHPAAS_STAGE_CLIENT_KEY_PATHPAAS_PROD_CLIENT_KEY_PATH
Set
/var/run/secrets/kubernetes.io/serviceaccount/tokenvalue to these varsPAAS_TEST_CLIENT_TOKEN_PATHPAAS_STAGE_CLIENT_TOKEN_PATHPAAS_STAGE_CLIENT_TOKEN_PATH
Set the cluster name to these vars (you can get it by calling
kubectl config current-context)PAAS_TEST_CLUSTER_NAMEPAAS_STAGE_CLUSTER_NAMEPAAS_PROD_CLUSTER_NAME
Set the system name to these vars (you can get it by calling
kubectl config current-context)PAAS_TEST_SYSTEM_NAMEPAAS_STAGE_SYSTEM_NAMEPAAS_PROD_SYSTEM_NAME
- Update the
DOCKER_EMAILproperty with your email - Update the
DOCKER_REGISTRY_ORGANIZATIONwith your Docker organization name - If you don’t want to upload the images to DockerHub update
DOCKER_REGISTRY_URL
- Run the pipeline