Table of Contents
- 1. Features
- I. Cloud Native Applications
- 2. Spring Cloud Context: Application Context Services
- 2.1. The Bootstrap Application Context
- 2.2. Application Context Hierarchies
- 2.3. Changing the Location of Bootstrap Properties
- 2.4. Overriding the Values of Remote Properties
- 2.5. Customizing the Bootstrap Configuration
- 2.6. Customizing the Bootstrap Property Sources
- 2.7. Logging Configuration
- 2.8. Environment Changes
- 2.9. Refresh Scope
- 2.10. Encryption and Decryption
- 2.11. Endpoints
- 3. Spring Cloud Commons: Common Abstractions
- 3.1. @EnableDiscoveryClient
- 3.2. ServiceRegistry
- 3.3. Spring RestTemplate as a Load Balancer Client
- 3.4. Spring WebClient as a Load Balancer Client
- 3.5. Multiple RestTemplate objects
- 3.6. Spring WebFlux WebClient as a Load Balancer Client
- 3.7. Ignore Network Interfaces
- 3.8. HTTP Client Factories
- 3.9. Enabled Features
- 3.10. Spring Cloud Compatibility Verification
- II. Spring Cloud Config
- 4. Quick Start
- 5. Spring Cloud Config Server
- 5.1. Environment Repository
- 5.1.1. Git Backend
- Skipping SSL Certificate Validation
- Setting HTTP Connection Timeout
- Placeholders in Git URI
- Pattern Matching and Multiple Repositories
- Authentication
- Authentication with AWS CodeCommit
- Git SSH configuration using properties
- Placeholders in Git Search Paths
- Force pull in Git Repositories
- Deleting untracked branches in Git Repositories
- Git Refresh Rate
- 5.1.2. Version Control Backend Filesystem Use
- 5.1.3. File System Backend
- 5.1.4. Vault Backend
- 5.1.5. Accessing Backends Through a Proxy
- 5.1.6. Sharing Configuration With All Applications
- 5.1.7. JDBC Backend
- 5.1.8. CredHub Backend
- 5.1.9. Composite Environment Repositories
- 5.1.10. Property Overrides
- 5.2. Health Indicator
- 5.3. Security
- 5.4. Encryption and Decryption
- 5.5. Key Management
- 5.6. Creating a Key Store for Testing
- 5.7. Using Multiple Keys and Key Rotation
- 5.8. Serving Encrypted Properties
- 6. Serving Alternative Formats
- 7. Serving Plain Text
- 8. Embedding the Config Server
- 9. Push Notifications and Spring Cloud Bus
- 10. Spring Cloud Config Client
- III. Spring Cloud Netflix
- 11. Service Discovery: Eureka Clients
- 11.1. How to Include Eureka Client
- 11.2. Registering with Eureka
- 11.3. Authenticating with the Eureka Server
- 11.4. Status Page and Health Indicator
- 11.5. Registering a Secure Application
- 11.6. Eureka’s Health Checks
- 11.7. Eureka Metadata for Instances and Clients
- 11.8. Using the EurekaClient
- 11.9. Alternatives to the Native Netflix EurekaClient
- 11.10. Why Is It so Slow to Register a Service?
- 11.11. Zones
- 12. Service Discovery: Eureka Server
- 13. Circuit Breaker: Hystrix Clients
- 14. Circuit Breaker: Hystrix Dashboard
- 15. Hystrix Timeouts And Ribbon Clients
- 16. Client Side Load Balancer: Ribbon
- 16.1. How to Include Ribbon
- 16.2. Customizing the Ribbon Client
- 16.3. Customizing the Default for All Ribbon Clients
- 16.4. Customizing the Ribbon Client by Setting Properties
- 16.5. Using Ribbon with Eureka
- 16.6. Example: How to Use Ribbon Without Eureka
- 16.7. Example: Disable Eureka Use in Ribbon
- 16.8. Using the Ribbon API Directly
- 16.9. Caching of Ribbon Configuration
- 16.10. How to Configure Hystrix Thread Pools
- 16.11. How to Provide a Key to Ribbon’s
IRule
- 17. External Configuration: Archaius
- 18. Router and Filter: Zuul
- 18.1. How to Include Zuul
- 18.2. Embedded Zuul Reverse Proxy
- 18.3. Zuul Http Client
- 18.4. Cookies and Sensitive Headers
- 18.5. Ignored Headers
- 18.6. Management Endpoints
- 18.7. Strangulation Patterns and Local Forwards
- 18.8. Uploading Files through Zuul
- 18.9. Query String Encoding
- 18.10. Request URI Encoding
- 18.11. Plain Embedded Zuul
- 18.12. Disable Zuul Filters
- 18.13. Providing Hystrix Fallbacks For Routes
- 18.14. Zuul Timeouts
- 18.15. Rewriting the
Locationheader - 18.16. Enabling Cross Origin Requests
- 18.17. Metrics
- 18.18. Zuul Developer Guide
- 19. Polyglot support with Sidecar
- 20. Retrying Failed Requests
- 21. HTTP Clients
- 22. Modules In Maintenance Mode
- IV. Spring Cloud OpenFeign
- V. Spring Cloud Stream
- 24. A Brief History of Spring’s Data Integration Journey
- 25. Quick Start
- 26. What’s New in 2.0?
- 27. Introducing Spring Cloud Stream
- 28. Main Concepts
- 29. Programming Model
- 30. Binders
- 31. Configuration Options
- 32. Content Type Negotiation
- 33. Schema Evolution Support
- 34. Inter-Application Communication
- 35. Testing
- 36. Health Indicator
- 37. Metrics Emitter
- 38. Samples
- VI. Binder Implementations
- 39. Apache Kafka Binder
- 40. Apache Kafka Streams Binder
- 40.1. Usage
- 40.2. Kafka Streams Binder Overview
- 40.3. Configuration Options
- 40.4. Multiple Input Bindings
- 40.5. Multiple Output Bindings (aka Branching)
- 40.6. Message Conversion
- 40.7. Error Handling
- 40.8. State Store
- 40.9. Interactive Queries
- 40.10. Accessing the underlying KafkaStreams object
- 40.11. State Cleanup
- 41. RabbitMQ Binder
- VII. Spring Cloud Bus
- VIII. Spring Cloud Sleuth
- 50. Introduction
- 51. Additional Resources
- 52. Features
- 53. Sampling
- 54. Propagation
- 55. Current Tracing Component
- 56. Current Span
- 57. Instrumentation
- 58. Span lifecycle
- 59. Naming spans
- 60. Managing Spans with Annotations
- 61. Customizations
- 62. Sending Spans to Zipkin
- 63. Zipkin Stream Span Consumer
- 64. Integrations
- 65. Running examples
- IX. Spring Cloud Consul
- 66. Install Consul
- 67. Consul Agent
- 68. Service Discovery with Consul
- 69. Distributed Configuration with Consul
- 70. Consul Retry
- 71. Spring Cloud Bus with Consul
- 72. Circuit Breaker with Hystrix
- 73. Hystrix metrics aggregation with Turbine and Consul
- X. Spring Cloud Zookeeper
- 74. Install Zookeeper
- 75. Service Discovery with Zookeeper
- 76. Using Spring Cloud Zookeeper with Spring Cloud Netflix Components
- 77. Spring Cloud Zookeeper and Service Registry
- 78. Zookeeper Dependencies
- 79. Spring Cloud Zookeeper Dependency Watcher
- 80. Distributed Configuration with Zookeeper
- XI. Spring Cloud Security
- XII. Spring Cloud for Cloud Foundry
- XIII. Spring Cloud Contract
- 86. Spring Cloud Contract
- 87. Spring Cloud Contract Verifier Introduction
- 88. Spring Cloud Contract FAQ
- 88.1. Why use Spring Cloud Contract Verifier and not X ?
- 88.2. I don’t want to write a contract in Groovy!
- 88.3. What is this value(consumer(), producer()) ?
- 88.4. How to do Stubs versioning?
- 88.5. Common repo with contracts
- 88.6. Do I need a Binary Storage? Can’t I use Git?
- 88.7. Can I use the Pact Broker?
- 88.8. How can I debug the request/response being sent by the generated tests client?
- 89. Spring Cloud Contract Verifier Setup
- 89.1. Gradle Project
- 89.1.1. Prerequisites
- 89.1.2. Add Gradle Plugin with Dependencies
- 89.1.3. Gradle and Rest Assured 2.0
- 89.1.4. Snapshot Versions for Gradle
- 89.1.5. Add stubs
- 89.1.6. Run the Plugin
- 89.1.7. Default Setup
- 89.1.8. Configure Plugin
- 89.1.9. Configuration Options
- 89.1.10. Single Base Class for All Tests
- 89.1.11. Different Base Classes for Contracts
- 89.1.12. Invoking Generated Tests
- 89.1.13. Pushing stubs to SCM
- 89.1.14. Spring Cloud Contract Verifier on the Consumer Side
- 89.2. Maven Project
- 89.2.1. Add maven plugin
- 89.2.2. Maven and Rest Assured 2.0
- 89.2.3. Snapshot versions for Maven
- 89.2.4. Add stubs
- 89.2.5. Run plugin
- 89.2.6. Configure plugin
- 89.2.7. Configuration Options
- 89.2.8. Single Base Class for All Tests
- 89.2.9. Different base classes for contracts
- 89.2.10. Invoking generated tests
- 89.2.11. Pushing stubs to SCM
- 89.2.12. Maven Plugin and STS
- 89.2.13. Maven Plugin with Spock Tests
- 89.3. Stubs and Transitive Dependencies
- 89.4. Scenarios
- 89.5. Docker Project
- 90. Spring Cloud Contract Verifier Messaging
- 91. Spring Cloud Contract Stub Runner
- 92. Stub Runner for Messaging
- 93. Contract DSL
- 93.1. Limitations
- 93.2. Common Top-Level elements
- 93.3. Request
- 93.4. Response
- 93.5. Dynamic properties
- 93.5.1. Dynamic properties inside the body
- 93.5.2. Regular expressions
- 93.5.3. Passing Optional Parameters
- 93.5.4. Executing Custom Methods on the Server Side
- 93.5.5. Referencing the Request from the Response
- 93.5.6. Registering Your Own WireMock Extension
- 93.5.7. Dynamic Properties in the Matchers Sections
- 93.6. JAX-RS Support
- 93.7. Async Support
- 93.8. Working with Context Paths
- 93.9. Working with WebFlux
- 93.10. XML Support for REST
- 93.11. Messaging Top-Level Elements
- 93.12. Multiple Contracts in One File
- 93.13. Generating Spring REST Docs snippets from the contracts
- 94. Customization
- 95. Using the Pluggable Architecture
- 96. Spring Cloud Contract WireMock
- 96.1. Registering Stubs Automatically
- 96.2. Using Files to Specify the Stub Bodies
- 96.3. Alternative: Using JUnit Rules
- 96.4. Relaxed SSL Validation for Rest Template
- 96.5. WireMock and Spring MVC Mocks
- 96.6. Customization of WireMock configuration
- 96.7. Generating Stubs using REST Docs
- 96.8. Generating Contracts by Using REST Docs
- 97. Migrations
- 98. Links
- XIV. Spring Cloud Vault
- 99. Quick Start
- 100. Client Side Usage
- 101. Authentication methods
- 101.1. Token authentication
- 101.2. AppId authentication
- 101.3. AppRole authentication
- 101.4. AWS-EC2 authentication
- 101.5. AWS-IAM authentication
- 101.6. Azure MSI authentication
- 101.7. TLS certificate authentication
- 101.8. Cubbyhole authentication
- 101.9. GCP-GCE authentication
- 101.10. GCP-IAM authentication
- 101.11. Kubernetes authentication
- 102. Secret Backends
- 103. Database backends
- 104. Configure
PropertySourceLocatorbehavior - 105. Service Registry Configuration
- 106. Vault Client Fail Fast
- 107. Vault Client SSL configuration
- 108. Lease lifecycle management (renewal and revocation)
- XV. Spring Cloud Gateway
- 109. How to Include Spring Cloud Gateway
- 110. Glossary
- 111. How It Works
- 112. Route Predicate Factories
- 112.1. After Route Predicate Factory
- 112.2. Before Route Predicate Factory
- 112.3. Between Route Predicate Factory
- 112.4. Cookie Route Predicate Factory
- 112.5. Header Route Predicate Factory
- 112.6. Host Route Predicate Factory
- 112.7. Method Route Predicate Factory
- 112.8. Path Route Predicate Factory
- 112.9. Query Route Predicate Factory
- 112.10. RemoteAddr Route Predicate Factory
- 113. GatewayFilter Factories
- 113.1. AddRequestHeader GatewayFilter Factory
- 113.2. AddRequestParameter GatewayFilter Factory
- 113.3. AddResponseHeader GatewayFilter Factory
- 113.4. Hystrix GatewayFilter Factory
- 113.5. FallbackHeaders GatewayFilter Factory
- 113.6. PrefixPath GatewayFilter Factory
- 113.7. PreserveHostHeader GatewayFilter Factory
- 113.8. RequestRateLimiter GatewayFilter Factory
- 113.9. RedirectTo GatewayFilter Factory
- 113.10. RemoveHopByHopHeadersFilter GatewayFilter Factory
- 113.11. RemoveRequestHeader GatewayFilter Factory
- 113.12. RemoveResponseHeader GatewayFilter Factory
- 113.13. RewritePath GatewayFilter Factory
- 113.14. RewriteResponseHeader GatewayFilter Factory
- 113.15. SaveSession GatewayFilter Factory
- 113.16. SecureHeaders GatewayFilter Factory
- 113.17. SetPath GatewayFilter Factory
- 113.18. SetResponseHeader GatewayFilter Factory
- 113.19. SetStatus GatewayFilter Factory
- 113.20. StripPrefix GatewayFilter Factory
- 113.21. Retry GatewayFilter Factory
- 113.22. RequestSize GatewayFilter Factory
- 113.23. Modify Request Body GatewayFilter Factory
- 113.24. Modify Response Body GatewayFilter Factory
- 113.25. Default Filters
- 114. Global Filters
- 114.1. Combined Global Filter and GatewayFilter Ordering
- 114.2. Forward Routing Filter
- 114.3. LoadBalancerClient Filter
- 114.4. Netty Routing Filter
- 114.5. Netty Write Response Filter
- 114.6. RouteToRequestUrl Filter
- 114.7. Websocket Routing Filter
- 114.8. Gateway Metrics Filter
- 114.9. Marking An Exchange As Routed
- 115. TLS / SSL
- 116. Configuration
- 117. Reactor Netty Access Logs
- 118. CORS Configuration
- 119. Actuator API
- 120. Developer Guide
- 121. Building a Simple Gateway Using Spring MVC or Webflux
- XVI. Spring Cloud Function
- 122. Introduction
- 123. Getting Started
- 124. Building and Running a Function
- 125. Function Catalog and Flexible Function Signatures
- 126. Standalone Web Applications
- 127. Standalone Streaming Applications
- 128. Deploying a Packaged Function
- 129. Functional Bean Definitions
- 130. Dynamic Compilation
- 131. Serverless Platform Adapters
- XVII. Spring Cloud Kubernetes
- 132. Why do you need Spring Cloud Kubernetes?
- 133. Starters
- 134. DiscoveryClient for Kubernetes
- 135. Kubernetes native service discovery
- 136. Kubernetes PropertySource implementations
- 137. Ribbon Discovery in Kubernetes
- 138. Kubernetes Ecosystem Awareness
- 139. Pod Health Indicator
- 140. Leader Election
- 141. Security Configurations Inside Kubernetes
- 142. Examples
- 143. Other Resources
- 144. Building
- 145. Contributing
- XVIII. Spring Cloud GCP
- 146. Introduction
- 147. Dependency Management
- 148. Getting started
- 149. Spring Cloud GCP Core
- 150. Google Cloud Pub/Sub
- 151. Spring Resources
- 152. Spring JDBC
- 153. Spring Integration
- 154. Spring Cloud Stream
- 155. Spring Cloud Sleuth
- 156. Stackdriver Logging
- 157. Spring Cloud Config
- 158. Spring Data Cloud Spanner
- 159. Spring Data Cloud Datastore
- 160. Cloud Memorystore for Redis
- 161. Cloud Identity-Aware Proxy (IAP) Authentication
- 162. Google Cloud Vision
- 163. Cloud Foundry
- 164. Kotlin Support
- 165. Sample
- XIX. Appendix: Compendium of Configuration Properties
Spring Cloud provides tools for developers to quickly build some of the common patterns in distributed systems (e.g. configuration management, service discovery, circuit breakers, intelligent routing, micro-proxy, control bus). Coordination of distributed systems leads to boiler plate patterns, and using Spring Cloud developers can quickly stand up services and applications that implement those patterns. They will work well in any distributed environment, including the developer’s own laptop, bare metal data centres, and managed platforms such as Cloud Foundry.
Version: 1.0.0.BUILD-SNAPSHOT
Spring Cloud focuses on providing good out of box experience for typical use cases and extensibility mechanism to cover others.
- Distributed/versioned configuration
- Service registration and discovery
- Routing
- Service-to-service calls
- Load balancing
- Circuit Breakers
- Distributed messaging
Cloud Native is a style of application development that encourages easy adoption of best practices in the areas of continuous delivery and value-driven development. A related discipline is that of building 12-factor Applications, in which development practices are aligned with delivery and operations goals — for instance, by using declarative programming and management and monitoring. Spring Cloud facilitates these styles of development in a number of specific ways. The starting point is a set of features to which all components in a distributed system need easy access.
Many of those features are covered by Spring Boot, on which Spring Cloud builds. Some more features are delivered by Spring Cloud as two libraries: Spring Cloud Context and Spring Cloud Commons.
Spring Cloud Context provides utilities and special services for the ApplicationContext of a Spring Cloud application (bootstrap context, encryption, refresh scope, and environment endpoints). Spring Cloud Commons is a set of abstractions and common classes used in different Spring Cloud implementations (such as Spring Cloud Netflix and Spring Cloud Consul).
If you get an exception due to "Illegal key size" and you use Sun’s JDK, you need to install the Java Cryptography Extension (JCE) Unlimited Strength Jurisdiction Policy Files. See the following links for more information:
Extract the files into the JDK/jre/lib/security folder for whichever version of JRE/JDK x64/x86 you use.
![[Note]](images/note.png) | Note |
|---|---|
Spring Cloud is released under the non-restrictive Apache 2.0 license. If you would like to contribute to this section of the documentation or if you find an error, you can find the source code and issue trackers for the project at github. |
Spring Boot has an opinionated view of how to build an application with Spring. For instance, it has conventional locations for common configuration files and has endpoints for common management and monitoring tasks. Spring Cloud builds on top of that and adds a few features that probably all components in a system would use or occasionally need.
A Spring Cloud application operates by creating a “bootstrap” context, which is a parent context for the main application.
It is responsible for loading configuration properties from the external sources and for decrypting properties in the local external configuration files.
The two contexts share an Environment, which is the source of external properties for any Spring application.
By default, bootstrap properties (not bootstrap.properties but properties that are loaded during the bootstrap phase) are added with high precedence, so they cannot be overridden by local configuration.
The bootstrap context uses a different convention for locating external configuration than the main application context.
Instead of application.yml (or .properties), you can use bootstrap.yml, keeping the external configuration for bootstrap and main context
nicely separate.
The following listing shows an example:
bootstrap.yml.
spring:
  application:
    name: foo
  cloud:
    config:
      uri: ${SPRING_CONFIG_URI:http://localhost:8888}
If your application needs any application-specific configuration from the server, it is a good idea to set the spring.application.name (in bootstrap.yml or application.yml).
You can disable the bootstrap process completely by setting spring.cloud.bootstrap.enabled=false (for example, in system properties).
If you build an application context from SpringApplication or SpringApplicationBuilder, then the Bootstrap context is added as a parent to that context.
It is a feature of Spring that child contexts inherit property sources and profiles from their parent, so the “main” application context contains additional property sources, compared to building the same context without Spring Cloud Config.
The additional property sources are:
- “bootstrap”: If any
PropertySourceLocatorsare found in the Bootstrap context and if they have non-empty properties, an optionalCompositePropertySourceappears with high priority. An example would be properties from the Spring Cloud Config Server. See “Section 2.6, “Customizing the Bootstrap Property Sources”” for instructions on how to customize the contents of this property source. - “applicationConfig: [classpath:bootstrap.yml]” (and related files if Spring profiles are active): If you have a
bootstrap.yml(or.properties), those properties are used to configure the Bootstrap context. Then they get added to the child context when its parent is set. They have lower precedence than theapplication.yml(or.properties) and any other property sources that are added to the child as a normal part of the process of creating a Spring Boot application. See “Section 2.3, “Changing the Location of Bootstrap Properties”” for instructions on how to customize the contents of these property sources.
Because of the ordering rules of property sources, the “bootstrap” entries take precedence.
However, note that these do not contain any data from bootstrap.yml, which has very low precedence but can be used to set defaults.
You can extend the context hierarchy by setting the parent context of any ApplicationContext you create — for example, by using its own interface or with the SpringApplicationBuilder convenience methods (parent(), child() and sibling()).
The bootstrap context is the parent of the most senior ancestor that you create yourself.
Every context in the hierarchy has its own “bootstrap” (possibly empty) property source to avoid promoting values inadvertently from parents down to their descendants.
If there is a Config Server, every context in the hierarchy can also (in principle) have a different spring.application.name and, hence, a different remote property source.
Normal Spring application context behavior rules apply to property resolution: properties from a child context override those in
the parent, by name and also by property source name.
(If the child has a property source with the same name as the parent, the value from the parent is not included in the child).
Note that the SpringApplicationBuilder lets you share an Environment amongst the whole hierarchy, but that is not the default.
Thus, sibling contexts, in particular, do not need to have the same profiles or property sources, even though they may share common values with their parent.
The bootstrap.yml (or .properties) location can be specified by setting spring.cloud.bootstrap.name (default: bootstrap) or spring.cloud.bootstrap.location (default: empty) — for example, in System properties.
Those properties behave like the spring.config.* variants with the same name.
In fact, they are used to set up the bootstrap ApplicationContext by setting those properties in its Environment.
If there is an active profile (from spring.profiles.active or through the Environment API in the
context you are building), properties in that profile get loaded as well, the same as in a regular Spring Boot app — for example, from bootstrap-development.properties for a development profile.
The property sources that are added to your application by the bootstrap context are often “remote” (from example, from Spring Cloud Config Server).
By default, they cannot be overridden locally.
If you want to let your applications override the remote properties with their own System properties or config files, the remote property source has to grant it permission by setting spring.cloud.config.allowOverride=true (it does not work to set this locally).
Once that flag is set, two finer-grained settings control the location of the remote properties in relation to system properties and the application’s local configuration:
spring.cloud.config.overrideNone=true: Override from any local property source.spring.cloud.config.overrideSystemProperties=false: Only system properties, command line arguments, and environment variables (but not the local config files) should override the remote settings.
The bootstrap context can be set to do anything you like by adding entries to /META-INF/spring.factories under a key named org.springframework.cloud.bootstrap.BootstrapConfiguration.
This holds a comma-separated list of Spring @Configuration classes that are used to create the context.
Any beans that you want to be available to the main application context for autowiring can be created here.
There is a special contract for @Beans of type ApplicationContextInitializer.
If you want to control the startup sequence, classes can be marked with an @Order annotation (the default order is last).
![[Warning]](images/warning.png) | Warning |
|---|---|
When adding custom |
The bootstrap process ends by injecting initializers into the main SpringApplication instance (which is the normal Spring Boot startup sequence, whether it is running as a standalone application or deployed in an application server).
First, a bootstrap context is created from the classes found in spring.factories.
Then, all @Beans of type ApplicationContextInitializer are added to the main SpringApplication before it is started.
The default property source for external configuration added by the bootstrap process is the Spring Cloud Config Server, but you can add additional sources by adding beans of type PropertySourceLocator to the bootstrap context (through spring.factories).
For instance, you can insert additional properties from a different server or from a database.
As an example, consider the following custom locator:
@Configuration
public class CustomPropertySourceLocator implements PropertySourceLocator {

    @Override
    public PropertySource<?> locate(Environment environment) {
        return new MapPropertySource("customProperty",
                Collections.<String, Object>singletonMap("property.from.sample.custom.source", "worked as intended"));
    }

}
The Environment that is passed in is the one for the ApplicationContext about to be created — in other words, the one for which we supply additional property sources for.
It already has its normal Spring Boot-provided property sources, so you can use those to locate a property source specific to this Environment (for example, by keying it on spring.application.name, as is done in the default Spring Cloud Config Server property source locator).
If you create a jar with this class in it and then add a META-INF/spring.factories containing the following, the customProperty PropertySource appears in any application that includes that jar on its classpath:
org.springframework.cloud.bootstrap.BootstrapConfiguration=sample.custom.CustomPropertySourceLocator
If you are going to use Spring Boot to configure log settings than you should place this configuration in `bootstrap.[yml | properties] if you would like it to apply to all events.
| Note |
|---|---|
For Spring Cloud to initialize logging configuration properly you cannot use a custom prefix. For example,
using |
The application listens for an EnvironmentChangeEvent and reacts to the change in a couple of standard ways (additional ApplicationListeners can be added as @Beans by the user in the normal way).
When an EnvironmentChangeEvent is observed, it has a list of key values that have changed, and the application uses those to:
- Re-bind any
@ConfigurationPropertiesbeans in the context - Set the logger levels for any properties in
logging.level.*
Note that the Config Client does not, by default, poll for changes in the Environment.
Generally, we would not recommend that approach for detecting changes (although you could set it up with a
@Scheduled annotation).
If you have a scaled-out client application, it is better to broadcast the EnvironmentChangeEvent to all the instances instead of having them polling for changes (for example, by using the Spring Cloud Bus).
The EnvironmentChangeEvent covers a large class of refresh use cases, as long as you can actually make a change to the Environment and publish the event.
Note that those APIs are public and part of core Spring).
You can verify that the changes are bound to @ConfigurationProperties beans by visiting the /configprops endpoint (a normal Spring Boot Actuator feature).
For instance, a DataSource can have its maxPoolSize changed at runtime (the default DataSource created by Spring Boot is an @ConfigurationProperties bean) and grow capacity dynamically.
Re-binding @ConfigurationProperties does not cover another large class of use cases, where you need more control over the refresh and where you need a change to be atomic over the whole ApplicationContext.
To address those concerns, we have @RefreshScope.
When there is a configuration change, a Spring @Bean that is marked as @RefreshScope gets special treatment.
This feature addresses the problem of stateful beans that only get their configuration injected when they are initialized.
For instance, if a DataSource has open connections when the database URL is changed via the Environment, you probably want the holders of those connections to be able to complete what they are doing.
Then, the next time something borrows a connection from the pool, it gets one with the new URL.
Sometimes, it might even be mandatory to apply the @RefreshScope
annotation on some beans which can be only initialized once. If a bean
is "immutable", you will have to either annotate the bean with @RefreshScope
or specify the classname under the property key
spring.cloud.refresh.extra-refreshable.
![[Important]](images/important.png) | Important |
|---|---|
If you create a |
Refresh scope beans are lazy proxies that initialize when they are used (that is, when a method is called), and the scope acts as a cache of initialized values. To force a bean to re-initialize on the next method call, you must invalidate its cache entry.
The RefreshScope is a bean in the context and has a public refreshAll() method to refresh all beans in the scope by clearing the target cache.
The /refresh endpoint exposes this functionality (over HTTP or JMX).
To refresh an individual bean by name, there is also a refresh(String) method.
To expose the /refresh endpoint, you need to add following configuration to your application:
management:
  endpoints:
    web:
      exposure:
        include: refresh
| Note |
|---|---|
|
Spring Cloud has an Environment pre-processor for decrypting property values locally.
It follows the same rules as the Config Server and has the same external configuration through encrypt.*.
Thus, you can use encrypted values in the form of {cipher}* and, as long as there is a valid key, they are decrypted before the main application context gets the Environment settings.
To use the encryption features in an application, you need to include Spring Security RSA in your classpath (Maven co-ordinates: "org.springframework.security:spring-security-rsa"), and you also need the full strength JCE extensions in your JVM.
If you get an exception due to "Illegal key size" and you use Sun’s JDK, you need to install the Java Cryptography Extension (JCE) Unlimited Strength Jurisdiction Policy Files. See the following links for more information:
Extract the files into the JDK/jre/lib/security folder for whichever version of JRE/JDK x64/x86 you use.
For a Spring Boot Actuator application, some additional management endpoints are available. You can use:
POSTto/actuator/envto update theEnvironmentand rebind@ConfigurationPropertiesand log levels./actuator/refreshto re-load the boot strap context and refresh the@RefreshScopebeans./actuator/restartto close theApplicationContextand restart it (disabled by default)./actuator/pauseand/actuator/resumefor calling theLifecyclemethods (stop()andstart()on theApplicationContext).
| Note |
|---|---|
If you disable the |
Patterns such as service discovery, load balancing, and circuit breakers lend themselves to a common abstraction layer that can be consumed by all Spring Cloud clients, independent of the implementation (for example, discovery with Eureka or Consul).
Spring Cloud Commons provides the @EnableDiscoveryClient annotation.
This looks for implementations of the DiscoveryClient interface with META-INF/spring.factories.
Implementations of the Discovery Client add a configuration class to spring.factories under the org.springframework.cloud.client.discovery.EnableDiscoveryClient key.
Examples of DiscoveryClient implementations include Spring Cloud Netflix Eureka, Spring Cloud Consul Discovery, and Spring Cloud Zookeeper Discovery.
By default, implementations of DiscoveryClient auto-register the local Spring Boot server with the remote discovery server.
This behavior can be disabled by setting autoRegister=false in @EnableDiscoveryClient.
| Note |
|---|---|
|
Commons creates a Spring Boot HealthIndicator that DiscoveryClient implementations can participate in by implementing DiscoveryHealthIndicator.
To disable the composite HealthIndicator, set spring.cloud.discovery.client.composite-indicator.enabled=false.
A generic HealthIndicator based on DiscoveryClient is auto-configured (DiscoveryClientHealthIndicator).
To disable it, set spring.cloud.discovery.client.health-indicator.enabled=false.
To disable the description field of the DiscoveryClientHealthIndicator, set spring.cloud.discovery.client.health-indicator.include-description=false.
Otherwise, it can bubble up as the description of the rolled up HealthIndicator.
DiscoveryClient interface extends Ordered. This is useful when using multiple discovery
clients, as it allows you to define the order of the returned discovery clients, similar to
how you can order the beans loaded by a Spring application. By default, the order of any DiscoveryClient is set to
0. If you want to set a different order for your custom DiscoveryClient implementations, you just need to override
the getOrder() method so that it returns the value that is suitable for your setup. Apart from this, you can use
properties to set the order of the DiscoveryClient
implementations provided by Spring Cloud, among others ConsulDiscoveryClient, EurekaDiscoveryClient and
ZookeeperDiscoveryClient. In order to do it, you just need to set the
spring.cloud.{clientIdentifier}.discovery.order (or eureka.client.order for Eureka) property to the desired value.
Commons now provides a ServiceRegistry interface that provides methods such as register(Registration) and deregister(Registration), which let you provide custom registered services.
Registration is a marker interface.
The following example shows the ServiceRegistry in use:
@Configuration
@EnableDiscoveryClient(autoRegister=false)
public class MyConfiguration {
    private ServiceRegistry registry;

    public MyConfiguration(ServiceRegistry registry) {
        this.registry = registry;
    }

    // called through some external process, such as an event or a custom actuator endpoint
    public void register() {
        Registration registration = constructRegistration();
        this.registry.register(registration);
    }
}
Each ServiceRegistry implementation has its own Registry implementation.
ZookeeperRegistrationused withZookeeperServiceRegistryEurekaRegistrationused withEurekaServiceRegistryConsulRegistrationused withConsulServiceRegistry
If you are using the ServiceRegistry interface, you are going to need to pass the
correct Registry implementation for the ServiceRegistry implementation you
are using.
By default, the ServiceRegistry implementation auto-registers the running service.
To disable that behavior, you can set:
* @EnableDiscoveryClient(autoRegister=false) to permanently disable auto-registration.
* spring.cloud.service-registry.auto-registration.enabled=false to disable the behavior through configuration.
There are two events that will be fired when a service auto-registers. The first event, called
InstancePreRegisteredEvent, is fired before the service is registered. The second
event, called InstanceRegisteredEvent, is fired after the service is registered. You can register an
ApplicationListener(s) to listen to and react to these events.
| Note |
|---|---|
These events will not be fired if |
Spring Cloud Commons provides a /service-registry actuator endpoint.
This endpoint relies on a Registration bean in the Spring Application Context.
Calling /service-registry with GET returns the status of the Registration.
Using POST to the same endpoint with a JSON body changes the status of the current Registration to the new value.
The JSON body has to include the status field with the preferred value.
Please see the documentation of the ServiceRegistry implementation you use for the allowed values when updating the status and the values returned for the status.
For instance, Eureka’s supported statuses are UP, DOWN, OUT_OF_SERVICE, and UNKNOWN.
RestTemplate can be automatically configured to use ribbon.
To create a load-balanced RestTemplate, create a RestTemplate @Bean and use the @LoadBalanced qualifier, as shown in the following example:
@Configuration
public class MyConfiguration {

    @LoadBalanced
    @Bean
    RestTemplate restTemplate() {
        return new RestTemplate();
    }
}

public class MyClass {
    @Autowired
    private RestTemplate restTemplate;

    public String doOtherStuff() {
        String results = restTemplate.getForObject("http://stores/stores", String.class);
        return results;
    }
}
![[Caution]](images/caution.png) | Caution |
|---|---|
A |
The URI needs to use a virtual host name (that is, a service name, not a host name).
The Ribbon client is used to create a full physical address.
See RibbonAutoConfiguration for details of how the RestTemplate is set up.
WebClient can be automatically configured to use the LoadBalancerClient.
To create a load-balanced WebClient, create a WebClient.Builder @Bean and use the @LoadBalanced qualifier, as shown in the following example:
@Configuration
public class MyConfiguration {

	@Bean
	@LoadBalanced
	public WebClient.Builder loadBalancedWebClientBuilder() {
		return WebClient.builder();
	}
}

public class MyClass {
    @Autowired
    private WebClient.Builder webClientBuilder;

    public Mono<String> doOtherStuff() {
        return webClientBuilder.build().get().uri("http://stores/stores")
        				.retrieve().bodyToMono(String.class);
    }
}
The URI needs to use a virtual host name (that is, a service name, not a host name). The Ribbon client is used to create a full physical address.
A load-balanced RestTemplate can be configured to retry failed requests.
By default, this logic is disabled.
You can enable it by adding Spring Retry to your application’s classpath.
The load-balanced RestTemplate honors some of the Ribbon configuration values related to retrying failed requests.
You can use client.ribbon.MaxAutoRetries, client.ribbon.MaxAutoRetriesNextServer, and client.ribbon.OkToRetryOnAllOperations properties.
If you would like to disable the retry logic with Spring Retry on the classpath, you can set spring.cloud.loadbalancer.retry.enabled=false.
See the Ribbon documentation for a description of what these properties do.
If you would like to implement a BackOffPolicy in your retries, you need to create a bean of type LoadBalancedRetryFactory and override the createBackOffPolicy method:
@Configuration
public class MyConfiguration {
    @Bean
    LoadBalancedRetryFactory retryFactory() {
        return new LoadBalancedRetryFactory() {
            @Override
            public BackOffPolicy createBackOffPolicy(String service) {
        		return new ExponentialBackOffPolicy();
        	}
        };
    }
}
| Note |
|---|---|
|
If you want to add one or more RetryListener implementations to your retry functionality, you need to
create a bean of type LoadBalancedRetryListenerFactory and return the RetryListener array
you would like to use for a given service, as shown in the following example:
@Configuration
public class MyConfiguration {
    @Bean
    LoadBalancedRetryListenerFactory retryListenerFactory() {
        return new LoadBalancedRetryListenerFactory() {
            @Override
            public RetryListener[] createRetryListeners(String service) {
                return new RetryListener[]{new RetryListener() {
                    @Override
                    public <T, E extends Throwable> boolean open(RetryContext context, RetryCallback<T, E> callback) {
                        //TODO Do you business...
                        return true;
                    }

                    @Override
                     public <T, E extends Throwable> void close(RetryContext context, RetryCallback<T, E> callback, Throwable throwable) {
                        //TODO Do you business...
                    }

                    @Override
                    public <T, E extends Throwable> void onError(RetryContext context, RetryCallback<T, E> callback, Throwable throwable) {
                        //TODO Do you business...
                    }
                }};
            }
        };
    }
}
If you want a RestTemplate that is not load-balanced, create a RestTemplate bean and inject it.
To access the load-balanced RestTemplate, use the @LoadBalanced qualifier when you create your @Bean, as shown in the following example:\
@Configuration
public class MyConfiguration {

    @LoadBalanced
    @Bean
    RestTemplate loadBalanced() {
        return new RestTemplate();
    }

    @Primary
    @Bean
    RestTemplate restTemplate() {
        return new RestTemplate();
    }
}

public class MyClass {
    @Autowired
    private RestTemplate restTemplate;

    @Autowired
    @LoadBalanced
    private RestTemplate loadBalanced;

    public String doOtherStuff() {
        return loadBalanced.getForObject("http://stores/stores", String.class);
    }

    public String doStuff() {
        return restTemplate.getForObject("http://example.com", String.class);
    }
}
| Important |
|---|---|
Notice the use of the |
![[Tip]](images/tip.png) | Tip |
|---|---|
If you see errors such as |
WebClient can be configured to use the LoadBalancerClient. LoadBalancerExchangeFilterFunction is auto-configured if spring-webflux is on the classpath. The following example shows how to configure a WebClient to use load balancer:
public class MyClass {
    @Autowired
    private LoadBalancerExchangeFilterFunction lbFunction;

    public Mono<String> doOtherStuff() {
        return WebClient.builder().baseUrl("http://stores")
            .filter(lbFunction)
            .build()
            .get()
            .uri("/stores")
            .retrieve()
            .bodyToMono(String.class);
    }
}
The URI needs to use a virtual host name (that is, a service name, not a host name).
The LoadBalancerClient is used to create a full physical address.
Sometimes, it is useful to ignore certain named network interfaces so that they can be excluded from Service Discovery registration (for example, when running in a Docker container).
A list of regular expressions can be set to cause the desired network interfaces to be ignored.
The following configuration ignores the docker0 interface and all interfaces that start with veth:
application.yml.
spring:
  cloud:
    inetutils:
      ignoredInterfaces:
        - docker0
        - veth.*
You can also force the use of only specified network addresses by using a list of regular expressions, as shown in the following example:
bootstrap.yml.
spring:
  cloud:
    inetutils:
      preferredNetworks:
        - 192.168
        - 10.0
You can also force the use of only site-local addresses, as shown in the following example: .application.yml
spring:
  cloud:
    inetutils:
      useOnlySiteLocalInterfaces: true
See Inet4Address.html.isSiteLocalAddress() for more details about what constitutes a site-local address.
Spring Cloud Commons provides beans for creating both Apache HTTP clients (ApacheHttpClientFactory) and OK HTTP clients (OkHttpClientFactory).
The OkHttpClientFactory bean is created only if the OK HTTP jar is on the classpath.
In addition, Spring Cloud Commons provides beans for creating the connection managers used by both clients: ApacheHttpClientConnectionManagerFactory for the Apache HTTP client and OkHttpClientConnectionPoolFactory for the OK HTTP client.
If you would like to customize how the HTTP clients are created in downstream projects, you can provide your own implementation of these beans.
In addition, if you provide a bean of type HttpClientBuilder or OkHttpClient.Builder, the default factories use these builders as the basis for the builders returned to downstream projects.
You can also disable the creation of these beans by setting spring.cloud.httpclientfactories.apache.enabled or spring.cloud.httpclientfactories.ok.enabled to false.
Spring Cloud Commons provides a /features actuator endpoint.
This endpoint returns features available on the classpath and whether they are enabled.
The information returned includes the feature type, name, version, and vendor.
There are two types of 'features': abstract and named.
Abstract features are features where an interface or abstract class is defined and that an implementation the creates, such as DiscoveryClient, LoadBalancerClient, or LockService.
The abstract class or interface is used to find a bean of that type in the context.
The version displayed is bean.getClass().getPackage().getImplementationVersion().
Named features are features that do not have a particular class they implement, such as "Circuit Breaker", "API Gateway", "Spring Cloud Bus", and others. These features require a name and a bean type.
Any module can declare any number of HasFeature beans, as shown in the following examples:
@Bean
public HasFeatures commonsFeatures() {
  return HasFeatures.abstractFeatures(DiscoveryClient.class, LoadBalancerClient.class);
}

@Bean
public HasFeatures consulFeatures() {
  return HasFeatures.namedFeatures(
    new NamedFeature("Spring Cloud Bus", ConsulBusAutoConfiguration.class),
    new NamedFeature("Circuit Breaker", HystrixCommandAspect.class));
}

@Bean
HasFeatures localFeatures() {
  return HasFeatures.builder()
      .abstractFeature(Foo.class)
      .namedFeature(new NamedFeature("Bar Feature", Bar.class))
      .abstractFeature(Baz.class)
      .build();
}
Each of these beans should go in an appropriately guarded @Configuration.
Due to the fact that some users have problem with setting up Spring Cloud application, we’ve decided to add a compatibility verification mechanism. It will break if your current setup is not compatible with Spring Cloud requirements, together with a report, showing what exactly went wrong.
At the moment we verify which version of Spring Boot is added to your classpath.
Example of a report
***************************
APPLICATION FAILED TO START
***************************

Description:

Your project setup is incompatible with our requirements due to following reasons:

- Spring Boot [2.1.0.RELEASE] is not compatible with this Spring Cloud release train


Action:

Consider applying the following actions:

- Change Spring Boot version to one of the following versions [1.2.x, 1.3.x] .
You can find the latest Spring Boot versions here [https://spring.io/projects/spring-boot#learn].
If you want to learn more about the Spring Cloud Release train compatibility, you can visit this page [https://spring.io/projects/spring-cloud#overview] and check the [Release Trains] section.
In order to disable this feature, set spring.cloud.compatibility-verifier.enabled to false.
If you want to override the compatible Spring Boot versions, just set the
spring.cloud.compatibility-verifier.compatible-boot-versions property with a comma separated list
of compatible Spring Boot versions.
1.0.0.BUILD-SNAPSHOT
Spring Cloud Config provides server-side and client-side support for externalized configuration in a distributed system. With the Config Server, you have a central place to manage external properties for applications across all environments.
The concepts on both client and server map identically to the Spring Environment and PropertySource abstractions, so they fit very well with Spring applications but can be used with any application running in any language.
As an application moves through the deployment pipeline from dev to test and into production, you can manage the configuration between those environments and be certain that applications have everything they need to run when they migrate.
The default implementation of the server storage backend uses git, so it easily supports labelled versions of configuration environments as well as being accessible to a wide range of tooling for managing the content.
It is easy to add alternative implementations and plug them in with Spring configuration.
This quick start walks through using both the server and the client of Spring Cloud Config Server.
First, start the server, as follows:
$ cd spring-cloud-config-server
$ ../mvnw spring-boot:run
The server is a Spring Boot application, so you can run it from your IDE if you prefer to do so (the main class is ConfigServerApplication).
Next try out a client, as follows:
$ curl localhost:8888/foo/development
{"name":"foo","label":"master","propertySources":[
  {"name":"https://github.com/scratches/config-repo/foo-development.properties","source":{"bar":"spam"}},
  {"name":"https://github.com/scratches/config-repo/foo.properties","source":{"foo":"bar"}}
]}
The default strategy for locating property sources is to clone a git repository (at spring.cloud.config.server.git.uri) and use it to initialize a mini SpringApplication.
The mini-application’s Environment is used to enumerate property sources and publish them at a JSON endpoint.
The HTTP service has resources in the following form:
/{application}/{profile}[/{label}]
/{application}-{profile}.yml
/{label}/{application}-{profile}.yml
/{application}-{profile}.properties
/{label}/{application}-{profile}.properties
where application is injected as the spring.config.name in the SpringApplication (what is normally application in a regular Spring Boot app), profile is an active profile (or comma-separated list of properties), and label is an optional git label (defaults to master.)
Spring Cloud Config Server pulls configuration for remote clients from various sources. The following example gets configuration from a git repository (which must be provided), as shown in the following example:
spring:
  cloud:
    config:
      server:
        git:
          uri: https://github.com/spring-cloud-samples/config-repo
Other sources are any JDBC compatible database, Subversion, Hashicorp Vault, Credhub and local filesystems.
To use these features in an application, you can build it as a Spring Boot application that depends on spring-cloud-config-client (for an example, see the test cases for the config-client or the sample application).
The most convenient way to add the dependency is with a Spring Boot starter org.springframework.cloud:spring-cloud-starter-config.
There is also a parent pom and BOM (spring-cloud-starter-parent) for Maven users and a Spring IO version management properties file for Gradle and Spring CLI users. The following example shows a typical Maven configuration:
pom.xml.
   <parent>
       <groupId>org.springframework.boot</groupId>
       <artifactId>spring-boot-starter-parent</artifactId>
       <version>{spring-boot-docs-version}</version>
       <relativePath /> <!-- lookup parent from repository -->
   </parent>

<dependencyManagement>
	<dependencies>
		<dependency>
			<groupId>org.springframework.cloud</groupId>
			<artifactId>spring-cloud-dependencies</artifactId>
			<version>{spring-cloud-version}</version>
			<type>pom</type>
			<scope>import</scope>
		</dependency>
	</dependencies>
</dependencyManagement>

<dependencies>
	<dependency>
		<groupId>org.springframework.cloud</groupId>
		<artifactId>spring-cloud-starter-config</artifactId>
	</dependency>
	<dependency>
		<groupId>org.springframework.boot</groupId>
		<artifactId>spring-boot-starter-test</artifactId>
		<scope>test</scope>
	</dependency>
</dependencies>

<build>
	<plugins>
           <plugin>
               <groupId>org.springframework.boot</groupId>
               <artifactId>spring-boot-maven-plugin</artifactId>
           </plugin>
	</plugins>
</build>

   <!-- repositories also needed for snapshots and milestones -->
Now you can create a standard Spring Boot application, such as the following HTTP server:
@SpringBootApplication
@RestController
public class Application {

    @RequestMapping("/")
    public String home() {
        return "Hello World!";
    }

    public static void main(String[] args) {
        SpringApplication.run(Application.class, args);
    }

}
When this HTTP server runs, it picks up the external configuration from the default local config server (if it is running) on port 8888.
To modify the startup behavior, you can change the location of the config server by using bootstrap.properties (similar to application.properties but for the bootstrap phase of an application context), as shown in the following example:
spring.cloud.config.uri: http://myconfigserver.com
By default, if no application name is set, application will be used. To modify the name, the following property can be added to the bootstrap.properties file:
spring.application.name: myapp
| Note |
|---|---|
When setting the property |
The bootstrap properties show up in the /env endpoint as a high-priority property source, as shown in the following example.
$ curl localhost:8080/env
{
  "profiles":[],
  "configService:https://github.com/spring-cloud-samples/config-repo/bar.properties":{"foo":"bar"},
  "servletContextInitParams":{},
  "systemProperties":{...},
  ...
}
A property source called ``configService:<URL of remote repository>/<file name> contains the foo property with a value of bar and is highest priority.
| Note |
|---|---|
The URL in the property source name is the git repository, not the config server URL. |
Spring Cloud Config Server provides an HTTP resource-based API for external configuration (name-value pairs or equivalent YAML content).
The server is embeddable in a Spring Boot application, by using the @EnableConfigServer annotation.
Consequently, the following application is a config server:
ConfigServer.java.
@SpringBootApplication
@EnableConfigServer
public class ConfigServer {
  public static void main(String[] args) {
    SpringApplication.run(ConfigServer.class, args);
  }
}
Like all Spring Boot applications, it runs on port 8080 by default, but you can switch it to the more conventional port 8888 in various ways.
The easiest, which also sets a default configuration repository, is by launching it with spring.config.name=configserver (there is a configserver.yml in the Config Server jar).
Another is to use your own application.properties, as shown in the following example:
application.properties.
server.port: 8888
spring.cloud.config.server.git.uri: file://${user.home}/config-repo
where ${user.home}/config-repo is a git repository containing YAML and properties files.
| Note |
|---|---|
On Windows, you need an extra "/" in the file URL if it is absolute with a drive prefix (for example, |
| Tip |
|---|---|
The following listing shows a recipe for creating the git repository in the preceding example: $ cd $HOME $ mkdir config-repo $ cd config-repo $ git init . $ echo info.foo: bar > application.properties $ git add -A . $ git commit -m "Add application.properties" |
| Warning |
|---|---|
Using the local filesystem for your git repository is intended for testing only. You should use a server to host your configuration repositories in production. |
| Warning |
|---|---|
The initial clone of your configuration repository can be quick and efficient if you keep only text files in it. If you store binary files, especially large ones, you may experience delays on the first request for configuration or encounter out of memory errors in the server. |
Where should you store the configuration data for the Config Server?
The strategy that governs this behaviour is the EnvironmentRepository, serving Environment objects.
This Environment is a shallow copy of the domain from the Spring Environment (including propertySources as the main feature).
The Environment resources are parametrized by three variables:
{application}, which maps tospring.application.nameon the client side.{profile}, which maps tospring.profiles.activeon the client (comma-separated list).{label}, which is a server side feature labelling a "versioned" set of config files.
Repository implementations generally behave like a Spring Boot application, loading configuration files from a spring.config.name equal to the {application} parameter, and spring.profiles.active equal to the {profiles} parameter.
Precedence rules for profiles are also the same as in a regular Spring Boot application: Active profiles take precedence over defaults, and, if there are multiple profiles, the last one wins (similar to adding entries to a Map).
The following sample client application has this bootstrap configuration:
bootstrap.yml.
spring:
  application:
    name: foo
  profiles:
    active: dev,mysql
(As usual with a Spring Boot application, these properties could also be set by environment variables or command line arguments).
If the repository is file-based, the server creates an
Environment from application.yml (shared between all clients) and
foo.yml (with foo.yml taking precedence).
If the YAML files have documents inside them that point to Spring profiles, those are applied with higher precedence (in order of the profiles listed).
If there are profile-specific YAML (or properties) files, these are also applied with higher precedence than the defaults.
Higher precedence translates to a PropertySource listed earlier in the Environment.
(These same rules apply in a standalone Spring Boot application.)
You can set spring.cloud.config.server.accept-empty to false so that Server would return a HTTP 404 status, if the application is not found.By default, this flag is set to true.
The default implementation of EnvironmentRepository uses a Git backend, which is very convenient for managing upgrades and physical environments and for auditing changes.
To change the location of the repository, you can set the spring.cloud.config.server.git.uri configuration property in the Config Server (for example in application.yml).
If you set it with a file: prefix, it should work from a local repository so that you can get started quickly and easily without a server. However, in that case, the server operates directly on the local repository without cloning it (it does not matter if it is not bare because the Config Server never makes changes to the "remote" repository).
To scale the Config Server up and make it highly available, you need to have all instances of the server pointing to the same repository, so only a shared file system would work.
Even in that case, it is better to use the ssh: protocol for a shared filesystem repository, so that the server can clone it and use a local working copy as a cache.
This repository implementation maps the {label} parameter of the HTTP resource to a git label (commit id, branch name, or tag).
If the git branch or tag name contains a slash (/), then the label in the HTTP URL should instead be specified with the special string (_) (to avoid ambiguity with other URL paths).
For example, if the label is foo/bar, replacing the slash would result in the following label: foo(_)bar.
The inclusion of the special string (_) can also be applied to the {application} parameter.
If you use a command-line client such as curl, be careful with the brackets in the URL — you should escape them from the shell with single quotes ('').
The configuration server’s validation of the Git server’s SSL certificate can be disabled by setting the git.skipSslValidation property to true (default is false).
spring:
  cloud:
    config:
      server:
        git:
          uri: https://example.com/my/repo
          skipSslValidation: true
You can configure the time, in seconds, that the configuration server will wait to acquire an HTTP connection. Use the git.timeout property.
spring:
  cloud:
    config:
      server:
        git:
          uri: https://example.com/my/repo
          timeout: 4
Spring Cloud Config Server supports a git repository URL with placeholders for the {application} and {profile} (and {label} if you need it, but remember that the label is applied as a git label anyway).
So you can support a “one repository per application” policy by using a structure similar to the following:
spring:
  cloud:
    config:
      server:
        git:
          uri: https://github.com/myorg/{application}
You can also support a “one repository per profile” policy by using a similar pattern but with
{profile}.
Additionally, using the special string "(_)" within your {application} parameters can enable support for multiple
organizations, as shown in the following example:
spring:
  cloud:
    config:
      server:
        git:
          uri: https://github.com/{application}
where {application} is provided at request time in the following format: organization(_)application.
Spring Cloud Config also includes support for more complex requirements with pattern
matching on the application and profile name.
The pattern format is a comma-separated list of {application}/{profile} names with wildcards (note that a pattern beginning with a wildcard may need to be quoted), as shown in the following example:
spring:
  cloud:
    config:
      server:
        git:
          uri: https://github.com/spring-cloud-samples/config-repo
          repos:
            simple: https://github.com/simple/config-repo
            special:
              pattern: special*/dev*,*special*/dev*
              uri: https://github.com/special/config-repo
            local:
              pattern: local*
              uri: file:/home/configsvc/config-repo
If {application}/{profile} does not match any of the patterns, it uses the default URI defined under spring.cloud.config.server.git.uri.
In the above example, for the “simple” repository, the pattern is simple/* (it only matches one application named simple in all profiles). The “local” repository matches all application names beginning with local in all profiles (the /* suffix is added automatically to any pattern that does not have a profile matcher).
| Note |
|---|---|
The “one-liner” short cut used in the “simple” example can be used only if the only property to be set is the URI. If you need to set anything else (credentials, pattern, and so on) you need to use the full form. |
The pattern property in the repo is actually an array, so you can use a YAML array (or [0], [1], etc. suffixes in properties files) to bind to multiple patterns.
You may need to do so if you are going to run apps with multiple profiles, as shown in the following example:
spring:
  cloud:
    config:
      server:
        git:
          uri: https://github.com/spring-cloud-samples/config-repo
          repos:
            development:
              pattern:
                - '*/development'
                - '*/staging'
              uri: https://github.com/development/config-repo
            staging:
              pattern:
                - '*/qa'
                - '*/production'
              uri: https://github.com/staging/config-repo
| Note |
|---|---|
Spring Cloud guesses that a pattern containing a profile that does not end in |
Every repository can also optionally store config files in sub-directories, and patterns to search for those directories can be specified as searchPaths.
The following example shows a config file at the top level:
spring:
  cloud:
    config:
      server:
        git:
          uri: https://github.com/spring-cloud-samples/config-repo
          searchPaths: foo,bar*
In the preceding example, the server searches for config files in the top level and in the foo/ sub-directory and also any sub-directory whose name begins with bar.
By default, the server clones remote repositories when configuration is first requested. The server can be configured to clone the repositories at startup, as shown in the following top-level example:
spring:
  cloud:
    config:
      server:
        git:
          uri: https://git/common/config-repo.git
          repos:
            team-a:
                pattern: team-a-*
                cloneOnStart: true
                uri: http://git/team-a/config-repo.git
            team-b:
                pattern: team-b-*
                cloneOnStart: false
                uri: http://git/team-b/config-repo.git
            team-c:
                pattern: team-c-*
                uri: http://git/team-a/config-repo.git
In the preceding example, the server clones team-a’s config-repo on startup, before it accepts any requests. All other repositories are not cloned until configuration from the repository is requested.
| Note |
|---|---|
Setting a repository to be cloned when the Config Server starts up can help to identify a misconfigured configuration source (such as an invalid repository URI) quickly, while the Config Server is starting up.
With |
To use HTTP basic authentication on the remote repository, add the username and password properties separately (not in the URL), as shown in the following example:
spring:
  cloud:
    config:
      server:
        git:
          uri: https://github.com/spring-cloud-samples/config-repo
          username: trolley
          password: strongpassword
If you do not use HTTPS and user credentials, SSH should also work out of the box when you store keys in the default directories (~/.ssh) and the URI points to an SSH location, such as [email protected]:configuration/cloud-configuration.
It is important that an entry for the Git server be present in the ~/.ssh/known_hosts file and that it is in ssh-rsa format.
Other formats (such as ecdsa-sha2-nistp256) are not supported.
To avoid surprises, you should ensure that only one entry is present in the known_hosts file for the Git server and that it matches the URL you provided to the config server.
If you use a hostname in the URL, you want to have exactly that (not the IP) in the known_hosts file.
The repository is accessed by using JGit, so any documentation you find on that should be applicable.
HTTPS proxy settings can be set in ~/.git/config or (in the same way as for any other JVM process) with
system properties (-Dhttps.proxyHost and -Dhttps.proxyPort).
| Tip |
|---|---|
If you do not know where your |
Spring Cloud Config Server also supports AWS CodeCommit authentication. AWS CodeCommit uses an authentication helper when using Git from the command line. This helper is not used with the JGit library, so a JGit CredentialProvider for AWS CodeCommit is created if the Git URI matches the AWS CodeCommit pattern. AWS CodeCommit URIs follow this pattern://git-codecommit.${AWS_REGION}.amazonaws.com/${repopath}.
If you provide a username and password with an AWS CodeCommit URI, they must be the AWS accessKeyId and secretAccessKey that provide access to the repository. If you do not specify a username and password, the accessKeyId and secretAccessKey are retrieved by using the AWS Default Credential Provider Chain.
If your Git URI matches the CodeCommit URI pattern (shown earlier), you must provide valid AWS credentials in the username and password or in one of the locations supported by the default credential provider chain. AWS EC2 instances may use IAM Roles for EC2 Instances.
| Note |
|---|---|
The |
By default, the JGit library used by Spring Cloud Config Server uses SSH configuration files such as ~/.ssh/known_hosts and /etc/ssh/ssh_config when connecting to Git repositories by using an SSH URI.
In cloud environments such as Cloud Foundry, the local filesystem may be ephemeral or not easily accessible.
For those cases, SSH configuration can be set by using Java properties.
In order to activate property-based SSH configuration, the spring.cloud.config.server.git.ignoreLocalSshSettings property must be set to true, as shown in the following example:
  spring:
    cloud:
      config:
        server:
          git:
            uri: git@gitserver.com:team/repo1.git
            ignoreLocalSshSettings: true
            hostKey: someHostKey
            hostKeyAlgorithm: ssh-rsa
            privateKey: |
                         -----BEGIN RSA PRIVATE KEY-----
                         MIIEpgIBAAKCAQEAx4UbaDzY5xjW6hc9jwN0mX33XpTDVW9WqHp5AKaRbtAC3DqX
                         IXFMPgw3K45jxRb93f8tv9vL3rD9CUG1Gv4FM+o7ds7FRES5RTjv2RT/JVNJCoqF
                         ol8+ngLqRZCyBtQN7zYByWMRirPGoDUqdPYrj2yq+ObBBNhg5N+hOwKjjpzdj2Ud
                         1l7R+wxIqmJo1IYyy16xS8WsjyQuyC0lL456qkd5BDZ0Ag8j2X9H9D5220Ln7s9i
                         oezTipXipS7p7Jekf3Ywx6abJwOmB0rX79dV4qiNcGgzATnG1PkXxqt76VhcGa0W
                         DDVHEEYGbSQ6hIGSh0I7BQun0aLRZojfE3gqHQIDAQABAoIBAQCZmGrk8BK6tXCd
                         fY6yTiKxFzwb38IQP0ojIUWNrq0+9Xt+NsypviLHkXfXXCKKU4zUHeIGVRq5MN9b
                         BO56/RrcQHHOoJdUWuOV2qMqJvPUtC0CpGkD+valhfD75MxoXU7s3FK7yjxy3rsG
                         EmfA6tHV8/4a5umo5TqSd2YTm5B19AhRqiuUVI1wTB41DjULUGiMYrnYrhzQlVvj
                         5MjnKTlYu3V8PoYDfv1GmxPPh6vlpafXEeEYN8VB97e5x3DGHjZ5UrurAmTLTdO8
                         +AahyoKsIY612TkkQthJlt7FJAwnCGMgY6podzzvzICLFmmTXYiZ/28I4BX/mOSe
                         pZVnfRixAoGBAO6Uiwt40/PKs53mCEWngslSCsh9oGAaLTf/XdvMns5VmuyyAyKG
                         ti8Ol5wqBMi4GIUzjbgUvSUt+IowIrG3f5tN85wpjQ1UGVcpTnl5Qo9xaS1PFScQ
                         xrtWZ9eNj2TsIAMp/svJsyGG3OibxfnuAIpSXNQiJPwRlW3irzpGgVx/AoGBANYW
                         dnhshUcEHMJi3aXwR12OTDnaLoanVGLwLnkqLSYUZA7ZegpKq90UAuBdcEfgdpyi
                         PhKpeaeIiAaNnFo8m9aoTKr+7I6/uMTlwrVnfrsVTZv3orxjwQV20YIBCVRKD1uX
                         VhE0ozPZxwwKSPAFocpyWpGHGreGF1AIYBE9UBtjAoGBAI8bfPgJpyFyMiGBjO6z
                         FwlJc/xlFqDusrcHL7abW5qq0L4v3R+FrJw3ZYufzLTVcKfdj6GelwJJO+8wBm+R
                         gTKYJItEhT48duLIfTDyIpHGVm9+I1MGhh5zKuCqIhxIYr9jHloBB7kRm0rPvYY4
                         VAykcNgyDvtAVODP+4m6JvhjAoGBALbtTqErKN47V0+JJpapLnF0KxGrqeGIjIRV
                         cYA6V4WYGr7NeIfesecfOC356PyhgPfpcVyEztwlvwTKb3RzIT1TZN8fH4YBr6Ee
                         KTbTjefRFhVUjQqnucAvfGi29f+9oE3Ei9f7wA+H35ocF6JvTYUsHNMIO/3gZ38N
                         CPjyCMa9AoGBAMhsITNe3QcbsXAbdUR00dDsIFVROzyFJ2m40i4KCRM35bC/BIBs
                         q0TY3we+ERB40U8Z2BvU61QuwaunJ2+uGadHo58VSVdggqAo0BSkH58innKKt96J
                         69pcVH/4rmLbXdcmNYGm6iu+MlPQk4BUZknHSmVHIFdJ0EPupVaQ8RHT
                         -----END RSA PRIVATE KEY-----
The following table describes the SSH configuration properties.
Table 5.1. SSH Configuration Properties
| Property Name | Remarks |
|---|---|
ignoreLocalSshSettings | If |
privateKey | Valid SSH private key. Must be set if |
hostKey | Valid SSH host key. Must be set if |
hostKeyAlgorithm | One of |
strictHostKeyChecking |
|
knownHostsFile | Location of custom |
preferredAuthentications | Override server authentication method order. This should allow for evading login prompts if server has keyboard-interactive authentication before the |
Spring Cloud Config Server also supports a search path with placeholders for the {application} and {profile} (and {label} if
you need it), as shown in the following example:
spring:
  cloud:
    config:
      server:
        git:
          uri: https://github.com/spring-cloud-samples/config-repo
          searchPaths: '{application}'
The preceding listing causes a search of the repository for files in the same name as the directory (as well as the top level). Wildcards are also valid in a search path with placeholders (any matching directory is included in the search).
As mentioned earlier, Spring Cloud Config Server makes a clone of the remote git repository in case the local copy gets dirty (for example, folder content changes by an OS process) such that Spring Cloud Config Server cannot update the local copy from remote repository.
To solve this issue, there is a force-pull property that makes Spring Cloud Config Server force pull from the remote repository if the local copy is dirty, as shown in the following example:
spring:
  cloud:
    config:
      server:
        git:
          uri: https://github.com/spring-cloud-samples/config-repo
          force-pull: true
If you have a multiple-repositories configuration, you can configure the force-pull property per repository, as shown in the following example:
spring:
  cloud:
    config:
      server:
        git:
          uri: https://git/common/config-repo.git
          force-pull: true
          repos:
            team-a:
                pattern: team-a-*
                uri: http://git/team-a/config-repo.git
                force-pull: true
            team-b:
                pattern: team-b-*
                uri: http://git/team-b/config-repo.git
                force-pull: true
            team-c:
                pattern: team-c-*
                uri: http://git/team-a/config-repo.git
| Note |
|---|---|
The default value for |
As Spring Cloud Config Server has a clone of the remote git repository
after check-outing branch to local repo (e.g fetching properties by label) it will keep this branch
forever or till the next server restart (which creates new local repo).
So there could be a case when remote branch is deleted but local copy of it is still available for fetching.
And if Spring Cloud Config Server client service starts with --spring.cloud.config.label=deletedRemoteBranch,master
it will fetch properties from deletedRemoteBranch local branch, but not from master.
In order to keep local repository branches clean and up to remote - deleteUntrackedBranches property could be set.
It will make Spring Cloud Config Server force delete untracked branches from local repository.
Example:
spring:
  cloud:
    config:
      server:
        git:
          uri: https://github.com/spring-cloud-samples/config-repo
          deleteUntrackedBranches: true
| Note |
|---|---|
The default value for |
You can control how often the config server will fetch updated configuration data
from your Git backend by using spring.cloud.config.server.git.refreshRate. The
value of this property is specified in seconds. By default the value is 0, meaning
the config server will fetch updated configuration from the Git repo every time it
is requested.
| Warning |
|---|---|
With VCS-based backends (git, svn), files are checked out or cloned to the local filesystem.
By default, they are put in the system temporary directory with a prefix of |
There is also a “native” profile in the Config Server that does not use Git but loads the config files from the local classpath or file system (any static URL you want to point to with spring.cloud.config.server.native.searchLocations).
To use the native profile, launch the Config Server with spring.profiles.active=native.
| Note |
|---|---|
Remember to use the |
| Warning |
|---|---|
The default value of the |
| Tip |
|---|---|
A filesystem backend is great for getting started quickly and for testing. To use it in production, you need to be sure that the file system is reliable and shared across all instances of the Config Server. |
The search locations can contain placeholders for {application}, {profile}, and {label}.
In this way, you can segregate the directories in the path and choose a strategy that makes sense for you (such as subdirectory per application or subdirectory per profile).
If you do not use placeholders in the search locations, this repository also appends the {label} parameter of the HTTP resource to a suffix on the search path, so properties files are loaded from each search location and a subdirectory with the same name as the label (the labelled properties take precedence in the Spring Environment).
Thus, the default behaviour with no placeholders is the same as adding a search location ending with /{label}/.
For example, file:/tmp/config is the same as file:/tmp/config,file:/tmp/config/{label}.
This behavior can be disabled by setting spring.cloud.config.server.native.addLabelLocations=false.
Spring Cloud Config Server also supports Vault as a backend.
For more information on Vault, see the Vault quick start guide.
To enable the config server to use a Vault backend, you can run your config server with the vault profile.
For example, in your config server’s application.properties, you can add spring.profiles.active=vault.
By default, the config server assumes that your Vault server runs at http://127.0.0.1:8200.
It also assumes that the name of backend is secret and the key is application.
All of these defaults can be configured in your config server’s application.properties.
The following table describes configurable Vault properties:
| Name | Default Value |
|---|---|
host | 127.0.0.1 |
port | 8200 |
scheme | http |
backend | secret |
defaultKey | application |
profileSeparator | , |
kvVersion | 1 |
skipSslValidation | false |
timeout | 5 |
namespace | null |
| Important |
|---|---|
All of the properties in the preceding table must be prefixed with |
All configurable properties can be found in org.springframework.cloud.config.server.environment.VaultEnvironmentProperties.
Vault 0.10.0 introduced a versioned key-value backend (k/v backend version 2) that exposes a different API than earlier versions, it now requires a data/ between the mount path and the actual context path and wraps secrets in a data object. Setting kvVersion=2 will take this into account.
Optionally, there is support for the Vault Enterprise X-Vault-Namespace header. To have it sent to Vault set the namespace property.
With your config server running, you can make HTTP requests to the server to retrieve values from the Vault backend. To do so, you need a token for your Vault server.
First, place some data in you Vault, as shown in the following example:
$ vault kv put secret/application foo=bar baz=bam
$ vault kv put secret/myapp foo=myappsbar
Second, make an HTTP request to your config server to retrieve the values, as shown in the following example:
$ curl -X "GET" "http://localhost:8888/myapp/default" -H "X-Config-Token: yourtoken"
You should see a response similar to the following:
{
   "name":"myapp",
   "profiles":[
      "default"
   ],
   "label":null,
   "version":null,
   "state":null,
   "propertySources":[
      {
         "name":"vault:myapp",
         "source":{
            "foo":"myappsbar"
         }
      },
      {
         "name":"vault:application",
         "source":{
            "baz":"bam",
            "foo":"bar"
         }
      }
   ]
}
When using Vault, you can provide your applications with multiple properties sources. For example, assume you have written data to the following paths in Vault:
secret/myApp,dev
secret/myApp
secret/application,dev
secret/application
Properties written to secret/application are available to all applications using the Config Server.
An application with the name, myApp, would have any properties written to secret/myApp and secret/application available to it.
When myApp has the dev profile enabled, properties written to all of the above paths would be available to it, with properties in the first path in the list taking priority over the others.
The configuration server can access a Git or Vault backend through an HTTP or HTTPS proxy. This behavior is controlled for either Git or Vault by settings under proxy.http and proxy.https. These settings are per repository, so if you are using a composite environment repository you must configure proxy settings for each backend in the composite individually. If using a network which requires separate proxy servers for HTTP and HTTPS URLs, you can configure both the HTTP and the HTTPS proxy settings for a single backend.
The following table describes the proxy configuration properties for both HTTP and HTTPS proxies. All of these properties must be prefixed by proxy.http or proxy.https.
Table 5.2. Proxy Configuration Properties
| Property Name | Remarks |
|---|---|
host | The host of the proxy. |
port | The port with which to access the proxy. |
nonProxyHosts | Any hosts which the configuration server should access outside the proxy. If values are provided for both |
username | The username with which to authenticate to the proxy. If values are provided for both |
password | The password with which to authenticate to the proxy. If values are provided for both |
The following configuration uses an HTTPS proxy to access a Git repository.
spring:
  profiles:
    active: git
  cloud:
    config:
      server:
        git:
          uri: https://github.com/spring-cloud-samples/config-repo
          proxy:
            https:
              host: my-proxy.host.io
              password: myproxypassword
              port: '3128'
              username: myproxyusername
              nonProxyHosts: example.com
Sharing configuration between all applications varies according to which approach you take, as described in the following topics:
With file-based (git, svn, and native) repositories, resources with file names in application* (application.properties, application.yml, application-*.properties, and so on) are shared between all client applications.
You can use resources with these file names to configure global defaults and have them be overridden by application-specific files as necessary.
The #_property_overrides[property overrides] feature can also be used for setting global defaults, with placeholders applications allowed to override them locally.
| Tip |
|---|---|
With the “native” profile (a local file system backend) , you should use an explicit search location that is not part of the server’s own configuration.
Otherwise, the |
When using Vault as a backend, you can share configuration with all applications by placing configuration in secret/application.
For example, if you run the following Vault command, all applications using the config server will have the properties foo and baz available to them:
$ vault write secret/application foo=bar baz=bam
Spring Cloud Config Server supports JDBC (relational database) as a backend for configuration properties.
You can enable this feature by adding spring-jdbc to the classpath and using the jdbc profile or by adding a bean of type JdbcEnvironmentRepository.
If you include the right dependencies on the classpath (see the user guide for more details on that), Spring Boot configures a data source.
The database needs to have a table called PROPERTIES with columns called APPLICATION, PROFILE, and LABEL (with the usual Environment meaning), plus KEY and VALUE for the key and value pairs in Properties style.
All fields are of type String in Java, so you can make them VARCHAR of whatever length you need.
Property values behave in the same way as they would if they came from Spring Boot properties files named {application}-{profile}.properties, including all the encryption and decryption, which will be applied as post-processing steps (that is, not in the repository implementation directly).
Spring Cloud Config Server supports CredHub as a backend for configuration properties. You can enable this feature by adding a dependency to Spring CredHub.
pom.xml.
<dependencies>
	<dependency>
		<groupId>org.springframework.credhub</groupId>
		<artifactId>spring-credhub-starter</artifactId>
	</dependency>
</dependencies>
The following configuration uses mutual TLS to access a CredHub:
spring:
  profiles:
    active: credhub
  cloud:
    config:
      server:
        credhub:
          url: https://credhub:8844
The properties should be stored as JSON, such as:
credhub set --name "/demo-app/default/master/toggles" --type=json
value: {"toggle.button": "blue", "toggle.link": "red"}
credhub set --name "/demo-app/default/master/abs" --type=json
value: {"marketing.enabled": true, "external.enabled": false}All client applications with the name spring.cloud.config.name=demo-app will have the following properties available to them:
{
    toggle.button: "blue",
    toggle.link: "red",
    marketing.enabled: true,
    external.enabled: false
} | Note |
|---|---|
When no profile is specified |
You can authenticate with OAuth 2.0 using UAA as a provider.
pom.xml.
<dependencies>
	<dependency>
		<groupId>org.springframework.security</groupId>
		<artifactId>spring-security-config</artifactId>
	</dependency>
	<dependency>
		<groupId>org.springframework.security</groupId>
		<artifactId>spring-security-oauth2-client</artifactId>
	</dependency>
</dependencies>
The following configuration uses OAuth 2.0 and UAA to access a CredHub:
spring:
  profiles:
    active: credhub
  cloud:
    config:
      server:
        credhub:
          url: https://credhub:8844
          oauth2:
            registration-id: credhub-client
  security:
    oauth2:
      client:
        registration:
          credhub-client:
            provider: uaa
            client-id: credhub_config_server
            client-secret: asecret
            authorization-grant-type: client_credentials
        provider:
          uaa:
            token-uri: https://uaa:8443/oauth/token
| Note |
|---|---|
The used UAA client-id should have |
In some scenarios, you may wish to pull configuration data from multiple environment repositories.
To do so, you can enable the composite profile in your configuration server’s application properties or YAML file.
If, for example, you want to pull configuration data from a Subversion repository as well as two Git repositories, you can set the following properties for your configuration server:
spring:
  profiles:
    active: composite
  cloud:
    config:
      server:
        composite:
        -
          type: svn
          uri: file:///path/to/svn/repo
        -
          type: git
          uri: file:///path/to/rex/git/repo
        -
          type: git
          uri: file:///path/to/walter/git/repo
Using this configuration, precedence is determined by the order in which repositories are listed under the composite key.
In the above example, the Subversion repository is listed first, so a value found in the Subversion repository will override values found for the same property in one of the Git repositories.
A value found in the rex Git repository will be used before a value found for the same property in the walter Git repository.
If you want to pull configuration data only from repositories that are each of distinct types, you can enable the corresponding profiles, rather than the composite profile, in your configuration server’s application properties or YAML file.
If, for example, you want to pull configuration data from a single Git repository and a single HashiCorp Vault server, you can set the following properties for your configuration server:
spring:
  profiles:
    active: git, vault
  cloud:
    config:
      server:
        git:
          uri: file:///path/to/git/repo
          order: 2
        vault:
          host: 127.0.0.1
          port: 8200
          order: 1
Using this configuration, precedence can be determined by an order property.
You can use the order property to specify the priority order for all your repositories.
The lower the numerical value of the order property, the higher priority it has.
The priority order of a repository helps resolve any potential conflicts between repositories that contain values for the same properties.
| Note |
|---|---|
If your composite environment includes a Vault server as in the previous example, you must include a Vault token in every request made to the configuration server. See Vault Backend. |
| Note |
|---|---|
Any type of failure when retrieving values from an environment repository results in a failure for the entire composite environment. |
| Note |
|---|---|
When using a composite environment, it is important that all repositories contain the same labels.
If you have an environment similar to those in the preceding examples and you request configuration data with the |
In addition to using one of the environment repositories from Spring Cloud, you can also provide your own EnvironmentRepository bean to be included as part of a composite environment.
To do so, your bean must implement the EnvironmentRepository interface.
If you want to control the priority of your custom EnvironmentRepository within the composite environment, you should also implement the Ordered interface and override the getOrdered method.
If you do not implement the Ordered interface, your EnvironmentRepository is given the lowest priority.
The Config Server has an “overrides” feature that lets the operator provide configuration properties to all applications.
The overridden properties cannot be accidentally changed by the application with the normal Spring Boot hooks.
To declare overrides, add a map of name-value pairs to spring.cloud.config.server.overrides, as shown in the following example:
spring:
  cloud:
    config:
      server:
        overrides:
          foo: bar
The preceding examples causes all applications that are config clients to read foo=bar, independent of their own configuration.
| Note |
|---|---|
A configuration system cannot force an application to use configuration data in any particular way. Consequently, overrides are not enforceable. However, they do provide useful default behavior for Spring Cloud Config clients. |
| Tip |
|---|---|
Normally, Spring environment placeholders with |
| Note |
|---|---|
In YAML, you do not need to escape the backslash itself. However, in properties files, you do need to escape the backslash, when you configure the overrides on the server. |
You can change the priority of all overrides in the client to be more like default values, letting applications supply their own values in environment variables or System properties, by setting the spring.cloud.config.overrideNone=true flag (the default is false) in the remote repository.
Config Server comes with a Health Indicator that checks whether the configured EnvironmentRepository is working.
By default, it asks the EnvironmentRepository for an application named app, the default profile, and the default label provided by the EnvironmentRepository implementation.
You can configure the Health Indicator to check more applications along with custom profiles and custom labels, as shown in the following example:
spring:
  cloud:
    config:
      server:
        health:
          repositories:
            myservice:
              label: mylabel
            myservice-dev:
              name: myservice
              profiles: development
You can disable the Health Indicator by setting spring.cloud.config.server.health.enabled=false.
You can secure your Config Server in any way that makes sense to you (from physical network security to OAuth2 bearer tokens), because Spring Security and Spring Boot offer support for many security arrangements.
To use the default Spring Boot-configured HTTP Basic security, include Spring Security on the classpath (for example, through spring-boot-starter-security).
The default is a username of user and a randomly generated password. A random password is not useful in practice, so we recommend you configure the password (by setting spring.security.user.password) and encrypt it (see below for instructions on how to do that).
| Important |
|---|---|
To use the encryption and decryption features you need the full-strength JCE installed in your JVM (it is not included by default). You can download the “Java Cryptography Extension (JCE) Unlimited Strength Jurisdiction Policy Files” from Oracle and follow the installation instructions (essentially, you need to replace the two policy files in the JRE lib/security directory with the ones that you downloaded). |
If the remote property sources contain encrypted content (values starting with {cipher}), they are decrypted before sending to clients over HTTP.
The main advantage of this setup is that the property values need not be in plain text when they are “at rest” (for example, in a git repository).
If a value cannot be decrypted, it is removed from the property source and an additional property is added with the same key but prefixed with invalid and a value that means “not applicable” (usually <n/a>).
This is largely to prevent cipher text being used as a password and accidentally leaking.
If you set up a remote config repository for config client applications, it might contain an application.yml similar to the following:
application.yml.
spring:
  datasource:
    username: dbuser
    password: '{cipher}FKSAJDFGYOS8F7GLHAKERGFHLSAJ'
Encrypted values in a .properties file must not be wrapped in quotes. Otherwise, the value is not decrypted. The following example shows values that would work:
application.properties.
spring.datasource.username: dbuser
spring.datasource.password: {cipher}FKSAJDFGYOS8F7GLHAKERGFHLSAJ
You can safely push this plain text to a shared git repository, and the secret password remains protected.
The server also exposes /encrypt and /decrypt endpoints (on the assumption that these are secured and only accessed by authorized agents).
If you edit a remote config file, you can use the Config Server to encrypt values by POSTing to the /encrypt endpoint, as shown in the following example:
$ curl localhost:8888/encrypt -d mysecret
682bc583f4641835fa2db009355293665d2647dade3375c0ee201de2a49f7bda
| Note |
|---|---|
If the value you encrypt has characters in it that need to be URL encoded, you should use the |
| Tip |
|---|---|
Be sure not to include any of the curl command statistics in the encrypted value. Outputting the value to a file can help avoid this problem. |
The inverse operation is also available through /decrypt (provided the server is
configured with a symmetric key or a full key pair), as shown in the following example:
$ curl localhost:8888/decrypt -d 682bc583f4641835fa2db009355293665d2647dade3375c0ee201de2a49f7bda
mysecret
| Tip |
|---|---|
If you testing with curl, then use |
Take the encrypted value and add the {cipher} prefix before you put it in the YAML or properties file and before you commit and push it to a remote (potentially insecure) store.
The /encrypt and /decrypt endpoints also both accept paths in the form of /*/{name}/{profiles}, which can be used to control cryptography on a per-application (name) and per-profile basis when clients call into the main environment resource.
| Note |
|---|---|
To control the cryptography in this granular way, you must also provide a |
The spring command line client (with Spring Cloud CLI extensions
installed) can also be used to encrypt and decrypt, as shown in the following example:
$ spring encrypt mysecret --key foo
682bc583f4641835fa2db009355293665d2647dade3375c0ee201de2a49f7bda
$ spring decrypt --key foo 682bc583f4641835fa2db009355293665d2647dade3375c0ee201de2a49f7bda
mysecret
To use a key in a file (such as an RSA public key for encryption), prepend the key value with "@" and provide the file path, as shown in the following example:
$ spring encrypt mysecret --key @${HOME}/.ssh/id_rsa.pub
AQAjPgt3eFZQXwt8tsHAVv/QHiY5sI2dRcR+... | Note |
|---|---|
The |
The Config Server can use a symmetric (shared) key or an asymmetric one (RSA key pair).
The asymmetric choice is superior in terms of security, but it is often more convenient to use a symmetric key since it is a single property value to configure in the bootstrap.properties.
To configure a symmetric key, you need to set encrypt.key to a secret String (or use the ENCRYPT_KEY environment variable to keep it out of plain-text configuration files).
| Note |
|---|---|
You cannot configure an asymmetric key using |
To configure an asymmetric key use a keystore (e.g. as
created by the keytool utility that comes with the JDK). The
keystore properties are encrypt.keyStore.* with * equal to
| Property | Description |
|---|---|
| Contains a |
| Holds the password that unlocks the keystore |
| Identifies which key in the store to use |
| The type of KeyStore to create. Defaults to |
The encryption is done with the public key, and a private key is needed for decryption. Thus, in principle, you can configure only the public key in the server if you want to only encrypt (and are prepared to decrypt the values yourself locally with the private key). In practice, you might not want to do decrypt locally, because it spreads the key management process around all the clients, instead of concentrating it in the server. On the other hand, it can be a useful option if your config server is relatively insecure and only a handful of clients need the encrypted properties.
To create a keystore for testing, you can use a command resembling the following:
$ keytool -genkeypair -alias mytestkey -keyalg RSA \
  -dname "CN=Web Server,OU=Unit,O=Organization,L=City,S=State,C=US" \
  -keypass changeme -keystore server.jks -storepass letmein
Put the server.jks file in the classpath (for instance) and then, in
your bootstrap.yml, for the Config Server, create the following settings:
encrypt:
  keyStore:
    location: classpath:/server.jks
    password: letmein
    alias: mytestkey
    secret: changeme
In addition to the {cipher} prefix in encrypted property values, the Config Server looks for zero or more {name:value} prefixes before the start of the (Base64 encoded) cipher text.
The keys are passed to a TextEncryptorLocator, which can do whatever logic it needs to locate a TextEncryptor for the cipher.
If you have configured a keystore (encrypt.keystore.location), the default locator looks for keys with aliases supplied by the key prefix, with a cipher text like resembling the following:
foo:
  bar: `{cipher}{key:testkey}...`
The locator looks for a key named "testkey".
A secret can also be supplied by using a {secret:…} value in the prefix.
However, if it is not supplied, the default is to use the keystore password (which is what you get when you build a keystore and do not specify a secret).
If you do supply a secret, you should also encrypt the secret using a custom SecretLocator.
When the keys are being used only to encrypt a few bytes of configuration data (that is, they are not being used elsewhere), key rotation is hardly ever necessary on cryptographic grounds.
However, you might occasionally need to change the keys (for example, in the event of a security breach).
In that case, all the clients would need to change their source config files (for example, in git) and use a new {key:…} prefix in all the ciphers.
Note that the clients need to first check that the key alias is available in the Config Server keystore.
| Tip |
|---|---|
If you want to let the Config Server handle all encryption as well as decryption, the |
Sometimes you want the clients to decrypt the configuration locally, instead of doing it in the server.
In that case, if you provide the encrypt.* configuration to locate a key, you can still have /encrypt and /decrypt endpoints, but you need to explicitly switch off the decryption of outgoing properties by placing spring.cloud.config.server.encrypt.enabled=false in bootstrap.[yml|properties].
If you do not care about the endpoints, it should work if you do not configure either the key or the enabled flag.
The default JSON format from the environment endpoints is perfect for consumption by Spring applications, because it maps directly onto the Environment abstraction.
If you prefer, you can consume the same data as YAML or Java properties by adding a suffix (".yml", ".yaml" or ".properties") to the resource path.
This can be useful for consumption by applications that do not care about the structure of the JSON endpoints or the extra metadata they provide (for example, an application that is not using Spring might benefit from the simplicity of this approach).
The YAML and properties representations have an additional flag (provided as a boolean query parameter called resolvePlaceholders) to signal that placeholders in the source documents (in the standard Spring ${…} form) should be resolved in the output before rendering, where possible.
This is a useful feature for consumers that do not know about the Spring placeholder conventions.
| Note |
|---|---|
There are limitations in using the YAML or properties formats, mainly in relation to the loss of metadata. For example, the JSON is structured as an ordered list of property sources, with names that correlate with the source. The YAML and properties forms are coalesced into a single map, even if the origin of the values has multiple sources, and the names of the original source files are lost. Also, the YAML representation is not necessarily a faithful representation of the YAML source in a backing repository either. It is constructed from a list of flat property sources, and assumptions have to be made about the form of the keys. |
Instead of using the Environment abstraction (or one of the alternative representations of it in YAML or properties format), your applications might need generic plain-text configuration files that are tailored to their environment.
The Config Server provides these through an additional endpoint at /{name}/{profile}/{label}/{path}, where name, profile, and label have the same meaning as the regular environment endpoint, but path is a file name (such as log.xml).
The source files for this endpoint are located in the same way as for the environment endpoints.
The same search path is used for properties and YAML files.
However, instead of aggregating all matching resources, only the first one to match is returned.
After a resource is located, placeholders in the normal format (${…}) are resolved by using the effective Environment for the supplied application name, profile, and label.
In this way, the resource endpoint is tightly integrated with the environment endpoints.
Consider the following example for a GIT or SVN repository:
application.yml
nginx.conf
where nginx.conf looks like this:
server {
    listen              80;
    server_name         ${nginx.server.name};
}
and application.yml like this:
nginx:
  server:
    name: example.com
---
spring:
  profiles: development
nginx:
  server:
    name: develop.com
The /foo/default/master/nginx.conf resource might be as follows:
server {
    listen              80;
    server_name         example.com;
}
and /foo/development/master/nginx.conf like this:
server {
    listen              80;
    server_name         develop.com;
} | Note |
|---|---|
As with the source files for environment configuration, the |
| Note |
|---|---|
If you do not want to supply the |
The Config Server runs best as a standalone application.
However, if need be, you can embed it in another application.
To do so, use the @EnableConfigServer annotation.
An optional property named spring.cloud.config.server.bootstrap can be useful in this case.
It is a flag to indicate whether the server should configure itself from its own remote repository.
By default, the flag is off, because it can delay startup.
However, when embedded in another application, it makes sense to initialize the same way as any other application.
When setting spring.cloud.config.server.bootstrap to true you must also use a composite environment repository configuration.
For example
spring:
  application:
    name: configserver
  profiles:
    active: composite
  cloud:
    config:
      server:
        composite:
          - type: native
            search-locations: ${HOME}/Desktop/config
        bootstrap: true
| Note |
|---|---|
If you use the bootstrap flag, the config server needs to have its name and repository URI configured in |
To change the location of the server endpoints, you can (optionally) set spring.cloud.config.server.prefix (for example, /config), to serve the resources under a prefix.
The prefix should start but not end with a /.
It is applied to the @RequestMappings in the Config Server (that is, underneath the Spring Boot server.servletPath and server.contextPath prefixes).
If you want to read the configuration for an application directly from the backend repository (instead of from the config server), you
basically want an embedded config server with no endpoints.
You can switch off the endpoints entirely by not using the @EnableConfigServer annotation (set spring.cloud.config.server.bootstrap=true).
Many source code repository providers (such as Github, Gitlab, Gitea, Gitee, Gogs, or Bitbucket) notify you of changes in a repository through a webhook.
You can configure the webhook through the provider’s user interface as a URL and a set of events in which you are interested.
For instance, Github uses a POST to the webhook with a JSON body containing a list of commits and a header (X-Github-Event) set to push.
If you add a dependency on the spring-cloud-config-monitor library and activate the Spring Cloud Bus in your Config Server, then a /monitor endpoint is enabled.
When the webhook is activated, the Config Server sends a RefreshRemoteApplicationEvent targeted at the applications it thinks might have changed.
The change detection can be strategized.
However, by default, it looks for changes in files that match the application name (for example, foo.properties is targeted at the foo application, while application.properties is targeted at all applications).
The strategy to use when you want to override the behavior is PropertyPathNotificationExtractor, which accepts the request headers and body as parameters and returns a list of file paths that changed.
The default configuration works out of the box with Github, Gitlab, Gitea, Gitee, Gogs or Bitbucket.
In addition to the JSON notifications from Github, Gitlab, Gitee, or Bitbucket, you can trigger a change notification by POSTing to /monitor with form-encoded body parameters in the pattern of path={name}.
Doing so broadcasts to applications matching the {name} pattern (which can contain wildcards).
| Note |
|---|---|
The |
| Note |
|---|---|
The default configuration also detects filesystem changes in local git repositories. In that case, the webhook is not used. However, as soon as you edit a config file, a refresh is broadcast. |
A Spring Boot application can take immediate advantage of the Spring Config Server (or other external property sources provided by the application developer).
It also picks up some additional useful features related to Environment change events.
The default behavior for any application that has the Spring Cloud Config Client on the classpath is as follows:
When a config client starts, it binds to the Config Server (through the spring.cloud.config.uri bootstrap configuration property) and initializes Spring Environment with remote property sources.
The net result of this behavior is that all client applications that want to consume the Config Server need a bootstrap.yml (or an environment variable) with the server address set in spring.cloud.config.uri (it defaults to "http://localhost:8888").
If you use a DiscoveryClient implementation, such as Spring Cloud Netflix and Eureka Service Discovery or Spring Cloud Consul, you can have the Config Server register with the Discovery Service.
However, in the default “Config First” mode, clients cannot take advantage of the registration.
If you prefer to use DiscoveryClient to locate the Config Server, you can do so by setting spring.cloud.config.discovery.enabled=true (the default is false).
The net result of doing so is that client applications all need a bootstrap.yml (or an environment variable) with the appropriate discovery configuration.
For example, with Spring Cloud Netflix, you need to define the Eureka server address (for example, in eureka.client.serviceUrl.defaultZone).
The price for using this option is an extra network round trip on startup, to locate the service registration.
The benefit is that, as long as the Discovery Service is a fixed point, the Config Server can change its coordinates.
The default service ID is configserver, but you can change that on the client by setting spring.cloud.config.discovery.serviceId (and on the server, in the usual way for a service, such as by setting spring.application.name).
The discovery client implementations all support some kind of metadata map (for example, we have eureka.instance.metadataMap for Eureka).
Some additional properties of the Config Server may need to be configured in its service registration metadata so that clients can connect correctly.
If the Config Server is secured with HTTP Basic, you can configure the credentials as user and password.
Also, if the Config Server has a context path, you can set configPath.
For example, the following YAML file is for a Config Server that is a Eureka client:
bootstrap.yml.
eureka:
  instance:
    ...
    metadataMap:
      user: osufhalskjrtl
      password: lviuhlszvaorhvlo5847
      configPath: /config
In some cases, you may want to fail startup of a service if it cannot connect to the Config Server.
If this is the desired behavior, set the bootstrap configuration property spring.cloud.config.fail-fast=true to make the client halt with an Exception.
If you expect that the config server may occasionally be unavailable when your application starts, you can make it keep trying after a failure.
First, you need to set spring.cloud.config.fail-fast=true.
Then you need to add spring-retry and spring-boot-starter-aop to your classpath.
The default behavior is to retry six times with an initial backoff interval of 1000ms and an exponential multiplier of 1.1 for subsequent backoffs.
You can configure these properties (and others) by setting the spring.cloud.config.retry.* configuration properties.
| Tip |
|---|---|
To take full control of the retry behavior, add a |
The Config Service serves property sources from /{name}/{profile}/{label}, where the default bindings in the client app are as follows:
- "name" =
${spring.application.name} - "profile" =
${spring.profiles.active}(actuallyEnvironment.getActiveProfiles()) - "label" = "master"
| Note |
|---|---|
When setting the property |
You can override all of them by setting spring.cloud.config.* (where * is name, profile or label).
The label is useful for rolling back to previous versions of configuration.
With the default Config Server implementation, it can be a git label, branch name, or commit ID.
Label can also be provided as a comma-separated list.
In that case, the items in the list are tried one by one until one succeeds.
This behavior can be useful when working on a feature branch.
For instance, you might want to align the config label with your branch but make it optional (in that case, use spring.cloud.config.label=myfeature,develop).
To ensure high availability when you have multiple instances of Config Server deployed and expect one or more instances to be unavailable from time to time, you can either specify multiple URLs (as a comma-separated list under the spring.cloud.config.uri property) or have all your instances register in a Service Registry like Eureka ( if using Discovery-First Bootstrap mode ). Note that doing so ensures high availability only when the Config Server is not running (that is, when the application has exited) or when a connection timeout has occurred. For example, if the Config Server returns a 500 (Internal Server Error) response or the Config Client receives a 401 from the Config Server (due to bad credentials or other causes), the Config Client does not try to fetch properties from other URLs. An error of that kind indicates a user issue rather than an availability problem.
If you use HTTP basic security on your Config Server, it is currently possible to support per-Config Server auth credentials only if you embed the credentials in each URL you specify under the spring.cloud.config.uri property. If you use any other kind of security mechanism, you cannot (currently) support per-Config Server authentication and authorization.
If you want to configure read timeout, this can be done by using the property spring.cloud.config.request-read-timeout.
If you use HTTP Basic security on the server, clients need to know the password (and username if it is not the default). You can specify the username and password through the config server URI or via separate username and password properties, as shown in the following example:
bootstrap.yml.
spring:
  cloud:
    config:
     uri: https://user:[email protected]
The following example shows an alternate way to pass the same information:
bootstrap.yml.
spring:
  cloud:
    config:
     uri: https://myconfig.mycompany.com
     username: user
     password: secret
The spring.cloud.config.password and spring.cloud.config.username values override anything that is provided in the URI.
If you deploy your apps on Cloud Foundry, the best way to provide the password is through service credentials (such as in the URI, since it does not need to be in a config file).
The following example works locally and for a user-provided service on Cloud Foundry named configserver:
bootstrap.yml.
spring:
  cloud:
    config:
     uri: ${vcap.services.configserver.credentials.uri:http://user:password@localhost:8888}
If you use another form of security, you might need to provide a RestTemplate to the ConfigServicePropertySourceLocator (for example, by grabbing it in the bootstrap context and injecting it).
The Config Client supplies a Spring Boot Health Indicator that attempts to load configuration from the Config Server.
The health indicator can be disabled by setting health.config.enabled=false.
The response is also cached for performance reasons.
The default cache time to live is 5 minutes.
To change that value, set the health.config.time-to-live property (in milliseconds).
In some cases, you might need to customize the requests made to the config server from the client.
Typically, doing so involves passing special Authorization headers to authenticate requests to the server.
To provide a custom RestTemplate:
- Create a new configuration bean with an implementation of
PropertySourceLocator, as shown in the following example:
CustomConfigServiceBootstrapConfiguration.java.
@Configuration
public class CustomConfigServiceBootstrapConfiguration {
    @Bean
    public ConfigServicePropertySourceLocator configServicePropertySourceLocator() {
        ConfigClientProperties clientProperties = configClientProperties();
       ConfigServicePropertySourceLocator configServicePropertySourceLocator =  new ConfigServicePropertySourceLocator(clientProperties);
        configServicePropertySourceLocator.setRestTemplate(customRestTemplate(clientProperties));
        return configServicePropertySourceLocator;
    }
}
- In
resources/META-INF, create a file calledspring.factoriesand specify your custom configuration, as shown in the following example:
spring.factories.
org.springframework.cloud.bootstrap.BootstrapConfiguration = com.my.config.client.CustomConfigServiceBootstrapConfiguration
When using Vault as a backend to your config server, the client needs to supply a token for the server to retrieve values from Vault.
This token can be provided within the client by setting spring.cloud.config.token
in bootstrap.yml, as shown in the following example:
bootstrap.yml.
spring:
  cloud:
    config:
      token: YourVaultToken
Vault supports the ability to nest keys in a value stored in Vault, as shown in the following example:
echo -n '{"appA": {"secret": "appAsecret"}, "bar": "baz"}' | vault write secret/myapp -
This command writes a JSON object to your Vault.
To access these values in Spring, you would use the traditional dot(.) annotation, as shown in the following example
@Value("${appA.secret}")
String name = "World";
The preceding code would sets the value of the name variable to appAsecret.
1.0.0.BUILD-SNAPSHOT
This project provides Netflix OSS integrations for Spring Boot apps through autoconfiguration and binding to the Spring Environment and other Spring programming model idioms. With a few simple annotations you can quickly enable and configure the common patterns inside your application and build large distributed systems with battle-tested Netflix components. The patterns provided include Service Discovery (Eureka), Circuit Breaker (Hystrix), Intelligent Routing (Zuul) and Client Side Load Balancing (Ribbon).
Service Discovery is one of the key tenets of a microservice-based architecture. Trying to hand-configure each client or some form of convention can be difficult to do and can be brittle. Eureka is the Netflix Service Discovery Server and Client. The server can be configured and deployed to be highly available, with each server replicating state about the registered services to the others.
To include the Eureka Client in your project, use the starter with a group ID of org.springframework.cloud and an artifact ID of spring-cloud-starter-netflix-eureka-client.
See the Spring Cloud Project page for details on setting up your build system with the current Spring Cloud Release Train.
When a client registers with Eureka, it provides meta-data about itself — such as host, port, health indicator URL, home page, and other details. Eureka receives heartbeat messages from each instance belonging to a service. If the heartbeat fails over a configurable timetable, the instance is normally removed from the registry.
The following example shows a minimal Eureka client application:
@SpringBootApplication
@RestController
public class Application {

    @RequestMapping("/")
    public String home() {
        return "Hello world";
    }

    public static void main(String[] args) {
        new SpringApplicationBuilder(Application.class).web(true).run(args);
    }

}
Note that the preceding example shows a normal Spring Boot application.
By having spring-cloud-starter-netflix-eureka-client on the classpath, your application automatically registers with the Eureka Server. Configuration is required to locate the Eureka server, as shown in the following example:
application.yml.
eureka:
  client:
    serviceUrl:
      defaultZone: http://localhost:8761/eureka/
In the preceding example, "defaultZone" is a magic string fallback value that provides the service URL for any client that does not express a preference (in other words, it is a useful default).
The default application name (that is, the service ID), virtual host, and non-secure port (taken from the Environment) are ${spring.application.name}, ${spring.application.name} and ${server.port}, respectively.
Having spring-cloud-starter-netflix-eureka-client on the classpath makes the app into both a Eureka “instance” (that is, it registers itself) and a “client” (it can query the registry to locate other services).
The instance behaviour is driven by eureka.instance.* configuration keys, but the defaults are fine if you ensure that your application has a value for spring.application.name (this is the default for the Eureka service ID or VIP).
See EurekaInstanceConfigBean and EurekaClientConfigBean for more details on the configurable options.
To disable the Eureka Discovery Client, you can set eureka.client.enabled to false. Eureka Discovery Client will also be disabled when spring.cloud.discovery.enabled is set to false.
HTTP basic authentication is automatically added to your eureka client if one of the eureka.client.serviceUrl.defaultZone URLs has credentials embedded in it (curl style, as follows: http://user:password@localhost:8761/eureka).
For more complex needs, you can create a @Bean of type DiscoveryClientOptionalArgs and inject ClientFilter instances into it, all of which is applied to the calls from the client to the server.
| Note |
|---|---|
Because of a limitation in Eureka, it is not possible to support per-server basic auth credentials, so only the first set that are found is used. |
The status page and health indicators for a Eureka instance default to /info and /health respectively, which are the default locations of useful endpoints in a Spring Boot Actuator application.
You need to change these, even for an Actuator application if you use a non-default context path or servlet path (such as server.servletPath=/custom). The following example shows the default values for the two settings:
application.yml.
eureka:
  instance:
    statusPageUrlPath: ${server.servletPath}/info
    healthCheckUrlPath: ${server.servletPath}/health
These links show up in the metadata that is consumed by clients and are used in some scenarios to decide whether to send requests to your application, so it is helpful if they are accurate.
| Note |
|---|---|
In Dalston it was also required to set the status and health check URLs when changing that management context path. This requirement was removed beginning in Edgware. |
If your app wants to be contacted over HTTPS, you can set two flags in the EurekaInstanceConfig:
eureka.instance.[nonSecurePortEnabled]=[false]eureka.instance.[securePortEnabled]=[true]
Doing so makes Eureka publish instance information that shows an explicit preference for secure communication.
The Spring Cloud DiscoveryClient always returns a URI starting with https for a service configured this way.
Similarly, when a service is configured this way, the Eureka (native) instance information has a secure health check URL.
Because of the way Eureka works internally, it still publishes a non-secure URL for the status and home pages unless you also override those explicitly. You can use placeholders to configure the eureka instance URLs, as shown in the following example:
application.yml.
eureka:
  instance:
    statusPageUrl: https://${eureka.hostname}/info
    healthCheckUrl: https://${eureka.hostname}/health
    homePageUrl: https://${eureka.hostname}/
(Note that ${eureka.hostname} is a native placeholder only available
in later versions of Eureka. You could achieve the same thing with
Spring placeholders as well — for example, by using ${eureka.instance.hostName}.)
| Note |
|---|---|
If your application runs behind a proxy, and the SSL termination is in the proxy (for example, if you run in Cloud Foundry or other platforms as a service), then you need to ensure that the proxy “forwarded” headers are intercepted and handled by the application. If the Tomcat container embedded in a Spring Boot application has explicit configuration for the 'X-Forwarded-\*` headers, this happens automatically. The links rendered by your app to itself being wrong (the wrong host, port, or protocol) is a sign that you got this configuration wrong. |
By default, Eureka uses the client heartbeat to determine if a client is up. Unless specified otherwise, the Discovery Client does not propagate the current health check status of the application, per the Spring Boot Actuator. Consequently, after successful registration, Eureka always announces that the application is in 'UP' state. This behavior can be altered by enabling Eureka health checks, which results in propagating application status to Eureka. As a consequence, every other application does not send traffic to applications in states other then 'UP'. The following example shows how to enable health checks for the client:
application.yml.
eureka:
  client:
    healthcheck:
      enabled: true
| Warning |
|---|---|
|
If you require more control over the health checks, consider implementing your own com.netflix.appinfo.HealthCheckHandler.
It is worth spending a bit of time understanding how the Eureka metadata works, so you can use it in a way that makes sense in your platform.
There is standard metadata for information such as hostname, IP address, port numbers, the status page, and health check.
These are published in the service registry and used by clients to contact the services in a straightforward way.
Additional metadata can be added to the instance registration in the eureka.instance.metadataMap, and this metadata is accessible in the remote clients.
In general, additional metadata does not change the behavior of the client, unless the client is made aware of the meaning of the metadata.
There are a couple of special cases, described later in this document, where Spring Cloud already assigns meaning to the metadata map.
Cloud Foundry has a global router so that all instances of the same app have the same hostname (other PaaS solutions with a similar architecture have the same arrangement).
This is not necessarily a barrier to using Eureka.
However, if you use the router (recommended or even mandatory, depending on the way your platform was set up), you need to explicitly set the hostname and port numbers (secure or non-secure) so that they use the router.
You might also want to use instance metadata so that you can distinguish between the instances on the client (for example, in a custom load balancer).
By default, the eureka.instance.instanceId is vcap.application.instance_id, as shown in the following example:
application.yml.
eureka:
  instance:
    hostname: ${vcap.application.uris[0]}
    nonSecurePort: 80
Depending on the way the security rules are set up in your Cloud Foundry instance, you might be able to register and use the IP address of the host VM for direct service-to-service calls. This feature is not yet available on Pivotal Web Services (PWS).
If the application is planned to be deployed to an AWS cloud, the Eureka instance must be configured to be AWS-aware. You can do so by customizing the EurekaInstanceConfigBean as follows:
@Bean
@Profile("!default")
public EurekaInstanceConfigBean eurekaInstanceConfig(InetUtils inetUtils) {
  EurekaInstanceConfigBean b = new EurekaInstanceConfigBean(inetUtils);
  AmazonInfo info = AmazonInfo.Builder.newBuilder().autoBuild("eureka");
  b.setDataCenterInfo(info);
  return b;
}
A vanilla Netflix Eureka instance is registered with an ID that is equal to its host name (that is, there is only one service per host). Spring Cloud Eureka provides a sensible default, which is defined as follows:
${spring.cloud.client.hostname}:${spring.application.name}:${spring.application.instance_id:${server.port}}}
An example is myhost:myappname:8080.
By using Spring Cloud, you can override this value by providing a unique identifier in eureka.instance.instanceId, as shown in the following example:
application.yml.
eureka:
  instance:
    instanceId: ${spring.application.name}:${vcap.application.instance_id:${spring.application.instance_id:${random.value}}}
With the metadata shown in the preceding example and multiple service instances deployed on localhost, the random value is inserted there to make the instance unique.
In Cloud Foundry, the vcap.application.instance_id is populated automatically in a Spring Boot application, so the random value is not needed.
Once you have an application that is a discovery client, you can use it to discover service instances from the Eureka Server.
One way to do so is to use the native com.netflix.discovery.EurekaClient (as opposed to the Spring Cloud DiscoveryClient), as shown in the following example:
@Autowired
private EurekaClient discoveryClient;

public String serviceUrl() {
    InstanceInfo instance = discoveryClient.getNextServerFromEureka("STORES", false);
    return instance.getHomePageUrl();
} | Tip |
|---|---|
Do not use the |
By default, EurekaClient uses Jersey for HTTP communication.
If you wish to avoid dependencies from Jersey, you can exclude it from your dependencies.
Spring Cloud auto-configures a transport client based on Spring RestTemplate.
The following example shows Jersey being excluded:
<dependency>
    <groupId>org.springframework.cloud</groupId>
    <artifactId>spring-cloud-starter-netflix-eureka-client</artifactId>
    <exclusions>
        <exclusion>
            <groupId>com.sun.jersey</groupId>
            <artifactId>jersey-client</artifactId>
        </exclusion>
        <exclusion>
            <groupId>com.sun.jersey</groupId>
            <artifactId>jersey-core</artifactId>
        </exclusion>
        <exclusion>
            <groupId>com.sun.jersey.contribs</groupId>
            <artifactId>jersey-apache-client4</artifactId>
        </exclusion>
    </exclusions>
</dependency>You need not use the raw Netflix EurekaClient.
Also, it is usually more convenient to use it behind a wrapper of some sort.
Spring Cloud has support for Feign (a REST client builder) and Spring RestTemplate through the logical Eureka service identifiers (VIPs) instead of physical URLs.
To configure Ribbon with a fixed list of physical servers, you can set <client>.ribbon.listOfServers to a comma-separated list of physical addresses (or hostnames), where <client> is the ID of the client.
You can also use the org.springframework.cloud.client.discovery.DiscoveryClient, which provides a simple API (not specific to Netflix) for discovery clients, as shown in the following example:
@Autowired
private DiscoveryClient discoveryClient;

public String serviceUrl() {
    List<ServiceInstance> list = discoveryClient.getInstances("STORES");
    if (list != null && list.size() > 0 ) {
        return list.get(0).getUri();
    }
    return null;
}Being an instance also involves a periodic heartbeat to the registry
(through the client’s serviceUrl) with a default duration of 30 seconds.
A service is not available for discovery by clients until the instance, the server, and the client all have the same metadata in their local
cache (so it could take 3 heartbeats).
You can change the period by setting eureka.instance.leaseRenewalIntervalInSeconds.
Setting it to a value of less than 30 speeds up the process of getting clients connected to other services.
In production, it is probably better to stick with the default, because of internal computations in the server that make assumptions about the lease renewal period.
If you have deployed Eureka clients to multiple zones, you may prefer that those clients use services within the same zone before trying services in another zone. To set that up, you need to configure your Eureka clients correctly.
First, you need to make sure you have Eureka servers deployed to each zone and that they are peers of each other. See the section on zones and regions for more information.
Next, you need to tell Eureka which zone your service is in.
You can do so by using the metadataMap property.
For example, if service 1 is deployed to both zone 1 and zone 2, you need to set the following Eureka properties in service 1:
Service 1 in Zone 1
eureka.instance.metadataMap.zone = zone1
eureka.client.preferSameZoneEureka = true
Service 1 in Zone 2
eureka.instance.metadataMap.zone = zone2
eureka.client.preferSameZoneEureka = true
This section describes how to set up a Eureka server.
To include Eureka Server in your project, use the starter with a group ID of org.springframework.cloud and an artifact ID of spring-cloud-starter-netflix-eureka-server.
See the Spring Cloud Project page for details on setting up your build system with the current Spring Cloud Release Train.
| Note |
|---|---|
If your project already uses Thymeleaf as its template engine, the Freemarker templates of the Eureka server may not be loaded correctly. In this case it is necessary to configure the template loader manually: |
application.yml.
spring:
  freemarker:
    template-loader-path: classpath:/templates/
    prefer-file-system-access: false
The following example shows a minimal Eureka server:
@SpringBootApplication
@EnableEurekaServer
public class Application {

    public static void main(String[] args) {
        new SpringApplicationBuilder(Application.class).web(true).run(args);
    }

}
The server has a home page with a UI and HTTP API endpoints for the normal Eureka functionality under /eureka/*.
The following links have some Eureka background reading: flux capacitor and google group discussion.
| Tip |
|---|---|
Due to Gradle’s dependency resolution rules and the lack of a parent bom feature, depending on build.gradle. buildscript {
dependencies {
classpath("org.springframework.boot:spring-boot-gradle-plugin:{spring-boot-docs-version}")
}
}
apply plugin: "spring-boot"
dependencyManagement {
imports {
mavenBom "org.springframework.cloud:spring-cloud-dependencies:{spring-cloud-version}"
}
}
|
The Eureka server does not have a back end store, but the service instances in the registry all have to send heartbeats to keep their registrations up to date (so this can be done in memory). Clients also have an in-memory cache of Eureka registrations (so they do not have to go to the registry for every request to a service).
By default, every Eureka server is also a Eureka client and requires (at least one) service URL to locate a peer. If you do not provide it, the service runs and works, but it fills your logs with a lot of noise about not being able to register with the peer.
See also below for details of Ribbon support on the client side for Zones and Regions.
The combination of the two caches (client and server) and the heartbeats make a standalone Eureka server fairly resilient to failure, as long as there is some sort of monitor or elastic runtime (such as Cloud Foundry) keeping it alive. In standalone mode, you might prefer to switch off the client side behavior so that it does not keep trying and failing to reach its peers. The following example shows how to switch off the client-side behavior:
application.yml (Standalone Eureka Server).
server:
  port: 8761

eureka:
  instance:
    hostname: localhost
  client:
    registerWithEureka: false
    fetchRegistry: false
    serviceUrl:
      defaultZone: http://${eureka.instance.hostname}:${server.port}/eureka/
Notice that the serviceUrl is pointing to the same host as the local instance.
Eureka can be made even more resilient and available by running multiple instances and asking them to register with each other.
In fact, this is the default behavior, so all you need to do to make it work is add a valid serviceUrl to a peer, as shown in the following example:
application.yml (Two Peer Aware Eureka Servers).
---
spring:
  profiles: peer1
eureka:
  instance:
    hostname: peer1
  client:
    serviceUrl:
      defaultZone: http://peer2/eureka/

---
spring:
  profiles: peer2
eureka:
  instance:
    hostname: peer2
  client:
    serviceUrl:
      defaultZone: http://peer1/eureka/
In the preceding example, we have a YAML file that can be used to run the same server on two hosts (peer1 and peer2) by running it in different Spring profiles.
You could use this configuration to test the peer awareness on a single host (there is not much value in doing that in production) by manipulating /etc/hosts to resolve the host names.
In fact, the eureka.instance.hostname is not needed if you are running on a machine that knows its own hostname (by default, it is looked up by using java.net.InetAddress).
You can add multiple peers to a system, and, as long as they are all connected to each other by at least one edge, they synchronize the registrations amongst themselves. If the peers are physically separated (inside a data center or between multiple data centers), then the system can, in principle, survive “split-brain” type failures. You can add multiple peers to a system, and as long as they are all directly connected to each other, they will synchronize the registrations amongst themselves.
application.yml (Three Peer Aware Eureka Servers).
eureka:
  client:
    serviceUrl:
      defaultZone: http://peer1/eureka/,http://peer2/eureka/,http://peer3/eureka/

---
spring:
  profiles: peer1
eureka:
  instance:
    hostname: peer1

---
spring:
  profiles: peer2
eureka:
  instance:
    hostname: peer2

---
spring:
  profiles: peer3
eureka:
  instance:
    hostname: peer3
In some cases, it is preferable for Eureka to advertise the IP addresses of services rather than the hostname.
Set eureka.instance.preferIpAddress to true and, when the application registers with eureka, it uses its IP address rather than its hostname.
| Tip |
|---|---|
If the hostname cannot be determined by Java, then the IP address is sent to Eureka.
Only explict way of setting the hostname is by setting |
You can secure your Eureka server simply by adding Spring Security to your
server’s classpath via spring-boot-starter-security. By default when Spring Security is on the classpath it will require that
a valid CSRF token be sent with every request to the app. Eureka clients will not generally possess a valid
cross site request forgery (CSRF) token you will need to disable this requirement for the /eureka/** endpoints.
For example:
@EnableWebSecurity
class WebSecurityConfig extends WebSecurityConfigurerAdapter {

    @Override
    protected void configure(HttpSecurity http) throws Exception {
        http.csrf().ignoringAntMatchers("/eureka/**");
        super.configure(http);
    }
}
For more information on CSRF see the Spring Security documentation.
A demo Eureka Server can be found in the Spring Cloud Samples repo.
The JAXB modules which the Eureka server depends upon were removed in JDK 11. If you intend to use JDK 11 when running a Eureka server you must include these dependencies in your POM or Gradle file.
<dependency>
	<groupId>org.glassfish.jaxb</groupId>
	<artifactId>jaxb-runtime</artifactId>
</dependency>
Netflix has created a library called Hystrix that implements the circuit breaker pattern. In a microservice architecture, it is common to have multiple layers of service calls, as shown in the following example:
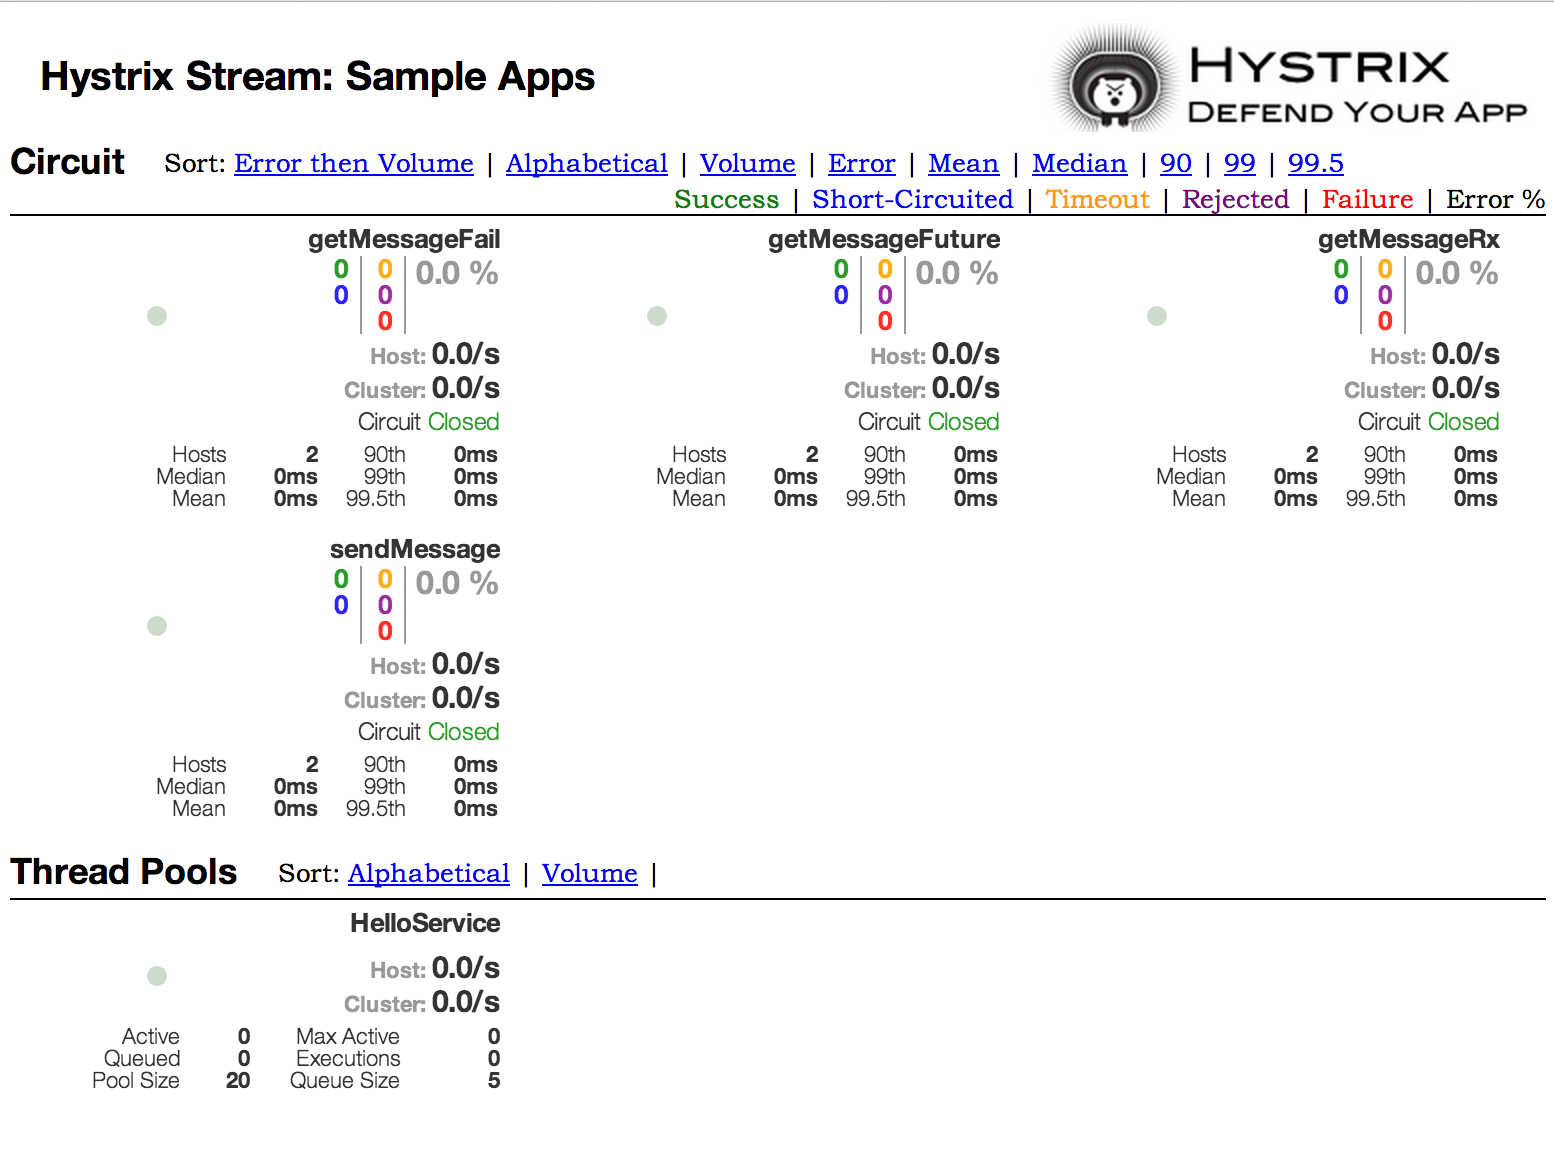
A service failure in the lower level of services can cause cascading failure all the way up to the user.
When calls to a particular service exceed circuitBreaker.requestVolumeThreshold (default: 20 requests) and the failure percentage is greater than circuitBreaker.errorThresholdPercentage (default: >50%) in a rolling window defined by metrics.rollingStats.timeInMilliseconds (default: 10 seconds), the circuit opens and the call is not made.
In cases of error and an open circuit, a fallback can be provided by the developer.
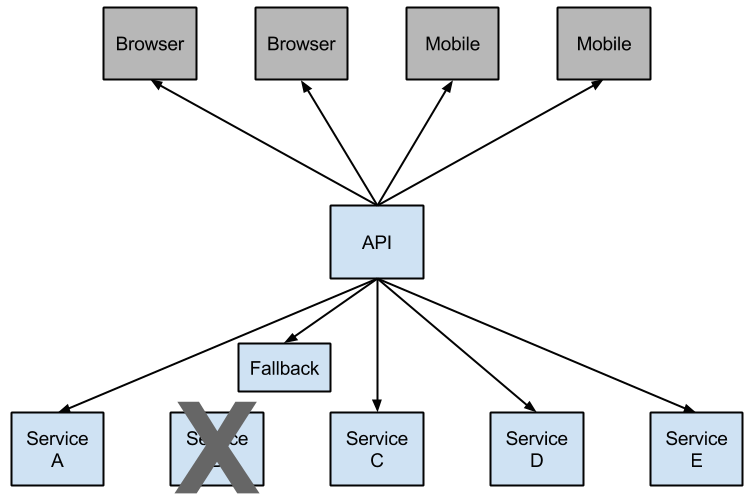
Having an open circuit stops cascading failures and allows overwhelmed or failing services time to recover. The fallback can be another Hystrix protected call, static data, or a sensible empty value. Fallbacks may be chained so that the first fallback makes some other business call, which in turn falls back to static data.
To include Hystrix in your project, use the starter with a group ID of org.springframework.cloud
and a artifact ID of spring-cloud-starter-netflix-hystrix.
See the Spring Cloud Project page for details on setting up your build system with the current Spring Cloud Release Train.
The following example shows a minimal Eureka server with a Hystrix circuit breaker:
@SpringBootApplication
@EnableCircuitBreaker
public class Application {

    public static void main(String[] args) {
        new SpringApplicationBuilder(Application.class).web(true).run(args);
    }

}

@Component
public class StoreIntegration {

    @HystrixCommand(fallbackMethod = "defaultStores")
    public Object getStores(Map<String, Object> parameters) {
        //do stuff that might fail
    }

    public Object defaultStores(Map<String, Object> parameters) {
        return /* something useful */;
    }
}
The @HystrixCommand is provided by a Netflix contrib library called “javanica”.
Spring Cloud automatically wraps Spring beans with that annotation in a proxy that is connected to the Hystrix circuit breaker.
The circuit breaker calculates when to open and close the circuit and what to do in case of a failure.
To configure the @HystrixCommand you can use the commandProperties
attribute with a list of @HystrixProperty annotations. See
here
for more details. See the Hystrix wiki
for details on the properties available.
If you want some thread local context to propagate into a @HystrixCommand, the default declaration does not work, because it executes the command in a thread pool (in case of timeouts).
You can switch Hystrix to use the same thread as the caller through configuration or directly in the annotation, by asking it to use a different “Isolation Strategy”.
The following example demonstrates setting the thread in the annotation:
@HystrixCommand(fallbackMethod = "stubMyService",
    commandProperties = {
      @HystrixProperty(name="execution.isolation.strategy", value="SEMAPHORE")
    }
)
...
The same thing applies if you are using @SessionScope or @RequestScope.
If you encounter a runtime exception that says it cannot find the scoped context, you need to use the same thread.
You also have the option to set the hystrix.shareSecurityContext property to true.
Doing so auto-configures a Hystrix concurrency strategy plugin hook to transfer the SecurityContext from your main thread to the one used by the Hystrix command.
Hystrix does not let multiple Hystrix concurrency strategy be registered so an extension mechanism is available by declaring your own HystrixConcurrencyStrategy as a Spring bean.
Spring Cloud looks for your implementation within the Spring context and wrap it inside its own plugin.
The state of the connected circuit breakers are also exposed in the /health endpoint of the calling application, as shown in the following example:
{
    "hystrix": {
        "openCircuitBreakers": [
            "StoreIntegration::getStoresByLocationLink"
        ],
        "status": "CIRCUIT_OPEN"
    },
    "status": "UP"
}
To enable the Hystrix metrics stream, include a dependency on spring-boot-starter-actuator and set
management.endpoints.web.exposure.include: hystrix.stream.
Doing so exposes the /actuator/hystrix.stream as a management endpoint, as shown in the following example:
    <dependency>
        <groupId>org.springframework.boot</groupId>
        <artifactId>spring-boot-starter-actuator</artifactId>
    </dependency>
One of the main benefits of Hystrix is the set of metrics it gathers about each HystrixCommand. The Hystrix Dashboard displays the health of each circuit breaker in an efficient manner.
When using Hystrix commands that wrap Ribbon clients you want to make sure your Hystrix timeout is configured to be longer than the configured Ribbon timeout, including any potential retries that might be made. For example, if your Ribbon connection timeout is one second and the Ribbon client might retry the request three times, than your Hystrix timeout should be slightly more than three seconds.
To include the Hystrix Dashboard in your project, use the starter with a group ID of org.springframework.cloud and an artifact ID of spring-cloud-starter-netflix-hystrix-dashboard.
See the Spring Cloud Project page for details on setting up your build system with the current Spring Cloud Release Train.
To run the Hystrix Dashboard, annotate your Spring Boot main class with @EnableHystrixDashboard.
Then visit /hystrix and point the dashboard to an individual instance’s /hystrix.stream endpoint in a Hystrix client application.
| Note |
|---|---|
When connecting to a |
Looking at an individual instance’s Hystrix data is not very useful in terms of the overall health of the system. Turbine is an application that aggregates all of the relevant /hystrix.stream endpoints into a combined /turbine.stream for use in the Hystrix Dashboard.
Individual instances are located through Eureka.
Running Turbine requires annotating your main class with the @EnableTurbine annotation (for example, by using spring-cloud-starter-netflix-turbine to set up the classpath).
All of the documented configuration properties from the Turbine 1 wiki apply.
The only difference is that the turbine.instanceUrlSuffix does not need the port prepended, as this is handled automatically unless turbine.instanceInsertPort=false.
| Note |
|---|---|
By default, Turbine looks for the |
eureka:
  instance:
    metadata-map:
      management.port: ${management.port:8081}
The turbine.appConfig configuration key is a list of Eureka serviceIds that turbine uses to lookup instances.
The turbine stream is then used in the Hystrix dashboard with a URL similar to the following:
http://my.turbine.server:8080/turbine.stream?cluster=CLUSTERNAME
The cluster parameter can be omitted if the name is default.
The cluster parameter must match an entry in turbine.aggregator.clusterConfig.
Values returned from Eureka are upper-case. Consequently, the following example works if there is an application called customers registered with Eureka:
turbine:
  aggregator:
    clusterConfig: CUSTOMERS
  appConfig: customers
If you need to customize which cluster names should be used by Turbine (because you do not want to store cluster names in
turbine.aggregator.clusterConfig configuration), provide a bean of type TurbineClustersProvider.
The clusterName can be customized by a SPEL expression in turbine.clusterNameExpression with root as an instance of InstanceInfo.
The default value is appName, which means that the Eureka serviceId becomes the cluster key (that is, the InstanceInfo for customers has an appName of CUSTOMERS).
A different example is turbine.clusterNameExpression=aSGName, which gets the cluster name from the AWS ASG name.
The following listing shows another example:
turbine:
  aggregator:
    clusterConfig: SYSTEM,USER
  appConfig: customers,stores,ui,admin
  clusterNameExpression: metadata['cluster']
In the preceding example, the cluster name from four services is pulled from their metadata map and is expected to have values that include SYSTEM and USER.
To use the “default” cluster for all apps, you need a string literal expression (with single quotes and escaped with double quotes if it is in YAML as well):
turbine:
  appConfig: customers,stores
  clusterNameExpression: "'default'"
Spring Cloud provides a spring-cloud-starter-netflix-turbine that has all the dependencies you need to get a Turbine server running. To add Turbine, create a Spring Boot application and annotate it with @EnableTurbine.
| Note |
|---|---|
By default, Spring Cloud lets Turbine use the host and port to allow multiple processes per host, per cluster.
If you want the native Netflix behavior built into Turbine to not allow multiple processes per host, per cluster (the key to the instance ID is the hostname), set |
In some situations it might be useful for other applications to know what custers have been configured
in Turbine. To support this you can use the /clusters endpoint which will return a JSON array of
all the configured clusters.
GET /clusters.
[
  {
    "name": "RACES",
    "link": "http://localhost:8383/turbine.stream?cluster=RACES"
  },
  {
    "name": "WEB",
    "link": "http://localhost:8383/turbine.stream?cluster=WEB"
  }
]
This endpoint can be disabled by setting turbine.endpoints.clusters.enabled to false.
In some environments (such as in a PaaS setting), the classic Turbine model of pulling metrics from all the distributed Hystrix commands does not work.
In that case, you might want to have your Hystrix commands push metrics to Turbine. Spring Cloud enables that with messaging.
To do so on the client, add a dependency to spring-cloud-netflix-hystrix-stream and the spring-cloud-starter-stream-* of your choice.
See the Spring Cloud Stream documentation for details on the brokers and how to configure the client credentials. It should work out of the box for a local broker.
On the server side, create a Spring Boot application and annotate it with @EnableTurbineStream.
The Turbine Stream server requires the use of Spring Webflux, therefore spring-boot-starter-webflux needs to be included in your project.
By default spring-boot-starter-webflux is included when adding spring-cloud-starter-netflix-turbine-stream to your application.
You can then point the Hystrix Dashboard to the Turbine Stream Server instead of individual Hystrix streams.
If Turbine Stream is running on port 8989 on myhost, then put http://myhost:8989 in the stream input field in the Hystrix Dashboard.
Circuits are prefixed by their respective serviceId, followed by a dot (.), and then the circuit name.
Spring Cloud provides a spring-cloud-starter-netflix-turbine-stream that has all the dependencies you need to get a Turbine Stream server running.
You can then add the Stream binder of your choice — such as spring-cloud-starter-stream-rabbit.
Turbine Stream server also supports the cluster parameter.
Unlike Turbine server, Turbine Stream uses eureka serviceIds as cluster names and these are not configurable.
If Turbine Stream server is running on port 8989 on my.turbine.server and you have two eureka serviceIds customers and products in your environment, the following URLs will be available on your Turbine Stream server. default and empty cluster name will provide all metrics that Turbine Stream server receives.
http://my.turbine.sever:8989/turbine.stream?cluster=customers
http://my.turbine.sever:8989/turbine.stream?cluster=products
http://my.turbine.sever:8989/turbine.stream?cluster=default
http://my.turbine.sever:8989/turbine.stream
So, you can use eureka serviceIds as cluster names for your Turbine dashboard (or any compatible dashboard).
You don’t need to configure any properties like turbine.appConfig, turbine.clusterNameExpression and turbine.aggregator.clusterConfig for your Turbine Stream server.
| Note |
|---|---|
Turbine Stream server gathers all metrics from the configured input channel with Spring Cloud Stream. It means that it doesn’t gather Hystrix metrics actively from each instance. It just can provide metrics that were already gathered into the input channel by each instance. |
Ribbon is a client-side load balancer that gives you a lot of control over the behavior of HTTP and TCP clients.
Feign already uses Ribbon, so, if you use @FeignClient, this section also applies.
A central concept in Ribbon is that of the named client.
Each load balancer is part of an ensemble of components that work together to contact a remote server on demand, and the ensemble has a name that you give it as an application developer (for example, by using the @FeignClient annotation).
On demand, Spring Cloud creates a new ensemble as an ApplicationContext for each named client by using
RibbonClientConfiguration.
This contains (amongst other things) an ILoadBalancer, a RestClient, and a ServerListFilter.
To include Ribbon in your project, use the starter with a group ID of org.springframework.cloud and an artifact ID of spring-cloud-starter-netflix-ribbon.
See the Spring Cloud Project page for details on setting up your build system with the current Spring Cloud Release Train.
You can configure some bits of a Ribbon client by using external properties in <client>.ribbon.*, which is similar to using the Netflix APIs natively, except that you can use Spring Boot configuration files.
The native options can be inspected as static fields in CommonClientConfigKey (part of ribbon-core).
Spring Cloud also lets you take full control of the client by declaring additional configuration (on top of the RibbonClientConfiguration) using @RibbonClient, as shown in the following example:
@Configuration
@RibbonClient(name = "custom", configuration = CustomConfiguration.class)
public class TestConfiguration {
}
In this case, the client is composed from the components already in RibbonClientConfiguration, together with any in CustomConfiguration (where the latter generally overrides the former).
| Warning |
|---|---|
The |
The following table shows the beans that Spring Cloud Netflix provides by default for Ribbon:
| Bean Type | Bean Name | Class Name |
|---|---|---|
|
|
|
|
|
|
|
|
|
|
|
|
|
|
|
|
|
|
|
|
|
Creating a bean of one of those type and placing it in a @RibbonClient configuration (such as FooConfiguration above) lets you override each one of the beans described, as shown in the following example:
@Configuration
protected static class FooConfiguration {

	@Bean
	public ZonePreferenceServerListFilter serverListFilter() {
		ZonePreferenceServerListFilter filter = new ZonePreferenceServerListFilter();
		filter.setZone("myTestZone");
		return filter;
	}

	@Bean
	public IPing ribbonPing() {
		return new PingUrl();
	}

}
The include statement in the preceding example replaces NoOpPing with PingUrl and provides a custom serverListFilter.
A default configuration can be provided for all Ribbon Clients by using the @RibbonClients annotation and registering a default configuration, as shown in the following example:
@RibbonClients(defaultConfiguration = DefaultRibbonConfig.class)
public class RibbonClientDefaultConfigurationTestsConfig {

	public static class BazServiceList extends ConfigurationBasedServerList {

		public BazServiceList(IClientConfig config) {
			super.initWithNiwsConfig(config);
		}

	}

}

@Configuration
class DefaultRibbonConfig {

	@Bean
	public IRule ribbonRule() {
		return new BestAvailableRule();
	}

	@Bean
	public IPing ribbonPing() {
		return new PingUrl();
	}

	@Bean
	public ServerList<Server> ribbonServerList(IClientConfig config) {
		return new RibbonClientDefaultConfigurationTestsConfig.BazServiceList(config);
	}

	@Bean
	public ServerListSubsetFilter serverListFilter() {
		ServerListSubsetFilter filter = new ServerListSubsetFilter();
		return filter;
	}

}
Starting with version 1.2.0, Spring Cloud Netflix now supports customizing Ribbon clients by setting properties to be compatible with the Ribbon documentation.
This lets you change behavior at start up time in different environments.
The following list shows the supported properties>:
<clientName>.ribbon.NFLoadBalancerClassName: Should implementILoadBalancer<clientName>.ribbon.NFLoadBalancerRuleClassName: Should implementIRule<clientName>.ribbon.NFLoadBalancerPingClassName: Should implementIPing<clientName>.ribbon.NIWSServerListClassName: Should implementServerList<clientName>.ribbon.NIWSServerListFilterClassName: Should implementServerListFilter
| Note |
|---|---|
Classes defined in these properties have precedence over beans defined by using |
To set the IRule for a service name called users, you could set the following properties:
application.yml.
users:
  ribbon:
    NIWSServerListClassName: com.netflix.loadbalancer.ConfigurationBasedServerList
    NFLoadBalancerRuleClassName: com.netflix.loadbalancer.WeightedResponseTimeRule
See the Ribbon documentation for implementations provided by Ribbon.
When Eureka is used in conjunction with Ribbon (that is, both are on the classpath), the ribbonServerList is overridden with an extension of DiscoveryEnabledNIWSServerList, which populates the list of servers from Eureka.
It also replaces the IPing interface with NIWSDiscoveryPing, which delegates to Eureka to determine if a server is up.
The ServerList that is installed by default is a DomainExtractingServerList. Its purpose is to make metadata available to the load balancer without using AWS AMI metadata (which is what Netflix relies on).
By default, the server list is constructed with “zone” information, as provided in the instance metadata (so, on the remote clients, set eureka.instance.metadataMap.zone).
If that is missing and if the approximateZoneFromHostname flag is set, it can use the domain name from the server hostname as a proxy for the zone.
Once the zone information is available, it can be used in a ServerListFilter.
By default, it is used to locate a server in the same zone as the client, because the default is a ZonePreferenceServerListFilter.
By default, the zone of the client is determined in the same way as the remote instances (that is, through eureka.instance.metadataMap.zone).
| Note |
|---|---|
The orthodox “archaius” way to set the client zone is through a configuration property called "@zone". If it is available, Spring Cloud uses that in preference to all other settings (note that the key must be quoted in YAML configuration). |
| Note |
|---|---|
If there is no other source of zone data, then a guess is made, based on the client configuration (as opposed to the instance configuration).
We take |
Eureka is a convenient way to abstract the discovery of remote servers so that you do not have to hard code their URLs in clients.
However, if you prefer not to use Eureka, Ribbon and Feign also work.
Suppose you have declared a @RibbonClient for "stores", and Eureka is not in use (and not even on the classpath).
The Ribbon client defaults to a configured server list.
You can supply the configuration as follows:
application.yml.
stores:
  ribbon:
    listOfServers: example.com,google.com
Setting the ribbon.eureka.enabled property to false explicitly disables the use of Eureka in Ribbon, as shown in the following example:
application.yml.
ribbon:
  eureka:
   enabled: false
You can also use the LoadBalancerClient directly, as shown in the following example:
public class MyClass {
    @Autowired
    private LoadBalancerClient loadBalancer;

    public void doStuff() {
        ServiceInstance instance = loadBalancer.choose("stores");
        URI storesUri = URI.create(String.format("http://%s:%s", instance.getHost(), instance.getPort()));
        // ... do something with the URI
    }
}
Each Ribbon named client has a corresponding child application Context that Spring Cloud maintains. This application context is lazily loaded on the first request to the named client. This lazy loading behavior can be changed to instead eagerly load these child application contexts at startup, by specifying the names of the Ribbon clients, as shown in the following example:
application.yml.
ribbon:
  eager-load:
    enabled: true
    clients: client1, client2, client3
If you change zuul.ribbonIsolationStrategy to THREAD, the thread isolation strategy for Hystrix is used for all routes.
In that case, the HystrixThreadPoolKey is set to RibbonCommand as the default.
It means that HystrixCommands for all routes are executed in the same Hystrix thread pool.
This behavior can be changed with the following configuration:
application.yml.
zuul:
  threadPool:
    useSeparateThreadPools: true
The preceding example results in HystrixCommands being executed in the Hystrix thread pool for each route.
In this case, the default HystrixThreadPoolKey is the same as the service ID for each route.
To add a prefix to HystrixThreadPoolKey, set zuul.threadPool.threadPoolKeyPrefix to the value that you want to add, as shown in the following example:
application.yml.
zuul:
  threadPool:
    useSeparateThreadPools: true
    threadPoolKeyPrefix: zuulgw
If you need to provide your own IRule implementation to handle a special routing requirement like a “canary” test, pass some information to the choose method of IRule.
com.netflix.loadbalancer.IRule.java.
public interface IRule{
    public Server choose(Object key);
         :
You can provide some information that is used by your IRule implementation to choose a target server, as shown in the following example:
RequestContext.getCurrentContext()
              .set(FilterConstants.LOAD_BALANCER_KEY, "canary-test");
If you put any object into the RequestContext with a key of FilterConstants.LOAD_BALANCER_KEY, it is passed to the choose method of the IRule implementation.
The code shown in the preceding example must be executed before RibbonRoutingFilter is executed.
Zuul’s pre filter is the best place to do that.
You can access HTTP headers and query parameters through the RequestContext in pre filter, so it can be used to determine the LOAD_BALANCER_KEY that is passed to Ribbon.
If you do not put any value with LOAD_BALANCER_KEY in RequestContext, null is passed as a parameter of the choose method.
Archaius is the Netflix client-side configuration library. It is the library used by all of the Netflix OSS components for configuration. Archaius is an extension of the Apache Commons Configuration project. It allows updates to configuration by either polling a source for changes or by letting a source push changes to the client. Archaius uses Dynamic<Type>Property classes as handles to properties, as shown in the following example:
Archaius Example.
class ArchaiusTest {
    DynamicStringProperty myprop = DynamicPropertyFactory
            .getInstance()
            .getStringProperty("my.prop");

    void doSomething() {
        OtherClass.someMethod(myprop.get());
    }
}
Archaius has its own set of configuration files and loading priorities. Spring applications should generally not use Archaius directly, but the need to configure the Netflix tools natively remains. Spring Cloud has a Spring Environment Bridge so that Archaius can read properties from the Spring Environment. This bridge allows Spring Boot projects to use the normal configuration toolchain while letting them configure the Netflix tools as documented (for the most part).
Routing is an integral part of a microservice architecture.
For example, / may be mapped to your web application, /api/users is mapped to the user service and /api/shop is mapped to the shop service.
Zuul is a JVM-based router and server-side load balancer from Netflix.
Netflix uses Zuul for the following:
- Authentication
- Insights
- Stress Testing
- Canary Testing
- Dynamic Routing
- Service Migration
- Load Shedding
- Security
- Static Response handling
- Active/Active traffic management
Zuul’s rule engine lets rules and filters be written in essentially any JVM language, with built-in support for Java and Groovy.
| Note |
|---|---|
The configuration property |
| Note |
|---|---|
The default Hystrix isolation pattern ( |
To include Zuul in your project, use the starter with a group ID of org.springframework.cloud and a artifact ID of spring-cloud-starter-netflix-zuul.
See the Spring Cloud Project page for details on setting up your build system with the current Spring Cloud Release Train.
Spring Cloud has created an embedded Zuul proxy to ease the development of a common use case where a UI application wants to make proxy calls to one or more back end services. This feature is useful for a user interface to proxy to the back end services it requires, avoiding the need to manage CORS and authentication concerns independently for all the back ends.
To enable it, annotate a Spring Boot main class with @EnableZuulProxy. Doing so causes local calls to be forwarded to the appropriate service.
By convention, a service with an ID of users receives requests from the proxy located at /users (with the prefix stripped).
The proxy uses Ribbon to locate an instance to which to forward through discovery.
All requests are executed in a hystrix command, so failures appear in Hystrix metrics.
Once the circuit is open, the proxy does not try to contact the service.
| Note |
|---|---|
the Zuul starter does not include a discovery client, so, for routes based on service IDs, you need to provide one of those on the classpath as well (Eureka is one choice). |
To skip having a service automatically added, set zuul.ignored-services to a list of service ID patterns.
If a service matches a pattern that is ignored but is also included in the explicitly configured routes map, it is unignored, as shown in the following example:
application.yml.
 zuul:
  ignoredServices: '*'
  routes:
    users: /myusers/**
In the preceding example, all services are ignored, except for users.
To augment or change the proxy routes, you can add external configuration, as follows:
application.yml.
 zuul:
  routes:
    users: /myusers/**
The preceding example means that HTTP calls to /myusers get forwarded to the users service (for example /myusers/101 is forwarded to /101).
To get more fine-grained control over a route, you can specify the path and the serviceId independently, as follows:
application.yml.
 zuul:
  routes:
    users:
      path: /myusers/**
      serviceId: users_service
The preceding example means that HTTP calls to /myusers get forwarded to the users_service service.
The route must have a path that can be specified as an ant-style pattern, so /myusers/* only matches one level, but /myusers/** matches hierarchically.
The location of the back end can be specified as either a serviceId (for a service from discovery) or a url (for a physical location), as shown in the following example:
application.yml.
 zuul:
  routes:
    users:
      path: /myusers/**
      url: http://example.com/users_service
These simple url-routes do not get executed as a HystrixCommand, nor do they load-balance multiple URLs with Ribbon.
To achieve those goals, you can specify a serviceId with a static list of servers, as follows:
application.yml.
zuul:
  routes:
    echo:
      path: /myusers/**
      serviceId: myusers-service
      stripPrefix: true

hystrix:
  command:
    myusers-service:
      execution:
        isolation:
          thread:
            timeoutInMilliseconds: ...

myusers-service:
  ribbon:
    NIWSServerListClassName: com.netflix.loadbalancer.ConfigurationBasedServerList
    listOfServers: http://example1.com,http://example2.com
    ConnectTimeout: 1000
    ReadTimeout: 3000
    MaxTotalHttpConnections: 500
    MaxConnectionsPerHost: 100
Another method is specifiying a service-route and configuring a Ribbon client for the serviceId (doing so requires disabling Eureka support in Ribbon — see above for more information), as shown in the following example:
application.yml.
zuul:
  routes:
    users:
      path: /myusers/**
      serviceId: users

ribbon:
  eureka:
    enabled: false

users:
  ribbon:
    listOfServers: example.com,google.com
You can provide a convention between serviceId and routes by using regexmapper.
It uses regular-expression named groups to extract variables from serviceId and inject them into a route pattern, as shown in the following example:
ApplicationConfiguration.java.
@Bean
public PatternServiceRouteMapper serviceRouteMapper() {
    return new PatternServiceRouteMapper(
        "(?<name>^.+)-(?<version>v.+$)",
        "${version}/${name}");
}
The preceding example means that a serviceId of myusers-v1 is mapped to route /v1/myusers/**.
Any regular expression is accepted, but all named groups must be present in both servicePattern and routePattern.
If servicePattern does not match a serviceId, the default behavior is used.
In the preceding example, a serviceId of myusers is mapped to the "/myusers/**" route (with no version detected).
This feature is disabled by default and only applies to discovered services.
To add a prefix to all mappings, set zuul.prefix to a value, such as /api.
By default, the proxy prefix is stripped from the request before the request is forwarded by (you can switch this behavior off with zuul.stripPrefix=false).
You can also switch off the stripping of the service-specific prefix from individual routes, as shown in the following example:
application.yml.
 zuul:
  routes:
    users:
      path: /myusers/**
      stripPrefix: false
| Note |
|---|---|
|
In the preceding example, requests to /myusers/101 are forwarded to /myusers/101 on the users service.
The zuul.routes entries actually bind to an object of type ZuulProperties.
If you look at the properties of that object, you can see that it also has a retryable flag.
Set that flag to true to have the Ribbon client automatically retry failed requests.
You can also set that flag to true when you need to modify the parameters of the retry operations that use the Ribbon client configuration.
By default, the X-Forwarded-Host header is added to the forwarded requests.
To turn it off, set zuul.addProxyHeaders = false.
By default, the prefix path is stripped, and the request to the back end picks up a X-Forwarded-Prefix header (/myusers in the examples shown earlier).
If you set a default route (/), an application with @EnableZuulProxy could act as a standalone server. For example, zuul.route.home: / would route all traffic ("/**") to the "home" service.
If more fine-grained ignoring is needed, you can specify specific patterns to ignore. These patterns are evaluated at the start of the route location process, which means prefixes should be included in the pattern to warrant a match. Ignored patterns span all services and supersede any other route specification. The following example shows how to create ignored patterns:
application.yml.
 zuul:
  ignoredPatterns: /**/admin/**
  routes:
    users: /myusers/**
The preceding example means that all calls (such as /myusers/101) are forwarded to /101 on the users service.
However, calls including /admin/ do not resolve.
| Warning |
|---|---|
If you need your routes to have their order preserved, you need to use a YAML file, as the ordering is lost when using a properties file. The following example shows such a YAML file: |
application.yml.
 zuul:
  routes:
    users:
      path: /myusers/**
    legacy:
      path: /**
If you were to use a properties file, the legacy path might end up in front of the users
path, rendering the users path unreachable.
The default HTTP client used by Zuul is now backed by the Apache HTTP Client instead of the deprecated Ribbon RestClient.
To use RestClient or okhttp3.OkHttpClient, set ribbon.restclient.enabled=true or ribbon.okhttp.enabled=true, respectively.
If you would like to customize the Apache HTTP client or the OK HTTP client, provide a bean of type ClosableHttpClient or OkHttpClient.
You can share headers between services in the same system, but you probably do not want sensitive headers leaking downstream into external servers. You can specify a list of ignored headers as part of the route configuration. Cookies play a special role, because they have well defined semantics in browsers, and they are always to be treated as sensitive. If the consumer of your proxy is a browser, then cookies for downstream services also cause problems for the user, because they all get jumbled up together (all downstream services look like they come from the same place).
If you are careful with the design of your services, (for example, if only one of the downstream services sets cookies), you might be able to let them flow from the back end all the way up to the caller.
Also, if your proxy sets cookies and all your back-end services are part of the same system, it can be natural to simply share them (and, for instance, use Spring Session to link them up to some shared state).
Other than that, any cookies that get set by downstream services are likely to be not useful to the caller, so it is recommended that you make (at least) Set-Cookie and Cookie into sensitive headers for routes that are not part of your domain.
Even for routes that are part of your domain, try to think carefully about what it means before letting cookies flow between them and the proxy.
The sensitive headers can be configured as a comma-separated list per route, as shown in the following example:
application.yml.
 zuul:
  routes:
    users:
      path: /myusers/**
      sensitiveHeaders: Cookie,Set-Cookie,Authorization
      url: https://downstream
| Note |
|---|---|
This is the default value for |
The sensitiveHeaders are a blacklist, and the default is not empty.
Consequently, to make Zuul send all headers (except the ignored ones), you must explicitly set it to the empty list.
Doing so is necessary if you want to pass cookie or authorization headers to your back end. The following example shows how to use sensitiveHeaders:
application.yml.
 zuul:
  routes:
    users:
      path: /myusers/**
      sensitiveHeaders:
      url: https://downstream
You can also set sensitive headers, by setting zuul.sensitiveHeaders.
If sensitiveHeaders is set on a route, it overrides the global sensitiveHeaders setting.
In addition to the route-sensitive headers, you can set a global value called zuul.ignoredHeaders for values (both request and response) that should be discarded during interactions with downstream services.
By default, if Spring Security is not on the classpath, these are empty.
Otherwise, they are initialized to a set of well known “security” headers (for example, involving caching) as specified by Spring Security.
The assumption in this case is that the downstream services might add these headers, too, but we want the values from the proxy.
To not discard these well known security headers when Spring Security is on the classpath, you can set zuul.ignoreSecurityHeaders to false.
Doing so can be useful if you disabled the HTTP Security response headers in Spring Security and want the values provided by downstream services.
By default, if you use @EnableZuulProxy with the Spring Boot Actuator, you enable two additional endpoints:
- Routes
- Filters
A GET to the routes endpoint at /routes returns a list of the mapped routes:
GET /routes.
{
  /stores/**: "http://localhost:8081"
}
Additional route details can be requested by adding the ?format=details query string to /routes.
Doing so produces the following output:
GET /routes/details.
{
  "/stores/**": {
    "id": "stores",
    "fullPath": "/stores/**",
    "location": "http://localhost:8081",
    "path": "/**",
    "prefix": "/stores",
    "retryable": false,
    "customSensitiveHeaders": false,
    "prefixStripped": true
  }
}
A POST to /routes forces a refresh of the existing routes (for example, when there have been changes in the service catalog).
You can disable this endpoint by setting endpoints.routes.enabled to false.
| Note |
|---|---|
the routes should respond automatically to changes in the service catalog, but the |
A common pattern when migrating an existing application or API is to “strangle” old endpoints, slowly replacing them with different implementations. The Zuul proxy is a useful tool for this because you can use it to handle all traffic from the clients of the old endpoints but redirect some of the requests to new ones.
The following example shows the configuration details for a “strangle” scenario:
application.yml.
 zuul:
  routes:
    first:
      path: /first/**
      url: http://first.example.com
    second:
      path: /second/**
      url: forward:/second
    third:
      path: /third/**
      url: forward:/3rd
    legacy:
      path: /**
      url: http://legacy.example.com
In the preceding example, we are strangle the “legacy” application, which is mapped to all requests that do not match one of the other patterns.
Paths in /first/** have been extracted into a new service with an external URL.
Paths in /second/** are forwarded so that they can be handled locally (for example, with a normal Spring @RequestMapping).
Paths in /third/** are also forwarded but with a different prefix (/third/foo is forwarded to /3rd/foo).
| Note |
|---|---|
The ignored patterns aren’t completely ignored, they just are not handled by the proxy (so they are also effectively forwarded locally). |
If you use @EnableZuulProxy, you can use the proxy paths to upload files and it should work, so long as the files are small.
For large files there is an alternative path that bypasses the Spring DispatcherServlet (to avoid multipart processing) in "/zuul/*".
In other words, if you have zuul.routes.customers=/customers/**, then you can POST large files to /zuul/customers/*.
The servlet path is externalized via zuul.servletPath.
If the proxy route takes you through a Ribbon load balancer, extremely large files also require elevated timeout settings, as shown in the following example:
application.yml.
hystrix.command.default.execution.isolation.thread.timeoutInMilliseconds: 60000
ribbon:
  ConnectTimeout: 3000
  ReadTimeout: 60000
Note that, for streaming to work with large files, you need to use chunked encoding in the request (which some browsers do not do by default), as shown in the following example:
$ curl -v -H "Transfer-Encoding: chunked" \
    -F "[email protected]" localhost:9999/zuul/simple/file
When processing the incoming request, query params are decoded so that they can be available for possible modifications in Zuul filters.
They are then re-encoded the back end request is rebuilt in the route filters.
The result can be different than the original input if (for example) it was encoded with Javascript’s encodeURIComponent() method.
While this causes no issues in most cases, some web servers can be picky with the encoding of complex query string.
To force the original encoding of the query string, it is possible to pass a special flag to ZuulProperties so that the query string is taken as is with the HttpServletRequest::getQueryString method, as shown in the following example:
application.yml.
 zuul:
  forceOriginalQueryStringEncoding: true
| Note |
|---|---|
This special flag works only with |
When processing the incoming request, request URI is decoded before matching them to routes. The request URI is then re-encoded when the back end request is rebuilt in the route filters. This can cause some unexpected behavior if your URI includes the encoded "/" character.
To use the original request URI, it is possible to pass a special flag to 'ZuulProperties' so that the URI will be taken as is with the HttpServletRequest::getRequestURI method, as shown in the following example:
application.yml.
 zuul:
  decodeUrl: false
| Note |
|---|---|
If you are overriding request URI using |
If you use @EnableZuulServer (instead of @EnableZuulProxy), you can also run a Zuul server without proxying or selectively switch on parts of the proxying platform.
Any beans that you add to the application of type ZuulFilter are installed automatically (as they are with @EnableZuulProxy) but without any of the proxy filters being added automatically.
In that case, the routes into the Zuul server are still specified by configuring "zuul.routes.*", but there is no service discovery and no proxying. Consequently, the "serviceId" and "url" settings are ignored. The following example maps all paths in "/api/**" to the Zuul filter chain:
application.yml.
 zuul:
  routes:
    api: /api/**
Zuul for Spring Cloud comes with a number of ZuulFilter beans enabled by default in both proxy and server mode.
See the Zuul filters package for the list of filters that you can enable.
If you want to disable one, set zuul.<SimpleClassName>.<filterType>.disable=true.
By convention, the package after filters is the Zuul filter type.
For example to disable org.springframework.cloud.netflix.zuul.filters.post.SendResponseFilter, set zuul.SendResponseFilter.post.disable=true.
When a circuit for a given route in Zuul is tripped, you can provide a fallback response by creating a bean of type FallbackProvider.
Within this bean, you need to specify the route ID the fallback is for and provide a ClientHttpResponse to return as a fallback.
The following example shows a relatively simple FallbackProvider implementation:
class MyFallbackProvider implements FallbackProvider {

    @Override
    public String getRoute() {
        return "customers";
    }

    @Override
    public ClientHttpResponse fallbackResponse(String route, final Throwable cause) {
        if (cause instanceof HystrixTimeoutException) {
            return response(HttpStatus.GATEWAY_TIMEOUT);
        } else {
            return response(HttpStatus.INTERNAL_SERVER_ERROR);
        }
    }

    private ClientHttpResponse response(final HttpStatus status) {
        return new ClientHttpResponse() {
            @Override
            public HttpStatus getStatusCode() throws IOException {
                return status;
            }

            @Override
            public int getRawStatusCode() throws IOException {
                return status.value();
            }

            @Override
            public String getStatusText() throws IOException {
                return status.getReasonPhrase();
            }

            @Override
            public void close() {
            }

            @Override
            public InputStream getBody() throws IOException {
                return new ByteArrayInputStream("fallback".getBytes());
            }

            @Override
            public HttpHeaders getHeaders() {
                HttpHeaders headers = new HttpHeaders();
                headers.setContentType(MediaType.APPLICATION_JSON);
                return headers;
            }
        };
    }
}
The following example shows how the route configuration for the previous example might appear:
zuul:
  routes:
    customers: /customers/**
If you would like to provide a default fallback for all routes, you can create a bean of type FallbackProvider and have the getRoute method return * or null, as shown in the following example:
class MyFallbackProvider implements FallbackProvider {
    @Override
    public String getRoute() {
        return "*";
    }

    @Override
    public ClientHttpResponse fallbackResponse(String route, Throwable throwable) {
        return new ClientHttpResponse() {
            @Override
            public HttpStatus getStatusCode() throws IOException {
                return HttpStatus.OK;
            }

            @Override
            public int getRawStatusCode() throws IOException {
                return 200;
            }

            @Override
            public String getStatusText() throws IOException {
                return "OK";
            }

            @Override
            public void close() {

            }

            @Override
            public InputStream getBody() throws IOException {
                return new ByteArrayInputStream("fallback".getBytes());
            }

            @Override
            public HttpHeaders getHeaders() {
                HttpHeaders headers = new HttpHeaders();
                headers.setContentType(MediaType.APPLICATION_JSON);
                return headers;
            }
        };
    }
}
If you want to configure the socket timeouts and read timeouts for requests proxied through Zuul, you have two options, based on your configuration:
- If Zuul uses service discovery, you need to configure these timeouts with the
ribbon.ReadTimeoutandribbon.SocketTimeoutRibbon properties.
If you have configured Zuul routes by specifying URLs, you need to use
zuul.host.connect-timeout-millis and zuul.host.socket-timeout-millis.
If Zuul is fronting a web application, you may need to re-write the Location header when the web application redirects through a HTTP status code of 3XX.
Otherwise, the browser redirects to the web application’s URL instead of the Zuul URL.
You can configure a LocationRewriteFilter Zuul filter to re-write the Location header to the Zuul’s URL.
It also adds back the stripped global and route-specific prefixes.
The following example adds a filter by using a Spring Configuration file:
import org.springframework.cloud.netflix.zuul.filters.post.LocationRewriteFilter;
...

@Configuration
@EnableZuulProxy
public class ZuulConfig {
    @Bean
    public LocationRewriteFilter locationRewriteFilter() {
        return new LocationRewriteFilter();
    }
}
| Caution |
|---|---|
Use this filter carefully. The filter acts on the |
By default Zuul routes all Cross Origin requests (CORS) to the services. If you want instead Zuul to handle these requests it can be done by providing custom WebMvcConfigurer bean:
@Bean
public WebMvcConfigurer corsConfigurer() {
    return new WebMvcConfigurer() {
        public void addCorsMappings(CorsRegistry registry) {
            registry.addMapping("/path-1/**")
                    .allowedOrigins("http://allowed-origin.com")
                    .allowedMethods("GET", "POST");
        }
    };
}
In the example above, we allow GET and POST methods from http://allowed-origin.com to send cross-origin requests to the endpoints starting with path-1.
You can apply CORS configuration to a specific path pattern or globally for the whole application, using /** mapping.
You can customize properties: allowedOrigins,allowedMethods,allowedHeaders,exposedHeaders,allowCredentials and maxAge via this configuration.
Zuul will provide metrics under the Actuator metrics endpoint for any failures that might occur when routing requests.
These metrics can be viewed by hitting /actuator/metrics. The metrics will have a name that has the format
ZUUL::EXCEPTION:errorCause:statusCode.
For a general overview of how Zuul works, see the Zuul Wiki.
Zuul is implemented as a Servlet. For the general cases, Zuul is embedded into the Spring Dispatch mechanism. This lets Spring MVC be in control of the routing.
In this case, Zuul buffers requests.
If there is a need to go through Zuul without buffering requests (for example, for large file uploads), the Servlet is also installed outside of the Spring Dispatcher.
By default, the servlet has an address of /zuul.
This path can be changed with the zuul.servlet-path property.
To pass information between filters, Zuul uses a RequestContext.
Its data is held in a ThreadLocal specific to each request.
Information about where to route requests, errors, and the actual HttpServletRequest and HttpServletResponse are stored there.
The RequestContext extends ConcurrentHashMap, so anything can be stored in the context. FilterConstants contains the keys used by the filters installed by Spring Cloud Netflix (more on these later).
Spring Cloud Netflix installs a number of filters, depending on which annotation was used to enable Zuul. @EnableZuulProxy is a superset of @EnableZuulServer. In other words, @EnableZuulProxy contains all the filters installed by @EnableZuulServer. The additional filters in the “proxy” enable routing functionality. If you want a “blank” Zuul, you should use @EnableZuulServer.
@EnableZuulServer creates a SimpleRouteLocator that loads route definitions from Spring Boot configuration files.
The following filters are installed (as normal Spring Beans):
Pre filters:
ServletDetectionFilter: Detects whether the request is through the Spring Dispatcher. Sets a boolean with a key ofFilterConstants.IS_DISPATCHER_SERVLET_REQUEST_KEY.FormBodyWrapperFilter: Parses form data and re-encodes it for downstream requests.DebugFilter: If thedebugrequest parameter is set, setsRequestContext.setDebugRouting()andRequestContext.setDebugRequest()totrue. *Route filters:SendForwardFilter: Forwards requests by using the ServletRequestDispatcher. The forwarding location is stored in theRequestContextattribute,FilterConstants.FORWARD_TO_KEY. This is useful for forwarding to endpoints in the current application.
Post filters:
SendResponseFilter: Writes responses from proxied requests to the current response.
Error filters:
SendErrorFilter: Forwards to/error(by default) ifRequestContext.getThrowable()is not null. You can change the default forwarding path (/error) by setting theerror.pathproperty.
Creates a DiscoveryClientRouteLocator that loads route definitions from a DiscoveryClient (such as Eureka) as well as from properties. A route is created for each serviceId from the DiscoveryClient. As new services are added, the routes are refreshed.
In addition to the filters described earlier, the following filters are installed (as normal Spring Beans):
Pre filters:
PreDecorationFilter: Determines where and how to route, depending on the suppliedRouteLocator. It also sets various proxy-related headers for downstream requests.
Route filters:
RibbonRoutingFilter: Uses Ribbon, Hystrix, and pluggable HTTP clients to send requests. Service IDs are found in theRequestContextattribute,FilterConstants.SERVICE_ID_KEY. This filter can use different HTTP clients:- Apache
HttpClient: The default client. - Squareup
OkHttpClientv3: Enabled by having thecom.squareup.okhttp3:okhttplibrary on the classpath and settingribbon.okhttp.enabled=true. - Netflix Ribbon HTTP client: Enabled by setting
ribbon.restclient.enabled=true. This client has limitations, including that it does not support the PATCH method, but it also has built-in retry.
- Apache
SimpleHostRoutingFilter: Sends requests to predetermined URLs through an Apache HttpClient. URLs are found inRequestContext.getRouteHost().
Most of the following "How to Write" examples below are included Sample Zuul Filters project. There are also examples of manipulating the request or response body in that repository.
This section includes the following examples:
Pre filters set up data in the RequestContext for use in filters downstream.
The main use case is to set information required for route filters.
The following example shows a Zuul pre filter:
public class QueryParamPreFilter extends ZuulFilter {
	@Override
	public int filterOrder() {
		return PRE_DECORATION_FILTER_ORDER - 1; // run before PreDecoration
	}

	@Override
	public String filterType() {
		return PRE_TYPE;
	}

	@Override
	public boolean shouldFilter() {
		RequestContext ctx = RequestContext.getCurrentContext();
		return !ctx.containsKey(FORWARD_TO_KEY) // a filter has already forwarded
				&& !ctx.containsKey(SERVICE_ID_KEY); // a filter has already determined serviceId
	}
    @Override
    public Object run() {
        RequestContext ctx = RequestContext.getCurrentContext();
		HttpServletRequest request = ctx.getRequest();
		if (request.getParameter("sample") != null) {
		    // put the serviceId in `RequestContext`
    		ctx.put(SERVICE_ID_KEY, request.getParameter("foo"));
    	}
        return null;
    }
}
The preceding filter populates SERVICE_ID_KEY from the sample request parameter.
In practice, you should not do that kind of direct mapping. Instead, the service ID should be looked up from the value of sample instead.
Now that SERVICE_ID_KEY is populated, PreDecorationFilter does not run and RibbonRoutingFilter runs.
| Tip |
|---|---|
If you want to route to a full URL, call |
To modify the path to which routing filters forward, set the REQUEST_URI_KEY.
Route filters run after pre filters and make requests to other services. Much of the work here is to translate request and response data to and from the model required by the client. The following example shows a Zuul route filter:
public class OkHttpRoutingFilter extends ZuulFilter {
	@Autowired
	private ProxyRequestHelper helper;

	@Override
	public String filterType() {
		return ROUTE_TYPE;
	}

	@Override
	public int filterOrder() {
		return SIMPLE_HOST_ROUTING_FILTER_ORDER - 1;
	}

	@Override
	public boolean shouldFilter() {
		return RequestContext.getCurrentContext().getRouteHost() != null
				&& RequestContext.getCurrentContext().sendZuulResponse();
	}

    @Override
    public Object run() {
		OkHttpClient httpClient = new OkHttpClient.Builder()
				// customize
				.build();

		RequestContext context = RequestContext.getCurrentContext();
		HttpServletRequest request = context.getRequest();

		String method = request.getMethod();

		String uri = this.helper.buildZuulRequestURI(request);

		Headers.Builder headers = new Headers.Builder();
		Enumeration<String> headerNames = request.getHeaderNames();
		while (headerNames.hasMoreElements()) {
			String name = headerNames.nextElement();
			Enumeration<String> values = request.getHeaders(name);

			while (values.hasMoreElements()) {
				String value = values.nextElement();
				headers.add(name, value);
			}
		}

		InputStream inputStream = request.getInputStream();

		RequestBody requestBody = null;
		if (inputStream != null && HttpMethod.permitsRequestBody(method)) {
			MediaType mediaType = null;
			if (headers.get("Content-Type") != null) {
				mediaType = MediaType.parse(headers.get("Content-Type"));
			}
			requestBody = RequestBody.create(mediaType, StreamUtils.copyToByteArray(inputStream));
		}

		Request.Builder builder = new Request.Builder()
				.headers(headers.build())
				.url(uri)
				.method(method, requestBody);

		Response response = httpClient.newCall(builder.build()).execute();

		LinkedMultiValueMap<String, String> responseHeaders = new LinkedMultiValueMap<>();

		for (Map.Entry<String, List<String>> entry : response.headers().toMultimap().entrySet()) {
			responseHeaders.put(entry.getKey(), entry.getValue());
		}

		this.helper.setResponse(response.code(), response.body().byteStream(),
				responseHeaders);
		context.setRouteHost(null); // prevent SimpleHostRoutingFilter from running
		return null;
    }
}
The preceding filter translates Servlet request information into OkHttp3 request information, executes an HTTP request, and translates OkHttp3 response information to the Servlet response.
Post filters typically manipulate the response. The following filter adds a random UUID as the X-Sample header:
public class AddResponseHeaderFilter extends ZuulFilter {
	@Override
	public String filterType() {
		return POST_TYPE;
	}

	@Override
	public int filterOrder() {
		return SEND_RESPONSE_FILTER_ORDER - 1;
	}

	@Override
	public boolean shouldFilter() {
		return true;
	}

	@Override
	public Object run() {
		RequestContext context = RequestContext.getCurrentContext();
    	HttpServletResponse servletResponse = context.getResponse();
		servletResponse.addHeader("X-Sample", UUID.randomUUID().toString());
		return null;
	}
}
| Note |
|---|---|
Other manipulations, such as transforming the response body, are much more complex and computationally intensive. |
If an exception is thrown during any portion of the Zuul filter lifecycle, the error filters are executed.
The SendErrorFilter is only run if RequestContext.getThrowable() is not null.
It then sets specific javax.servlet.error.* attributes in the request and forwards the request to the Spring Boot error page.
Zuul internally uses Ribbon for calling the remote URLs. By default, Ribbon clients are lazily loaded by Spring Cloud on first call. This behavior can be changed for Zuul by using the following configuration, which results eager loading of the child Ribbon related Application contexts at application startup time. The following example shows how to enable eager loading:
application.yml.
zuul:
  ribbon:
    eager-load:
      enabled: true
Do you have non-JVM languages with which you want to take advantage of Eureka, Ribbon, and Config Server? The Spring Cloud Netflix Sidecar was inspired by Netflix Prana. It includes an HTTP API to get all of the instances (by host and port) for a given service. You can also proxy service calls through an embedded Zuul proxy that gets its route entries from Eureka. The Spring Cloud Config Server can be accessed directly through host lookup or through the Zuul Proxy. The non-JVM application should implement a health check so the Sidecar can report to Eureka whether the app is up or down.
To include Sidecar in your project, use the dependency with a group ID of org.springframework.cloud
and artifact ID or spring-cloud-netflix-sidecar.
To enable the Sidecar, create a Spring Boot application with @EnableSidecar.
This annotation includes @EnableCircuitBreaker, @EnableDiscoveryClient, and @EnableZuulProxy.
Run the resulting application on the same host as the non-JVM application.
To configure the side car, add sidecar.port and sidecar.health-uri to application.yml.
The sidecar.port property is the port on which the non-JVM application listens.
This is so the Sidecar can properly register the application with Eureka.
The sidecar.secure-port-enabled options provides a way to enable secure port for traffic.
The sidecar.health-uri is a URI accessible on the non-JVM application that mimics a Spring Boot health indicator.
It should return a JSON document that resembles the following:
health-uri-document.
{
  "status":"UP"
}
The following application.yml example shows sample configuration for a Sidecar application:
application.yml.
server:
  port: 5678
spring:
  application:
    name: sidecar

sidecar:
  port: 8000
  health-uri: http://localhost:8000/health.json
The API for the DiscoveryClient.getInstances() method is /hosts/{serviceId}.
The following example response for /hosts/customers returns two instances on different hosts:
/hosts/customers.
[
    {
        "host": "myhost",
        "port": 9000,
        "uri": "http://myhost:9000",
        "serviceId": "CUSTOMERS",
        "secure": false
    },
    {
        "host": "myhost2",
        "port": 9000,
        "uri": "http://myhost2:9000",
        "serviceId": "CUSTOMERS",
        "secure": false
    }
]
This API is accessible to the non-JVM application (if the sidecar is on port 5678) at http://localhost:5678/hosts/{serviceId}.
The Zuul proxy automatically adds routes for each service known in Eureka to /<serviceId>, so the customers service is available at /customers.
The non-JVM application can access the customer service at http://localhost:5678/customers (assuming the sidecar is listening on port 5678).
If the Config Server is registered with Eureka, the non-JVM application can access it through the Zuul proxy.
If the serviceId of the ConfigServer is configserver and the Sidecar is on port 5678, then it can be accessed at http://localhost:5678/configserver.
Non-JVM applications can take advantage of the Config Server’s ability to return YAML documents. For example, a call to http://sidecar.local.spring.io:5678/configserver/default-master.yml might result in a YAML document resembling the following:
eureka:
  client:
    serviceUrl:
      defaultZone: http://localhost:8761/eureka/
  password: password
info:
  description: Spring Cloud Samples
  url: https://github.com/spring-cloud-samples
To enable the health check request to accept all certificates when using HTTPs set sidecar.accept-all-ssl-certificates to `true.
Spring Cloud Netflix offers a variety of ways to make HTTP requests.
You can use a load balanced RestTemplate, Ribbon, or Feign.
No matter how you choose to create your HTTP requests, there is always a chance that a request may fail.
When a request fails, you may want to have the request be retried automatically.
To do so when using Sping Cloud Netflix, you need to include Spring Retry on your application’s classpath.
When Spring Retry is present, load-balanced RestTemplates, Feign, and Zuul automatically retry any failed requests (assuming your configuration allows doing so).
By default, no backoff policy is used when retrying requests.
If you would like to configure a backoff policy, you need to create a bean of type LoadBalancedRetryFactory and override the createBackOffPolicy method for a given service, as shown in the following example:
@Configuration
public class MyConfiguration {
    @Bean
    LoadBalancedRetryFactory retryFactory() {
        return new LoadBalancedRetryFactory() {
            @Override
            public BackOffPolicy createBackOffPolicy(String service) {
                return new ExponentialBackOffPolicy();
            }
        };
    }
}
When you use Ribbon with Spring Retry, you can control the retry functionality by configuring certain Ribbon properties.
To do so, set the client.ribbon.MaxAutoRetries, client.ribbon.MaxAutoRetriesNextServer, and client.ribbon.OkToRetryOnAllOperations properties.
See the Ribbon documentation for a description of what these properties do.
| Warning |
|---|---|
Enabling |
In addition, you may want to retry requests when certain status codes are returned in the response.
You can list the response codes you would like the Ribbon client to retry by setting the clientName.ribbon.retryableStatusCodes property, as shown in the following example:
clientName:
  ribbon:
    retryableStatusCodes: 404,502
You can also create a bean of type LoadBalancedRetryPolicy and implement the retryableStatusCode method to retry a request given the status code.
Spring Cloud Netflix automatically creates the HTTP client used by Ribbon, Feign, and Zuul for you.
However, you can also provide your own HTTP clients customized as you need them to be.
To do so, you can create a bean of type ClosableHttpClient if you
are using the Apache Http Cient or OkHttpClient if you are using OK HTTP.
| Note |
|---|---|
When you create your own HTTP client, you are also responsible for implementing the correct connection management strategies for these clients. Doing so improperly can result in resource management issues. |
Placing a module in maintenance mode means that the Spring Cloud team will no longer be adding new features to the module. We will fix blocker bugs and security issues, and we will also consider and review small pull requests from the community.
We intend to continue to support these modules for a period of at least a year from the general availability of the Greenwich release train.
The following Spring Cloud Netflix modules and corresponding starters will be placed into maintenance mode:
- spring-cloud-netflix-archaius
- spring-cloud-netflix-hystrix-contract
- spring-cloud-netflix-hystrix-dashboard
- spring-cloud-netflix-hystrix-stream
- spring-cloud-netflix-hystrix
- spring-cloud-netflix-ribbon
- spring-cloud-netflix-turbine-stream
- spring-cloud-netflix-turbine
- spring-cloud-netflix-zuul
| Note |
|---|---|
This does not include the Eureka or concurrency-limits modules. |
1.0.0.BUILD-SNAPSHOT
This project provides OpenFeign integrations for Spring Boot apps through autoconfiguration and binding to the Spring Environment and other Spring programming model idioms.
Feign is a declarative web service client. It makes writing web service clients easier. To use Feign create an interface and annotate it. It has pluggable annotation support including Feign annotations and JAX-RS annotations. Feign also supports pluggable encoders and decoders. Spring Cloud adds support for Spring MVC annotations and for using the same HttpMessageConverters used by default in Spring Web. Spring Cloud integrates Ribbon and Eureka to provide a load balanced http client when using Feign.
To include Feign in your project use the starter with group org.springframework.cloud
and artifact id spring-cloud-starter-openfeign. See the Spring Cloud Project page
for details on setting up your build system with the current Spring Cloud Release Train.
Example spring boot app
@SpringBootApplication
@EnableFeignClients
public class Application {

    public static void main(String[] args) {
        SpringApplication.run(Application.class, args);
    }

}
StoreClient.java.
@FeignClient("stores")
public interface StoreClient {
    @RequestMapping(method = RequestMethod.GET, value = "/stores")
    List<Store> getStores();

    @RequestMapping(method = RequestMethod.POST, value = "/stores/{storeId}", consumes = "application/json")
    Store update(@PathVariable("storeId") Long storeId, Store store);
}
In the @FeignClient annotation the String value ("stores" above) is
an arbitrary client name, which is used to create a Ribbon load
balancer (see below for details of Ribbon
support). You can also specify a URL using the url attribute
(absolute value or just a hostname). The name of the bean in the
application context is the fully qualified name of the interface.
To specify your own alias value you can use the qualifier value
of the @FeignClient annotation.
The Ribbon client above will want to discover the physical addresses for the "stores" service. If your application is a Eureka client then it will resolve the service in the Eureka service registry. If you don’t want to use Eureka, you can simply configure a list of servers in your external configuration (see above for example).
A central concept in Spring Cloud’s Feign support is that of the named client. Each feign client is part of an ensemble of components that work together to contact a remote server on demand, and the ensemble has a name that you give it as an application developer using the @FeignClient annotation. Spring Cloud creates a new ensemble as an
ApplicationContext on demand for each named client using FeignClientsConfiguration. This contains (amongst other things) an feign.Decoder, a feign.Encoder, and a feign.Contract.
It is possible to override the name of that ensemble by using the contextId
attribute of the @FeignClient annotation.
Spring Cloud lets you take full control of the feign client by declaring additional configuration (on top of the FeignClientsConfiguration) using @FeignClient. Example:
@FeignClient(name = "stores", configuration = FooConfiguration.class)
public interface StoreClient {
    //..
}
In this case the client is composed from the components already in FeignClientsConfiguration together with any in FooConfiguration (where the latter will override the former).
| Note |
|---|---|
|
| Note |
|---|---|
The |
| Note |
|---|---|
Using |
| Warning |
|---|---|
Previously, using the |
Placeholders are supported in the name and url attributes.
@FeignClient(name = "${feign.name}", url = "${feign.url}")
public interface StoreClient {
    //..
}
Spring Cloud Netflix provides the following beans by default for feign (BeanType beanName: ClassName):
DecoderfeignDecoder:ResponseEntityDecoder(which wraps aSpringDecoder)EncoderfeignEncoder:SpringEncoderLoggerfeignLogger:Slf4jLoggerContractfeignContract:SpringMvcContractFeign.BuilderfeignBuilder:HystrixFeign.BuilderClientfeignClient: if Ribbon is enabled it is aLoadBalancerFeignClient, otherwise the default feign client is used.
The OkHttpClient and ApacheHttpClient feign clients can be used by setting feign.okhttp.enabled or feign.httpclient.enabled to true, respectively, and having them on the classpath.
You can customize the HTTP client used by providing a bean of either ClosableHttpClient when using Apache or OkHttpClient when using OK HTTP.
Spring Cloud Netflix does not provide the following beans by default for feign, but still looks up beans of these types from the application context to create the feign client:
Logger.LevelRetryerErrorDecoderRequest.OptionsCollection<RequestInterceptor>SetterFactory
Creating a bean of one of those type and placing it in a @FeignClient configuration (such as FooConfiguration above) allows you to override each one of the beans described. Example:
@Configuration
public class FooConfiguration {
    @Bean
    public Contract feignContract() {
        return new feign.Contract.Default();
    }

    @Bean
    public BasicAuthRequestInterceptor basicAuthRequestInterceptor() {
        return new BasicAuthRequestInterceptor("user", "password");
    }
}
This replaces the SpringMvcContract with feign.Contract.Default and adds a RequestInterceptor to the collection of RequestInterceptor.
@FeignClient also can be configured using configuration properties.
application.yml
feign:
  client:
    config:
      feignName:
        connectTimeout: 5000
        readTimeout: 5000
        loggerLevel: full
        errorDecoder: com.example.SimpleErrorDecoder
        retryer: com.example.SimpleRetryer
        requestInterceptors:
          - com.example.FooRequestInterceptor
          - com.example.BarRequestInterceptor
        decode404: false
        encoder: com.example.SimpleEncoder
        decoder: com.example.SimpleDecoder
        contract: com.example.SimpleContract
Default configurations can be specified in the @EnableFeignClients attribute defaultConfiguration in a similar manner as described above. The difference is that this configuration will apply to all feign clients.
If you prefer using configuration properties to configured all @FeignClient, you can create configuration properties with default feign name.
application.yml
feign:
  client:
    config:
      default:
        connectTimeout: 5000
        readTimeout: 5000
        loggerLevel: basic
If we create both @Configuration bean and configuration properties, configuration properties will win.
It will override @Configuration values. But if you want to change the priority to @Configuration,
you can change feign.client.default-to-properties to false.
| Note |
|---|---|
If you need to use |
application.yml
# To disable Hystrix in Feign
feign:
  hystrix:
    enabled: false

# To set thread isolation to SEMAPHORE
hystrix:
  command:
    default:
      execution:
        isolation:
          strategy: SEMAPHORE
If we want to create multiple feign clients with the same name or url
so that they would point to the same server but each with a different custom configuration then
we have to use contextId attribute of the @FeignClient in order to avoid name
collision of these configuration beans.
@FeignClient(contextId = "fooClient", name = "stores", configuration = FooConfiguration.class)
public interface FooClient {
    //..
}
@FeignClient(contextId = "barClient", name = "stores", configuration = BarConfiguration.class)
public interface BarClient {
    //..
}
In some cases it might be necessary to customize your Feign Clients in a way that is not possible using the methods above. In this case you can create Clients using the Feign Builder API. Below is an example which creates two Feign Clients with the same interface but configures each one with a separate request interceptor.
@Import(FeignClientsConfiguration.class)
class FooController {

	private FooClient fooClient;

	private FooClient adminClient;

    	@Autowired
	public FooController(Decoder decoder, Encoder encoder, Client client, Contract contract) {
		this.fooClient = Feign.builder().client(client)
				.encoder(encoder)
				.decoder(decoder)
				.contract(contract)
				.requestInterceptor(new BasicAuthRequestInterceptor("user", "user"))
				.target(FooClient.class, "http://PROD-SVC");

		this.adminClient = Feign.builder().client(client)
				.encoder(encoder)
				.decoder(decoder)
				.contract(contract)
				.requestInterceptor(new BasicAuthRequestInterceptor("admin", "admin"))
				.target(FooClient.class, "http://PROD-SVC");
    }
}
| Note |
|---|---|
In the above example |
| Note |
|---|---|
|
| Note |
|---|---|
The Feign |
If Hystrix is on the classpath and feign.hystrix.enabled=true, Feign will wrap all methods with a circuit breaker. Returning a com.netflix.hystrix.HystrixCommand is also available. This lets you use reactive patterns (with a call to .toObservable() or .observe() or asynchronous use (with a call to .queue()).
To disable Hystrix support on a per-client basis create a vanilla Feign.Builder with the "prototype" scope, e.g.:
@Configuration
public class FooConfiguration {
    	@Bean
	@Scope("prototype")
	public Feign.Builder feignBuilder() {
		return Feign.builder();
	}
}
| Warning |
|---|---|
Prior to the Spring Cloud Dalston release, if Hystrix was on the classpath Feign would have wrapped all methods in a circuit breaker by default. This default behavior was changed in Spring Cloud Dalston in favor for an opt-in approach. |
Hystrix supports the notion of a fallback: a default code path that is executed when they circuit is open or there is an error. To enable fallbacks for a given @FeignClient set the fallback attribute to the class name that implements the fallback. You also need to declare your implementation as a Spring bean.
@FeignClient(name = "hello", fallback = HystrixClientFallback.class)
protected interface HystrixClient {
    @RequestMapping(method = RequestMethod.GET, value = "/hello")
    Hello iFailSometimes();
}

static class HystrixClientFallback implements HystrixClient {
    @Override
    public Hello iFailSometimes() {
        return new Hello("fallback");
    }
}
If one needs access to the cause that made the fallback trigger, one can use the fallbackFactory attribute inside @FeignClient.
@FeignClient(name = "hello", fallbackFactory = HystrixClientFallbackFactory.class)
protected interface HystrixClient {
	@RequestMapping(method = RequestMethod.GET, value = "/hello")
	Hello iFailSometimes();
}

@Component
static class HystrixClientFallbackFactory implements FallbackFactory<HystrixClient> {
	@Override
	public HystrixClient create(Throwable cause) {
		return new HystrixClient() {
			@Override
			public Hello iFailSometimes() {
				return new Hello("fallback; reason was: " + cause.getMessage());
			}
		};
	}
}
| Warning |
|---|---|
There is a limitation with the implementation of fallbacks in Feign and how Hystrix fallbacks work. Fallbacks are currently not supported for methods that return |
When using Feign with Hystrix fallbacks, there are multiple beans in the ApplicationContext of the same type. This will cause @Autowired to not work because there isn’t exactly one bean, or one marked as primary. To work around this, Spring Cloud Netflix marks all Feign instances as @Primary, so Spring Framework will know which bean to inject. In some cases, this may not be desirable. To turn off this behavior set the primary attribute of @FeignClient to false.
@FeignClient(name = "hello", primary = false)
public interface HelloClient {
	// methods here
}
Feign supports boilerplate apis via single-inheritance interfaces. This allows grouping common operations into convenient base interfaces.
UserService.java.
public interface UserService {

    @RequestMapping(method = RequestMethod.GET, value ="/users/{id}")
    User getUser(@PathVariable("id") long id);
}
UserResource.java.
@RestController
public class UserResource implements UserService {

}
UserClient.java.
package project.user;

@FeignClient("users")
public interface UserClient extends UserService {

}
| Note |
|---|---|
It is generally not advisable to share an interface between a server and a client. It introduces tight coupling, and also actually doesn’t work with Spring MVC in its current form (method parameter mapping is not inherited). |
You may consider enabling the request or response GZIP compression for your Feign requests. You can do this by enabling one of the properties:
feign.compression.request.enabled=true
feign.compression.response.enabled=true
Feign request compression gives you settings similar to what you may set for your web server:
feign.compression.request.enabled=true
feign.compression.request.mime-types=text/xml,application/xml,application/json
feign.compression.request.min-request-size=2048
These properties allow you to be selective about the compressed media types and minimum request threshold length.
A logger is created for each Feign client created. By default the name of the logger is the full class name of the interface used to create the Feign client. Feign logging only responds to the DEBUG level.
application.yml.
logging.level.project.user.UserClient: DEBUG
The Logger.Level object that you may configure per client, tells Feign how much to log. Choices are:
NONE, No logging (DEFAULT).BASIC, Log only the request method and URL and the response status code and execution time.HEADERS, Log the basic information along with request and response headers.FULL, Log the headers, body, and metadata for both requests and responses.
For example, the following would set the Logger.Level to FULL:
@Configuration
public class FooConfiguration {
    @Bean
    Logger.Level feignLoggerLevel() {
        return Logger.Level.FULL;
    }
}
The OpenFeign @QueryMap annotation provides support for POJOs to be used as
GET parameter maps. Unfortunately, the default OpenFeign QueryMap annotation is
incompatible with Spring because it lacks a value property.
Spring Cloud OpenFeign provides an equivalent @SpringQueryMap annotation, which
is used to annotate a POJO or Map parameter as a query parameter map.
For example, the Params class defines parameters param1 and param2:
// Params.java
public class Params {
    private String param1;
    private String param2;

    // [Getters and setters omitted for brevity]
}
The following feign client uses the Params class by using the @SpringQueryMap annotation:
@FeignClient("demo")
public class DemoTemplate {

    @GetMapping(path = "/demo")
    String demoEndpoint(@SpringQueryMap Params params);
}
Spring’s journey on Data Integration started with Spring Integration. With its programming model, it provided a consistent developer experience to build applications that can embrace Enterprise Integration Patterns to connect with external systems such as, databases, message brokers, and among others.
Fast forward to the cloud-era, where microservices have become prominent in the enterprise setting. Spring Boot transformed the way how developers built Applications. With Spring’s programming model and the runtime responsibilities handled by Spring Boot, it became seamless to develop stand-alone, production-grade Spring-based microservices.
To extend this to Data Integration workloads, Spring Integration and Spring Boot were put together into a new project. Spring Cloud Stream was born.
With Spring Cloud Stream, developers can: * Build, test, iterate, and deploy data-centric applications in isolation. * Apply modern microservices architecture patterns, including composition through messaging. * Decouple application responsibilities with event-centric thinking. An event can represent something that has happened in time, to which the downstream consumer applications can react without knowing where it originated or the producer’s identity. * Port the business logic onto message brokers (such as RabbitMQ, Apache Kafka, Amazon Kinesis). * Interoperate between channel-based and non-channel-based application binding scenarios to support stateless and stateful computations by using Project Reactor’s Flux and Kafka Streams APIs. * Rely on the framework’s automatic content-type support for common use-cases. Extending to different data conversion types is possible.
You can try Spring Cloud Stream in less then 5 min even before you jump into any details by following this three-step guide.
We show you how to create a Spring Cloud Stream application that receives messages coming from the messaging middleware of your choice (more on this later) and logs received messages to the console.
We call it LoggingConsumer.
While not very practical, it provides a good introduction to some of the main concepts
and abstractions, making it easier to digest the rest of this user guide.
The three steps are as follows:
To get started, visit the Spring Initializr. From there, you can generate our LoggingConsumer application. To do so:
- In the Dependencies section, start typing
stream. When the “Cloud Stream” option should appears, select it. - Start typing either 'kafka' or 'rabbit'.
Select “Kafka” or “RabbitMQ”.
Basically, you choose the messaging middleware to which your application binds. We recommend using the one you have already installed or feel more comfortable with installing and running. Also, as you can see from the Initilaizer screen, there are a few other options you can choose. For example, you can choose Gradle as your build tool instead of Maven (the default).
In the Artifact field, type 'logging-consumer'.
The value of the Artifact field becomes the application name. If you chose RabbitMQ for the middleware, your Spring Initializr should now be as follows:

Click the Generate Project button.
Doing so downloads the zipped version of the generated project to your hard drive.
- Unzip the file into the folder you want to use as your project directory.
| Tip |
|---|---|
We encourage you to explore the many possibilities available in the Spring Initializr. It lets you create many different kinds of Spring applications. |
Now you can import the project into your IDE. Keep in mind that, depending on the IDE, you may need to follow a specific import procedure. For example, depending on how the project was generated (Maven or Gradle), you may need to follow specific import procedure (for example, in Eclipse or STS, you need to use File → Import → Maven → Existing Maven Project).
Once imported, the project must have no errors of any kind. Also, src/main/java should contain com.example.loggingconsumer.LoggingConsumerApplication.
Technically, at this point, you can run the application’s main class. It is already a valid Spring Boot application. However, it does not do anything, so we want to add some code.
Modify the com.example.loggingconsumer.LoggingConsumerApplication class to look as follows:
@SpringBootApplication
@EnableBinding(Sink.class)
public class LoggingConsumerApplication {

	public static void main(String[] args) {
		SpringApplication.run(LoggingConsumerApplication.class, args);
	}

	@StreamListener(Sink.INPUT)
	public void handle(Person person) {
		System.out.println("Received: " + person);
	}

	public static class Person {
		private String name;
		public String getName() {
			return name;
		}
		public void setName(String name) {
			this.name = name;
		}
		public String toString() {
			return this.name;
		}
	}
}
As you can see from the preceding listing:
- We have enabled
Sinkbinding (input-no-output) by using@EnableBinding(Sink.class). Doing so signals to the framework to initiate binding to the messaging middleware, where it automatically creates the destination (that is, queue, topic, and others) that are bound to theSink.INPUTchannel. - We have added a
handlermethod to receive incoming messages of typePerson. Doing so lets you see one of the core features of the framework: It tries to automatically convert incoming message payloads to typePerson.
You now have a fully functional Spring Cloud Stream application that does listens for messages.
From here, for simplicity, we assume you selected RabbitMQ in step one.
Assuming you have RabbitMQ installed and running, you can start the application by running its main method in your IDE.
You should see following output:
	--- [ main] c.s.b.r.p.RabbitExchangeQueueProvisioner : declaring queue for inbound: input.anonymous.CbMIwdkJSBO1ZoPDOtHtCg, bound to: input
	--- [ main] o.s.a.r.c.CachingConnectionFactory       : Attempting to connect to: [localhost:5672]
	--- [ main] o.s.a.r.c.CachingConnectionFactory       : Created new connection: rabbitConnectionFactory#2a3a299:0/SimpleConnection@66c83fc8. . .
	. . .
	--- [ main] o.s.i.a.i.AmqpInboundChannelAdapter      : started inbound.input.anonymous.CbMIwdkJSBO1ZoPDOtHtCg
	. . .
	--- [ main] c.e.l.LoggingConsumerApplication         : Started LoggingConsumerApplication in 2.531 seconds (JVM running for 2.897)
Go to the RabbitMQ management console or any other RabbitMQ client and send a message to input.anonymous.CbMIwdkJSBO1ZoPDOtHtCg.
The anonymous.CbMIwdkJSBO1ZoPDOtHtCg part represents the group name and is generated, so it is bound to be different in your environment.
For something more predictable, you can use an explicit group name by setting spring.cloud.stream.bindings.input.group=hello (or whatever name you like).
The contents of the message should be a JSON representation of the Person class, as follows:
{"name":"Sam Spade"}Then, in your console, you should see:
Received: Sam Spade
You can also build and package your application into a boot jar (by using ./mvnw clean install) and run the built JAR by using the java -jar command.
Now you have a working (albeit very basic) Spring Cloud Stream application.
Spring Cloud Stream introduces a number of new features, enhancements, and changes. The following sections outline the most notable ones:
- Polling Consumers: Introduction of polled consumers, which lets the application control message processing rates. See “Section 29.3.5, “Using Polled Consumers”” for more details. You can also read this blog post for more details.
- Micrometer Support: Metrics has been switched to use Micrometer.
MeterRegistryis also provided as a bean so that custom applications can autowire it to capture custom metrics. See “Chapter 37, Metrics Emitter” for more details. - New Actuator Binding Controls: New actuator binding controls let you both visualize and control the Bindings lifecycle. For more details, see Section 30.6, “Binding visualization and control”.
- Configurable RetryTemplate: Aside from providing properties to configure
RetryTemplate, we now let you provide your own template, effectively overriding the one provided by the framework. To use it, configure it as a@Beanin your application.
This version includes the following notable enhancements:
This change slims down the footprint of the deployed application in the event neither actuator nor web dependencies required. It also lets you switch between the reactive and conventional web paradigms by manually adding one of the following dependencies.
The following listing shows how to add the conventional web framework:
<dependency>
        <groupId>org.springframework.boot</groupId>
        <artifactId>spring-boot-starter-web</artifactId>
</dependency>
The following listing shows how to add the reactive web framework:
<dependency>
        <groupId>org.springframework.boot</groupId>
        <artifactId>spring-boot-starter-webflux</artifactId>
</dependency>
The following list shows how to add the actuator dependency:
<dependency>
    <groupId>org.springframework.boot</groupId>
    <artifactId>spring-boot-starter-actuator</artifactId>
</dependency>
One of the core themes for verion 2.0 is improvements (in both consistency and performance) around content-type negotiation and message conversion. The following summary outlines the notable changes and improvements in this area. See the “Chapter 32, Content Type Negotiation” section for more details. Also this blog post contains more detail.
- All message conversion is now handled only by
MessageConverterobjects. - We introduced the
@StreamMessageConverterannotation to provide customMessageConverterobjects. - We introduced the default
Content Typeasapplication/json, which needs to be taken into consideration when migrating 1.3 application or operating in the mixed mode (that is, 1.3 producer → 2.0 consumer). - Messages with textual payloads and a
contentTypeoftext/…or…/jsonare no longer converted toMessage<String>for cases where the argument type of the providedMessageHandlercan not be determined (that is,public void handle(Message<?> message)orpublic void handle(Object payload)). Furthermore, a strong argument type may not be enough to properly convert messages, so thecontentTypeheader may be used as a supplement by someMessageConverters.
As of version 2.0, the following items have been deprecated:
JavaSerializationMessageConverter and KryoMessageConverter remain for now. However, we plan to move them out of the core packages and support in the future.
The main reason for this deprecation is to flag the issue that type-based, language-specific serialization could cause in distributed environments, where Producers and Consumers may depend on different JVM versions or have different versions of supporting libraries (that is, Kryo).
We also wanted to draw the attention to the fact that Consumers and Producers may not even be Java-based, so polyglot style serialization (i.e., JSON) is better suited.
The following is a quick summary of notable deprecations. See the corresponding {spring-cloud-stream-javadoc-current}[javadoc] for more details.
SharedChannelRegistry. UseSharedBindingTargetRegistry.Bindings. Beans qualified by it are already uniquely identified by their type — for example, providedSource,Processor, or custom bindings:
public interface Sample {
	String OUTPUT = "sampleOutput";

	@Output(Sample.OUTPUT)
	MessageChannel output();
}HeaderMode.raw. Usenone,headersorembeddedHeadersProducerProperties.partitionKeyExtractorClassin favor ofpartitionKeyExtractorNameandProducerProperties.partitionSelectorClassin favor ofpartitionSelectorName. This change ensures that both components are Spring configured and managed and are referenced in a Spring-friendly way.BinderAwareRouterBeanPostProcessor. While the component remains, it is no longer aBeanPostProcessorand will be renamed in the future.BinderProperties.setEnvironment(Properties environment). UseBinderProperties.setEnvironment(Map<String, Object> environment).
This section goes into more detail about how you can work with Spring Cloud Stream. It covers topics such as creating and running stream applications.
Spring Cloud Stream is a framework for building message-driven microservice applications. Spring Cloud Stream builds upon Spring Boot to create standalone, production-grade Spring applications and uses Spring Integration to provide connectivity to message brokers. It provides opinionated configuration of middleware from several vendors, introducing the concepts of persistent publish-subscribe semantics, consumer groups, and partitions.
You can add the @EnableBinding annotation to your application to get immediate connectivity to a message broker, and you can add @StreamListener to a method to cause it to receive events for stream processing.
The following example shows a sink application that receives external messages:
@SpringBootApplication
@EnableBinding(Sink.class)
public class VoteRecordingSinkApplication {

  public static void main(String[] args) {
    SpringApplication.run(VoteRecordingSinkApplication.class, args);
  }

  @StreamListener(Sink.INPUT)
  public void processVote(Vote vote) {
      votingService.recordVote(vote);
  }
}
The @EnableBinding annotation takes one or more interfaces as parameters (in this case, the parameter is a single Sink interface).
An interface declares input and output channels.
Spring Cloud Stream provides the Source, Sink, and Processor interfaces. You can also define your own interfaces.
The following listing shows the definition of the Sink interface:
public interface Sink {
  String INPUT = "input";

  @Input(Sink.INPUT)
  SubscribableChannel input();
}
The @Input annotation identifies an input channel, through which received messages enter the application.
The @Output annotation identifies an output channel, through which published messages leave the application.
The @Input and @Output annotations can take a channel name as a parameter.
If a name is not provided, the name of the annotated method is used.
Spring Cloud Stream creates an implementation of the interface for you. You can use this in the application by autowiring it, as shown in the following example (from a test case):
@RunWith(SpringJUnit4ClassRunner.class)
@SpringApplicationConfiguration(classes = VoteRecordingSinkApplication.class)
@WebAppConfiguration
@DirtiesContext
public class StreamApplicationTests {

  @Autowired
  private Sink sink;

  @Test
  public void contextLoads() {
    assertNotNull(this.sink.input());
  }
}
Spring Cloud Stream provides a number of abstractions and primitives that simplify the writing of message-driven microservice applications. This section gives an overview of the following:
A Spring Cloud Stream application consists of a middleware-neutral core. The application communicates with the outside world through input and output channels injected into it by Spring Cloud Stream. Channels are connected to external brokers through middleware-specific Binder implementations.

Spring Cloud Stream applications can be run in stand-alone mode from your IDE for testing. To run a Spring Cloud Stream application in production, you can create an executable (or “fat”) JAR by using the standard Spring Boot tooling provided for Maven or Gradle. See the Spring Boot Reference Guide for more details.
Spring Cloud Stream provides Binder implementations for Kafka and Rabbit MQ. Spring Cloud Stream also includes a TestSupportBinder, which leaves a channel unmodified so that tests can interact with channels directly and reliably assert on what is received. You can also use the extensible API to write your own Binder.
Spring Cloud Stream uses Spring Boot for configuration, and the Binder abstraction makes it possible for a Spring Cloud Stream application to be flexible in how it connects to middleware.
For example, deployers can dynamically choose, at runtime, the destinations (such as the Kafka topics or RabbitMQ exchanges) to which channels connect.
Such configuration can be provided through external configuration properties and in any form supported by Spring Boot (including application arguments, environment variables, and application.yml or application.properties files).
In the sink example from the Chapter 27, Introducing Spring Cloud Stream section, setting the spring.cloud.stream.bindings.input.destination application property to raw-sensor-data causes it to read from the raw-sensor-data Kafka topic or from a queue bound to the raw-sensor-data RabbitMQ exchange.
Spring Cloud Stream automatically detects and uses a binder found on the classpath. You can use different types of middleware with the same code. To do so, include a different binder at build time. For more complex use cases, you can also package multiple binders with your application and have it choose the binder( and even whether to use different binders for different channels) at runtime.
Communication between applications follows a publish-subscribe model, where data is broadcast through shared topics. This can be seen in the following figure, which shows a typical deployment for a set of interacting Spring Cloud Stream applications.

Data reported by sensors to an HTTP endpoint is sent to a common destination named raw-sensor-data.
From the destination, it is independently processed by a microservice application that computes time-windowed averages and by another microservice application that ingests the raw data into HDFS (Hadoop Distributed File System).
In order to process the data, both applications declare the topic as their input at runtime.
The publish-subscribe communication model reduces the complexity of both the producer and the consumer and lets new applications be added to the topology without disruption of the existing flow. For example, downstream from the average-calculating application, you can add an application that calculates the highest temperature values for display and monitoring. You can then add another application that interprets the same flow of averages for fault detection. Doing all communication through shared topics rather than point-to-point queues reduces coupling between microservices.
While the concept of publish-subscribe messaging is not new, Spring Cloud Stream takes the extra step of making it an opinionated choice for its application model. By using native middleware support, Spring Cloud Stream also simplifies use of the publish-subscribe model across different platforms.
While the publish-subscribe model makes it easy to connect applications through shared topics, the ability to scale up by creating multiple instances of a given application is equally important. When doing so, different instances of an application are placed in a competing consumer relationship, where only one of the instances is expected to handle a given message.
Spring Cloud Stream models this behavior through the concept of a consumer group.
(Spring Cloud Stream consumer groups are similar to and inspired by Kafka consumer groups.)
Each consumer binding can use the spring.cloud.stream.bindings.<channelName>.group property to specify a group name.
For the consumers shown in the following figure, this property would be set as spring.cloud.stream.bindings.<channelName>.group=hdfsWrite or spring.cloud.stream.bindings.<channelName>.group=average.

All groups that subscribe to a given destination receive a copy of published data, but only one member of each group receives a given message from that destination. By default, when a group is not specified, Spring Cloud Stream assigns the application to an anonymous and independent single-member consumer group that is in a publish-subscribe relationship with all other consumer groups.
Two types of consumer are supported:
- Message-driven (sometimes referred to as Asynchronous)
- Polled (sometimes referred to as Synchronous)
Prior to version 2.0, only asynchronous consumers were supported. A message is delivered as soon as it is available and a thread is available to process it.
When you wish to control the rate at which messages are processed, you might want to use a synchronous consumer.
Consistent with the opinionated application model of Spring Cloud Stream, consumer group subscriptions are durable. That is, a binder implementation ensures that group subscriptions are persistent and that, once at least one subscription for a group has been created, the group receives messages, even if they are sent while all applications in the group are stopped.
| Note |
|---|---|
Anonymous subscriptions are non-durable by nature. For some binder implementations (such as RabbitMQ), it is possible to have non-durable group subscriptions. |
In general, it is preferable to always specify a consumer group when binding an application to a given destination. When scaling up a Spring Cloud Stream application, you must specify a consumer group for each of its input bindings. Doing so prevents the application’s instances from receiving duplicate messages (unless that behavior is desired, which is unusual).
Spring Cloud Stream provides support for partitioning data between multiple instances of a given application. In a partitioned scenario, the physical communication medium (such as the broker topic) is viewed as being structured into multiple partitions. One or more producer application instances send data to multiple consumer application instances and ensure that data identified by common characteristics are processed by the same consumer instance.
Spring Cloud Stream provides a common abstraction for implementing partitioned processing use cases in a uniform fashion. Partitioning can thus be used whether the broker itself is naturally partitioned (for example, Kafka) or not (for example, RabbitMQ).

Partitioning is a critical concept in stateful processing, where it is critical (for either performance or consistency reasons) to ensure that all related data is processed together. For example, in the time-windowed average calculation example, it is important that all measurements from any given sensor are processed by the same application instance.
| Note |
|---|---|
To set up a partitioned processing scenario, you must configure both the data-producing and the data-consuming ends. |
To understand the programming model, you should be familiar with the following core concepts:
- Destination Binders: Components responsible to provide integration with the external messaging systems.
- Destination Bindings: Bridge between the external messaging systems and application provided Producers and Consumers of messages (created by the Destination Binders).
- Message: The canonical data structure used by producers and consumers to communicate with Destination Binders (and thus other applications via external messaging systems).

Destination Binders are extension components of Spring Cloud Stream responsible for providing the necessary configuration and implementation to facilitate integration with external messaging systems. This integration is responsible for connectivity, delegation, and routing of messages to and from producers and consumers, data type conversion, invocation of the user code, and more.
Binders handle a lot of the boiler plate responsibilities that would otherwise fall on your shoulders. However, to accomplish that, the binder still needs some help in the form of minimalistic yet required set of instructions from the user, which typically come in the form of some type of configuration.
While it is out of scope of this section to discuss all of the available binder and binding configuration options (the rest of the manual covers them extensively), Destination Binding does require special attention. The next section discusses it in detail.
As stated earlier, Destination Bindings provide a bridge between the external messaging system and application-provided Producers and Consumers.
Applying the @EnableBinding annotation to one of the application’s configuration classes defines a destination binding.
The @EnableBinding annotation itself is meta-annotated with @Configuration and triggers the configuration of the Spring Cloud Stream infrastructure.
The following example shows a fully configured and functioning Spring Cloud Stream application that receives the payload of the message from the INPUT
destination as a String type (see Chapter 32, Content Type Negotiation section), logs it to the console and sends it to the OUTPUT destination after converting it to upper case.
@SpringBootApplication
@EnableBinding(Processor.class)
public class MyApplication {

	public static void main(String[] args) {
		SpringApplication.run(MyApplication.class, args);
	}

	@StreamListener(Processor.INPUT)
	@SendTo(Processor.OUTPUT)
	public String handle(String value) {
		System.out.println("Received: " + value);
		return value.toUpperCase();
	}
}
As you can see the @EnableBinding annotation can take one or more interface classes as parameters. The parameters are referred to as bindings,
and they contain methods representing bindable components.
These components are typically message channels (see Spring Messaging)
for channel-based binders (such as Rabbit, Kafka, and others). However other types of bindings can
provide support for the native features of the corresponding technology. For example Kafka Streams binder (formerly known as KStream) allows native bindings directly to Kafka Streams
(see Kafka Streams for more details).
Spring Cloud Stream already provides binding interfaces for typical message exchange contracts, which include:
- Sink: Identifies the contract for the message consumer by providing the destination from which the message is consumed.
- Source: Identifies the contract for the message producer by providing the destination to which the produced message is sent.
- Processor: Encapsulates both the sink and the source contracts by exposing two destinations that allow consumption and production of messages.
public interface Sink {

  String INPUT = "input";

  @Input(Sink.INPUT)
  SubscribableChannel input();
}
public interface Source {

  String OUTPUT = "output";

  @Output(Source.OUTPUT)
  MessageChannel output();
}
public interface Processor extends Source, Sink {}
While the preceding example satisfies the majority of cases, you can also define your own contracts by defining your own bindings interfaces and use @Input and @Output
annotations to identify the actual bindable components.
For example:
public interface Barista {

    @Input
    SubscribableChannel orders();

    @Output
    MessageChannel hotDrinks();

    @Output
    MessageChannel coldDrinks();
}
Using the interface shown in the preceding example as a parameter to @EnableBinding triggers the creation of the three bound channels named orders, hotDrinks, and coldDrinks,
respectively.
You can provide as many binding interfaces as you need, as arguments to the @EnableBinding annotation, as shown in the following example:
@EnableBinding(value = { Orders.class, Payment.class })In Spring Cloud Stream, the bindable MessageChannel components are the Spring Messaging MessageChannel (for outbound) and its extension, SubscribableChannel,
(for inbound).
Pollable Destination Binding
While the previously described bindings support event-based message consumption, sometimes you need more control, such as rate of consumption.
Starting with version 2.0, you can now bind a pollable consumer:
The following example shows how to bind a pollable consumer:
public interface PolledBarista {

    @Input
    PollableMessageSource orders();
	. . .
}
In this case, an implementation of PollableMessageSource is bound to the orders “channel”. See Section 29.3.5, “Using Polled Consumers” for more details.
Customizing Channel Names
By using the @Input and @Output annotations, you can specify a customized channel name for the channel, as shown in the following example:
public interface Barista {
    @Input("inboundOrders")
    SubscribableChannel orders();
}
In the preceding example, the created bound channel is named inboundOrders.
Normally, you need not access individual channels or bindings directly (other then configuring them via @EnableBinding annotation). However there may be
times, such as testing or other corner cases, when you do.
Aside from generating channels for each binding and registering them as Spring beans, for each bound interface, Spring Cloud Stream generates a bean that implements the interface. That means you can have access to the interfaces representing the bindings or individual channels by auto-wiring either in your application, as shown in the following two examples:
Autowire Binding interface
@Autowire
private Source source

public void sayHello(String name) {
    source.output().send(MessageBuilder.withPayload(name).build());
}
Autowire individual channel
@Autowire
private MessageChannel output;

public void sayHello(String name) {
    output.send(MessageBuilder.withPayload(name).build());
}
You can also use standard Spring’s @Qualifier annotation for cases when channel names are customized or in multiple-channel scenarios that require specifically named channels.
The following example shows how to use the @Qualifier annotation in this way:
@Autowire
@Qualifier("myChannel")
private MessageChannel output;
You can write a Spring Cloud Stream application by using either Spring Integration annotations or Spring Cloud Stream native annotation.
Spring Cloud Stream is built on the concepts and patterns defined by Enterprise Integration Patterns and relies in its internal implementation on an already established and popular implementation of Enterprise Integration Patterns within the Spring portfolio of projects: Spring Integration framework.
So its only natural for it to support the foundation, semantics, and configuration options that are already established by Spring Integration
For example, you can attach the output channel of a Source to a MessageSource and use the familiar @InboundChannelAdapter annotation, as follows:
@EnableBinding(Source.class)
public class TimerSource {

  @Bean
  @InboundChannelAdapter(value = Source.OUTPUT, poller = @Poller(fixedDelay = "10", maxMessagesPerPoll = "1"))
  public MessageSource<String> timerMessageSource() {
    return () -> new GenericMessage<>("Hello Spring Cloud Stream");
  }
}
Similarly, you can use @Transformer or @ServiceActivator while providing an implementation of a message handler method for a Processor binding contract, as shown in the following example:
@EnableBinding(Processor.class) public class TransformProcessor { @Transformer(inputChannel = Processor.INPUT, outputChannel = Processor.OUTPUT) public Object transform(String message) { return message.toUpperCase(); } }
| Note |
|---|---|
While this may be skipping ahead a bit, it is important to understand that, when you consume from the same binding using |
Complementary to its Spring Integration support, Spring Cloud Stream provides its own @StreamListener annotation, modeled after other Spring Messaging annotations
(@MessageMapping, @JmsListener, @RabbitListener, and others) and provides conviniences, such as content-based routing and others.
@EnableBinding(Sink.class) public class VoteHandler { @Autowired VotingService votingService; @StreamListener(Sink.INPUT) public void handle(Vote vote) { votingService.record(vote); } }
As with other Spring Messaging methods, method arguments can be annotated with @Payload, @Headers, and @Header.
For methods that return data, you must use the @SendTo annotation to specify the output binding destination for data returned by the method, as shown in the following example:
@EnableBinding(Processor.class) public class TransformProcessor { @Autowired VotingService votingService; @StreamListener(Processor.INPUT) @SendTo(Processor.OUTPUT) public VoteResult handle(Vote vote) { return votingService.record(vote); } }
Spring Cloud Stream supports dispatching messages to multiple handler methods annotated with @StreamListener based on conditions.
In order to be eligible to support conditional dispatching, a method must satisfy the follow conditions:
- It must not return a value.
- It must be an individual message handling method (reactive API methods are not supported).
The condition is specified by a SpEL expression in the condition argument of the annotation and is evaluated for each message.
All the handlers that match the condition are invoked in the same thread, and no assumption must be made about the order in which the invocations take place.
In the following example of a @StreamListener with dispatching conditions, all the messages bearing a header type with the value bogey are dispatched to the
receiveBogey method, and all the messages bearing a header type with the value bacall are dispatched to the receiveBacall method.
@EnableBinding(Sink.class) @EnableAutoConfiguration public static class TestPojoWithAnnotatedArguments { @StreamListener(target = Sink.INPUT, condition = "headers['type']=='bogey'") public void receiveBogey(@Payload BogeyPojo bogeyPojo) { // handle the message } @StreamListener(target = Sink.INPUT, condition = "headers['type']=='bacall'") public void receiveBacall(@Payload BacallPojo bacallPojo) { // handle the message } }
Content Type Negotiation in the Context of condition
It is important to understand some of the mechanics behind content-based routing using the condition argument of @StreamListener, especially in the context of the type of the message as a whole.
It may also help if you familiarize yourself with the Chapter 32, Content Type Negotiation before you proceed.
Consider the following scenario:
@EnableBinding(Sink.class) @EnableAutoConfiguration public static class CatsAndDogs { @StreamListener(target = Sink.INPUT, condition = "payload.class.simpleName=='Dog'") public void bark(Dog dog) { // handle the message } @StreamListener(target = Sink.INPUT, condition = "payload.class.simpleName=='Cat'") public void purr(Cat cat) { // handle the message } }
The preceding code is perfectly valid. It compiles and deploys without any issues, yet it never produces the result you expect.
That is because you are testing something that does not yet exist in a state you expect. That is because the payload of the message is not yet converted from the
wire format (byte[]) to the desired type.
In other words, it has not yet gone through the type conversion process described in the Chapter 32, Content Type Negotiation.
So, unless you use a SPeL expression that evaluates raw data (for example, the value of the first byte in the byte array), use message header-based expressions
(such as condition = "headers['type']=='dog'").
| Note |
|---|---|
At the moment, dispatching through |
Since Spring Cloud Stream v2.1, another alternative for defining stream handlers and sources is to use build-in
support for Spring Cloud Function where they can be expressed as beans of
type java.util.function.[Supplier/Function/Consumer].
To specify which functional bean to bind to the external destination(s) exposed by the bindings, you must provide spring.cloud.stream.function.definition property.
Here is the example of the Processor application exposing message handler as java.util.function.Function
@SpringBootApplication @EnableBinding(Processor.class) public class MyFunctionBootApp { public static void main(String[] args) { SpringApplication.run(MyFunctionBootApp.class, "--spring.cloud.stream.function.definition=toUpperCase"); } @Bean public Function<String, String> toUpperCase() { return s -> s.toUpperCase(); } }
In the above you we simply define a bean of type java.util.function.Function called toUpperCase and identify it as a bean to be used as message handler
whose 'input' and 'output' must be bound to the external destinations exposed by the Processor binding.
Below are the examples of simple functional applications to support Source, Processor and Sink.
Here is the example of a Source application defined as java.util.function.Supplier
@SpringBootApplication @EnableBinding(Source.class) public static class SourceFromSupplier { public static void main(String[] args) { SpringApplication.run(SourceFromSupplier.class, "--spring.cloud.stream.function.definition=date"); } @Bean public Supplier<Date> date() { return () -> new Date(12345L); } }
Here is the example of a Processor application defined as java.util.function.Function
@SpringBootApplication @EnableBinding(Processor.class) public static class ProcessorFromFunction { public static void main(String[] args) { SpringApplication.run(ProcessorFromFunction.class, "--spring.cloud.stream.function.definition=toUpperCase"); } @Bean public Function<String, String> toUpperCase() { return s -> s.toUpperCase(); } }
Here is the example of a Sink application defined as java.util.function.Consumer
@EnableAutoConfiguration @EnableBinding(Sink.class) public static class SinkFromConsumer { public static void main(String[] args) { SpringApplication.run(SinkFromConsumer.class, "--spring.cloud.stream.function.definition=sink"); } @Bean public Consumer<String> sink() { return System.out::println; } }
Using this programming model you can also benefit from functional composition where you can dynamically compose complex handlers from a set of simple functions. As an example let’s add the following function bean to the application defined above
@Bean public Function<String, String> wrapInQuotes() { return s -> "\"" + s + "\""; }
and modify the spring.cloud.stream.function.definition property to reflect your intention to compose a new function from both ‘toUpperCase’ and ‘wrapInQuotes’.
To do that Spring Cloud Function allows you to use | (pipe) symbol. So to finish our example our property will now look like this:
—spring.cloud.stream.function.definition=toUpperCase|wrapInQuotes
When using polled consumers, you poll the PollableMessageSource on demand.
Consider the following example of a polled consumer:
public interface PolledConsumer { @Input PollableMessageSource destIn(); @Output MessageChannel destOut(); }
Given the polled consumer in the preceding example, you might use it as follows:
@Bean public ApplicationRunner poller(PollableMessageSource destIn, MessageChannel destOut) { return args -> { while (someCondition()) { try { if (!destIn.poll(m -> { String newPayload = ((String) m.getPayload()).toUpperCase(); destOut.send(new GenericMessage<>(newPayload)); })) { Thread.sleep(1000); } } catch (Exception e) { // handle failure } } }; }
The PollableMessageSource.poll() method takes a MessageHandler argument (often a lambda expression, as shown here).
It returns true if the message was received and successfully processed.
As with message-driven consumers, if the MessageHandler throws an exception, messages are published to error channels, as discussed in “???”.
Normally, the poll() method acknowledges the message when the MessageHandler exits.
If the method exits abnormally, the message is rejected (not re-queued), but see the section called “Handling Errors”.
You can override that behavior by taking responsibility for the acknowledgment, as shown in the following example:
@Bean public ApplicationRunner poller(PollableMessageSource dest1In, MessageChannel dest2Out) { return args -> { while (someCondition()) { if (!dest1In.poll(m -> { StaticMessageHeaderAccessor.getAcknowledgmentCallback(m).noAutoAck(); // e.g. hand off to another thread which can perform the ack // or acknowledge(Status.REQUEUE) })) { Thread.sleep(1000); } } }; }
| Important |
|---|---|
You must |
| Important |
|---|---|
Some messaging systems (such as Apache Kafka) maintain a simple offset in a log. If a delivery fails and is re-queued with |
There is also an overloaded poll method, for which the definition is as follows:
poll(MessageHandler handler, ParameterizedTypeReference<?> type)
The type is a conversion hint that allows the incoming message payload to be converted, as shown in the following example:
boolean result = pollableSource.poll(received -> { Map<String, Foo> payload = (Map<String, Foo>) received.getPayload(); ... }, new ParameterizedTypeReference<Map<String, Foo>>() {});
By default, an error channel is configured for the pollable source; if the callback throws an exception, an ErrorMessage is sent to the error channel (<destination>.<group>.errors); this error channel is also bridged to the global Spring Integration errorChannel.
You can subscribe to either error channel with a @ServiceActivator to handle errors; without a subscription, the error will simply be logged and the message will be acknowledged as successful.
If the error channel service activator throws an exception, the message will be rejected (by default) and won’t be redelivered.
If the service activator throws a RequeueCurrentMessageException, the message will be requeued at the broker and will be again retrieved on a subsequent poll.
If the listener throws a RequeueCurrentMessageException directly, the message will be requeued, as discussed above, and will not be sent to the error channels.
Errors happen, and Spring Cloud Stream provides several flexible mechanisms to handle them. The error handling comes in two flavors:
- application: The error handling is done within the application (custom error handler).
- system: The error handling is delegated to the binder (re-queue, DL, and others). Note that the techniques are dependent on binder implementation and the capability of the underlying messaging middleware.
Spring Cloud Stream uses the Spring Retry library to facilitate successful message processing. See Section 29.4.3, “Retry Template” for more details. However, when all fails, the exceptions thrown by the message handlers are propagated back to the binder. At that point, binder invokes custom error handler or communicates the error back to the messaging system (re-queue, DLQ, and others).
There are two types of application-level error handling. Errors can be handled at each binding subscription or a global handler can handle all the binding subscription errors. Let’s review the details.

For each input binding, Spring Cloud Stream creates a dedicated error channel with the following semantics <destinationName>.errors.
| Note |
|---|---|
The |
Consider the following:
spring.cloud.stream.bindings.input.group=myGroup
@StreamListener(Sink.INPUT) // destination name 'input.myGroup' public void handle(Person value) { throw new RuntimeException("BOOM!"); } @ServiceActivator(inputChannel = Processor.INPUT + ".myGroup.errors") //channel name 'input.myGroup.errors' public void error(Message<?> message) { System.out.println("Handling ERROR: " + message); }
In the preceding example the destination name is input.myGroup and the dedicated error channel name is input.myGroup.errors.
| Note |
|---|---|
The use of @StreamListener annotation is intended specifically to define bindings that bridge internal channels and external destinations. Given that the destination specific error channel does NOT have an associated external destination, such channel is a prerogative of Spring Integration (SI). This means that the handler for such destination must be defined using one of the SI handler annotations (i.e., @ServiceActivator, @Transformer etc.). |
| Note |
|---|---|
If |
Also, in the event you are binding to the existing destination such as:
spring.cloud.stream.bindings.input.destination=myFooDestination spring.cloud.stream.bindings.input.group=myGroup
the full destination name is myFooDestination.myGroup and then the dedicated error channel name is myFooDestination.myGroup.errors.
Back to the example…
The handle(..) method, which subscribes to the channel named input, throws an exception. Given there is also a subscriber to the error channel input.myGroup.errors
all error messages are handled by this subscriber.
If you have multiple bindings, you may want to have a single error handler. Spring Cloud Stream automatically provides support for
a global error channel by bridging each individual error channel to the channel named errorChannel, allowing a single subscriber to handle all errors,
as shown in the following example:
@StreamListener("errorChannel") public void error(Message<?> message) { System.out.println("Handling ERROR: " + message); }
This may be a convenient option if error handling logic is the same regardless of which handler produced the error.
System-level error handling implies that the errors are communicated back to the messaging system and, given that not every messaging system is the same, the capabilities may differ from binder to binder.
That said, in this section we explain the general idea behind system level error handling and use Rabbit binder as an example. NOTE: Kafka binder provides similar support, although some configuration properties do differ. Also, for more details and configuration options, see the individual binder’s documentation.
If no internal error handlers are configured, the errors propagate to the binders, and the binders subsequently propagate those errors back to the messaging system. Depending on the capabilities of the messaging system such a system may drop the message, re-queue the message for re-processing or send the failed message to DLQ. Both Rabbit and Kafka support these concepts. However, other binders may not, so refer to your individual binder’s documentation for details on supported system-level error-handling options.
By default, if no additional system-level configuration is provided, the messaging system drops the failed message. While acceptable in some cases, for most cases, it is not, and we need some recovery mechanism to avoid message loss.
DLQ allows failed messages to be sent to a special destination: - Dead Letter Queue.
When configured, failed messages are sent to this destination for subsequent re-processing or auditing and reconciliation.
For example, continuing on the previous example and to set up the DLQ with Rabbit binder, you need to set the following property:
spring.cloud.stream.rabbit.bindings.input.consumer.auto-bind-dlq=true
Keep in mind that, in the above property, input corresponds to the name of the input destination binding.
The consumer indicates that it is a consumer property and auto-bind-dlq instructs the binder to configure DLQ for input
destination, which results in an additional Rabbit queue named input.myGroup.dlq.
Once configured, all failed messages are routed to this queue with an error message similar to the following:
delivery_mode: 1
headers:
x-death:
count: 1
reason: rejected
queue: input.hello
time: 1522328151
exchange:
routing-keys: input.myGroup
Payload {"name”:"Bob"}As you can see from the above, your original message is preserved for further actions.
However, one thing you may have noticed is that there is limited information on the original issue with the message processing. For example, you do not see a stack trace corresponding to the original error. To get more relevant information about the original error, you must set an additional property:
spring.cloud.stream.rabbit.bindings.input.consumer.republish-to-dlq=true
Doing so forces the internal error handler to intercept the error message and add additional information to it before publishing it to DLQ. Once configured, you can see that the error message contains more information relevant to the original error, as follows:
delivery_mode: 2
headers:
x-original-exchange:
x-exception-message: has an error
x-original-routingKey: input.myGroup
x-exception-stacktrace: org.springframework.messaging.MessageHandlingException: nested exception is
org.springframework.messaging.MessagingException: has an error, failedMessage=GenericMessage [payload=byte[15],
headers={amqp_receivedDeliveryMode=NON_PERSISTENT, amqp_receivedRoutingKey=input.hello, amqp_deliveryTag=1,
deliveryAttempt=3, amqp_consumerQueue=input.hello, amqp_redelivered=false, id=a15231e6-3f80-677b-5ad7-d4b1e61e486e,
amqp_consumerTag=amq.ctag-skBFapilvtZhDsn0k3ZmQg, contentType=application/json, timestamp=1522327846136}]
at org.spring...integ...han...MethodInvokingMessageProcessor.processMessage(MethodInvokingMessageProcessor.java:107)
at. . . . .
Payload {"name”:"Bob"}This effectively combines application-level and system-level error handling to further assist with downstream troubleshooting mechanics.
As mentioned earlier, the currently supported binders (Rabbit and Kafka) rely on RetryTemplate to facilitate successful message processing. See Section 29.4.3, “Retry Template” for details.
However, for cases when max-attempts property is set to 1, internal reprocessing of the message is disabled. At this point, you can facilitate message re-processing (re-tries)
by instructing the messaging system to re-queue the failed message. Once re-queued, the failed message is sent back to the original handler, essentially creating a retry loop.
This option may be feasible for cases where the nature of the error is related to some sporadic yet short-term unavailability of some resource.
To accomplish that, you must set the following properties:
spring.cloud.stream.bindings.input.consumer.max-attempts=1 spring.cloud.stream.rabbit.bindings.input.consumer.requeue-rejected=true
In the preceding example, the max-attempts set to 1 essentially disabling internal re-tries and requeue-rejected (short for requeue rejected messages) is set to true.
Once set, the failed message is resubmitted to the same handler and loops continuously or until the handler throws AmqpRejectAndDontRequeueException
essentially allowing you to build your own re-try logic within the handler itself.
The RetryTemplate is part of the Spring Retry library.
While it is out of scope of this document to cover all of the capabilities of the RetryTemplate, we will mention the following consumer properties that are specifically related to
the RetryTemplate:
- maxAttempts
The number of attempts to process the message.
Default: 3.
- backOffInitialInterval
The backoff initial interval on retry.
Default 1000 milliseconds.
- backOffMaxInterval
The maximum backoff interval.
Default 10000 milliseconds.
- backOffMultiplier
The backoff multiplier.
Default 2.0.
- defaultRetryable
Whether exceptions thrown by the listener that are not listed in the
retryableExceptionsare retryable.Default:
true.- retryableExceptions
A map of Throwable class names in the key and a boolean in the value. Specify those exceptions (and subclasses) that will or won’t be retried. Also see
defaultRetriable. Example:spring.cloud.stream.bindings.input.consumer.retryable-exceptions.java.lang.IllegalStateException=false.Default: empty.
While the preceding settings are sufficient for majority of the customization requirements, they may not satisfy certain complex requirements at, which
point you may want to provide your own instance of the RetryTemplate. To do so configure it as a bean in your application configuration. The application provided
instance will override the one provided by the framework. Also, to avoid conflicts you must qualify the instance of the RetryTemplate you want to be used by the binder
as @StreamRetryTemplate. For example,
@StreamRetryTemplate public RetryTemplate myRetryTemplate() { return new RetryTemplate(); }
As you can see from the above example you don’t need to annotate it with @Bean since @StreamRetryTemplate is a qualified @Bean.
Spring Cloud Stream also supports the use of reactive APIs where incoming and outgoing data is handled as continuous data flows.
Support for reactive APIs is available through spring-cloud-stream-reactive, which needs to be added explicitly to your project.
The programming model with reactive APIs is declarative. Instead of specifying how each individual message should be handled, you can use operators that describe functional transformations from inbound to outbound data flows.
At present Spring Cloud Stream supports the only the Reactor API. In the future, we intend to support a more generic model based on Reactive Streams.
The reactive programming model also uses the @StreamListener annotation for setting up reactive handlers.
The differences are that:
- The
@StreamListenerannotation must not specify an input or output, as they are provided as arguments and return values from the method. - The arguments of the method must be annotated with
@Inputand@Output, indicating which input or output the incoming and outgoing data flows connect to, respectively. - The return value of the method, if any, is annotated with
@Output, indicating the input where data should be sent.
| Note |
|---|---|
Reactive programming support requires Java 1.8. |
| Note |
|---|---|
As of Spring Cloud Stream 1.1.1 and later (starting with release train Brooklyn.SR2), reactive programming support requires the use of Reactor 3.0.4.RELEASE and higher.
Earlier Reactor versions (including 3.0.1.RELEASE, 3.0.2.RELEASE and 3.0.3.RELEASE) are not supported.
|
| Note |
|---|---|
The use of term, “reactive”, currently refers to the reactive APIs being used and not to the execution model being reactive (that is, the bound endpoints still use a 'push' rather than a 'pull' model). While some backpressure support is provided by the use of Reactor, we do intend, in a future release, to support entirely reactive pipelines by the use of native reactive clients for the connected middleware. |
A Reactor-based handler can have the following argument types:
- For arguments annotated with
@Input, it supports the ReactorFluxtype. The parameterization of the inbound Flux follows the same rules as in the case of individual message handling: It can be the entireMessage, a POJO that can be theMessagepayload, or a POJO that is the result of a transformation based on theMessagecontent-type header. Multiple inputs are provided. - For arguments annotated with
Output, it supports theFluxSendertype, which connects aFluxproduced by the method with an output. Generally speaking, specifying outputs as arguments is only recommended when the method can have multiple outputs.
A Reactor-based handler supports a return type of Flux. In that case, it must be annotated with @Output. We recommend using the return value of the method when a single output Flux is available.
The following example shows a Reactor-based Processor:
@EnableBinding(Processor.class) @EnableAutoConfiguration public static class UppercaseTransformer { @StreamListener @Output(Processor.OUTPUT) public Flux<String> receive(@Input(Processor.INPUT) Flux<String> input) { return input.map(s -> s.toUpperCase()); } }
The same processor using output arguments looks like the following example:
@EnableBinding(Processor.class) @EnableAutoConfiguration public static class UppercaseTransformer { @StreamListener public void receive(@Input(Processor.INPUT) Flux<String> input, @Output(Processor.OUTPUT) FluxSender output) { output.send(input.map(s -> s.toUpperCase())); } }
Spring Cloud Stream reactive support also provides the ability for creating reactive sources through the @StreamEmitter annotation.
By using the @StreamEmitter annotation, a regular source may be converted to a reactive one.
@StreamEmitter is a method level annotation that marks a method to be an emitter to outputs declared with @EnableBinding.
You cannot use the @Input annotation along with @StreamEmitter, as the methods marked with this annotation are not listening for any input. Rather, methods marked with @StreamEmitter generate output.
Following the same programming model used in @StreamListener, @StreamEmitter also allows flexible ways of using the @Output annotation, depending on whether the method has any arguments, a return type, and other considerations.
The remainder of this section contains examples of using the @StreamEmitter annotation in various styles.
The following example emits the Hello, World message every millisecond and publishes to a Reactor Flux:
@EnableBinding(Source.class) @EnableAutoConfiguration public static class HelloWorldEmitter { @StreamEmitter @Output(Source.OUTPUT) public Flux<String> emit() { return Flux.intervalMillis(1) .map(l -> "Hello World"); } }
In the preceding example, the resulting messages in the Flux are sent to the output channel of the Source.
The next example is another flavor of an @StreamEmmitter that sends a Reactor Flux.
Instead of returning a Flux, the following method uses a FluxSender to programmatically send a Flux from a source:
@EnableBinding(Source.class) @EnableAutoConfiguration public static class HelloWorldEmitter { @StreamEmitter @Output(Source.OUTPUT) public void emit(FluxSender output) { output.send(Flux.intervalMillis(1) .map(l -> "Hello World")); } }
The next example is exactly same as the above snippet in functionality and style.
However, instead of using an explicit @Output annotation on the method, it uses the annotation on the method parameter.
@EnableBinding(Source.class) @EnableAutoConfiguration public static class HelloWorldEmitter { @StreamEmitter public void emit(@Output(Source.OUTPUT) FluxSender output) { output.send(Flux.intervalMillis(1) .map(l -> "Hello World")); } }
The last example in this section is yet another flavor of writing reacting sources by using the Reactive Streams Publisher API and taking advantage of the support for it in Spring Integration Java DSL.
The Publisher in the following example still uses Reactor Flux under the hood, but, from an application perspective, that is transparent to the user and only needs Reactive Streams and Java DSL for Spring Integration:
@EnableBinding(Source.class) @EnableAutoConfiguration public static class HelloWorldEmitter { @StreamEmitter @Output(Source.OUTPUT) @Bean public Publisher<Message<String>> emit() { return IntegrationFlows.from(() -> new GenericMessage<>("Hello World"), e -> e.poller(p -> p.fixedDelay(1))) .toReactivePublisher(); } }
Spring Cloud Stream provides a Binder abstraction for use in connecting to physical destinations at the external middleware. This section provides information about the main concepts behind the Binder SPI, its main components, and implementation-specific details.
The following image shows the general relationship of producers and consumers:

A producer is any component that sends messages to a channel.
The channel can be bound to an external message broker with a Binder implementation for that broker.
When invoking the bindProducer() method, the first parameter is the name of the destination within the broker, the second parameter is the local channel instance to which the producer sends messages, and the third parameter contains properties (such as a partition key expression) to be used within the adapter that is created for that channel.
A consumer is any component that receives messages from a channel.
As with a producer, the consumer’s channel can be bound to an external message broker.
When invoking the bindConsumer() method, the first parameter is the destination name, and a second parameter provides the name of a logical group of consumers.
Each group that is represented by consumer bindings for a given destination receives a copy of each message that a producer sends to that destination (that is, it follows normal publish-subscribe semantics).
If there are multiple consumer instances bound with the same group name, then messages are load-balanced across those consumer instances so that each message sent by a producer is consumed by only a single consumer instance within each group (that is, it follows normal queueing semantics).
The Binder SPI consists of a number of interfaces, out-of-the box utility classes, and discovery strategies that provide a pluggable mechanism for connecting to external middleware.
The key point of the SPI is the Binder interface, which is a strategy for connecting inputs and outputs to external middleware. The following listing shows the definnition of the Binder interface:
public interface Binder<T, C extends ConsumerProperties, P extends ProducerProperties> { Binding<T> bindConsumer(String name, String group, T inboundBindTarget, C consumerProperties); Binding<T> bindProducer(String name, T outboundBindTarget, P producerProperties); }
The interface is parameterized, offering a number of extension points:
- Input and output bind targets. As of version 1.0, only
MessageChannelis supported, but this is intended to be used as an extension point in the future. - Extended consumer and producer properties, allowing specific Binder implementations to add supplemental properties that can be supported in a type-safe manner.
A typical binder implementation consists of the following:
- A class that implements the
Binderinterface; - A Spring
@Configurationclass that creates a bean of typeBinderalong with the middleware connection infrastructure. A
META-INF/spring.bindersfile found on the classpath containing one or more binder definitions, as shown in the following example:kafka:\ org.springframework.cloud.stream.binder.kafka.config.KafkaBinderConfiguration
Spring Cloud Stream relies on implementations of the Binder SPI to perform the task of connecting channels to message brokers. Each Binder implementation typically connects to one type of messaging system.
By default, Spring Cloud Stream relies on Spring Boot’s auto-configuration to configure the binding process. If a single Binder implementation is found on the classpath, Spring Cloud Stream automatically uses it. For example, a Spring Cloud Stream project that aims to bind only to RabbitMQ can add the following dependency:
<dependency> <groupId>org.springframework.cloud</groupId> <artifactId>spring-cloud-stream-binder-rabbit</artifactId> </dependency>
For the specific Maven coordinates of other binder dependencies, see the documentation of that binder implementation.
When multiple binders are present on the classpath, the application must indicate which binder is to be used for each channel binding.
Each binder configuration contains a META-INF/spring.binders file, which is a simple properties file, as shown in the following example:
rabbit:\ org.springframework.cloud.stream.binder.rabbit.config.RabbitServiceAutoConfiguration
Similar files exist for the other provided binder implementations (such as Kafka), and custom binder implementations are expected to provide them as well.
The key represents an identifying name for the binder implementation, whereas the value is a comma-separated list of configuration classes that each contain one and only one bean definition of type org.springframework.cloud.stream.binder.Binder.
Binder selection can either be performed globally, using the spring.cloud.stream.defaultBinder property (for example, spring.cloud.stream.defaultBinder=rabbit) or individually, by configuring the binder on each channel binding.
For instance, a processor application (that has channels named input and output for read and write respectively) that reads from Kafka and writes to RabbitMQ can specify the following configuration:
spring.cloud.stream.bindings.input.binder=kafka spring.cloud.stream.bindings.output.binder=rabbit
By default, binders share the application’s Spring Boot auto-configuration, so that one instance of each binder found on the classpath is created. If your application should connect to more than one broker of the same type, you can specify multiple binder configurations, each with different environment settings.
| Note |
|---|---|
Turning on explicit binder configuration disables the default binder configuration process altogether.
If you do so, all binders in use must be included in the configuration.
Frameworks that intend to use Spring Cloud Stream transparently may create binder configurations that can be referenced by name, but they do not affect the default binder configuration.
In order to do so, a binder configuration may have its |
The following example shows a typical configuration for a processor application that connects to two RabbitMQ broker instances:
spring:
cloud:
stream:
bindings:
input:
destination: thing1
binder: rabbit1
output:
destination: thing2
binder: rabbit2
binders:
rabbit1:
type: rabbit
environment:
spring:
rabbitmq:
host: <host1>
rabbit2:
type: rabbit
environment:
spring:
rabbitmq:
host: <host2>Since version 2.0, Spring Cloud Stream supports visualization and control of the Bindings through Actuator endpoints.
Starting with version 2.0 actuator and web are optional, you must first add one of the web dependencies as well as add the actuator dependency manually. The following example shows how to add the dependency for the Web framework:
<dependency> <groupId>org.springframework.boot</groupId> <artifactId>spring-boot-starter-web</artifactId> </dependency>
The following example shows how to add the dependency for the WebFlux framework:
<dependency> <groupId>org.springframework.boot</groupId> <artifactId>spring-boot-starter-webflux</artifactId> </dependency>
You can add the Actuator dependency as follows:
<dependency> <groupId>org.springframework.boot</groupId> <artifactId>spring-boot-starter-actuator</artifactId> </dependency>
| Note |
|---|---|
To run Spring Cloud Stream 2.0 apps in Cloud Foundry, you must add |
You must also enable the bindings actuator endpoints by setting the following property: --management.endpoints.web.exposure.include=bindings.
Once those prerequisites are satisfied. you should see the following in the logs when application start:
: Mapped "{[/actuator/bindings/{name}],methods=[POST]. . .
: Mapped "{[/actuator/bindings],methods=[GET]. . .
: Mapped "{[/actuator/bindings/{name}],methods=[GET]. . .To visualize the current bindings, access the following URL:
http://<host>:<port>/actuator/bindings
Alternative, to see a single binding, access one of the URLs similar to the following:
http://<host>:<port>/actuator/bindings/myBindingName
You can also stop, start, pause, and resume individual bindings by posting to the same URL while providing a state argument as JSON, as shown in the following examples:
curl -d '{"state":"STOPPED"}' -H "Content-Type: application/json" -X POST http://<host>:<port>/actuator/bindings/myBindingName curl -d '{"state":"STARTED"}' -H "Content-Type: application/json" -X POST http://<host>:<port>/actuator/bindings/myBindingName curl -d '{"state":"PAUSED"}' -H "Content-Type: application/json" -X POST http://<host>:<port>/actuator/bindings/myBindingName curl -d '{"state":"RESUMED"}' -H "Content-Type: application/json" -X POST http://<host>:<port>/actuator/bindings/myBindingName
| Note |
|---|---|
|
The following properties are available when customizing binder configurations. These properties exposed via org.springframework.cloud.stream.config.BinderProperties
They must be prefixed with spring.cloud.stream.binders.<configurationName>.
- type
The binder type. It typically references one of the binders found on the classpath — in particular, a key in a
META-INF/spring.bindersfile.By default, it has the same value as the configuration name.
- inheritEnvironment
Whether the configuration inherits the environment of the application itself.
Default:
true.- environment
Root for a set of properties that can be used to customize the environment of the binder. When this property is set, the context in which the binder is being created is not a child of the application context. This setting allows for complete separation between the binder components and the application components.
Default:
empty.- defaultCandidate
Whether the binder configuration is a candidate for being considered a default binder or can be used only when explicitly referenced. This setting allows adding binder configurations without interfering with the default processing.
Default:
true.
Spring Cloud Stream supports general configuration options as well as configuration for bindings and binders. Some binders let additional binding properties support middleware-specific features.
Configuration options can be provided to Spring Cloud Stream applications through any mechanism supported by Spring Boot. This includes application arguments, environment variables, and YAML or .properties files.
These properties are exposed via org.springframework.cloud.stream.config.BindingServiceProperties
- spring.cloud.stream.instanceCount
The number of deployed instances of an application. Must be set for partitioning on the producer side. Must be set on the consumer side when using RabbitMQ and with Kafka if
autoRebalanceEnabled=false.Default:
1.- spring.cloud.stream.instanceIndex
- The instance index of the application: A number from
0toinstanceCount - 1. Used for partitioning with RabbitMQ and with Kafka ifautoRebalanceEnabled=false. Automatically set in Cloud Foundry to match the application’s instance index. - spring.cloud.stream.dynamicDestinations
A list of destinations that can be bound dynamically (for example, in a dynamic routing scenario). If set, only listed destinations can be bound.
Default: empty (letting any destination be bound).
- spring.cloud.stream.defaultBinder
The default binder to use, if multiple binders are configured. See Multiple Binders on the Classpath.
Default: empty.
- spring.cloud.stream.overrideCloudConnectors
This property is only applicable when the
cloudprofile is active and Spring Cloud Connectors are provided with the application. If the property isfalse(the default), the binder detects a suitable bound service (for example, a RabbitMQ service bound in Cloud Foundry for the RabbitMQ binder) and uses it for creating connections (usually through Spring Cloud Connectors). When set totrue, this property instructs binders to completely ignore the bound services and rely on Spring Boot properties (for example, relying on thespring.rabbitmq.*properties provided in the environment for the RabbitMQ binder). The typical usage of this property is to be nested in a customized environment when connecting to multiple systems.Default:
false.- spring.cloud.stream.bindingRetryInterval
The interval (in seconds) between retrying binding creation when, for example, the binder does not support late binding and the broker (for example, Apache Kafka) is down. Set it to zero to treat such conditions as fatal, preventing the application from starting.
Default:
30
Binding properties are supplied by using the format of spring.cloud.stream.bindings.<channelName>.<property>=<value>.
The <channelName> represents the name of the channel being configured (for example, output for a Source).
To avoid repetition, Spring Cloud Stream supports setting values for all channels, in the format of spring.cloud.stream.default.<property>=<value>.
When it comes to avoiding repetitions for extended binding properties, this format should be used - spring.cloud.stream.<binder-type>.default.<producer|consumer>.<property>=<value>.
In what follows, we indicate where we have omitted the spring.cloud.stream.bindings.<channelName>. prefix and focus just on the property name, with the understanding that the prefix ise included at runtime.
These properties are exposed via org.springframework.cloud.stream.config.BindingProperties
The following binding properties are available for both input and output bindings and must be prefixed with spring.cloud.stream.bindings.<channelName>. (for example, spring.cloud.stream.bindings.input.destination=ticktock).
Default values can be set by using the spring.cloud.stream.default prefix (for example`spring.cloud.stream.default.contentType=application/json`).
- destination
- The target destination of a channel on the bound middleware (for example, the RabbitMQ exchange or Kafka topic).
If the channel is bound as a consumer, it could be bound to multiple destinations, and the destination names can be specified as comma-separated
Stringvalues. If not set, the channel name is used instead. The default value of this property cannot be overridden. - group
The consumer group of the channel. Applies only to inbound bindings. See Consumer Groups.
Default:
null(indicating an anonymous consumer).- contentType
The content type of the channel. See “Chapter 32, Content Type Negotiation”.
Default:
application/json.- binder
The binder used by this binding. See “Section 30.4, “Multiple Binders on the Classpath”” for details.
Default:
null(the default binder is used, if it exists).
These properties are exposed via org.springframework.cloud.stream.binder.ConsumerProperties
The following binding properties are available for input bindings only and must be prefixed with spring.cloud.stream.bindings.<channelName>.consumer. (for example, spring.cloud.stream.bindings.input.consumer.concurrency=3).
Default values can be set by using the spring.cloud.stream.default.consumer prefix (for example, spring.cloud.stream.default.consumer.headerMode=none).
- concurrency
The concurrency of the inbound consumer.
Default:
1.- partitioned
Whether the consumer receives data from a partitioned producer.
Default:
false.- headerMode
When set to
none, disables header parsing on input. Effective only for messaging middleware that does not support message headers natively and requires header embedding. This option is useful when consuming data from non-Spring Cloud Stream applications when native headers are not supported. When set toheaders, it uses the middleware’s native header mechanism. When set toembeddedHeaders, it embeds headers into the message payload.Default: depends on the binder implementation.
- maxAttempts
If processing fails, the number of attempts to process the message (including the first). Set to
1to disable retry.Default:
3.- backOffInitialInterval
The backoff initial interval on retry.
Default:
1000.- backOffMaxInterval
The maximum backoff interval.
Default:
10000.- backOffMultiplier
The backoff multiplier.
Default:
2.0.- defaultRetryable
Whether exceptions thrown by the listener that are not listed in the
retryableExceptionsare retryable.Default:
true.- instanceIndex
When set to a value greater than equal to zero, it allows customizing the instance index of this consumer (if different from
spring.cloud.stream.instanceIndex). When set to a negative value, it defaults tospring.cloud.stream.instanceIndex. See “Section 34.2, “Instance Index and Instance Count”” for more information.Default:
-1.- instanceCount
When set to a value greater than equal to zero, it allows customizing the instance count of this consumer (if different from
spring.cloud.stream.instanceCount). When set to a negative value, it defaults tospring.cloud.stream.instanceCount. See “Section 34.2, “Instance Index and Instance Count”” for more information.Default:
-1.- retryableExceptions
A map of Throwable class names in the key and a boolean in the value. Specify those exceptions (and subclasses) that will or won’t be retried. Also see
defaultRetriable. Example:spring.cloud.stream.bindings.input.consumer.retryable-exceptions.java.lang.IllegalStateException=false.Default: empty.
- useNativeDecoding
When set to
true, the inbound message is deserialized directly by the client library, which must be configured correspondingly (for example, setting an appropriate Kafka producer value deserializer). When this configuration is being used, the inbound message unmarshalling is not based on thecontentTypeof the binding. When native decoding is used, it is the responsibility of the producer to use an appropriate encoder (for example, the Kafka producer value serializer) to serialize the outbound message. Also, when native encoding and decoding is used, theheaderMode=embeddedHeadersproperty is ignored and headers are not embedded in the message. See the producer propertyuseNativeEncoding.Default:
false.
These properties are exposed via org.springframework.cloud.stream.binder.ProducerProperties
The following binding properties are available for output bindings only and must be prefixed with spring.cloud.stream.bindings.<channelName>.producer. (for example, spring.cloud.stream.bindings.input.producer.partitionKeyExpression=payload.id).
Default values can be set by using the prefix spring.cloud.stream.default.producer (for example, spring.cloud.stream.default.producer.partitionKeyExpression=payload.id).
- partitionKeyExpression
A SpEL expression that determines how to partition outbound data. If set, or if
partitionKeyExtractorClassis set, outbound data on this channel is partitioned.partitionCountmust be set to a value greater than 1 to be effective. Mutually exclusive withpartitionKeyExtractorClass. See “Section 28.6, “Partitioning Support””.Default: null.
- partitionKeyExtractorClass
A
PartitionKeyExtractorStrategyimplementation. If set, or ifpartitionKeyExpressionis set, outbound data on this channel is partitioned.partitionCountmust be set to a value greater than 1 to be effective. Mutually exclusive withpartitionKeyExpression. See “Section 28.6, “Partitioning Support””.Default:
null.- partitionSelectorClass
A
PartitionSelectorStrategyimplementation. Mutually exclusive withpartitionSelectorExpression. If neither is set, the partition is selected as thehashCode(key) % partitionCount, wherekeyis computed through eitherpartitionKeyExpressionorpartitionKeyExtractorClass.Default:
null.- partitionSelectorExpression
A SpEL expression for customizing partition selection. Mutually exclusive with
partitionSelectorClass. If neither is set, the partition is selected as thehashCode(key) % partitionCount, wherekeyis computed through eitherpartitionKeyExpressionorpartitionKeyExtractorClass.Default:
null.- partitionCount
The number of target partitions for the data, if partitioning is enabled. Must be set to a value greater than 1 if the producer is partitioned. On Kafka, it is interpreted as a hint. The larger of this and the partition count of the target topic is used instead.
Default:
1.- requiredGroups
- A comma-separated list of groups to which the producer must ensure message delivery even if they start after it has been created (for example, by pre-creating durable queues in RabbitMQ).
- headerMode
When set to
none, it disables header embedding on output. It is effective only for messaging middleware that does not support message headers natively and requires header embedding. This option is useful when producing data for non-Spring Cloud Stream applications when native headers are not supported. When set toheaders, it uses the middleware’s native header mechanism. When set toembeddedHeaders, it embeds headers into the message payload.Default: Depends on the binder implementation.
- useNativeEncoding
When set to
true, the outbound message is serialized directly by the client library, which must be configured correspondingly (for example, setting an appropriate Kafka producer value serializer). When this configuration is being used, the outbound message marshalling is not based on thecontentTypeof the binding. When native encoding is used, it is the responsibility of the consumer to use an appropriate decoder (for example, the Kafka consumer value de-serializer) to deserialize the inbound message. Also, when native encoding and decoding is used, theheaderMode=embeddedHeadersproperty is ignored and headers are not embedded in the message. See the consumer propertyuseNativeDecoding.Default:
false.- errorChannelEnabled
When set to
true, if the binder supports asynchroous send results, send failures are sent to an error channel for the destination. See “???” for more information.Default:
false.
Besides the channels defined by using @EnableBinding, Spring Cloud Stream lets applications send messages to dynamically bound destinations.
This is useful, for example, when the target destination needs to be determined at runtime.
Applications can do so by using the BinderAwareChannelResolver bean, registered automatically by the @EnableBinding annotation.
The 'spring.cloud.stream.dynamicDestinations' property can be used for restricting the dynamic destination names to a known set (whitelisting). If this property is not set, any destination can be bound dynamically.
The BinderAwareChannelResolver can be used directly, as shown in the following example of a REST controller using a path variable to decide the target channel:
@EnableBinding @Controller public class SourceWithDynamicDestination { @Autowired private BinderAwareChannelResolver resolver; @RequestMapping(path = "/{target}", method = POST, consumes = "*/*") @ResponseStatus(HttpStatus.ACCEPTED) public void handleRequest(@RequestBody String body, @PathVariable("target") target, @RequestHeader(HttpHeaders.CONTENT_TYPE) Object contentType) { sendMessage(body, target, contentType); } private void sendMessage(String body, String target, Object contentType) { resolver.resolveDestination(target).send(MessageBuilder.createMessage(body, new MessageHeaders(Collections.singletonMap(MessageHeaders.CONTENT_TYPE, contentType)))); } }
Now consider what happens when we start the application on the default port (8080) and make the following requests with CURL:
curl -H "Content-Type: application/json" -X POST -d "customer-1" http://localhost:8080/customers curl -H "Content-Type: application/json" -X POST -d "order-1" http://localhost:8080/orders
The destinations, 'customers' and 'orders', are created in the broker (in the exchange for Rabbit or in the topic for Kafka) with names of 'customers' and 'orders', and the data is published to the appropriate destinations.
The BinderAwareChannelResolver is a general-purpose Spring Integration DestinationResolver and can be injected in other components — for example, in a router using a SpEL expression based on the target field of an incoming JSON message. The following example includes a router that reads SpEL expressions:
@EnableBinding @Controller public class SourceWithDynamicDestination { @Autowired private BinderAwareChannelResolver resolver; @RequestMapping(path = "/", method = POST, consumes = "application/json") @ResponseStatus(HttpStatus.ACCEPTED) public void handleRequest(@RequestBody String body, @RequestHeader(HttpHeaders.CONTENT_TYPE) Object contentType) { sendMessage(body, contentType); } private void sendMessage(Object body, Object contentType) { routerChannel().send(MessageBuilder.createMessage(body, new MessageHeaders(Collections.singletonMap(MessageHeaders.CONTENT_TYPE, contentType)))); } @Bean(name = "routerChannel") public MessageChannel routerChannel() { return new DirectChannel(); } @Bean @ServiceActivator(inputChannel = "routerChannel") public ExpressionEvaluatingRouter router() { ExpressionEvaluatingRouter router = new ExpressionEvaluatingRouter(new SpelExpressionParser().parseExpression("payload.target")); router.setDefaultOutputChannelName("default-output"); router.setChannelResolver(resolver); return router; } }
The Router Sink Application uses this technique to create the destinations on-demand.
If the channel names are known in advance, you can configure the producer properties as with any other destination.
Alternatively, if you register a NewBindingCallback<> bean, it is invoked just before the binding is created.
The callback takes the generic type of the extended producer properties used by the binder.
It has one method:
void configure(String channelName, MessageChannel channel, ProducerProperties producerProperties,
T extendedProducerProperties);The following example shows how to use the RabbitMQ binder:
@Bean public NewBindingCallback<RabbitProducerProperties> dynamicConfigurer() { return (name, channel, props, extended) -> { props.setRequiredGroups("bindThisQueue"); extended.setQueueNameGroupOnly(true); extended.setAutoBindDlq(true); extended.setDeadLetterQueueName("myDLQ"); }; }
| Note |
|---|---|
If you need to support dynamic destinations with multiple binder types, use |
Data transformation is one of the core features of any message-driven microservice architecture. Given that, in Spring Cloud Stream, such data
is represented as a Spring Message, a message may have to be transformed to a desired shape or size before reaching its destination. This is required for two reasons:
- To convert the contents of the incoming message to match the signature of the application-provided handler.
- To convert the contents of the outgoing message to the wire format.
The wire format is typically byte[] (that is true for the Kafka and Rabbit binders), but it is governed by the binder implementation.
In Spring Cloud Stream, message transformation is accomplished with an org.springframework.messaging.converter.MessageConverter.
| Note |
|---|---|
As a supplement to the details to follow, you may also want to read the following blog post. |
To better understand the mechanics and the necessity behind content-type negotiation, we take a look at a very simple use case by using the following message handler as an example:
@StreamListener(Processor.INPUT) @SendTo(Processor.OUTPUT) public String handle(Person person) {..}
| Note |
|---|---|
For simplicity, we assume that this is the only handler in the application (we assume there is no internal pipeline). |
The handler shown in the preceding example expects a Person object as an argument and produces a String type as an output.
In order for the framework to succeed in passing the incoming Message as an argument to this handler, it has to somehow transform the payload of the Message type from the wire format to a Person type.
In other words, the framework must locate and apply the appropriate MessageConverter.
To accomplish that, the framework needs some instructions from the user.
One of these instructions is already provided by the signature of the handler method itself (Person type).
Consequently, in theory, that should be (and, in some cases, is) enough.
However, for the majority of use cases, in order to select the appropriate MessageConverter, the framework needs an additional piece of information.
That missing piece is contentType.
Spring Cloud Stream provides three mechanisms to define contentType (in order of precedence):
- HEADER: The
contentTypecan be communicated through the Message itself. By providing acontentTypeheader, you declare the content type to use to locate and apply the appropriateMessageConverter. BINDING: The
contentTypecan be set per destination binding by setting thespring.cloud.stream.bindings.input.content-typeproperty.Note The
inputsegment in the property name corresponds to the actual name of the destination (which is “input” in our case). This approach lets you declare, on a per-binding basis, the content type to use to locate and apply the appropriateMessageConverter.- DEFAULT: If
contentTypeis not present in theMessageheader or the binding, the defaultapplication/jsoncontent type is used to locate and apply the appropriateMessageConverter.
As mentioned earlier, the preceding list also demonstrates the order of precedence in case of a tie. For example, a header-provided content type takes precedence over any other content type. The same applies for a content type set on a per-binding basis, which essentially lets you override the default content type. However, it also provides a sensible default (which was determined from community feedback).
Another reason for making application/json the default stems from the interoperability requirements driven by distributed microservices architectures, where producer and consumer not only run in different JVMs but can also run on different non-JVM platforms.
When the non-void handler method returns, if the the return value is already a Message, that Message becomes the payload. However, when the return value is not a Message, the new Message is constructed with the return value as the payload while inheriting
headers from the input Message minus the headers defined or filtered by SpringIntegrationProperties.messageHandlerNotPropagatedHeaders.
By default, there is only one header set there: contentType. This means that the new Message does not have contentType header set, thus ensuring that the contentType can evolve.
You can always opt out of returning a Message from the handler method where you can inject any header you wish.
If there is an internal pipeline, the Message is sent to the next handler by going through the same process of conversion. However, if there is no internal pipeline or you have reached the end of it, the Message is sent back to the output destination.
As mentioned earlier, for the framework to select the appropriate MessageConverter, it requires argument type and, optionally, content type information.
The logic for selecting the appropriate MessageConverter resides with the argument resolvers (HandlerMethodArgumentResolvers), which trigger right before the invocation of the user-defined handler method (which is when the actual argument type is known to the framework).
If the argument type does not match the type of the current payload, the framework delegates to the stack of the
pre-configured MessageConverters to see if any one of them can convert the payload.
As you can see, the Object fromMessage(Message<?> message, Class<?> targetClass);
operation of the MessageConverter takes targetClass as one of its arguments.
The framework also ensures that the provided Message always contains a contentType header.
When no contentType header was already present, it injects either the per-binding contentType header or the default contentType header.
The combination of contentType argument type is the mechanism by which framework determines if message can be converted to a target type.
If no appropriate MessageConverter is found, an exception is thrown, which you can handle by adding a custom MessageConverter (see “Section 32.3, “User-defined Message Converters””).
But what if the payload type matches the target type declared by the handler method? In this case, there is nothing to convert, and the
payload is passed unmodified. While this sounds pretty straightforward and logical, keep in mind handler methods that take a Message<?> or Object as an argument.
By declaring the target type to be Object (which is an instanceof everything in Java), you essentially forfeit the conversion process.
| Note |
|---|---|
Do not expect |
MessageConverters define two methods:
Object fromMessage(Message<?> message, Class<?> targetClass);
Message<?> toMessage(Object payload, @Nullable MessageHeaders headers);It is important to understand the contract of these methods and their usage, specifically in the context of Spring Cloud Stream.
The fromMessage method converts an incoming Message to an argument type.
The payload of the Message could be any type, and it is
up to the actual implementation of the MessageConverter to support multiple types.
For example, some JSON converter may support the payload type as byte[], String, and others.
This is important when the application contains an internal pipeline (that is, input → handler1 → handler2 →. . . → output) and the output of the upstream handler results in a Message which may not be in the initial wire format.
However, the toMessage method has a more strict contract and must always convert Message to the wire format: byte[].
So, for all intents and purposes (and especially when implementing your own converter) you regard the two methods as having the following signatures:
Object fromMessage(Message<?> message, Class<?> targetClass); Message<byte[]> toMessage(Object payload, @Nullable MessageHeaders headers);
As mentioned earlier, the framework already provides a stack of MessageConverters to handle most common use cases.
The following list describes the provided MessageConverters, in order of precedence (the first MessageConverter that works is used):
ApplicationJsonMessageMarshallingConverter: Variation of theorg.springframework.messaging.converter.MappingJackson2MessageConverter. Supports conversion of the payload of theMessageto/from POJO for cases whencontentTypeisapplication/json(DEFAULT).TupleJsonMessageConverter: DEPRECATED Supports conversion of the payload of theMessageto/fromorg.springframework.tuple.Tuple.ByteArrayMessageConverter: Supports conversion of the payload of theMessagefrombyte[]tobyte[]for cases whencontentTypeisapplication/octet-stream. It is essentially a pass through and exists primarily for backward compatibility.ObjectStringMessageConverter: Supports conversion of any type to aStringwhencontentTypeistext/plain. It invokes Object’stoString()method or, if the payload isbyte[], a newString(byte[]).JavaSerializationMessageConverter: DEPRECATED Supports conversion based on java serialization whencontentTypeisapplication/x-java-serialized-object.KryoMessageConverter: DEPRECATED Supports conversion based on Kryo serialization whencontentTypeisapplication/x-java-object.JsonUnmarshallingConverter: Similar to theApplicationJsonMessageMarshallingConverter. It supports conversion of any type whencontentTypeisapplication/x-java-object. It expects the actual type information to be embedded in thecontentTypeas an attribute (for example,application/x-java-object;type=foo.bar.Cat).
When no appropriate converter is found, the framework throws an exception. When that happens, you should check your code and configuration and ensure you did not miss anything (that is, ensure that you provided a contentType by using a binding or a header).
However, most likely, you found some uncommon case (such as a custom contentType perhaps) and the current stack of provided MessageConverters
does not know how to convert. If that is the case, you can add custom MessageConverter. See Section 32.3, “User-defined Message Converters”.
Spring Cloud Stream exposes a mechanism to define and register additional MessageConverters.
To use it, implement org.springframework.messaging.converter.MessageConverter, configure it as a @Bean, and annotate it with @StreamMessageConverter.
It is then apended to the existing stack of `MessageConverter`s.
| Note |
|---|---|
It is important to understand that custom |
The following example shows how to create a message converter bean to support a new content type called application/bar:
@EnableBinding(Sink.class) @SpringBootApplication public static class SinkApplication { ... @Bean @StreamMessageConverter public MessageConverter customMessageConverter() { return new MyCustomMessageConverter(); } } public class MyCustomMessageConverter extends AbstractMessageConverter { public MyCustomMessageConverter() { super(new MimeType("application", "bar")); } @Override protected boolean supports(Class<?> clazz) { return (Bar.class.equals(clazz)); } @Override protected Object convertFromInternal(Message<?> message, Class<?> targetClass, Object conversionHint) { Object payload = message.getPayload(); return (payload instanceof Bar ? payload : new Bar((byte[]) payload)); } }
Spring Cloud Stream also provides support for Avro-based converters and schema evolution. See “Chapter 33, Schema Evolution Support” for details.
Spring Cloud Stream provides support for schema evolution so that the data can be evolved over time and still work with older or newer producers and consumers and vice versa. Most serialization models, especially the ones that aim for portability across different platforms and languages, rely on a schema that describes how the data is serialized in the binary payload. In order to serialize the data and then to interpret it, both the sending and receiving sides must have access to a schema that describes the binary format. In certain cases, the schema can be inferred from the payload type on serialization or from the target type on deserialization. However, many applications benefit from having access to an explicit schema that describes the binary data format. A schema registry lets you store schema information in a textual format (typically JSON) and makes that information accessible to various applications that need it to receive and send data in binary format. A schema is referenceable as a tuple consisting of:
- A subject that is the logical name of the schema
- The schema version
- The schema format, which describes the binary format of the data
This following sections goes through the details of various components involved in schema evolution process.
The client-side abstraction for interacting with schema registry servers is the SchemaRegistryClient interface, which has the following structure:
public interface SchemaRegistryClient { SchemaRegistrationResponse register(String subject, String format, String schema); String fetch(SchemaReference schemaReference); String fetch(Integer id); }
Spring Cloud Stream provides out-of-the-box implementations for interacting with its own schema server and for interacting with the Confluent Schema Registry.
A client for the Spring Cloud Stream schema registry can be configured by using the @EnableSchemaRegistryClient, as follows:
@EnableBinding(Sink.class) @SpringBootApplication @EnableSchemaRegistryClient public static class AvroSinkApplication { ... }
| Note |
|---|---|
The default converter is optimized to cache not only the schemas from the remote server but also the |
The Schema Registry Client supports the following properties:
spring.cloud.stream.schemaRegistryClient.endpoint- The location of the schema-server.
When setting this, use a full URL, including protocol (
httporhttps) , port, and context path. - Default
http://localhost:8990/spring.cloud.stream.schemaRegistryClient.cached- Whether the client should cache schema server responses.
Normally set to
false, as the caching happens in the message converter. Clients using the schema registry client should set this totrue. - Default
true
For applications that have a SchemaRegistryClient bean registered with the application context, Spring Cloud Stream auto configures an Apache Avro message converter for schema management. This eases schema evolution, as applications that receive messages can get easy access to a writer schema that can be reconciled with their own reader schema.
For outbound messages, if the content type of the channel is set to application/*+avro, the MessageConverter is activated, as shown in the following example:
spring.cloud.stream.bindings.output.contentType=application/*+avroDuring the outbound conversion, the message converter tries to infer the schema of each outbound messages (based on its type) and register it to a subject (based on the payload type) by using the SchemaRegistryClient.
If an identical schema is already found, then a reference to it is retrieved.
If not, the schema is registered, and a new version number is provided.
The message is sent with a contentType header by using the following scheme: application/[prefix].[subject].v[version]+avro, where prefix is configurable and subject is deduced from the payload type.
For example, a message of the type User might be sent as a binary payload with a content type of application/vnd.user.v2+avro, where user is the subject and 2 is the version number.
When receiving messages, the converter infers the schema reference from the header of the incoming message and tries to retrieve it. The schema is used as the writer schema in the deserialization process.
If you have enabled Avro based schema registry client by setting spring.cloud.stream.bindings.output.contentType=application/*+avro, you can customize the behavior of the registration by setting the following properties.
- spring.cloud.stream.schema.avro.dynamicSchemaGenerationEnabled
Enable if you want the converter to use reflection to infer a Schema from a POJO.
Default:
false- spring.cloud.stream.schema.avro.readerSchema
- Avro compares schema versions by looking at a writer schema (origin payload) and a reader schema (your application payload). See the Avro documentation for more information. If set, this overrides any lookups at the schema server and uses the local schema as the reader schema.
Default:
null - spring.cloud.stream.schema.avro.schemaLocations
Registers any
.avscfiles listed in this property with the Schema Server.Default:
empty- spring.cloud.stream.schema.avro.prefix
The prefix to be used on the Content-Type header.
Default:
vnd
Spring Cloud Stream provides support for schema-based message converters through its spring-cloud-stream-schema module.
Currently, the only serialization format supported out of the box for schema-based message converters is Apache Avro, with more formats to be added in future versions.
The spring-cloud-stream-schema module contains two types of message converters that can be used for Apache Avro serialization:
- Converters that use the class information of the serialized or deserialized objects or a schema with a location known at startup.
- Converters that use a schema registry. They locate the schemas at runtime and dynamically register new schemas as domain objects evolve.
The AvroSchemaMessageConverter supports serializing and deserializing messages either by using a predefined schema or by using the schema information available in the class (either reflectively or contained in the SpecificRecord).
If you provide a custom converter, then the default AvroSchemaMessageConverter bean is not created. The following example shows a custom converter:
To use custom converters, you can simply add it to the application context, optionally specifying one or more MimeTypes with which to associate it.
The default MimeType is application/avro.
If the target type of the conversion is a GenericRecord, a schema must be set.
The following example shows how to configure a converter in a sink application by registering the Apache Avro MessageConverter without a predefined schema.
In this example, note that the mime type value is avro/bytes, not the default application/avro.
@EnableBinding(Sink.class) @SpringBootApplication public static class SinkApplication { ... @Bean public MessageConverter userMessageConverter() { return new AvroSchemaMessageConverter(MimeType.valueOf("avro/bytes")); } }
Conversely, the following application registers a converter with a predefined schema (found on the classpath):
@EnableBinding(Sink.class) @SpringBootApplication public static class SinkApplication { ... @Bean public MessageConverter userMessageConverter() { AvroSchemaMessageConverter converter = new AvroSchemaMessageConverter(MimeType.valueOf("avro/bytes")); converter.setSchemaLocation(new ClassPathResource("schemas/User.avro")); return converter; } }
Spring Cloud Stream provides a schema registry server implementation.
To use it, you can add the spring-cloud-stream-schema-server artifact to your project and use the @EnableSchemaRegistryServer annotation, which adds the schema registry server REST controller to your application.
This annotation is intended to be used with Spring Boot web applications, and the listening port of the server is controlled by the server.port property.
The spring.cloud.stream.schema.server.path property can be used to control the root path of the schema server (especially when it is embedded in other applications).
The spring.cloud.stream.schema.server.allowSchemaDeletion boolean property enables the deletion of a schema. By default, this is disabled.
The schema registry server uses a relational database to store the schemas. By default, it uses an embedded database. You can customize the schema storage by using the Spring Boot SQL database and JDBC configuration options.
The following example shows a Spring Boot application that enables the schema registry:
@SpringBootApplication @EnableSchemaRegistryServer public class SchemaRegistryServerApplication { public static void main(String[] args) { SpringApplication.run(SchemaRegistryServerApplication.class, args); } }
The Schema Registry Server API consists of the following operations:
POST /— see “the section called “Registering a New Schema””- 'GET /{subject}/{format}/{version}' — see “the section called “Retrieving an Existing Schema by Subject, Format, and Version””
GET /{subject}/{format}— see “the section called “Retrieving an Existing Schema by Subject and Format””GET /schemas/{id}— see “the section called “Retrieving an Existing Schema by ID””DELETE /{subject}/{format}/{version}— see “the section called “Deleting a Schema by Subject, Format, and Version””DELETE /schemas/{id}— see “the section called “Deleting a Schema by ID””DELETE /{subject}— see “the section called “Deleting a Schema by Subject””
To register a new schema, send a POST request to the / endpoint.
The / accepts a JSON payload with the following fields:
subject: The schema subjectformat: The schema formatdefinition: The schema definition
Its response is a schema object in JSON, with the following fields:
id: The schema IDsubject: The schema subjectformat: The schema formatversion: The schema versiondefinition: The schema definition
To retrieve an existing schema by subject, format, and version, send GET request to the /{subject}/{format}/{version} endpoint.
Its response is a schema object in JSON, with the following fields:
id: The schema IDsubject: The schema subjectformat: The schema formatversion: The schema versiondefinition: The schema definition
To retrieve an existing schema by subject and format, send a GET request to the /subject/format endpoint.
Its response is a list of schemas with each schema object in JSON, with the following fields:
id: The schema IDsubject: The schema subjectformat: The schema formatversion: The schema versiondefinition: The schema definition
To retrieve a schema by its ID, send a GET request to the /schemas/{id} endpoint.
Its response is a schema object in JSON, with the following fields:
id: The schema IDsubject: The schema subjectformat: The schema formatversion: The schema versiondefinition: The schema definition
To delete a schema identified by its subject, format, and version, send a DELETE request to the /{subject}/{format}/{version} endpoint.
To delete a schema by its ID, send a DELETE request to the /schemas/{id} endpoint.
DELETE /{subject}
Delete existing schemas by their subject.
| Note |
|---|---|
This note applies to users of Spring Cloud Stream 1.1.0.RELEASE only.
Spring Cloud Stream 1.1.0.RELEASE used the table name, |
The default configuration creates a DefaultSchemaRegistryClient bean.
If you want to use the Confluent schema registry, you need to create a bean of type ConfluentSchemaRegistryClient, which supersedes the one configured by default by the framework. The following example shows how to create such a bean:
@Bean public SchemaRegistryClient schemaRegistryClient(@Value("${spring.cloud.stream.schemaRegistryClient.endpoint}") String endpoint){ ConfluentSchemaRegistryClient client = new ConfluentSchemaRegistryClient(); client.setEndpoint(endpoint); return client; }
| Note |
|---|---|
The ConfluentSchemaRegistryClient is tested against Confluent platform version 4.0.0. |
To better understand how Spring Cloud Stream registers and resolves new schemas and its use of Avro schema comparison features, we provide two separate subsections:
The first part of the registration process is extracting a schema from the payload that is being sent over a channel.
Avro types such as SpecificRecord or GenericRecord already contain a schema, which can be retrieved immediately from the instance.
In the case of POJOs, a schema is inferred if the spring.cloud.stream.schema.avro.dynamicSchemaGenerationEnabled property is set to true (the default).

Ones a schema is obtained, the converter loads its metadata (version) from the remote server. First, it queries a local cache. If no result is found, it submits the data to the server, which replies with versioning information. The converter always caches the results to avoid the overhead of querying the Schema Server for every new message that needs to be serialized.

With the schema version information, the converter sets the contentType header of the message to carry the version information — for example: application/vnd.user.v1+avro.
When reading messages that contain version information (that is, a contentType header with a scheme like the one described under “Section 33.6.1, “Schema Registration Process (Serialization)””), the converter queries the Schema server to fetch the writer schema of the message.
Once it has found the correct schema of the incoming message, it retrieves the reader schema and, by using Avro’s schema resolution support, reads it into the reader definition (setting defaults and any missing properties).

| Note |
|---|---|
You should understand the difference between a writer schema (the application that wrote the message) and a reader schema (the receiving application).
We suggest taking a moment to read the Avro terminology and understand the process.
Spring Cloud Stream always fetches the writer schema to determine how to read a message.
If you want to get Avro’s schema evolution support working, you need to make sure that a |
Spring Cloud Stream enables communication between applications. Inter-application communication is a complex issue spanning several concerns, as described in the following topics:
While Spring Cloud Stream makes it easy for individual Spring Boot applications to connect to messaging systems, the typical scenario for Spring Cloud Stream is the creation of multi-application pipelines, where microservice applications send data to each other. You can achieve this scenario by correlating the input and output destinations of “adjacent” applications.
Suppose a design calls for the Time Source application to send data to the Log Sink application. You could use a common destination named ticktock for bindings within both applications.
Time Source (that has the channel name output) would set the following property:
spring.cloud.stream.bindings.output.destination=ticktock
Log Sink (that has the channel name input) would set the following property:
spring.cloud.stream.bindings.input.destination=ticktock
When scaling up Spring Cloud Stream applications, each instance can receive information about how many other instances of the same application exist and what its own instance index is.
Spring Cloud Stream does this through the spring.cloud.stream.instanceCount and spring.cloud.stream.instanceIndex properties.
For example, if there are three instances of a HDFS sink application, all three instances have spring.cloud.stream.instanceCount set to 3, and the individual applications have spring.cloud.stream.instanceIndex set to 0, 1, and 2, respectively.
When Spring Cloud Stream applications are deployed through Spring Cloud Data Flow, these properties are configured automatically; when Spring Cloud Stream applications are launched independently, these properties must be set correctly.
By default, spring.cloud.stream.instanceCount is 1, and spring.cloud.stream.instanceIndex is 0.
In a scaled-up scenario, correct configuration of these two properties is important for addressing partitioning behavior (see below) in general, and the two properties are always required by certain binders (for example, the Kafka binder) in order to ensure that data are split correctly across multiple consumer instances.
Partitioning in Spring Cloud Stream consists of two tasks:
You can configure an output binding to send partitioned data by setting one and only one of its partitionKeyExpression or partitionKeyExtractorName properties, as well as its partitionCount property.
For example, the following is a valid and typical configuration:
spring.cloud.stream.bindings.output.producer.partitionKeyExpression=payload.id spring.cloud.stream.bindings.output.producer.partitionCount=5
Based on that example configuration, data is sent to the target partition by using the following logic.
A partition key’s value is calculated for each message sent to a partitioned output channel based on the partitionKeyExpression.
The partitionKeyExpression is a SpEL expression that is evaluated against the outbound message for extracting the partitioning key.
If a SpEL expression is not sufficient for your needs, you can instead calculate the partition key value by providing an implementation of org.springframework.cloud.stream.binder.PartitionKeyExtractorStrategy and configuring it as a bean (by using the @Bean annotation).
If you have more then one bean of type org.springframework.cloud.stream.binder.PartitionKeyExtractorStrategy available in the Application Context, you can further filter it by specifying its name with the partitionKeyExtractorName property, as shown in the following example:
--spring.cloud.stream.bindings.output.producer.partitionKeyExtractorName=customPartitionKeyExtractor
--spring.cloud.stream.bindings.output.producer.partitionCount=5
. . .
@Bean
public CustomPartitionKeyExtractorClass customPartitionKeyExtractor() {
return new CustomPartitionKeyExtractorClass();
} | Note |
|---|---|
In previous versions of Spring Cloud Stream, you could specify the implementation of |
Once the message key is calculated, the partition selection process determines the target partition as a value between 0 and partitionCount - 1.
The default calculation, applicable in most scenarios, is based on the following formula: key.hashCode() % partitionCount.
This can be customized on the binding, either by setting a SpEL expression to be evaluated against the 'key' (through the partitionSelectorExpression property) or by configuring an implementation of org.springframework.cloud.stream.binder.PartitionSelectorStrategy as a bean (by using the @Bean annotation).
Similar to the PartitionKeyExtractorStrategy, you can further filter it by using the spring.cloud.stream.bindings.output.producer.partitionSelectorName property when more than one bean of this type is available in the Application Context, as shown in the following example:
--spring.cloud.stream.bindings.output.producer.partitionSelectorName=customPartitionSelector
. . .
@Bean
public CustomPartitionSelectorClass customPartitionSelector() {
return new CustomPartitionSelectorClass();
} | Note |
|---|---|
In previous versions of Spring Cloud Stream you could specify the implementation of |
An input binding (with the channel name input) is configured to receive partitioned data by setting its partitioned property, as well as the instanceIndex and instanceCount properties on the application itself, as shown in the following example:
spring.cloud.stream.bindings.input.consumer.partitioned=true spring.cloud.stream.instanceIndex=3 spring.cloud.stream.instanceCount=5
The instanceCount value represents the total number of application instances between which the data should be partitioned.
The instanceIndex must be a unique value across the multiple instances, with a value between 0 and instanceCount - 1.
The instance index helps each application instance to identify the unique partition(s) from which it receives data.
It is required by binders using technology that does not support partitioning natively.
For example, with RabbitMQ, there is a queue for each partition, with the queue name containing the instance index.
With Kafka, if autoRebalanceEnabled is true (default), Kafka takes care of distributing partitions across instances, and these properties are not required.
If autoRebalanceEnabled is set to false, the instanceCount and instanceIndex are used by the binder to determine which partition(s) the instance subscribes to (you must have at least as many partitions as there are instances).
The binder allocates the partitions instead of Kafka.
This might be useful if you want messages for a particular partition to always go to the same instance.
When a binder configuration requires them, it is important to set both values correctly in order to ensure that all of the data is consumed and that the application instances receive mutually exclusive datasets.
While a scenario in which using multiple instances for partitioned data processing may be complex to set up in a standalone case, Spring Cloud Dataflow can simplify the process significantly by populating both the input and output values correctly and by letting you rely on the runtime infrastructure to provide information about the instance index and instance count.
Spring Cloud Stream provides support for testing your microservice applications without connecting to a messaging system.
You can do that by using the TestSupportBinder provided by the spring-cloud-stream-test-support library, which can be added as a test dependency to the application, as shown in the following example:
<dependency> <groupId>org.springframework.cloud</groupId> <artifactId>spring-cloud-stream-test-support</artifactId> <scope>test</scope> </dependency>
| Note |
|---|---|
The |
The TestSupportBinder lets you interact with the bound channels and inspect any messages sent and received by the application.
For outbound message channels, the TestSupportBinder registers a single subscriber and retains the messages emitted by the application in a MessageCollector.
They can be retrieved during tests and have assertions made against them.
You can also send messages to inbound message channels so that the consumer application can consume the messages. The following example shows how to test both input and output channels on a processor:
@RunWith(SpringRunner.class) @SpringBootTest(webEnvironment= SpringBootTest.WebEnvironment.RANDOM_PORT) public class ExampleTest { @Autowired private Processor processor; @Autowired private MessageCollector messageCollector; @Test @SuppressWarnings("unchecked") public void testWiring() { Message<String> message = new GenericMessage<>("hello"); processor.input().send(message); Message<String> received = (Message<String>) messageCollector.forChannel(processor.output()).poll(); assertThat(received.getPayload(), equalTo("hello world")); } @SpringBootApplication @EnableBinding(Processor.class) public static class MyProcessor { @Autowired private Processor channels; @Transformer(inputChannel = Processor.INPUT, outputChannel = Processor.OUTPUT) public String transform(String in) { return in + " world"; } } }
In the preceding example, we create an application that has an input channel and an output channel, both bound through the Processor interface.
The bound interface is injected into the test so that we can have access to both channels.
We send a message on the input channel, and we use the MessageCollector provided by Spring Cloud Stream’s test support to capture that the message has been sent to the output channel as a result.
Once we have received the message, we can validate that the component functions correctly.
The intent behind the test binder superseding all the other binders on the classpath is to make it easy to test your applications without making changes to your production dependencies.
In some cases (for example, integration tests) it is useful to use the actual production binders instead, and that requires disabling the test binder autoconfiguration.
To do so, you can exclude the org.springframework.cloud.stream.test.binder.TestSupportBinderAutoConfiguration class by using one of the Spring Boot autoconfiguration exclusion mechanisms, as shown in the following example:
@SpringBootApplication(exclude = TestSupportBinderAutoConfiguration.class) @EnableBinding(Processor.class) public static class MyProcessor { @Transformer(inputChannel = Processor.INPUT, outputChannel = Processor.OUTPUT) public String transform(String in) { return in + " world"; } }
When autoconfiguration is disabled, the test binder is available on the classpath, and its defaultCandidate property is set to false so that it does not interfere with the regular user configuration. It can be referenced under the name, test, as shown in the following example:
spring.cloud.stream.defaultBinder=test
Spring Cloud Stream provides a health indicator for binders.
It is registered under the name binders and can be enabled or disabled by setting the management.health.binders.enabled property.
By default management.health.binders.enabled is set to false.
Setting management.health.binders.enabled to true enables the health indicator, allowing you to access the /health endpoint to retrieve the binder health indicators.
Health indicators are binder-specific and certain binder implementations may not necessarily provide a health indicator.
Spring Boot Actuator provides dependency management and auto-configuration for Micrometer, an application metrics facade that supports numerous monitoring systems.
Spring Cloud Stream provides support for emitting any available micrometer-based metrics to a binding destination, allowing for periodic collection of metric data from stream applications without relying on polling individual endpoints.
Metrics Emitter is activated by defining the spring.cloud.stream.bindings.applicationMetrics.destination property,
which specifies the name of the binding destination used by the current binder to publish metric messages.
For example:
spring.cloud.stream.bindings.applicationMetrics.destination=myMetricDestination
The preceding example instructs the binder to bind to myMetricDestination (that is, Rabbit exchange, Kafka topic, and others).
The following properties can be used for customizing the emission of metrics:
- spring.cloud.stream.metrics.key
The name of the metric being emitted. Should be a unique value per application.
Default:
${spring.application.name:${vcap.application.name:${spring.config.name:application}}}- spring.cloud.stream.metrics.properties
Allows white listing application properties that are added to the metrics payload
Default: null.
- spring.cloud.stream.metrics.meter-filter
Pattern to control the 'meters' one wants to capture. For example, specifying
spring.integration.*captures metric information for meters whose name starts withspring.integration.Default: all 'meters' are captured.
- spring.cloud.stream.metrics.schedule-interval
Interval to control the rate of publishing metric data.
Default: 1 min
Consider the following:
java -jar time-source.jar \
--spring.cloud.stream.bindings.applicationMetrics.destination=someMetrics \
--spring.cloud.stream.metrics.properties=spring.application** \
--spring.cloud.stream.metrics.meter-filter=spring.integration.*The following example shows the payload of the data published to the binding destination as a result of the preceding command:
{
"name": "application",
"createdTime": "2018-03-23T14:48:12.700Z",
"properties": {
},
"metrics": [
{
"id": {
"name": "spring.integration.send",
"tags": [
{
"key": "exception",
"value": "none"
},
{
"key": "name",
"value": "input"
},
{
"key": "result",
"value": "success"
},
{
"key": "type",
"value": "channel"
}
],
"type": "TIMER",
"description": "Send processing time",
"baseUnit": "milliseconds"
},
"timestamp": "2018-03-23T14:48:12.697Z",
"sum": 130.340546,
"count": 6,
"mean": 21.72342433333333,
"upper": 116.176299,
"total": 130.340546
}
]
} | Note |
|---|---|
Given that the format of the Metric message has slightly changed after migrating to Micrometer, the published message will also have
a |
For Spring Cloud Stream samples, see the spring-cloud-stream-samples repository on GitHub.
On CloudFoundry, services are usually exposed through a special environment variable called VCAP_SERVICES.
When configuring your binder connections, you can use the values from an environment variable as explained on the dataflow Cloud Foundry Server docs.
To use Apache Kafka binder, you need to add spring-cloud-stream-binder-kafka as a dependency to your Spring Cloud Stream application, as shown in the following example for Maven:
<dependency> <groupId>org.springframework.cloud</groupId> <artifactId>spring-cloud-stream-binder-kafka</artifactId> </dependency>
Alternatively, you can also use the Spring Cloud Stream Kafka Starter, as shown inn the following example for Maven:
<dependency> <groupId>org.springframework.cloud</groupId> <artifactId>spring-cloud-starter-stream-kafka</artifactId> </dependency>
The following image shows a simplified diagram of how the Apache Kafka binder operates:

The Apache Kafka Binder implementation maps each destination to an Apache Kafka topic. The consumer group maps directly to the same Apache Kafka concept. Partitioning also maps directly to Apache Kafka partitions as well.
The binder currently uses the Apache Kafka kafka-clients 1.0.0 jar and is designed to be used with a broker of at least that version.
This client can communicate with older brokers (see the Kafka documentation), but certain features may not be available.
For example, with versions earlier than 0.11.x.x, native headers are not supported.
Also, 0.11.x.x does not support the autoAddPartitions property.
This section contains the configuration options used by the Apache Kafka binder.
For common configuration options and properties pertaining to binder, see the core documentation.
- spring.cloud.stream.kafka.binder.brokers
A list of brokers to which the Kafka binder connects.
Default:
localhost.- spring.cloud.stream.kafka.binder.defaultBrokerPort
brokersallows hosts specified with or without port information (for example,host1,host2:port2). This sets the default port when no port is configured in the broker list.Default:
9092.- spring.cloud.stream.kafka.binder.configuration
Key/Value map of client properties (both producers and consumer) passed to all clients created by the binder. Due to the fact that these properties are used by both producers and consumers, usage should be restricted to common properties — for example, security settings. Properties here supersede any properties set in boot.
Default: Empty map.
- spring.cloud.stream.kafka.binder.consumerProperties
Key/Value map of arbitrary Kafka client consumer properties. Properties here supersede any properties set in boot and in the
configurationproperty above.Default: Empty map.
- spring.cloud.stream.kafka.binder.headers
The list of custom headers that are transported by the binder. Only required when communicating with older applications (⇐ 1.3.x) with a
kafka-clientsversion < 0.11.0.0. Newer versions support headers natively.Default: empty.
- spring.cloud.stream.kafka.binder.healthTimeout
The time to wait to get partition information, in seconds. Health reports as down if this timer expires.
Default: 10.
- spring.cloud.stream.kafka.binder.requiredAcks
The number of required acks on the broker. See the Kafka documentation for the producer
acksproperty.Default:
1.- spring.cloud.stream.kafka.binder.minPartitionCount
Effective only if
autoCreateTopicsorautoAddPartitionsis set. The global minimum number of partitions that the binder configures on topics on which it produces or consumes data. It can be superseded by thepartitionCountsetting of the producer or by the value ofinstanceCount * concurrencysettings of the producer (if either is larger).Default:
1.- spring.cloud.stream.kafka.binder.producerProperties
Key/Value map of arbitrary Kafka client producer properties. Properties here supersede any properties set in boot and in the
configurationproperty above.Default: Empty map.
- spring.cloud.stream.kafka.binder.replicationFactor
The replication factor of auto-created topics if
autoCreateTopicsis active. Can be overridden on each binding.Default:
1.- spring.cloud.stream.kafka.binder.autoCreateTopics
If set to
true, the binder creates new topics automatically. If set tofalse, the binder relies on the topics being already configured. In the latter case, if the topics do not exist, the binder fails to start.Note This setting is independent of the
auto.topic.create.enablesetting of the broker and does not influence it. If the server is set to auto-create topics, they may be created as part of the metadata retrieval request, with default broker settings.Default:
true.- spring.cloud.stream.kafka.binder.autoAddPartitions
If set to
true, the binder creates new partitions if required. If set tofalse, the binder relies on the partition size of the topic being already configured. If the partition count of the target topic is smaller than the expected value, the binder fails to start.Default:
false.- spring.cloud.stream.kafka.binder.transaction.transactionIdPrefix
Enables transactions in the binder. See
transaction.idin the Kafka documentation and Transactions in thespring-kafkadocumentation. When transactions are enabled, individualproducerproperties are ignored and all producers use thespring.cloud.stream.kafka.binder.transaction.producer.*properties.Default
null(no transactions)- spring.cloud.stream.kafka.binder.transaction.producer.*
Global producer properties for producers in a transactional binder. See
spring.cloud.stream.kafka.binder.transaction.transactionIdPrefixand Section 39.3.3, “Kafka Producer Properties” and the general producer properties supported by all binders.Default: See individual producer properties.
- spring.cloud.stream.kafka.binder.headerMapperBeanName
The bean name of a
KafkaHeaderMapperused for mappingspring-messagingheaders to and from Kafka headers. Use this, for example, if you wish to customize the trusted packages in aDefaultKafkaHeaderMapperthat uses JSON deserialization for the headers.Default: none.
The following properties are available for Kafka consumers only and
must be prefixed with spring.cloud.stream.kafka.bindings.<channelName>.consumer..
- admin.configuration
A
Mapof Kafka topic properties used when provisioning topics — for example,spring.cloud.stream.kafka.bindings.input.consumer.admin.configuration.message.format.version=0.9.0.0Default: none.
- admin.replicas-assignment
A Map<Integer, List<Integer>> of replica assignments, with the key being the partition and the value being the assignments. Used when provisioning new topics. See the
NewTopicJavadocs in thekafka-clientsjar.Default: none.
- admin.replication-factor
The replication factor to use when provisioning topics. Overrides the binder-wide setting. Ignored if
replicas-assignmentsis present.Default: none (the binder-wide default of 1 is used).
- autoRebalanceEnabled
When
true, topic partitions is automatically rebalanced between the members of a consumer group. Whenfalse, each consumer is assigned a fixed set of partitions based onspring.cloud.stream.instanceCountandspring.cloud.stream.instanceIndex. This requires both thespring.cloud.stream.instanceCountandspring.cloud.stream.instanceIndexproperties to be set appropriately on each launched instance. The value of thespring.cloud.stream.instanceCountproperty must typically be greater than 1 in this case.Default:
true.- ackEachRecord
When
autoCommitOffsetistrue, this setting dictates whether to commit the offset after each record is processed. By default, offsets are committed after all records in the batch of records returned byconsumer.poll()have been processed. The number of records returned by a poll can be controlled with themax.poll.recordsKafka property, which is set through the consumerconfigurationproperty. Setting this totruemay cause a degradation in performance, but doing so reduces the likelihood of redelivered records when a failure occurs. Also, see the binderrequiredAcksproperty, which also affects the performance of committing offsets.Default:
false.- autoCommitOffset
Whether to autocommit offsets when a message has been processed. If set to
false, a header with the keykafka_acknowledgmentof the typeorg.springframework.kafka.support.Acknowledgmentheader is present in the inbound message. Applications may use this header for acknowledging messages. See the examples section for details. When this property is set tofalse, Kafka binder sets the ack mode toorg.springframework.kafka.listener.AbstractMessageListenerContainer.AckMode.MANUALand the application is responsible for acknowledging records. Also seeackEachRecord.Default:
true.- autoCommitOnError
Effective only if
autoCommitOffsetis set totrue. If set tofalse, it suppresses auto-commits for messages that result in errors and commits only for successful messages. It allows a stream to automatically replay from the last successfully processed message, in case of persistent failures. If set totrue, it always auto-commits (if auto-commit is enabled). If not set (the default), it effectively has the same value asenableDlq, auto-committing erroneous messages if they are sent to a DLQ and not committing them otherwise.Default: not set.
- resetOffsets
Whether to reset offsets on the consumer to the value provided by startOffset.
Default:
false.- startOffset
The starting offset for new groups. Allowed values:
earliestandlatest. If the consumer group is set explicitly for the consumer 'binding' (throughspring.cloud.stream.bindings.<channelName>.group), 'startOffset' is set toearliest. Otherwise, it is set tolatestfor theanonymousconsumer group. Also seeresetOffsets(earlier in this list).Default: null (equivalent to
earliest).- enableDlq
When set to true, it enables DLQ behavior for the consumer. By default, messages that result in errors are forwarded to a topic named
error.<destination>.<group>. The DLQ topic name can be configurable by setting thedlqNameproperty. This provides an alternative option to the more common Kafka replay scenario for the case when the number of errors is relatively small and replaying the entire original topic may be too cumbersome. See Section 39.6, “Dead-Letter Topic Processing” processing for more information. Starting with version 2.0, messages sent to the DLQ topic are enhanced with the following headers:x-original-topic,x-exception-message, andx-exception-stacktraceasbyte[]. Not allowed whendestinationIsPatternistrue.Default:
false.- configuration
Map with a key/value pair containing generic Kafka consumer properties.
Default: Empty map.
- dlqName
The name of the DLQ topic to receive the error messages.
Default: null (If not specified, messages that result in errors are forwarded to a topic named
error.<destination>.<group>).- dlqProducerProperties
Using this, DLQ-specific producer properties can be set. All the properties available through kafka producer properties can be set through this property.
Default: Default Kafka producer properties.
- standardHeaders
Indicates which standard headers are populated by the inbound channel adapter. Allowed values:
none,id,timestamp, orboth. Useful if using native deserialization and the first component to receive a message needs anid(such as an aggregator that is configured to use a JDBC message store).Default:
none- converterBeanName
The name of a bean that implements
RecordMessageConverter. Used in the inbound channel adapter to replace the defaultMessagingMessageConverter.Default:
null- idleEventInterval
The interval, in milliseconds, between events indicating that no messages have recently been received. Use an
ApplicationListener<ListenerContainerIdleEvent>to receive these events. See the section called “Example: Pausing and Resuming the Consumer” for a usage example.Default:
30000- destinationIsPattern
When true, the destination is treated as a regular expression
Patternused to match topic names by the broker. When true, topics are not provisioned, andenableDlqis not allowed, because the binder does not know the topic names during the provisioning phase. Note, the time taken to detect new topics that match the pattern is controlled by the consumer propertymetadata.max.age.ms, which (at the time of writing) defaults to 300,000ms (5 minutes). This can be configured using theconfigurationproperty above.Default:
false
The following properties are available for Kafka producers only and
must be prefixed with spring.cloud.stream.kafka.bindings.<channelName>.producer..
- admin.configuration
A
Mapof Kafka topic properties used when provisioning new topics — for example,spring.cloud.stream.kafka.bindings.input.consumer.admin.configuration.message.format.version=0.9.0.0Default: none.
- admin.replicas-assignment
A Map<Integer, List<Integer>> of replica assignments, with the key being the partition and the value being the assignments. Used when provisioning new topics. See
NewTopicjavadocs in thekafka-clientsjar.Default: none.
- admin.replication-factor
The replication factor to use when provisioning new topics. Overrides the binder-wide setting. Ignored if
replicas-assignmentsis present.Default: none (the binder-wide default of 1 is used).
- bufferSize
Upper limit, in bytes, of how much data the Kafka producer attempts to batch before sending.
Default:
16384.- sync
Whether the producer is synchronous.
Default:
false.- batchTimeout
How long the producer waits to allow more messages to accumulate in the same batch before sending the messages. (Normally, the producer does not wait at all and simply sends all the messages that accumulated while the previous send was in progress.) A non-zero value may increase throughput at the expense of latency.
Default:
0.- messageKeyExpression
A SpEL expression evaluated against the outgoing message used to populate the key of the produced Kafka message — for example,
headers['myKey']. The payload cannot be used because, by the time this expression is evaluated, the payload is already in the form of abyte[].Default:
none.- headerPatterns
A comma-delimited list of simple patterns to match Spring messaging headers to be mapped to the Kafka
Headersin theProducerRecord. Patterns can begin or end with the wildcard character (asterisk). Patterns can be negated by prefixing with!. Matching stops after the first match (positive or negative). For example!ask,as*will passashbut notask.idandtimestampare never mapped.Default:
*(all headers - except theidandtimestamp)- configuration
Map with a key/value pair containing generic Kafka producer properties.
Default: Empty map.
| Note |
|---|---|
The Kafka binder uses the |
In this section, we show the use of the preceding properties for specific scenarios.
This example illustrates how one may manually acknowledge offsets in a consumer application.
This example requires that spring.cloud.stream.kafka.bindings.input.consumer.autoCommitOffset be set to false.
Use the corresponding input channel name for your example.
@SpringBootApplication
@EnableBinding(Sink.class)
public class ManuallyAcknowdledgingConsumer {
public static void main(String[] args) {
SpringApplication.run(ManuallyAcknowdledgingConsumer.class, args);
}
@StreamListener(Sink.INPUT)
public void process(Message<?> message) {
Acknowledgment acknowledgment = message.getHeaders().get(KafkaHeaders.ACKNOWLEDGMENT, Acknowledgment.class);
if (acknowledgment != null) {
System.out.println("Acknowledgment provided");
acknowledgment.acknowledge();
}
}
}Apache Kafka 0.9 supports secure connections between client and brokers.
To take advantage of this feature, follow the guidelines in the Apache Kafka Documentation as well as the Kafka 0.9 security guidelines from the Confluent documentation.
Use the spring.cloud.stream.kafka.binder.configuration option to set security properties for all clients created by the binder.
For example, to set security.protocol to SASL_SSL, set the following property:
spring.cloud.stream.kafka.binder.configuration.security.protocol=SASL_SSL
All the other security properties can be set in a similar manner.
When using Kerberos, follow the instructions in the reference documentation for creating and referencing the JAAS configuration.
Spring Cloud Stream supports passing JAAS configuration information to the application by using a JAAS configuration file and using Spring Boot properties.
The JAAS and (optionally) krb5 file locations can be set for Spring Cloud Stream applications by using system properties. The following example shows how to launch a Spring Cloud Stream application with SASL and Kerberos by using a JAAS configuration file:
java -Djava.security.auth.login.config=/path.to/kafka_client_jaas.conf -jar log.jar \
--spring.cloud.stream.kafka.binder.brokers=secure.server:9092 \
--spring.cloud.stream.bindings.input.destination=stream.ticktock \
--spring.cloud.stream.kafka.binder.configuration.security.protocol=SASL_PLAINTEXTAs an alternative to having a JAAS configuration file, Spring Cloud Stream provides a mechanism for setting up the JAAS configuration for Spring Cloud Stream applications by using Spring Boot properties.
The following properties can be used to configure the login context of the Kafka client:
- spring.cloud.stream.kafka.binder.jaas.loginModule
The login module name. Not necessary to be set in normal cases.
Default:
com.sun.security.auth.module.Krb5LoginModule.- spring.cloud.stream.kafka.binder.jaas.controlFlag
The control flag of the login module.
Default:
required.- spring.cloud.stream.kafka.binder.jaas.options
Map with a key/value pair containing the login module options.
Default: Empty map.
The following example shows how to launch a Spring Cloud Stream application with SASL and Kerberos by using Spring Boot configuration properties:
java --spring.cloud.stream.kafka.binder.brokers=secure.server:9092 \ --spring.cloud.stream.bindings.input.destination=stream.ticktock \ --spring.cloud.stream.kafka.binder.autoCreateTopics=false \ --spring.cloud.stream.kafka.binder.configuration.security.protocol=SASL_PLAINTEXT \ --spring.cloud.stream.kafka.binder.jaas.options.useKeyTab=true \ --spring.cloud.stream.kafka.binder.jaas.options.storeKey=true \ --spring.cloud.stream.kafka.binder.jaas.options.keyTab=/etc/security/keytabs/kafka_client.keytab \ --spring.cloud.stream.kafka.binder.jaas.options.principal=kafka-client-1@EXAMPLE.COM
The preceding example represents the equivalent of the following JAAS file:
KafkaClient {
com.sun.security.auth.module.Krb5LoginModule required
useKeyTab=true
storeKey=true
keyTab="/etc/security/keytabs/kafka_client.keytab"
principal="[email protected]";
};If the topics required already exist on the broker or will be created by an administrator, autocreation can be turned off and only client JAAS properties need to be sent.
| Note |
|---|---|
Do not mix JAAS configuration files and Spring Boot properties in the same application.
If the |
| Note |
|---|---|
Be careful when using the |
If you wish to suspend consumption but not cause a partition rebalance, you can pause and resume the consumer.
This is facilitated by adding the Consumer as a parameter to your @StreamListener.
To resume, you need an ApplicationListener for ListenerContainerIdleEvent instances.
The frequency at which events are published is controlled by the idleEventInterval property.
Since the consumer is not thread-safe, you must call these methods on the calling thread.
The following simple application shows how to pause and resume:
@SpringBootApplication @EnableBinding(Sink.class) public class Application { public static void main(String[] args) { SpringApplication.run(Application.class, args); } @StreamListener(Sink.INPUT) public void in(String in, @Header(KafkaHeaders.CONSUMER) Consumer<?, ?> consumer) { System.out.println(in); consumer.pause(Collections.singleton(new TopicPartition("myTopic", 0))); } @Bean public ApplicationListener<ListenerContainerIdleEvent> idleListener() { return event -> { System.out.println(event); if (event.getConsumer().paused().size() > 0) { event.getConsumer().resume(event.getConsumer().paused()); } }; } }
Starting with version 1.3, the binder unconditionally sends exceptions to an error channel for each consumer destination and can also be configured to send async producer send failures to an error channel. See Section 29.4, “Error Handling” for more information.
The payload of the ErrorMessage for a send failure is a KafkaSendFailureException with properties:
failedMessage: The Spring MessagingMessage<?>that failed to be sent.record: The rawProducerRecordthat was created from thefailedMessage
There is no automatic handling of producer exceptions (such as sending to a Dead-Letter queue). You can consume these exceptions with your own Spring Integration flow.
Kafka binder module exposes the following metrics:
spring.cloud.stream.binder.kafka.offset: This metric indicates how many messages have not been yet consumed from a given binder’s topic by a given consumer group.
The metrics provided are based on the Mircometer metrics library. The metric contains the consumer group information, topic and the actual lag in committed offset from the latest offset on the topic.
This metric is particularly useful for providing auto-scaling feedback to a PaaS platform.
Because you cannot anticipate how users would want to dispose of dead-lettered messages, the framework does not provide any standard mechanism to handle them. If the reason for the dead-lettering is transient, you may wish to route the messages back to the original topic. However, if the problem is a permanent issue, that could cause an infinite loop. The sample Spring Boot application within this topic is an example of how to route those messages back to the original topic, but it moves them to a “parking lot” topic after three attempts. The application is another spring-cloud-stream application that reads from the dead-letter topic. It terminates when no messages are received for 5 seconds.
The examples assume the original destination is so8400out and the consumer group is so8400.
There are a couple of strategies to consider:
- Consider running the rerouting only when the main application is not running. Otherwise, the retries for transient errors are used up very quickly.
- Alternatively, use a two-stage approach: Use this application to route to a third topic and another to route from there back to the main topic.
The following code listings show the sample application:
application.properties.
spring.cloud.stream.bindings.input.group=so8400replay spring.cloud.stream.bindings.input.destination=error.so8400out.so8400 spring.cloud.stream.bindings.output.destination=so8400out spring.cloud.stream.bindings.output.producer.partitioned=true spring.cloud.stream.bindings.parkingLot.destination=so8400in.parkingLot spring.cloud.stream.bindings.parkingLot.producer.partitioned=true spring.cloud.stream.kafka.binder.configuration.auto.offset.reset=earliest spring.cloud.stream.kafka.binder.headers=x-retries
Application.
@SpringBootApplication @EnableBinding(TwoOutputProcessor.class) public class ReRouteDlqKApplication implements CommandLineRunner { private static final String X_RETRIES_HEADER = "x-retries"; public static void main(String[] args) { SpringApplication.run(ReRouteDlqKApplication.class, args).close(); } private final AtomicInteger processed = new AtomicInteger(); @Autowired private MessageChannel parkingLot; @StreamListener(Processor.INPUT) @SendTo(Processor.OUTPUT) public Message<?> reRoute(Message<?> failed) { processed.incrementAndGet(); Integer retries = failed.getHeaders().get(X_RETRIES_HEADER, Integer.class); if (retries == null) { System.out.println("First retry for " + failed); return MessageBuilder.fromMessage(failed) .setHeader(X_RETRIES_HEADER, new Integer(1)) .setHeader(BinderHeaders.PARTITION_OVERRIDE, failed.getHeaders().get(KafkaHeaders.RECEIVED_PARTITION_ID)) .build(); } else if (retries.intValue() < 3) { System.out.println("Another retry for " + failed); return MessageBuilder.fromMessage(failed) .setHeader(X_RETRIES_HEADER, new Integer(retries.intValue() + 1)) .setHeader(BinderHeaders.PARTITION_OVERRIDE, failed.getHeaders().get(KafkaHeaders.RECEIVED_PARTITION_ID)) .build(); } else { System.out.println("Retries exhausted for " + failed); parkingLot.send(MessageBuilder.fromMessage(failed) .setHeader(BinderHeaders.PARTITION_OVERRIDE, failed.getHeaders().get(KafkaHeaders.RECEIVED_PARTITION_ID)) .build()); } return null; } @Override public void run(String... args) throws Exception { while (true) { int count = this.processed.get(); Thread.sleep(5000); if (count == this.processed.get()) { System.out.println("Idle, terminating"); return; } } } public interface TwoOutputProcessor extends Processor { @Output("parkingLot") MessageChannel parkingLot(); } }
Apache Kafka supports topic partitioning natively.
Sometimes it is advantageous to send data to specific partitions — for example, when you want to strictly order message processing (all messages for a particular customer should go to the same partition).
The following example shows how to configure the producer and consumer side:
@SpringBootApplication @EnableBinding(Source.class) public class KafkaPartitionProducerApplication { private static final Random RANDOM = new Random(System.currentTimeMillis()); private static final String[] data = new String[] { "foo1", "bar1", "qux1", "foo2", "bar2", "qux2", "foo3", "bar3", "qux3", "foo4", "bar4", "qux4", }; public static void main(String[] args) { new SpringApplicationBuilder(KafkaPartitionProducerApplication.class) .web(false) .run(args); } @InboundChannelAdapter(channel = Source.OUTPUT, poller = @Poller(fixedRate = "5000")) public Message<?> generate() { String value = data[RANDOM.nextInt(data.length)]; System.out.println("Sending: " + value); return MessageBuilder.withPayload(value) .setHeader("partitionKey", value) .build(); } }
application.yml.
spring: cloud: stream: bindings: output: destination: partitioned.topic producer: partitioned: true partition-key-expression: headers['partitionKey'] partition-count: 12
| Important |
|---|---|
The topic must be provisioned to have enough partitions to achieve the desired concurrency for all consumer groups.
The above configuration supports up to 12 consumer instances (6 if their |
| Note |
|---|---|
The preceding configuration uses the default partitioning ( |
Since partitions are natively handled by Kafka, no special configuration is needed on the consumer side. Kafka allocates partitions across the instances.
The following Spring Boot application listens to a Kafka stream and prints (to the console) the partition ID to which each message goes:
@SpringBootApplication @EnableBinding(Sink.class) public class KafkaPartitionConsumerApplication { public static void main(String[] args) { new SpringApplicationBuilder(KafkaPartitionConsumerApplication.class) .web(false) .run(args); } @StreamListener(Sink.INPUT) public void listen(@Payload String in, @Header(KafkaHeaders.RECEIVED_PARTITION_ID) int partition) { System.out.println(in + " received from partition " + partition); } }
application.yml.
spring: cloud: stream: bindings: input: destination: partitioned.topic group: myGroup
You can add instances as needed.
Kafka rebalances the partition allocations.
If the instance count (or instance count * concurrency) exceeds the number of partitions, some consumers are idle.
For using the Kafka Streams binder, you just need to add it to your Spring Cloud Stream application, using the following Maven coordinates:
<dependency> <groupId>org.springframework.cloud</groupId> <artifactId>spring-cloud-stream-binder-kafka-streams</artifactId> </dependency>
Spring Cloud Stream’s Apache Kafka support also includes a binder implementation designed explicitly for Apache Kafka Streams binding. With this native integration, a Spring Cloud Stream "processor" application can directly use the Apache Kafka Streams APIs in the core business logic.
Kafka Streams binder implementation builds on the foundation provided by the Kafka Streams in Spring Kafka project.
Kafka Streams binder provides binding capabilities for the three major types in Kafka Streams - KStream, KTable and GlobalKTable.
As part of this native integration, the high-level Streams DSL provided by the Kafka Streams API is available for use in the business logic.
An early version of the Processor API support is available as well.
As noted early-on, Kafka Streams support in Spring Cloud Stream is strictly only available for use in the Processor model. A model in which the messages read from an inbound topic, business processing can be applied, and the transformed messages can be written to an outbound topic. It can also be used in Processor applications with a no-outbound destination.
This application consumes data from a Kafka topic (e.g., words), computes word count for each unique word in a 5 seconds
time window, and the computed results are sent to a downstream topic (e.g., counts) for further processing.
@SpringBootApplication
@EnableBinding(KStreamProcessor.class)
public class WordCountProcessorApplication {
@StreamListener("input")
@SendTo("output")
public KStream<?, WordCount> process(KStream<?, String> input) {
return input
.flatMapValues(value -> Arrays.asList(value.toLowerCase().split("\\W+")))
.groupBy((key, value) -> value)
.windowedBy(TimeWindows.of(5000))
.count(Materialized.as("WordCounts-multi"))
.toStream()
.map((key, value) -> new KeyValue<>(null, new WordCount(key.key(), value, new Date(key.window().start()), new Date(key.window().end()))));
}
public static void main(String[] args) {
SpringApplication.run(WordCountProcessorApplication.class, args);
}Once built as a uber-jar (e.g., wordcount-processor.jar), you can run the above example like the following.
java -jar wordcount-processor.jar --spring.cloud.stream.bindings.input.destination=words --spring.cloud.stream.bindings.output.destination=counts
This application will consume messages from the Kafka topic words and the computed results are published to an output
topic counts.
Spring Cloud Stream will ensure that the messages from both the incoming and outgoing topics are automatically bound as KStream objects. As a developer, you can exclusively focus on the business aspects of the code, i.e. writing the logic required in the processor. Setting up the Streams DSL specific configuration required by the Kafka Streams infrastructure is automatically handled by the framework.
This section contains the configuration options used by the Kafka Streams binder.
For common configuration options and properties pertaining to binder, refer to the core documentation.
The following properties are available at the binder level and must be prefixed with spring.cloud.stream.kafka.streams.binder.
literal.
- configuration
- Map with a key/value pair containing properties pertaining to Apache Kafka Streams API.
This property must be prefixed with
spring.cloud.stream.kafka.streams.binder.. Following are some examples of using this property.
spring.cloud.stream.kafka.streams.binder.configuration.default.key.serde=org.apache.kafka.common.serialization.Serdes$StringSerde spring.cloud.stream.kafka.streams.binder.configuration.default.value.serde=org.apache.kafka.common.serialization.Serdes$StringSerde spring.cloud.stream.kafka.streams.binder.configuration.commit.interval.ms=1000
For more information about all the properties that may go into streams configuration, see StreamsConfig JavaDocs in Apache Kafka Streams docs.
- brokers
Broker URL
Default:
localhost- zkNodes
Zookeeper URL
Default:
localhost- serdeError
Deserialization error handler type. Possible values are -
logAndContinue,logAndFailorsendToDlqDefault:
logAndFail- applicationId
Convenient way to set the application.id for the Kafka Streams application globally at the binder level. If the application contains multiple
StreamListenermethods, then application.id should be set at the binding level per input binding.Default:
none
The following properties are only available for Kafka Streams producers and must be prefixed with spring.cloud.stream.kafka.streams.bindings.<binding name>.producer. literal.
For convenience, if there multiple output bindings and they all require a common value, that can be configured by using the prefix spring.cloud.stream.kafka.streams.default.producer..
- keySerde
key serde to use
Default:
none.- valueSerde
value serde to use
Default:
none.- useNativeEncoding
flag to enable native encoding
Default:
false.
The following properties are only available for Kafka Streams consumers and must be prefixed with spring.cloud.stream.kafka.streams.bindings.<binding name>.consumer.`literal.
For convenience, if there multiple input bindings and they all require a common value, that can be configured by using the prefix `spring.cloud.stream.kafka.streams.default.consumer..
- applicationId
Setting application.id per input binding.
Default:
none- keySerde
key serde to use
Default:
none.- valueSerde
value serde to use
Default:
none.- materializedAs
state store to materialize when using incoming KTable types
Default:
none.- useNativeDecoding
flag to enable native decoding
Default:
false.- dlqName
DLQ topic name.
Default:
none.
Windowing is an important concept in stream processing applications. Following properties are available to configure time-window computations.
- spring.cloud.stream.kafka.streams.timeWindow.length
When this property is given, you can autowire a
TimeWindowsbean into the application. The value is expressed in milliseconds.Default:
none.- spring.cloud.stream.kafka.streams.timeWindow.advanceBy
Value is given in milliseconds.
Default:
none.
For use cases that requires multiple incoming KStream objects or a combination of KStream and KTable objects, the Kafka Streams binder provides multiple bindings support.
Let’s see it in action.
@EnableBinding(KStreamKTableBinding.class)
.....
.....
@StreamListener
public void process(@Input("inputStream") KStream<String, PlayEvent> playEvents,
@Input("inputTable") KTable<Long, Song> songTable) {
....
....
}
interface KStreamKTableBinding {
@Input("inputStream")
KStream<?, ?> inputStream();
@Input("inputTable")
KTable<?, ?> inputTable();
}In the above example, the application is written as a sink, i.e. there are no output bindings and the application has to decide concerning downstream processing. When you write applications in this style, you might want to send the information downstream or store them in a state store (See below for Queryable State Stores).
In the case of incoming KTable, if you want to materialize the computations to a state store, you have to express it through the following property.
spring.cloud.stream.kafka.streams.bindings.inputTable.consumer.materializedAs: all-songs
The above example shows the use of KTable as an input binding. The binder also supports input bindings for GlobalKTable. GlobalKTable binding is useful when you have to ensure that all instances of your application has access to the data updates from the topic. KTable and GlobalKTable bindings are only available on the input. Binder supports both input and output bindings for KStream.
@EnableBinding(KStreamKTableBinding.class)
....
....
@StreamListener
@SendTo("output")
public KStream<String, Long> process(@Input("input") KStream<String, Long> userClicksStream,
@Input("inputTable") KTable<String, String> userRegionsTable) {
....
....
}
interface KStreamKTableBinding extends KafkaStreamsProcessor {
@Input("inputX")
KTable<?, ?> inputTable();
}Kafka Streams allow outbound data to be split into multiple topics based on some predicates. The Kafka Streams binder provides
support for this feature without compromising the programming model exposed through StreamListener in the end user application.
You can write the application in the usual way as demonstrated above in the word count example. However, when using the
branching feature, you are required to do a few things. First, you need to make sure that your return type is KStream[]
instead of a regular KStream. Second, you need to use the SendTo annotation containing the output bindings in the order
(see example below). For each of these output bindings, you need to configure destination, content-type etc., complying with
the standard Spring Cloud Stream expectations.
Here is an example:
@EnableBinding(KStreamProcessorWithBranches.class)
@EnableAutoConfiguration
public static class WordCountProcessorApplication {
@Autowired
private TimeWindows timeWindows;
@StreamListener("input")
@SendTo({"output1","output2","output3})
public KStream<?, WordCount>[] process(KStream<Object, String> input) {
Predicate<Object, WordCount> isEnglish = (k, v) -> v.word.equals("english");
Predicate<Object, WordCount> isFrench = (k, v) -> v.word.equals("french");
Predicate<Object, WordCount> isSpanish = (k, v) -> v.word.equals("spanish");
return input
.flatMapValues(value -> Arrays.asList(value.toLowerCase().split("\\W+")))
.groupBy((key, value) -> value)
.windowedBy(timeWindows)
.count(Materialized.as("WordCounts-1"))
.toStream()
.map((key, value) -> new KeyValue<>(null, new WordCount(key.key(), value, new Date(key.window().start()), new Date(key.window().end()))))
.branch(isEnglish, isFrench, isSpanish);
}
interface KStreamProcessorWithBranches {
@Input("input")
KStream<?, ?> input();
@Output("output1")
KStream<?, ?> output1();
@Output("output2")
KStream<?, ?> output2();
@Output("output3")
KStream<?, ?> output3();
}
}Properties:
spring.cloud.stream.bindings.output1.contentType: application/json
spring.cloud.stream.bindings.output2.contentType: application/json
spring.cloud.stream.bindings.output3.contentType: application/json
spring.cloud.stream.kafka.streams.binder.configuration.commit.interval.ms: 1000
spring.cloud.stream.kafka.streams.binder.configuration:
default.key.serde: org.apache.kafka.common.serialization.Serdes$StringSerde
default.value.serde: org.apache.kafka.common.serialization.Serdes$StringSerde
spring.cloud.stream.bindings.output1:
destination: foo
producer:
headerMode: raw
spring.cloud.stream.bindings.output2:
destination: bar
producer:
headerMode: raw
spring.cloud.stream.bindings.output3:
destination: fox
producer:
headerMode: raw
spring.cloud.stream.bindings.input:
destination: words
consumer:
headerMode: rawSimilar to message-channel based binder applications, the Kafka Streams binder adapts to the out-of-the-box content-type conversions without any compromise.
It is typical for Kafka Streams operations to know the type of SerDe’s used to transform the key and value correctly. Therefore, it may be more natural to rely on the SerDe facilities provided by the Apache Kafka Streams library itself at the inbound and outbound conversions rather than using the content-type conversions offered by the framework. On the other hand, you might be already familiar with the content-type conversion patterns provided by the framework, and that, you’d like to continue using for inbound and outbound conversions.
Both the options are supported in the Kafka Streams binder implementation.
If native encoding is disabled (which is the default), then the framework will convert the message using the contentType
set by the user (otherwise, the default application/json will be applied). It will ignore any SerDe set on the outbound
in this case for outbound serialization.
Here is the property to set the contentType on the outbound.
spring.cloud.stream.bindings.output.contentType: application/json
Here is the property to enable native encoding.
spring.cloud.stream.bindings.output.nativeEncoding: true
If native encoding is enabled on the output binding (user has to enable it as above explicitly), then the framework will
skip any form of automatic message conversion on the outbound. In that case, it will switch to the Serde set by the user.
The valueSerde property set on the actual output binding will be used. Here is an example.
spring.cloud.stream.kafka.streams.bindings.output.producer.valueSerde: org.apache.kafka.common.serialization.Serdes$StringSerde
If this property is not set, then it will use the "default" SerDe: spring.cloud.stream.kafka.streams.binder.configuration.default.value.serde.
It is worth to mention that Kafka Streams binder does not serialize the keys on outbound - it simply relies on Kafka itself.
Therefore, you either have to specify the keySerde property on the binding or it will default to the application-wide common
keySerde.
Binding level key serde:
spring.cloud.stream.kafka.streams.bindings.output.producer.keySerde
Common Key serde:
spring.cloud.stream.kafka.streams.binder.configuration.default.key.serde
If branching is used, then you need to use multiple output bindings. For example,
interface KStreamProcessorWithBranches {
@Input("input")
KStream<?, ?> input();
@Output("output1")
KStream<?, ?> output1();
@Output("output2")
KStream<?, ?> output2();
@Output("output3")
KStream<?, ?> output3();
}If nativeEncoding is set, then you can set different SerDe’s on individual output bindings as below.
spring.cloud.stream.kafka.streams.bindings.output1.producer.valueSerde=IntegerSerde spring.cloud.stream.kafka.streams.bindings.output2.producer.valueSerde=StringSerde spring.cloud.stream.kafka.streams.bindings.output3.producer.valueSerde=JsonSerde
Then if you have SendTo like this, @SendTo({"output1", "output2", "output3"}), the KStream[] from the branches are
applied with proper SerDe objects as defined above. If you are not enabling nativeEncoding, you can then set different
contentType values on the output bindings as below. In that case, the framework will use the appropriate message converter
to convert the messages before sending to Kafka.
spring.cloud.stream.bindings.output1.contentType: application/json spring.cloud.stream.bindings.output2.contentType: application/java-serialzied-object spring.cloud.stream.bindings.output3.contentType: application/octet-stream
Similar rules apply to data deserialization on the inbound.
If native decoding is disabled (which is the default), then the framework will convert the message using the contentType
set by the user (otherwise, the default application/json will be applied). It will ignore any SerDe set on the inbound
in this case for inbound deserialization.
Here is the property to set the contentType on the inbound.
spring.cloud.stream.bindings.input.contentType: application/json
Here is the property to enable native decoding.
spring.cloud.stream.bindings.input.nativeDecoding: true
If native decoding is enabled on the input binding (user has to enable it as above explicitly), then the framework will
skip doing any message conversion on the inbound. In that case, it will switch to the SerDe set by the user. The valueSerde
property set on the actual output binding will be used. Here is an example.
spring.cloud.stream.kafka.streams.bindings.input.consumer.valueSerde: org.apache.kafka.common.serialization.Serdes$StringSerde
If this property is not set, it will use the default SerDe: spring.cloud.stream.kafka.streams.binder.configuration.default.value.serde.
It is worth to mention that Kafka Streams binder does not deserialize the keys on inbound - it simply relies on Kafka itself.
Therefore, you either have to specify the keySerde property on the binding or it will default to the application-wide common
keySerde.
Binding level key serde:
spring.cloud.stream.kafka.streams.bindings.input.consumer.keySerde
Common Key serde:
spring.cloud.stream.kafka.streams.binder.configuration.default.key.serde
As in the case of KStream branching on the outbound, the benefit of setting value SerDe per binding is that if you have multiple input bindings (multiple KStreams object) and they all require separate value SerDe’s, then you can configure them individually. If you use the common configuration approach, then this feature won’t be applicable.
Apache Kafka Streams provide the capability for natively handling exceptions from deserialization errors.
For details on this support, please see this
Out of the box, Apache Kafka Streams provide two kinds of deserialization exception handlers - logAndContinue and logAndFail.
As the name indicates, the former will log the error and continue processing the next records and the latter will log the
error and fail. LogAndFail is the default deserialization exception handler.
Kafka Streams binder supports a selection of exception handlers through the following properties.
spring.cloud.stream.kafka.streams.binder.serdeError: logAndContinue
In addition to the above two deserialization exception handlers, the binder also provides a third one for sending the erroneous records (poison pills) to a DLQ topic. Here is how you enable this DLQ exception handler.
spring.cloud.stream.kafka.streams.binder.serdeError: sendToDlq
When the above property is set, all the deserialization error records are automatically sent to the DLQ topic.
spring.cloud.stream.kafka.streams.bindings.input.consumer.dlqName: foo-dlq
If this is set, then the error records are sent to the topic foo-dlq. If this is not set, then it will create a DLQ
topic with the name error.<input-topic-name>.<group-name>.
A couple of things to keep in mind when using the exception handling feature in Kafka Streams binder.
- The property
spring.cloud.stream.kafka.streams.binder.serdeErroris applicable for the entire application. This implies that if there are multipleStreamListenermethods in the same application, this property is applied to all of them. - The exception handling for deserialization works consistently with native deserialization and framework provided message conversion.
For general error handling in Kafka Streams binder, it is up to the end user applications to handle application level errors. As a side effect of providing a DLQ for deserialization exception handlers, Kafka Streams binder provides a way to get access to the DLQ sending bean directly from your application. Once you get access to that bean, you can programmatically send any exception records from your application to the DLQ.
It continues to remain hard to robust error handling using the high-level DSL; Kafka Streams doesn’t natively support error handling yet.
However, when you use the low-level Processor API in your application, there are options to control this behavior. See below.
@Autowired
private SendToDlqAndContinue dlqHandler;
@StreamListener("input")
@SendTo("output")
public KStream<?, WordCount> process(KStream<Object, String> input) {
input.process(() -> new Processor() {
ProcessorContext context;
@Override
public void init(ProcessorContext context) {
this.context = context;
}
@Override
public void process(Object o, Object o2) {
try {
.....
.....
}
catch(Exception e) {
//explicitly provide the kafka topic corresponding to the input binding as the first argument.
//DLQ handler will correctly map to the dlq topic from the actual incoming destination.
dlqHandler.sendToDlq("topic-name", (byte[]) o1, (byte[]) o2, context.partition());
}
}
.....
.....
});
}State store is created automatically by Kafka Streams when the DSL is used.
When processor API is used, you need to register a state store manually. In order to do so, you can use KafkaStreamsStateStore annotation.
You can specify the name and type of the store, flags to control log and disabling cache, etc.
Once the store is created by the binder during the bootstrapping phase, you can access this state store through the processor API.
Below are some primitives for doing this.
Creating a state store:
@KafkaStreamsStateStore(name="mystate", type= KafkaStreamsStateStoreProperties.StoreType.WINDOW, lengthMs=300000)
public void process(KStream<Object, Product> input) {
...
}Accessing the state store:
Processor<Object, Product>() {
WindowStore<Object, String> state;
@Override
public void init(ProcessorContext processorContext) {
state = (WindowStore)processorContext.getStateStore("mystate");
}
...
}As part of the public Kafka Streams binder API, we expose a class called InteractiveQueryService.
You can access this as a Spring bean in your application. An easy way to get access to this bean from your application is to "autowire" the bean.
@Autowired private InteractiveQueryService interactiveQueryService;
Once you gain access to this bean, then you can query for the particular state-store that you are interested. See below.
ReadOnlyKeyValueStore<Object, Object> keyValueStore =
interactiveQueryService.getQueryableStoreType("my-store", QueryableStoreTypes.keyValueStore());If there are multiple instances of the kafka streams application running, then before you can query them interactively, you need to identify which application instance hosts the key.
InteractiveQueryService API provides methods for identifying the host information.
In order for this to work, you must configure the property application.server as below:
spring.cloud.stream.kafka.streams.binder.configuration.application.server: <server>:<port>
Here are some code snippets:
org.apache.kafka.streams.state.HostInfo hostInfo = interactiveQueryService.getHostInfo("store-name",
key, keySerializer);
if (interactiveQueryService.getCurrentHostInfo().equals(hostInfo)) {
//query from the store that is locally available
}
else {
//query from the remote host
}StreamBuilderFactoryBean from spring-kafka that is responsible for constructing the KafkaStreams object can be accessed programmatically.
Each StreamBuilderFactoryBean is registered as stream-builder and appended with the StreamListener method name.
If your StreamListener method is named as process for example, the stream builder bean is named as stream-builder-process.
Since this is a factory bean, it should be accessed by prepending an ampersand (&) when accessing it programmatically.
Following is an example and it assumes the StreamListener method is named as process
StreamsBuilderFactoryBean streamsBuilderFactoryBean = context.getBean("&stream-builder-process", StreamsBuilderFactoryBean.class);
KafkaStreams kafkaStreams = streamsBuilderFactoryBean.getKafkaStreams();By default, the Kafkastreams.cleanup() method is called when the binding is stopped.
See the Spring Kafka documentation.
To modify this behavior simply add a single CleanupConfig @Bean (configured to clean up on start, stop, or neither) to the application context; the bean will be detected and wired into the factory bean.
To use the RabbitMQ binder, you can add it to your Spring Cloud Stream application, by using the following Maven coordinates:
<dependency> <groupId>org.springframework.cloud</groupId> <artifactId>spring-cloud-stream-binder-rabbit</artifactId> </dependency>
Alternatively, you can use the Spring Cloud Stream RabbitMQ Starter, as follows:
<dependency> <groupId>org.springframework.cloud</groupId> <artifactId>spring-cloud-starter-stream-rabbit</artifactId> </dependency>
The following simplified diagram shows how the RabbitMQ binder operates:

By default, the RabbitMQ Binder implementation maps each destination to a TopicExchange.
For each consumer group, a Queue is bound to that TopicExchange.
Each consumer instance has a corresponding RabbitMQ Consumer instance for its group’s Queue.
For partitioned producers and consumers, the queues are suffixed with the partition index and use the partition index as the routing key.
For anonymous consumers (those with no group property), an auto-delete queue (with a randomized unique name) is used.
By using the optional autoBindDlq option, you can configure the binder to create and configure dead-letter queues (DLQs) (and a dead-letter exchange DLX, as well as routing infrastructure).
By default, the dead letter queue has the name of the destination, appended with .dlq.
If retry is enabled (maxAttempts > 1), failed messages are delivered to the DLQ after retries are exhausted.
If retry is disabled (maxAttempts = 1), you should set requeueRejected to false (the default) so that failed messages are routed to the DLQ, instead of being re-queued.
In addition, republishToDlq causes the binder to publish a failed message to the DLQ (instead of rejecting it).
This feature lets additional information (such as the stack trace in the x-exception-stacktrace header) be added to the message in headers.
This option does not need retry enabled.
You can republish a failed message after just one attempt.
Starting with version 1.2, you can configure the delivery mode of republished messages.
See the republishDeliveryMode property.
| Important |
|---|---|
Setting |
See Section 41.3.1, “RabbitMQ Binder Properties” for more information about these properties.
The framework does not provide any standard mechanism to consume dead-letter messages (or to re-route them back to the primary queue). Some options are described in Section 41.6, “Dead-Letter Queue Processing”.
| Note |
|---|---|
When multiple RabbitMQ binders are used in a Spring Cloud Stream application, it is important to disable 'RabbitAutoConfiguration' to avoid the same configuration from |
Starting with version 2.0, the RabbitMessageChannelBinder sets the RabbitTemplate.userPublisherConnection property to true so that the non-transactional producers avoid deadlocks on consumers, which can happen if cached connections are blocked because of a memory alarm on the broker.
| Note |
|---|---|
Currently, a |
This section contains settings specific to the RabbitMQ Binder and bound channels.
For general binding configuration options and properties, see the Spring Cloud Stream core documentation.
By default, the RabbitMQ binder uses Spring Boot’s ConnectionFactory.
Conseuqently, it supports all Spring Boot configuration options for RabbitMQ.
(For reference, see the Spring Boot documentation).
RabbitMQ configuration options use the spring.rabbitmq prefix.
In addition to Spring Boot options, the RabbitMQ binder supports the following properties:
- spring.cloud.stream.rabbit.binder.adminAddresses
A comma-separated list of RabbitMQ management plugin URLs. Only used when
nodescontains more than one entry. Each entry in this list must have a corresponding entry inspring.rabbitmq.addresses. Only needed if you use a RabbitMQ cluster and wish to consume from the node that hosts the queue. See Queue Affinity and the LocalizedQueueConnectionFactory for more information.Default: empty.
- spring.cloud.stream.rabbit.binder.nodes
A comma-separated list of RabbitMQ node names. When more than one entry, used to locate the server address where a queue is located. Each entry in this list must have a corresponding entry in
spring.rabbitmq.addresses. Only needed if you use a RabbitMQ cluster and wish to consume from the node that hosts the queue. See Queue Affinity and the LocalizedQueueConnectionFactory for more information.Default: empty.
- spring.cloud.stream.rabbit.binder.compressionLevel
The compression level for compressed bindings. See
java.util.zip.Deflater.Default:
1(BEST_LEVEL).- spring.cloud.stream.binder.connection-name-prefix
A connection name prefix used to name the connection(s) created by this binder. The name is this prefix followed by
#n, wherenincrements each time a new connection is opened.Default: none (Spring AMQP default).
The following properties are available for Rabbit consumers only and must be prefixed with spring.cloud.stream.rabbit.bindings.<channelName>.consumer..
- acknowledgeMode
The acknowledge mode.
Default:
AUTO.- autoBindDlq
Whether to automatically declare the DLQ and bind it to the binder DLX.
Default:
false.- bindingRoutingKey
The routing key with which to bind the queue to the exchange (if
bindQueueistrue). For partitioned destinations,-<instanceIndex>is appended.Default:
#.- bindQueue
Whether to bind the queue to the destination exchange. Set it to
falseif you have set up your own infrastructure and have previously created and bound the queue.Default:
true.- consumerTagPrefix
Used to create the consumer tag(s); will be appended by
#nwherenincrements for each consumer created. Example:${spring.application.name}-${spring.cloud.stream.bindings.input.group}-${spring.cloud.stream.instance-index}.Default: none - the broker will generate random consumer tags.
- deadLetterQueueName
The name of the DLQ
Default:
prefix+destination.dlq- deadLetterExchange
A DLX to assign to the queue. Relevant only if
autoBindDlqistrue.Default: 'prefix+DLX'
- deadLetterExchangeType
The type of the DLX to assign to the queue. Relevant only if
autoBindDlqistrue.Default: 'direct'
- deadLetterRoutingKey
A dead letter routing key to assign to the queue. Relevant only if
autoBindDlqistrue.Default:
destination- declareDlx
Whether to declare the dead letter exchange for the destination. Relevant only if
autoBindDlqistrue. Set tofalseif you have a pre-configured DLX.Default:
true.- declareExchange
Whether to declare the exchange for the destination.
Default:
true.- delayedExchange
Whether to declare the exchange as a
Delayed Message Exchange. Requires the delayed message exchange plugin on the broker. Thex-delayed-typeargument is set to theexchangeType.Default:
false.- dlqDeadLetterExchange
If a DLQ is declared, a DLX to assign to that queue.
Default:
none- dlqDeadLetterRoutingKey
If a DLQ is declared, a dead letter routing key to assign to that queue.
Default:
none- dlqExpires
How long before an unused dead letter queue is deleted (in milliseconds).
Default:
no expiration- dlqLazy
Declare the dead letter queue with the
x-queue-mode=lazyargument. See “Lazy Queues”. Consider using a policy instead of this setting, because using a policy allows changing the setting without deleting the queue.Default:
false.- dlqMaxLength
Maximum number of messages in the dead letter queue.
Default:
no limit- dlqMaxLengthBytes
Maximum number of total bytes in the dead letter queue from all messages.
Default:
no limit- dlqMaxPriority
Maximum priority of messages in the dead letter queue (0-255).
Default:
none- dlqOverflowBehavior
Action to take when
dlqMaxLengthordlqMaxLengthBytesis exceeded; currentlydrop-headorreject-publishbut refer to the RabbitMQ documentation.Default:
none- dlqTtl
Default time to live to apply to the dead letter queue when declared (in milliseconds).
Default:
no limit- durableSubscription
Whether the subscription should be durable. Only effective if
groupis also set.Default:
true.- exchangeAutoDelete
If
declareExchangeis true, whether the exchange should be auto-deleted (that is, removed after the last queue is removed).Default:
true.- exchangeDurable
If
declareExchangeis true, whether the exchange should be durable (that is, it survives broker restart).Default:
true.- exchangeType
The exchange type:
direct,fanoutortopicfor non-partitioned destinations anddirectortopicfor partitioned destinations.Default:
topic.- exclusive
Whether to create an exclusive consumer. Concurrency should be 1 when this is
true. Often used when strict ordering is required but enabling a hot standby instance to take over after a failure. SeerecoveryInterval, which controls how often a standby instance attempts to consume.Default:
false.- expires
How long before an unused queue is deleted (in milliseconds).
Default:
no expiration- failedDeclarationRetryInterval
The interval (in milliseconds) between attempts to consume from a queue if it is missing.
Default: 5000
- headerPatterns
Patterns for headers to be mapped from inbound messages.
Default:
['*'](all headers).- lazy
Declare the queue with the
x-queue-mode=lazyargument. See “Lazy Queues”. Consider using a policy instead of this setting, because using a policy allows changing the setting without deleting the queue.Default:
false.- maxConcurrency
The maximum number of consumers.
Default:
1.- maxLength
The maximum number of messages in the queue.
Default:
no limit- maxLengthBytes
The maximum number of total bytes in the queue from all messages.
Default:
no limit- maxPriority
The maximum priority of messages in the queue (0-255).
Default:
none- missingQueuesFatal
When the queue cannot be found, whether to treat the condition as fatal and stop the listener container. Defaults to
falseso that the container keeps trying to consume from the queue — for example, when using a cluster and the node hosting a non-HA queue is down.Default:
false- overflowBehavior
Action to take when
maxLengthormaxLengthBytesis exceeded; currentlydrop-headorreject-publishbut refer to the RabbitMQ documentation.Default:
none- prefetch
Prefetch count.
Default:
1.- prefix
A prefix to be added to the name of the
destinationand queues.Default: "".
- queueDeclarationRetries
The number of times to retry consuming from a queue if it is missing. Relevant only when
missingQueuesFatalistrue. Otherwise, the container keeps retrying indefinitely.Default:
3- queueNameGroupOnly
When true, consume from a queue with a name equal to the
group. Otherwise the queue name isdestination.group. This is useful, for example, when using Spring Cloud Stream to consume from an existing RabbitMQ queue.Default: false.
- recoveryInterval
The interval between connection recovery attempts, in milliseconds.
Default:
5000.- requeueRejected
Whether delivery failures should be re-queued when retry is disabled or
republishToDlqisfalse.Default:
false.
- republishDeliveryMode
When
republishToDlqistrue, specifies the delivery mode of the republished message.Default:
DeliveryMode.PERSISTENT- republishToDlq
By default, messages that fail after retries are exhausted are rejected. If a dead-letter queue (DLQ) is configured, RabbitMQ routes the failed message (unchanged) to the DLQ. If set to
true, the binder republishs failed messages to the DLQ with additional headers, including the exception message and stack trace from the cause of the final failure.Default: false
- transacted
Whether to use transacted channels.
Default:
false.- ttl
Default time to live to apply to the queue when declared (in milliseconds).
Default:
no limit- txSize
The number of deliveries between acks.
Default:
1.
To set listener container properties that are not exposed as binder or binding properties, add a single bean of type ListenerContainerCustomizer to the application context.
The binder and binding properties will be set and then the customizer will be called.
The customizer (configure() method) is provided with the queue name as well as the consumer group as arguments.
The following properties are available for Rabbit producers only and
must be prefixed with spring.cloud.stream.rabbit.bindings.<channelName>.producer..
- autoBindDlq
Whether to automatically declare the DLQ and bind it to the binder DLX.
Default:
false.- batchingEnabled
Whether to enable message batching by producers. Messages are batched into one message according to the following properties (described in the next three entries in this list): 'batchSize',
batchBufferLimit, andbatchTimeout. See Batching for more information.Default:
false.- batchSize
The number of messages to buffer when batching is enabled.
Default:
100.- batchBufferLimit
The maximum buffer size when batching is enabled.
Default:
10000.- batchTimeout
The batch timeout when batching is enabled.
Default:
5000.- bindingRoutingKey
The routing key with which to bind the queue to the exchange (if
bindQueueistrue). Only applies to non-partitioned destinations. Only applies ifrequiredGroupsare provided and then only to those groups.Default:
#.- bindQueue
Whether to bind the queue to the destination exchange. Set it to
falseif you have set up your own infrastructure and have previously created and bound the queue. Only applies ifrequiredGroupsare provided and then only to those groups.Default:
true.- compress
Whether data should be compressed when sent.
Default:
false.- deadLetterQueueName
The name of the DLQ Only applies if
requiredGroupsare provided and then only to those groups.Default:
prefix+destination.dlq- deadLetterExchange
A DLX to assign to the queue. Relevant only when
autoBindDlqistrue. Applies only whenrequiredGroupsare provided and then only to those groups.Default: 'prefix+DLX'
- deadLetterExchangeType
The type of the DLX to assign to the queue. Relevant only if
autoBindDlqistrue. Applies only whenrequiredGroupsare provided and then only to those groups.Default: 'direct'
- deadLetterRoutingKey
A dead letter routing key to assign to the queue. Relevant only when
autoBindDlqistrue. Applies only whenrequiredGroupsare provided and then only to those groups.Default:
destination- declareDlx
Whether to declare the dead letter exchange for the destination. Relevant only if
autoBindDlqistrue. Set tofalseif you have a pre-configured DLX. Applies only whenrequiredGroupsare provided and then only to those groups.Default:
true.- declareExchange
Whether to declare the exchange for the destination.
Default:
true.- delayExpression
A SpEL expression to evaluate the delay to apply to the message (
x-delayheader). It has no effect if the exchange is not a delayed message exchange.Default: No
x-delayheader is set.- delayedExchange
Whether to declare the exchange as a
Delayed Message Exchange. Requires the delayed message exchange plugin on the broker. Thex-delayed-typeargument is set to theexchangeType.Default:
false.- deliveryMode
The delivery mode.
Default:
PERSISTENT.- dlqDeadLetterExchange
When a DLQ is declared, a DLX to assign to that queue. Applies only if
requiredGroupsare provided and then only to those groups.Default:
none- dlqDeadLetterRoutingKey
When a DLQ is declared, a dead letter routing key to assign to that queue. Applies only when
requiredGroupsare provided and then only to those groups.Default:
none- dlqExpires
How long (in milliseconds) before an unused dead letter queue is deleted. Applies only when
requiredGroupsare provided and then only to those groups.Default:
no expiration- dlqLazy
- Declare the dead letter queue with the
x-queue-mode=lazyargument. See “Lazy Queues”. Consider using a policy instead of this setting, because using a policy allows changing the setting without deleting the queue. Applies only whenrequiredGroupsare provided and then only to those groups. - dlqMaxLength
Maximum number of messages in the dead letter queue. Applies only if
requiredGroupsare provided and then only to those groups.Default:
no limit- dlqMaxLengthBytes
Maximum number of total bytes in the dead letter queue from all messages. Applies only when
requiredGroupsare provided and then only to those groups.Default:
no limit- dlqMaxPriority
Maximum priority of messages in the dead letter queue (0-255) Applies only when
requiredGroupsare provided and then only to those groups.Default:
none- dlqTtl
Default time (in milliseconds) to live to apply to the dead letter queue when declared. Applies only when
requiredGroupsare provided and then only to those groups.Default:
no limit- exchangeAutoDelete
If
declareExchangeistrue, whether the exchange should be auto-delete (it is removed after the last queue is removed).Default:
true.- exchangeDurable
If
declareExchangeistrue, whether the exchange should be durable (survives broker restart).Default:
true.- exchangeType
The exchange type:
direct,fanoutortopicfor non-partitioned destinations anddirectortopicfor partitioned destinations.Default:
topic.- expires
How long (in milliseconds) before an unused queue is deleted. Applies only when
requiredGroupsare provided and then only to those groups.Default:
no expiration- headerPatterns
Patterns for headers to be mapped to outbound messages.
Default:
['*'](all headers).- lazy
Declare the queue with the
x-queue-mode=lazyargument. See “Lazy Queues”. Consider using a policy instead of this setting, because using a policy allows changing the setting without deleting the queue. Applies only whenrequiredGroupsare provided and then only to those groups.Default:
false.- maxLength
Maximum number of messages in the queue. Applies only when
requiredGroupsare provided and then only to those groups.Default:
no limit- maxLengthBytes
Maximum number of total bytes in the queue from all messages. Only applies if
requiredGroupsare provided and then only to those groups.Default:
no limit- maxPriority
Maximum priority of messages in the queue (0-255). Only applies if
requiredGroupsare provided and then only to those groups.Default:
none- prefix
A prefix to be added to the name of the
destinationexchange.Default: "".
- queueNameGroupOnly
When
true, consume from a queue with a name equal to thegroup. Otherwise the queue name isdestination.group. This is useful, for example, when using Spring Cloud Stream to consume from an existing RabbitMQ queue. Applies only whenrequiredGroupsare provided and then only to those groups.Default: false.
- routingKeyExpression
A SpEL expression to determine the routing key to use when publishing messages. For a fixed routing key, use a literal expression, such as
routingKeyExpression='my.routingKey'in a properties file orroutingKeyExpression: '''my.routingKey'''in a YAML file.Default:
destinationordestination-<partition>for partitioned destinations.- transacted
Whether to use transacted channels.
Default:
false.- ttl
Default time (in milliseconds) to live to apply to the queue when declared. Applies only when
requiredGroupsare provided and then only to those groups.Default:
no limit
| Note |
|---|---|
In the case of RabbitMQ, content type headers can be set by external applications. Spring Cloud Stream supports them as part of an extended internal protocol used for any type of transport — including transports, such as Kafka (prior to 0.11), that do not natively support headers. |
When retry is enabled within the binder, the listener container thread is suspended for any back off periods that are configured. This might be important when strict ordering is required with a single consumer. However, for other use cases, it prevents other messages from being processed on that thread. An alternative to using binder retry is to set up dead lettering with time to live on the dead-letter queue (DLQ) as well as dead-letter configuration on the DLQ itself. See “Section 41.3.1, “RabbitMQ Binder Properties”” for more information about the properties discussed here. You can use the following example configuration to enable this feature:
- Set
autoBindDlqtotrue. The binder create a DLQ. Optionally, you can specify a name indeadLetterQueueName. - Set
dlqTtlto the back off time you want to wait between redeliveries. - Set the
dlqDeadLetterExchangeto the default exchange. Expired messages from the DLQ are routed to the original queue, because the defaultdeadLetterRoutingKeyis the queue name (destination.group). Setting to the default exchange is achieved by setting the property with no value, as shown in the next example.
To force a message to be dead-lettered, either throw an AmqpRejectAndDontRequeueException or set requeueRejected to true (the default) and throw any exception.
The loop continue without end, which is fine for transient problems, but you may want to give up after some number of attempts.
Fortunately, RabbitMQ provides the x-death header, which lets you determine how many cycles have occurred.
To acknowledge a message after giving up, throw an ImmediateAcknowledgeAmqpException.
The following configuration creates an exchange myDestination with queue myDestination.consumerGroup bound to a topic exchange with a wildcard routing key #:
--- spring.cloud.stream.bindings.input.destination=myDestination spring.cloud.stream.bindings.input.group=consumerGroup #disable binder retries spring.cloud.stream.bindings.input.consumer.max-attempts=1 #dlx/dlq setup spring.cloud.stream.rabbit.bindings.input.consumer.auto-bind-dlq=true spring.cloud.stream.rabbit.bindings.input.consumer.dlq-ttl=5000 spring.cloud.stream.rabbit.bindings.input.consumer.dlq-dead-letter-exchange= ---
This configuration creates a DLQ bound to a direct exchange (DLX) with a routing key of myDestination.consumerGroup.
When messages are rejected, they are routed to the DLQ.
After 5 seconds, the message expires and is routed to the original queue by using the queue name as the routing key, as shown in the following example:
Spring Boot application.
@SpringBootApplication @EnableBinding(Sink.class) public class XDeathApplication { public static void main(String[] args) { SpringApplication.run(XDeathApplication.class, args); } @StreamListener(Sink.INPUT) public void listen(String in, @Header(name = "x-death", required = false) Map<?,?> death) { if (death != null && death.get("count").equals(3L)) { // giving up - don't send to DLX throw new ImmediateAcknowledgeAmqpException("Failed after 4 attempts"); } throw new AmqpRejectAndDontRequeueException("failed"); } }
Notice that the count property in the x-death header is a Long.
Starting with version 1.3, the binder unconditionally sends exceptions to an error channel for each consumer destination and can also be configured to send async producer send failures to an error channel. See “???” for more information.
RabbitMQ has two types of send failures:
- Returned messages,
- Negatively acknowledged Publisher Confirms.
The latter is rare. According to the RabbitMQ documentation "[A nack] will only be delivered if an internal error occurs in the Erlang process responsible for a queue.".
As well as enabling producer error channels (as described in “???”), the RabbitMQ binder only sends messages to the channels if the connection factory is appropriately configured, as follows:
ccf.setPublisherConfirms(true);ccf.setPublisherReturns(true);
When using Spring Boot configuration for the connection factory, set the following properties:
spring.rabbitmq.publisher-confirmsspring.rabbitmq.publisher-returns
The payload of the ErrorMessage for a returned message is a ReturnedAmqpMessageException with the following properties:
failedMessage: The spring-messagingMessage<?>that failed to be sent.amqpMessage: The raw spring-amqpMessage.replyCode: An integer value indicating the reason for the failure (for example, 312 - No route).replyText: A text value indicating the reason for the failure (for example,NO_ROUTE).exchange: The exchange to which the message was published.routingKey: The routing key used when the message was published.
For negatively acknowledged confirmations, the payload is a NackedAmqpMessageException with the following properties:
failedMessage: The spring-messagingMessage<?>that failed to be sent.nackReason: A reason (if available — you may need to examine the broker logs for more information).
There is no automatic handling of these exceptions (such as sending to a dead-letter queue). You can consume these exceptions with your own Spring Integration flow.
Because you cannot anticipate how users would want to dispose of dead-lettered messages, the framework does not provide any standard mechanism to handle them.
If the reason for the dead-lettering is transient, you may wish to route the messages back to the original queue.
However, if the problem is a permanent issue, that could cause an infinite loop.
The following Spring Boot application shows an example of how to route those messages back to the original queue but moves them to a third “parking lot” queue after three attempts.
The second example uses the RabbitMQ Delayed Message Exchange to introduce a delay to the re-queued message.
In this example, the delay increases for each attempt.
These examples use a @RabbitListener to receive messages from the DLQ.
You could also use RabbitTemplate.receive() in a batch process.
The examples assume the original destination is so8400in and the consumer group is so8400.
The first two examples are for when the destination is not partitioned:
@SpringBootApplication public class ReRouteDlqApplication { private static final String ORIGINAL_QUEUE = "so8400in.so8400"; private static final String DLQ = ORIGINAL_QUEUE + ".dlq"; private static final String PARKING_LOT = ORIGINAL_QUEUE + ".parkingLot"; private static final String X_RETRIES_HEADER = "x-retries"; public static void main(String[] args) throws Exception { ConfigurableApplicationContext context = SpringApplication.run(ReRouteDlqApplication.class, args); System.out.println("Hit enter to terminate"); System.in.read(); context.close(); } @Autowired private RabbitTemplate rabbitTemplate; @RabbitListener(queues = DLQ) public void rePublish(Message failedMessage) { Integer retriesHeader = (Integer) failedMessage.getMessageProperties().getHeaders().get(X_RETRIES_HEADER); if (retriesHeader == null) { retriesHeader = Integer.valueOf(0); } if (retriesHeader < 3) { failedMessage.getMessageProperties().getHeaders().put(X_RETRIES_HEADER, retriesHeader + 1); this.rabbitTemplate.send(ORIGINAL_QUEUE, failedMessage); } else { this.rabbitTemplate.send(PARKING_LOT, failedMessage); } } @Bean public Queue parkingLot() { return new Queue(PARKING_LOT); } }
@SpringBootApplication public class ReRouteDlqApplication { private static final String ORIGINAL_QUEUE = "so8400in.so8400"; private static final String DLQ = ORIGINAL_QUEUE + ".dlq"; private static final String PARKING_LOT = ORIGINAL_QUEUE + ".parkingLot"; private static final String X_RETRIES_HEADER = "x-retries"; private static final String DELAY_EXCHANGE = "dlqReRouter"; public static void main(String[] args) throws Exception { ConfigurableApplicationContext context = SpringApplication.run(ReRouteDlqApplication.class, args); System.out.println("Hit enter to terminate"); System.in.read(); context.close(); } @Autowired private RabbitTemplate rabbitTemplate; @RabbitListener(queues = DLQ) public void rePublish(Message failedMessage) { Map<String, Object> headers = failedMessage.getMessageProperties().getHeaders(); Integer retriesHeader = (Integer) headers.get(X_RETRIES_HEADER); if (retriesHeader == null) { retriesHeader = Integer.valueOf(0); } if (retriesHeader < 3) { headers.put(X_RETRIES_HEADER, retriesHeader + 1); headers.put("x-delay", 5000 * retriesHeader); this.rabbitTemplate.send(DELAY_EXCHANGE, ORIGINAL_QUEUE, failedMessage); } else { this.rabbitTemplate.send(PARKING_LOT, failedMessage); } } @Bean public DirectExchange delayExchange() { DirectExchange exchange = new DirectExchange(DELAY_EXCHANGE); exchange.setDelayed(true); return exchange; } @Bean public Binding bindOriginalToDelay() { return BindingBuilder.bind(new Queue(ORIGINAL_QUEUE)).to(delayExchange()).with(ORIGINAL_QUEUE); } @Bean public Queue parkingLot() { return new Queue(PARKING_LOT); } }
With partitioned destinations, there is one DLQ for all partitions. We determine the original queue from the headers.
When republishToDlq is false, RabbitMQ publishes the message to the DLX/DLQ with an x-death header containing information about the original destination, as shown in the following example:
@SpringBootApplication public class ReRouteDlqApplication { private static final String ORIGINAL_QUEUE = "so8400in.so8400"; private static final String DLQ = ORIGINAL_QUEUE + ".dlq"; private static final String PARKING_LOT = ORIGINAL_QUEUE + ".parkingLot"; private static final String X_DEATH_HEADER = "x-death"; private static final String X_RETRIES_HEADER = "x-retries"; public static void main(String[] args) throws Exception { ConfigurableApplicationContext context = SpringApplication.run(ReRouteDlqApplication.class, args); System.out.println("Hit enter to terminate"); System.in.read(); context.close(); } @Autowired private RabbitTemplate rabbitTemplate; @SuppressWarnings("unchecked") @RabbitListener(queues = DLQ) public void rePublish(Message failedMessage) { Map<String, Object> headers = failedMessage.getMessageProperties().getHeaders(); Integer retriesHeader = (Integer) headers.get(X_RETRIES_HEADER); if (retriesHeader == null) { retriesHeader = Integer.valueOf(0); } if (retriesHeader < 3) { headers.put(X_RETRIES_HEADER, retriesHeader + 1); List<Map<String, ?>> xDeath = (List<Map<String, ?>>) headers.get(X_DEATH_HEADER); String exchange = (String) xDeath.get(0).get("exchange"); List<String> routingKeys = (List<String>) xDeath.get(0).get("routing-keys"); this.rabbitTemplate.send(exchange, routingKeys.get(0), failedMessage); } else { this.rabbitTemplate.send(PARKING_LOT, failedMessage); } } @Bean public Queue parkingLot() { return new Queue(PARKING_LOT); } }
When republishToDlq is true, the republishing recoverer adds the original exchange and routing key to headers, as shown in the following example:
@SpringBootApplication public class ReRouteDlqApplication { private static final String ORIGINAL_QUEUE = "so8400in.so8400"; private static final String DLQ = ORIGINAL_QUEUE + ".dlq"; private static final String PARKING_LOT = ORIGINAL_QUEUE + ".parkingLot"; private static final String X_RETRIES_HEADER = "x-retries"; private static final String X_ORIGINAL_EXCHANGE_HEADER = RepublishMessageRecoverer.X_ORIGINAL_EXCHANGE; private static final String X_ORIGINAL_ROUTING_KEY_HEADER = RepublishMessageRecoverer.X_ORIGINAL_ROUTING_KEY; public static void main(String[] args) throws Exception { ConfigurableApplicationContext context = SpringApplication.run(ReRouteDlqApplication.class, args); System.out.println("Hit enter to terminate"); System.in.read(); context.close(); } @Autowired private RabbitTemplate rabbitTemplate; @RabbitListener(queues = DLQ) public void rePublish(Message failedMessage) { Map<String, Object> headers = failedMessage.getMessageProperties().getHeaders(); Integer retriesHeader = (Integer) headers.get(X_RETRIES_HEADER); if (retriesHeader == null) { retriesHeader = Integer.valueOf(0); } if (retriesHeader < 3) { headers.put(X_RETRIES_HEADER, retriesHeader + 1); String exchange = (String) headers.get(X_ORIGINAL_EXCHANGE_HEADER); String originalRoutingKey = (String) headers.get(X_ORIGINAL_ROUTING_KEY_HEADER); this.rabbitTemplate.send(exchange, originalRoutingKey, failedMessage); } else { this.rabbitTemplate.send(PARKING_LOT, failedMessage); } } @Bean public Queue parkingLot() { return new Queue(PARKING_LOT); } }
RabbitMQ does not support partitioning natively.
Sometimes, it is advantageous to send data to specific partitions — for example, when you want to strictly order message processing, all messages for a particular customer should go to the same partition.
The RabbitMessageChannelBinder provides partitioning by binding a queue for each partition to the destination exchange.
The following Java and YAML examples show how to configure the producer:
Producer.
@SpringBootApplication @EnableBinding(Source.class) public class RabbitPartitionProducerApplication { private static final Random RANDOM = new Random(System.currentTimeMillis()); private static final String[] data = new String[] { "abc1", "def1", "qux1", "abc2", "def2", "qux2", "abc3", "def3", "qux3", "abc4", "def4", "qux4", }; public static void main(String[] args) { new SpringApplicationBuilder(RabbitPartitionProducerApplication.class) .web(false) .run(args); } @InboundChannelAdapter(channel = Source.OUTPUT, poller = @Poller(fixedRate = "5000")) public Message<?> generate() { String value = data[RANDOM.nextInt(data.length)]; System.out.println("Sending: " + value); return MessageBuilder.withPayload(value) .setHeader("partitionKey", value) .build(); } }
application.yml.
spring: cloud: stream: bindings: output: destination: partitioned.destination producer: partitioned: true partition-key-expression: headers['partitionKey'] partition-count: 2 required-groups: - myGroup
| Note |
|---|---|
The configuration in the prececing example uses the default partitioning ( The |
The following configuration provisions a topic exchange:

The following queues are bound to that exchange:

The following bindings associate the queues to the exchange:

The following Java and YAML examples continue the previous examples and show how to configure the consumer:
Consumer.
@SpringBootApplication @EnableBinding(Sink.class) public class RabbitPartitionConsumerApplication { public static void main(String[] args) { new SpringApplicationBuilder(RabbitPartitionConsumerApplication.class) .web(false) .run(args); } @StreamListener(Sink.INPUT) public void listen(@Payload String in, @Header(AmqpHeaders.CONSUMER_QUEUE) String queue) { System.out.println(in + " received from queue " + queue); } }
application.yml.
spring: cloud: stream: bindings: input: destination: partitioned.destination group: myGroup consumer: partitioned: true instance-index: 0
| Important |
|---|---|
The |
Spring Cloud Bus links the nodes of a distributed system with a lightweight message broker. This broker can then be used to broadcast state changes (such as configuration changes) or other management instructions. A key idea is that the bus is like a distributed actuator for a Spring Boot application that is scaled out. However, it can also be used as a communication channel between apps. This project provides starters for either an AMQP broker or Kafka as the transport.
| Note |
|---|---|
Spring Cloud is released under the non-restrictive Apache 2.0 license. If you would like to contribute to this section of the documentation or if you find an error, please find the source code and issue trackers in the project at github. |
Spring Cloud Bus works by adding Spring Boot autconfiguration if it detects itself on the
classpath. To enable the bus, add spring-cloud-starter-bus-amqp or
spring-cloud-starter-bus-kafka to your dependency management. Spring Cloud takes care of
the rest. Make sure the broker (RabbitMQ or Kafka) is available and configured. When
running on localhost, you need not do anything. If you run remotely, use Spring Cloud
Connectors or Spring Boot conventions to define the broker credentials, as shown in the
following example for Rabbit:
application.yml.
spring:
rabbitmq:
host: mybroker.com
port: 5672
username: user
password: secret
The bus currently supports sending messages to all nodes listening or all nodes for a
particular service (as defined by Eureka). The /bus/* actuator namespace has some HTTP
endpoints. Currently, two are implemented. The first, /bus/env, sends key/value pairs to
update each node’s Spring Environment. The second, /bus/refresh, reloads each
application’s configuration, as though they had all been pinged on their /refresh
endpoint.
| Note |
|---|---|
The Spring Cloud Bus starters cover Rabbit and Kafka, because those are the two most
common implementations. However, Spring Cloud Stream is quite flexible, and the binder
works with |
Spring Cloud Bus provides two endpoints, /actuator/bus-refresh and /actuator/bus-env
that correspond to individual actuator endpoints in Spring Cloud Commons,
/actuator/refresh and /actuator/env respectively.
The /actuator/bus-refresh endpoint clears the RefreshScope cache and rebinds
@ConfigurationProperties. See the Refresh Scope documentation for
more information.
To expose the /actuator/bus-refresh endpoint, you need to add following configuration to your
application:
management.endpoints.web.exposure.include=bus-refreshThe /actuator/bus-env endpoint updates each instances environment with the specified
key/value pair across multiple instances.
To expose the /actuator/bus-env endpoint, you need to add following configuration to your
application:
management.endpoints.web.exposure.include=bus-envThe /actuator/bus-env endpoint accepts POST requests with the following shape:
{ "name": "key1", "value": "value1" }
Each instance of the application has a service ID, whose value can be set with
spring.cloud.bus.id and whose value is expected to be a colon-separated list of
identifiers, in order from least specific to most specific. The default value is
constructed from the environment as a combination of the spring.application.name and
server.port (or spring.application.index, if set). The default value of the ID is
constructed in the form of app:index:id, where:
appis thevcap.application.name, if it exists, orspring.application.nameindexis thevcap.application.instance_index, if it exists,spring.application.index,local.server.port,server.port, or0(in that order).idis thevcap.application.instance_id, if it exists, or a random value.
The HTTP endpoints accept a “destination” path parameter, such as
/bus-refresh/customers:9000, where destination is a service ID. If the ID
is owned by an instance on the bus, it processes the message, and all other instances
ignore it.
The “destination” parameter is used in a Spring PathMatcher (with the path separator
as a colon — :) to determine if an instance processes the message. Using the example
from earlier, /bus-env/customers:** targets all instances of the
“customers” service regardless of the rest of the service ID.
The bus tries twice to eliminate processing an event — once from the original
ApplicationEvent and once from the queue. To do so, it checks the sending service ID
against the current service ID. If multiple instances of a service have the same ID,
events are not processed. When running on a local machine, each service is on a different
port, and that port is part of the ID. Cloud Foundry supplies an index to differentiate.
To ensure that the ID is unique outside Cloud Foundry, set spring.application.index to
something unique for each instance of a service.
Spring Cloud Bus uses Spring Cloud Stream to
broadcast the messages. So, to get messages to flow, you need only include the binder
implementation of your choice in the classpath. There are convenient starters for the bus
with AMQP (RabbitMQ) and Kafka (spring-cloud-starter-bus-[amqp|kafka]). Generally
speaking, Spring Cloud Stream relies on Spring Boot autoconfiguration conventions for
configuring middleware. For instance, the AMQP broker address can be changed with
spring.rabbitmq.* configuration properties. Spring Cloud Bus has a handful of
native configuration properties in spring.cloud.bus.* (for example,
spring.cloud.bus.destination is the name of the topic to use as the external
middleware). Normally, the defaults suffice.
To learn more about how to customize the message broker settings, consult the Spring Cloud Stream documentation.
Bus events (subclasses of RemoteApplicationEvent) can be traced by setting
spring.cloud.bus.trace.enabled=true. If you do so, the Spring Boot TraceRepository
(if it is present) shows each event sent and all the acks from each service instance. The
following example comes from the /trace endpoint:
{ "timestamp": "2015-11-26T10:24:44.411+0000", "info": { "signal": "spring.cloud.bus.ack", "type": "RefreshRemoteApplicationEvent", "id": "c4d374b7-58ea-4928-a312-31984def293b", "origin": "stores:8081", "destination": "*:**" } }, { "timestamp": "2015-11-26T10:24:41.864+0000", "info": { "signal": "spring.cloud.bus.sent", "type": "RefreshRemoteApplicationEvent", "id": "c4d374b7-58ea-4928-a312-31984def293b", "origin": "customers:9000", "destination": "*:**" } }, { "timestamp": "2015-11-26T10:24:41.862+0000", "info": { "signal": "spring.cloud.bus.ack", "type": "RefreshRemoteApplicationEvent", "id": "c4d374b7-58ea-4928-a312-31984def293b", "origin": "customers:9000", "destination": "*:**" } }
The preceding trace shows that a RefreshRemoteApplicationEvent was sent from
customers:9000, broadcast to all services, and received (acked) by customers:9000 and
stores:8081.
To handle the ack signals yourself, you could add an @EventListener for the
AckRemoteApplicationEvent and SentApplicationEvent types to your app (and enable
tracing). Alternatively, you could tap into the TraceRepository and mine the data from
there.
| Note |
|---|---|
Any Bus application can trace acks. However, sometimes, it is useful to do this in a central service that can do more complex queries on the data or forward it to a specialized tracing service. |
The Bus can carry any event of type RemoteApplicationEvent. The default transport is
JSON, and the deserializer needs to know which types are going to be used ahead of time.
To register a new type, you must put it in a subpackage of
org.springframework.cloud.bus.event.
To customise the event name, you can use @JsonTypeName on your custom class or rely on
the default strategy, which is to use the simple name of the class.
| Note |
|---|---|
Both the producer and the consumer need access to the class definition. |
If you cannot or do not want to use a subpackage of org.springframework.cloud.bus.event
for your custom events, you must specify which packages to scan for events of type
RemoteApplicationEvent by using the @RemoteApplicationEventScan annotation. Packages
specified with @RemoteApplicationEventScan include subpackages.
For example, consider the following custom event, called MyEvent:
package com.acme; public class MyEvent extends RemoteApplicationEvent { ... }
You can register that event with the deserializer in the following way:
package com.acme; @Configuration @RemoteApplicationEventScan public class BusConfiguration { ... }
Without specifying a value, the package of the class where @RemoteApplicationEventScan
is used is registered. In this example, com.acme is registered by using the package of
BusConfiguration.
You can also explicitly specify the packages to scan by using the value, basePackages
or basePackageClasses properties on @RemoteApplicationEventScan, as shown in the
following example:
package com.acme; @Configuration //@RemoteApplicationEventScan({"com.acme", "foo.bar"}) //@RemoteApplicationEventScan(basePackages = {"com.acme", "foo.bar", "fizz.buzz"}) @RemoteApplicationEventScan(basePackageClasses = BusConfiguration.class) public class BusConfiguration { ... }
All of the preceding examples of @RemoteApplicationEventScan are equivalent, in that the
com.acme package is registered by explicitly specifying the packages on
@RemoteApplicationEventScan.
| Note |
|---|---|
You can specify multiple base packages to scan. |
Adrian Cole, Spencer Gibb, Marcin Grzejszczak, Dave Syer, Jay Bryant
1.0.0.BUILD-SNAPSHOT
Spring Cloud Sleuth implements a distributed tracing solution for Spring Cloud.
Spring Cloud Sleuth borrows Dapper’s terminology.
Span: The basic unit of work. For example, sending an RPC is a new span, as is sending a response to an RPC. Spans are identified by a unique 64-bit ID for the span and another 64-bit ID for the trace the span is a part of. Spans also have other data, such as descriptions, timestamped events, key-value annotations (tags), the ID of the span that caused them, and process IDs (normally IP addresses).
Spans can be started and stopped, and they keep track of their timing information. Once you create a span, you must stop it at some point in the future.
| Tip |
|---|---|
The initial span that starts a trace is called a |
Trace: A set of spans forming a tree-like structure.
For example, if you run a distributed big-data store, a trace might be formed by a PUT request.
Annotation: Used to record the existence of an event in time. With Brave instrumentation, we no longer need to set special events for Zipkin to understand who the client and server are, where the request started, and where it ended. For learning purposes, however, we mark these events to highlight what kind of an action took place.
- cs: Client Sent. The client has made a request. This annotation indicates the start of the span.
- sr: Server Received: The server side got the request and started processing it.
Subtracting the
cstimestamp from this timestamp reveals the network latency. - ss: Server Sent. Annotated upon completion of request processing (when the response got sent back to the client).
Subtracting the
srtimestamp from this timestamp reveals the time needed by the server side to process the request. - cr: Client Received. Signifies the end of the span.
The client has successfully received the response from the server side.
Subtracting the
cstimestamp from this timestamp reveals the whole time needed by the client to receive the response from the server.
The following image shows how Span and Trace look in a system, together with the Zipkin annotations:

Each color of a note signifies a span (there are seven spans - from A to G). Consider the following note:
Trace Id = X Span Id = D Client Sent
This note indicates that the current span has Trace Id set to X and Span Id set to D.
Also, the Client Sent event took place.
The following image shows how parent-child relationships of spans look:

The following sections refer to the example shown in the preceding image.
This example has seven spans. If you go to traces in Zipkin, you can see this number in the second trace, as shown in the following image:

However, if you pick a particular trace, you can see four spans, as shown in the following image:

| Note |
|---|---|
When you pick a particular trace, you see merged spans. That means that, if there were two spans sent to Zipkin with Server Received and Server Sent or Client Received and Client Sent annotations, they are presented as a single span. |
Why is there a difference between the seven and four spans in this case?
- One span comes from the
http:/startspan. It has the Server Received (sr) and Server Sent (ss) annotations. - Two spans come from the RPC call from
service1toservice2to thehttp:/fooendpoint. The Client Sent (cs) and Client Received (cr) events took place on theservice1side. Server Received (sr) and Server Sent (ss) events took place on theservice2side. These two spans form one logical span related to an RPC call. - Two spans come from the RPC call from
service2toservice3to thehttp:/barendpoint. The Client Sent (cs) and Client Received (cr) events took place on theservice2side. The Server Received (sr) and Server Sent (ss) events took place on theservice3side. These two spans form one logical span related to an RPC call. - Two spans come from the RPC call from
service2toservice4to thehttp:/bazendpoint. The Client Sent (cs) and Client Received (cr) events took place on theservice2side. Server Received (sr) and Server Sent (ss) events took place on theservice4side. These two spans form one logical span related to an RPC call.
So, if we count the physical spans, we have one from http:/start, two from service1 calling service2, two from service2
calling service3, and two from service2 calling service4. In sum, we have a total of seven spans.
Logically, we see the information of four total Spans because we have one span related to the incoming request
to service1 and three spans related to RPC calls.
Zipkin lets you visualize errors in your trace. When an exception was thrown and was not caught, we set proper tags on the span, which Zipkin can then properly colorize. You could see in the list of traces one trace that is red. That appears because an exception was thrown.
If you click that trace, you see a similar picture, as follows:
If you then click on one of the spans, you see the following
The span shows the reason for the error and the whole stack trace related to it.
Starting with version 2.0.0, Spring Cloud Sleuth uses Brave as the tracing library.
Consequently, Sleuth no longer takes care of storing the context but delegates that work to Brave.
Due to the fact that Sleuth had different naming and tagging conventions than Brave, we decided to follow Brave’s conventions from now on.
However, if you want to use the legacy Sleuth approaches, you can set the spring.sleuth.http.legacy.enabled property to true.

The dependency graph in Zipkin should resemble the following image:

When using grep to read the logs of those four applications by scanning for a trace ID equal to (for example) 2485ec27856c56f4, you get output resembling the following:
service1.log:2016-02-26 11:15:47.561 INFO [service1,2485ec27856c56f4,2485ec27856c56f4,true] 68058 --- [nio-8081-exec-1] i.s.c.sleuth.docs.service1.Application : Hello from service1. Calling service2 service2.log:2016-02-26 11:15:47.710 INFO [service2,2485ec27856c56f4,9aa10ee6fbde75fa,true] 68059 --- [nio-8082-exec-1] i.s.c.sleuth.docs.service2.Application : Hello from service2. Calling service3 and then service4 service3.log:2016-02-26 11:15:47.895 INFO [service3,2485ec27856c56f4,1210be13194bfe5,true] 68060 --- [nio-8083-exec-1] i.s.c.sleuth.docs.service3.Application : Hello from service3 service2.log:2016-02-26 11:15:47.924 INFO [service2,2485ec27856c56f4,9aa10ee6fbde75fa,true] 68059 --- [nio-8082-exec-1] i.s.c.sleuth.docs.service2.Application : Got response from service3 [Hello from service3] service4.log:2016-02-26 11:15:48.134 INFO [service4,2485ec27856c56f4,1b1845262ffba49d,true] 68061 --- [nio-8084-exec-1] i.s.c.sleuth.docs.service4.Application : Hello from service4 service2.log:2016-02-26 11:15:48.156 INFO [service2,2485ec27856c56f4,9aa10ee6fbde75fa,true] 68059 --- [nio-8082-exec-1] i.s.c.sleuth.docs.service2.Application : Got response from service4 [Hello from service4] service1.log:2016-02-26 11:15:48.182 INFO [service1,2485ec27856c56f4,2485ec27856c56f4,true] 68058 --- [nio-8081-exec-1] i.s.c.sleuth.docs.service1.Application : Got response from service2 [Hello from service2, response from service3 [Hello from service3] and from service4 [Hello from service4]]
If you use a log aggregating tool (such as Kibana, Splunk, and others), you can order the events that took place. An example from Kibana would resemble the following image:
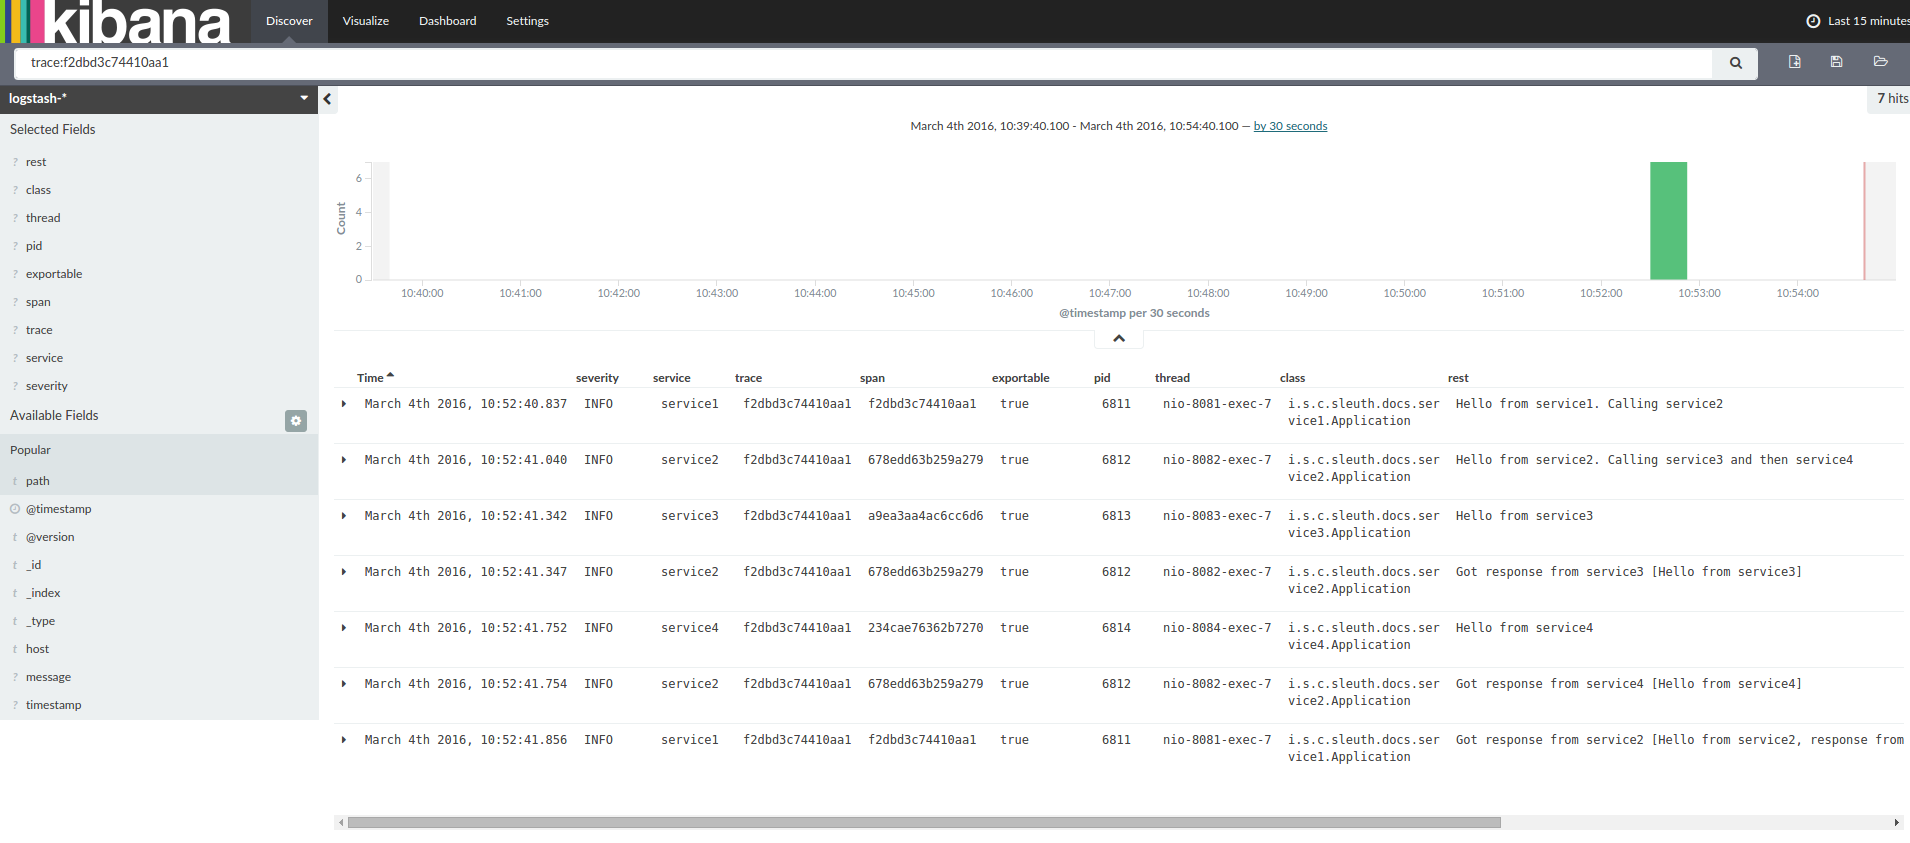
If you want to use Logstash, the following listing shows the Grok pattern for Logstash:
filter {
# pattern matching logback pattern
grok {
match => { "message" => "%{TIMESTAMP_ISO8601:timestamp}\s+%{LOGLEVEL:severity}\s+\[%{DATA:service},%{DATA:trace},%{DATA:span},%{DATA:exportable}\]\s+%{DATA:pid}\s+---\s+\[%{DATA:thread}\]\s+%{DATA:class}\s+:\s+%{GREEDYDATA:rest}" }
}
} | Note |
|---|---|
If you want to use Grok together with the logs from Cloud Foundry, you have to use the following pattern: |
filter {
# pattern matching logback pattern
grok {
match => { "message" => "(?m)OUT\s+%{TIMESTAMP_ISO8601:timestamp}\s+%{LOGLEVEL:severity}\s+\[%{DATA:service},%{DATA:trace},%{DATA:span},%{DATA:exportable}\]\s+%{DATA:pid}\s+---\s+\[%{DATA:thread}\]\s+%{DATA:class}\s+:\s+%{GREEDYDATA:rest}" }
}
}Often, you do not want to store your logs in a text file but in a JSON file that Logstash can immediately pick.
To do so, you have to do the following (for readability, we pass the dependencies in the groupId:artifactId:version notation).
Dependencies Setup
- Ensure that Logback is on the classpath (
ch.qos.logback:logback-core). - Add Logstash Logback encode. For example, to use version
4.6, addnet.logstash.logback:logstash-logback-encoder:4.6.
Logback Setup
Consider the following example of a Logback configuration file (named logback-spring.xml).
<?xml version="1.0" encoding="UTF-8"?> <configuration> <include resource="org/springframework/boot/logging/logback/defaults.xml"/> <springProperty scope="context" name="springAppName" source="spring.application.name"/> <!-- Example for logging into the build folder of your project --> <property name="LOG_FILE" value="${BUILD_FOLDER:-build}/${springAppName}"/> <!-- You can override this to have a custom pattern --> <property name="CONSOLE_LOG_PATTERN" value="%clr(%d{yyyy-MM-dd HH:mm:ss.SSS}){faint} %clr(${LOG_LEVEL_PATTERN:-%5p}) %clr(${PID:- }){magenta} %clr(---){faint} %clr([%15.15t]){faint} %clr(%-40.40logger{39}){cyan} %clr(:){faint} %m%n${LOG_EXCEPTION_CONVERSION_WORD:-%wEx}"/> <!-- Appender to log to console --> <appender name="console" class="ch.qos.logback.core.ConsoleAppender"> <filter class="ch.qos.logback.classic.filter.ThresholdFilter"> <!-- Minimum logging level to be presented in the console logs--> <level>DEBUG</level> </filter> <encoder> <pattern>${CONSOLE_LOG_PATTERN}</pattern> <charset>utf8</charset> </encoder> </appender> <!-- Appender to log to file --> <appender name="flatfile" class="ch.qos.logback.core.rolling.RollingFileAppender"> <file>${LOG_FILE}</file> <rollingPolicy class="ch.qos.logback.core.rolling.TimeBasedRollingPolicy"> <fileNamePattern>${LOG_FILE}.%d{yyyy-MM-dd}.gz</fileNamePattern> <maxHistory>7</maxHistory> </rollingPolicy> <encoder> <pattern>${CONSOLE_LOG_PATTERN}</pattern> <charset>utf8</charset> </encoder> </appender> <!-- Appender to log to file in a JSON format --> <appender name="logstash" class="ch.qos.logback.core.rolling.RollingFileAppender"> <file>${LOG_FILE}.json</file> <rollingPolicy class="ch.qos.logback.core.rolling.TimeBasedRollingPolicy"> <fileNamePattern>${LOG_FILE}.json.%d{yyyy-MM-dd}.gz</fileNamePattern> <maxHistory>7</maxHistory> </rollingPolicy> <encoder class="net.logstash.logback.encoder.LoggingEventCompositeJsonEncoder"> <providers> <timestamp> <timeZone>UTC</timeZone> </timestamp> <pattern> <pattern> { "severity": "%level", "service": "${springAppName:-}", "trace": "%X{X-B3-TraceId:-}", "span": "%X{X-B3-SpanId:-}", "parent": "%X{X-B3-ParentSpanId:-}", "exportable": "%X{X-Span-Export:-}", "pid": "${PID:-}", "thread": "%thread", "class": "%logger{40}", "rest": "%message" } </pattern> </pattern> </providers> </encoder> </appender> <root level="INFO"> <appender-ref ref="console"/> <!-- uncomment this to have also JSON logs --> <!--<appender-ref ref="logstash"/>--> <!--<appender-ref ref="flatfile"/>--> </root> </configuration>
That Logback configuration file:
- Logs information from the application in a JSON format to a
build/${spring.application.name}.jsonfile. - Has commented out two additional appenders: console and standard log file.
- Has the same logging pattern as the one presented in the previous section.
| Note |
|---|---|
If you use a custom |
The span context is the state that must get propagated to any child spans across process boundaries. Part of the Span Context is the Baggage. The trace and span IDs are a required part of the span context. Baggage is an optional part.
Baggage is a set of key:value pairs stored in the span context.
Baggage travels together with the trace and is attached to every span.
Spring Cloud Sleuth understands that a header is baggage-related if the HTTP header is prefixed with baggage- and, for messaging, it starts with baggage_.
| Important |
|---|---|
There is currently no limitation of the count or size of baggage items. However, keep in mind that too many can decrease system throughput or increase RPC latency. In extreme cases, too much baggage can crash the application, due to exceeding transport-level message or header capacity. |
The following example shows setting baggage on a span:
Span initialSpan = this.tracer.nextSpan().name("span").start(); ExtraFieldPropagation.set(initialSpan.context(), "foo", "bar"); ExtraFieldPropagation.set(initialSpan.context(), "UPPER_CASE", "someValue");
Baggage travels with the trace (every child span contains the baggage of its parent). Zipkin has no knowledge of baggage and does not receive that information.
| Important |
|---|---|
Starting from Sleuth 2.0.0 you have to pass the baggage key names explicitly in your project configuration. Read more about that setup here |
Tags are attached to a specific span. In other words, they are presented only for that particular span. However, you can search by tag to find the trace, assuming a span having the searched tag value exists.
If you want to be able to lookup a span based on baggage, you should add a corresponding entry as a tag in the root span.
| Important |
|---|---|
The span must be in scope. |
The following listing shows integration tests that use baggage:
The setup.
spring.sleuth:
baggage-keys:
- baz
- bizarrecase
propagation-keys:
- foo
- upper_case
The code.
initialSpan.tag("foo", ExtraFieldPropagation.get(initialSpan.context(), "foo")); initialSpan.tag("UPPER_CASE", ExtraFieldPropagation.get(initialSpan.context(), "UPPER_CASE"));
This section addresses how to add Sleuth to your project with either Maven or Gradle.
| Important |
|---|---|
To ensure that your application name is properly displayed in Zipkin, set the |
If you want to use only Spring Cloud Sleuth without the Zipkin integration, add the spring-cloud-starter-sleuth module to your project.
The following example shows how to add Sleuth with Maven:
Maven.
<dependencyManagement><dependencies> <dependency> <groupId>org.springframework.cloud</groupId> <artifactId>spring-cloud-dependencies</artifactId> <version>${release.train.version}</version> <type>pom</type> <scope>import</scope> </dependency> </dependencies> </dependencyManagement> <dependency>
<groupId>org.springframework.cloud</groupId> <artifactId>spring-cloud-starter-sleuth</artifactId> </dependency>
| We recommend that you add the dependency management through the Spring BOM so that you need not manage versions yourself. |
| Add the dependency to |
The following example shows how to add Sleuth with Gradle:
Gradle.
dependencyManagement {
imports {
mavenBom "org.springframework.cloud:spring-cloud-dependencies:${releaseTrainVersion}"
}
}
dependencies {
compile "org.springframework.cloud:spring-cloud-starter-sleuth"
}
| We recommend that you add the dependency management through the Spring BOM so that you need not manage versions yourself. |
| Add the dependency to |
If you want both Sleuth and Zipkin, add the spring-cloud-starter-zipkin dependency.
The following example shows how to do so for Maven:
Maven.
<dependencyManagement>
| We recommend that you add the dependency management through the Spring BOM so that you need not manage versions yourself. |
| Add the dependency to |
The following example shows how to do so for Gradle:
Gradle.
dependencyManagement {
imports {
mavenBom "org.springframework.cloud:spring-cloud-dependencies:${releaseTrainVersion}"
}
}
dependencies {
compile "org.springframework.cloud:spring-cloud-starter-zipkin"
}
| We recommend that you add the dependency management through the Spring BOM so that you need not manage versions yourself. |
| Add the dependency to |
If you want to use RabbitMQ or Kafka instead of HTTP, add the spring-rabbit or spring-kafka dependency.
The default destination name is zipkin.
If using Kafka, you must set the property spring.zipkin.sender.type property accordingly:
spring.zipkin.sender.type: kafka | Caution |
|---|---|
|
If you want Sleuth over RabbitMQ, add the spring-cloud-starter-zipkin and spring-rabbit
dependencies.
The following example shows how to do so for Gradle:
Maven.
<dependencyManagement><groupId>org.springframework.amqp</groupId> <artifactId>spring-rabbit</artifactId> </dependency>
| We recommend that you add the dependency management through the Spring BOM so that you need not manage versions yourself. |
| Add the dependency to |
| To automatically configure RabbitMQ, add the |
Gradle.
dependencyManagement {
imports {
mavenBom "org.springframework.cloud:spring-cloud-dependencies:${releaseTrainVersion}"
}
}
dependencies {
compile "org.springframework.cloud:spring-cloud-starter-zipkin"
compile "org.springframework.amqp:spring-rabbit"
}
| We recommend that you add the dependency management through the Spring BOM so that you need not manage versions yourself. |
| Add the dependency to |
| To automatically configure RabbitMQ, add the |
Spring Cloud Sleuth supports sending traces to multiple tracing systems as of version 2.1.0.
In order to get this to work, every tracing system needs to have a Reporter<Span> and Sender.
If you want to override the provided beans you need to give them a specific name.
To do this you can use respectively ZipkinAutoConfiguration.REPORTER_BEAN_NAME and ZipkinAutoConfiguration.SENDER_BEAN_NAME.
@Configuration protected static class MyConfig { @Bean(ZipkinAutoConfiguration.REPORTER_BEAN_NAME) Reporter<zipkin2.Span> myReporter() { return AsyncReporter.create(mySender()); } @Bean(ZipkinAutoConfiguration.SENDER_BEAN_NAME) MySender mySender() { return new MySender(); } static class MySender extends Sender { private boolean spanSent = false; boolean isSpanSent() { return this.spanSent; } @Override public Encoding encoding() { return Encoding.JSON; } @Override public int messageMaxBytes() { return Integer.MAX_VALUE; } @Override public int messageSizeInBytes(List<byte[]> encodedSpans) { return encoding().listSizeInBytes(encodedSpans); } @Override public Call<Void> sendSpans(List<byte[]> encodedSpans) { this.spanSent = true; return Call.create(null); } } }
You can watch a video of Reshmi Krishna and Marcin Grzejszczak talking about Spring Cloud Sleuth and Zipkin by clicking here.
You can check different setups of Sleuth and Brave in the openzipkin/sleuth-webmvc-example repository.
Adds trace and span IDs to the Slf4J MDC, so you can extract all the logs from a given trace or span in a log aggregator, as shown in the following example logs:
2016-02-02 15:30:57.902 INFO [bar,6bfd228dc00d216b,6bfd228dc00d216b,false] 23030 --- [nio-8081-exec-3] ... 2016-02-02 15:30:58.372 ERROR [bar,6bfd228dc00d216b,6bfd228dc00d216b,false] 23030 --- [nio-8081-exec-3] ... 2016-02-02 15:31:01.936 INFO [bar,46ab0d418373cbc9,46ab0d418373cbc9,false] 23030 --- [nio-8081-exec-4] ...
Notice the
[appname,traceId,spanId,exportable]entries from the MDC:spanId: The ID of a specific operation that took place.appname: The name of the application that logged the span.traceId: The ID of the latency graph that contains the span.exportable: Whether the log should be exported to Zipkin. When would you like the span not to be exportable? When you want to wrap some operation in a Span and have it written to the logs only.
- Provides an abstraction over common distributed tracing data models: traces, spans (forming a DAG), annotations, and key-value annotations. Spring Cloud Sleuth is loosely based on HTrace but is compatible with Zipkin (Dapper).
- Sleuth records timing information to aid in latency analysis. By using sleuth, you can pinpoint causes of latency in your applications.
Sleuth is written to not log too much and to not cause your production application to crash. To that end, Sleuth:
- Propagates structural data about your call graph in-band and the rest out-of-band.
- Includes opinionated instrumentation of layers such as HTTP.
- Includes a sampling policy to manage volume.
- Can report to a Zipkin system for query and visualization.
- Instruments common ingress and egress points from Spring applications (servlet filter, async endpoints, rest template, scheduled actions, message channels, Zuul filters, and Feign client).
- Sleuth includes default logic to join a trace across HTTP or messaging boundaries. For example, HTTP propagation works over Zipkin-compatible request headers.
- Sleuth can propagate context (also known as baggage) between processes. Consequently, if you set a baggage element on a Span, it is sent downstream to other processes over either HTTP or messaging.
- Provides a way to create or continue spans and add tags and logs through annotations.
If
spring-cloud-sleuth-zipkinis on the classpath, the app generates and collects Zipkin-compatible traces. By default, it sends them over HTTP to a Zipkin server on localhost (port 9411). You can configure the location of the service by settingspring.zipkin.baseUrl.- If you depend on
spring-rabbit, your app sends traces to a RabbitMQ broker instead of HTTP. - If you depend on
spring-kafka, and setspring.zipkin.sender.type: kafka, your app sends traces to a Kafka broker instead of HTTP.
- If you depend on
| Caution |
|---|---|
|
- Spring Cloud Sleuth is OpenTracing compatible.
| Important |
|---|---|
If you use Zipkin, configure the probability of spans exported by setting |
| Note |
|---|---|
The SLF4J MDC is always set and logback users immediately see the trace and span IDs in logs per the example
shown earlier.
Other logging systems have to configure their own formatter to get the same result.
The default is as follows:
|
| Important |
|---|---|
Starting with version |
| Important |
|---|---|
In the vast majority of cases you need to just use the |
Brave is a library used to capture and report latency information about distributed operations to Zipkin. Most users do not use Brave directly. They use libraries or frameworks rather than employ Brave on their behalf.
This module includes a tracer that creates and joins spans that model the latency of potentially distributed work. It also includes libraries to propagate the trace context over network boundaries (for example, with HTTP headers).
Most importantly, you need a brave.Tracer, configured to report to Zipkin.
The following example setup sends trace data (spans) to Zipkin over HTTP (as opposed to Kafka):
class MyClass { private final Tracer tracer; // Tracer will be autowired MyClass(Tracer tracer) { this.tracer = tracer; } void doSth() { Span span = tracer.newTrace().name("encode").start(); // ... } }
| Important |
|---|---|
If your span contains a name longer than 50 chars, then that name is truncated to 50 chars. Your names have to be explicit and concrete. Big names lead to latency issues and sometimes even thrown exceptions. |
The tracer creates and joins spans that model the latency of potentially distributed work. It can employ sampling to reduce overhead during the process, to reduce the amount of data sent to Zipkin, or both.
Spans returned by a tracer report data to Zipkin when finished or do nothing if unsampled. After starting a span, you can annotate events of interest or add tags containing details or lookup keys.
Spans have a context that includes trace identifiers that place the span at the correct spot in the tree representing the distributed operation.
When tracing code that never leaves your process, run it inside a scoped span.
@Autowired Tracer tracer; // Start a new trace or a span within an existing trace representing an operation ScopedSpan span = tracer.startScopedSpan("encode"); try { // The span is in "scope" meaning downstream code such as loggers can see trace IDs return encoder.encode(); } catch (RuntimeException | Error e) { span.error(e); // Unless you handle exceptions, you might not know the operation failed! throw e; } finally { span.finish(); // always finish the span }
When you need more features, or finer control, use the Span type:
@Autowired Tracer tracer; // Start a new trace or a span within an existing trace representing an operation Span span = tracer.nextSpan().name("encode").start(); // Put the span in "scope" so that downstream code such as loggers can see trace IDs try (SpanInScope ws = tracer.withSpanInScope(span)) { return encoder.encode(); } catch (RuntimeException | Error e) { span.error(e); // Unless you handle exceptions, you might not know the operation failed! throw e; } finally { span.finish(); // note the scope is independent of the span. Always finish a span. }
Both of the above examples report the exact same span on finish!
In the above example, the span will be either a new root span or the next child in an existing trace.
Once you have a span, you can add tags to it. The tags can be used as lookup keys or details. For example, you might add a tag with your runtime version, as shown in the following example:
span.tag("clnt/finagle.version", "6.36.0");
When exposing the ability to customize spans to third parties, prefer brave.SpanCustomizer as opposed to brave.Span.
The former is simpler to understand and test and does not tempt users with span lifecycle hooks.
interface MyTraceCallback { void request(Request request, SpanCustomizer customizer); }
Since brave.Span implements brave.SpanCustomizer, you can pass it to users, as shown in the following example:
for (MyTraceCallback callback : userCallbacks) {
callback.request(request, span);
}Sometimes, you do not know if a trace is in progress or not, and you do not want users to do null checks.
brave.CurrentSpanCustomizer handles this problem by adding data to any span that’s in progress or drops, as shown in the following example:
Ex.
// The user code can then inject this without a chance of it being null. @Autowired SpanCustomizer span; void userCode() { span.annotate("tx.started"); ... }
| Tip |
|---|---|
Check for instrumentation written here and Zipkin’s list before rolling your own RPC instrumentation. |
RPC tracing is often done automatically by interceptors. Behind the scenes, they add tags and events that relate to their role in an RPC operation.
The following example shows how to add a client span:
@Autowired Tracing tracing; @Autowired Tracer tracer; // before you send a request, add metadata that describes the operation span = tracer.nextSpan().name(service + "/" + method).kind(CLIENT); span.tag("myrpc.version", "1.0.0"); span.remoteServiceName("backend"); span.remoteIpAndPort("172.3.4.1", 8108); // Add the trace context to the request, so it can be propagated in-band tracing.propagation().injector(Request::addHeader) .inject(span.context(), request); // when the request is scheduled, start the span span.start(); // if there is an error, tag the span span.tag("error", error.getCode()); // or if there is an exception span.error(exception); // when the response is complete, finish the span span.finish();
Sometimes, you need to model an asynchronous operation where there is a
request but no response. In normal RPC tracing, you use span.finish()
to indicate that the response was received. In one-way tracing, you use
span.flush() instead, as you do not expect a response.
The following example shows how a client might model a one-way operation:
@Autowired Tracing tracing; @Autowired Tracer tracer; // start a new span representing a client request oneWaySend = tracer.nextSpan().name(service + "/" + method).kind(CLIENT); // Add the trace context to the request, so it can be propagated in-band tracing.propagation().injector(Request::addHeader) .inject(oneWaySend.context(), request); // fire off the request asynchronously, totally dropping any response request.execute(); // start the client side and flush instead of finish oneWaySend.start().flush();
The following example shows how a server might handle a one-way operation:
@Autowired Tracing tracing; @Autowired Tracer tracer; // pull the context out of the incoming request extractor = tracing.propagation().extractor(Request::getHeader); // convert that context to a span which you can name and add tags to oneWayReceive = nextSpan(tracer, extractor.extract(request)) .name("process-request") .kind(SERVER) ... add tags etc. // start the server side and flush instead of finish oneWayReceive.start().flush(); // you should not modify this span anymore as it is complete. However, // you can create children to represent follow-up work. next = tracer.newSpan(oneWayReceive.context()).name("step2").start();
Sampling may be employed to reduce the data collected and reported out of process. When a span is not sampled, it adds no overhead (a noop).
Sampling is an up-front decision, meaning that the decision to report data is made at the first operation in a trace and that decision is propagated downstream.
By default, a global sampler applies a single rate to all traced operations.
Tracer.Builder.sampler controls this setting, and it defaults to tracing every request.
Some applications need to sample based on the type or annotations of a java method.
Most users use a framework interceptor to automate this sort of policy. The following example shows how that might work internally:
@Autowired Tracer tracer; // derives a sample rate from an annotation on a java method DeclarativeSampler<Traced> sampler = DeclarativeSampler.create(Traced::sampleRate); @Around("@annotation(traced)") public Object traceThing(ProceedingJoinPoint pjp, Traced traced) throws Throwable { // When there is no trace in progress, this decides using an annotation Sampler decideUsingAnnotation = declarativeSampler.toSampler(traced); Tracer tracer = tracer.withSampler(decideUsingAnnotation); // This code looks the same as if there was no declarative override ScopedSpan span = tracer.startScopedSpan(spanName(pjp)); try { return pjp.proceed(); } catch (RuntimeException | Error e) { span.error(e); throw e; } finally { span.finish(); } }
Depending on what the operation is, you may want to apply different policies. For example, you might not want to trace requests to static resources such as images, or you might want to trace all requests to a new api.
Most users use a framework interceptor to automate this sort of policy. The following example shows how that might work internally:
@Autowired Tracer tracer; @Autowired Sampler fallback; Span nextSpan(final Request input) { Sampler requestBased = Sampler() { @Override public boolean isSampled(long traceId) { if (input.url().startsWith("/experimental")) { return true; } else if (input.url().startsWith("/static")) { return false; } return fallback.isSampled(traceId); } }; return tracer.withSampler(requestBased).nextSpan(); }
By default Spring Cloud Sleuth sets all spans to non-exportable.
That means that traces appear in logs but not in any remote store.
For testing the default is often enough, and it probably is all you need if you use only the logs (for example, with an ELK aggregator).
If you export span data to Zipkin, there is also an Sampler.ALWAYS_SAMPLE setting that exports everything and a ProbabilityBasedSampler setting that samples a fixed fraction of spans.
| Note |
|---|---|
The |
A sampler can be installed by creating a bean definition, as shown in the following example:
@Bean public Sampler defaultSampler() { return Sampler.ALWAYS_SAMPLE; }
| Tip |
|---|---|
You can set the HTTP header |
In order to use the rate-limited sampler set the spring.sleuth.sampler.rate property to choose an amount of traces to accept on a per-second interval. The minimum number is 0 and the max is 2,147,483,647 (max int).
Propagation is needed to ensure activities originating from the same root are collected together in the same trace. The most common propagation approach is to copy a trace context from a client by sending an RPC request to a server receiving it.
For example, when a downstream HTTP call is made, its trace context is encoded as request headers and sent along with it, as shown in the following image:
Client Span Server Span ┌──────────────────┐ ┌──────────────────┐ │ │ │ │ │ TraceContext │ Http Request Headers │ TraceContext │ │ ┌──────────────┐ │ ┌───────────────────┐ │ ┌──────────────┐ │ │ │ TraceId │ │ │ X─B3─TraceId │ │ │ TraceId │ │ │ │ │ │ │ │ │ │ │ │ │ │ ParentSpanId │ │ Extract │ X─B3─ParentSpanId │ Inject │ │ ParentSpanId │ │ │ │ ├─┼─────────>│ ├────────┼>│ │ │ │ │ SpanId │ │ │ X─B3─SpanId │ │ │ SpanId │ │ │ │ │ │ │ │ │ │ │ │ │ │ Sampled │ │ │ X─B3─Sampled │ │ │ Sampled │ │ │ └──────────────┘ │ └───────────────────┘ │ └──────────────┘ │ │ │ │ │ └──────────────────┘ └──────────────────┘
The names above are from B3 Propagation, which is built-in to Brave and has implementations in many languages and frameworks.
Most users use a framework interceptor to automate propagation. The next two examples show how that might work for a client and a server.
The following example shows how client-side propagation might work:
@Autowired Tracing tracing; // configure a function that injects a trace context into a request injector = tracing.propagation().injector(Request.Builder::addHeader); // before a request is sent, add the current span's context to it injector.inject(span.context(), request);
The following example shows how server-side propagation might work:
@Autowired Tracing tracing; @Autowired Tracer tracer; // configure a function that extracts the trace context from a request extractor = tracing.propagation().extractor(Request::getHeader); // when a server receives a request, it joins or starts a new trace span = tracer.nextSpan(extractor.extract(request));
Sometimes you need to propagate extra fields, such as a request ID or an alternate trace context. For example, if you are in a Cloud Foundry environment, you might want to pass the request ID, as shown in the following example:
// when you initialize the builder, define the extra field you want to propagate Tracing.newBuilder().propagationFactory( ExtraFieldPropagation.newFactory(B3Propagation.FACTORY, "x-vcap-request-id") ); // later, you can tag that request ID or use it in log correlation requestId = ExtraFieldPropagation.get("x-vcap-request-id");
You may also need to propagate a trace context that you are not using. For example, you may be in an Amazon Web Services environment but not be reporting data to X-Ray. To ensure X-Ray can co-exist correctly, pass-through its tracing header, as shown in the following example:
tracingBuilder.propagationFactory(
ExtraFieldPropagation.newFactory(B3Propagation.FACTORY, "x-amzn-trace-id")
); | Tip |
|---|---|
In Spring Cloud Sleuth all elements of the tracing builder |
If they follow a common pattern, you can also prefix fields.
The following example shows how to propagate x-vcap-request-id the field as-is but send the country-code and user-id fields on the wire as x-baggage-country-code and x-baggage-user-id, respectively:
Tracing.newBuilder().propagationFactory(
ExtraFieldPropagation.newFactoryBuilder(B3Propagation.FACTORY)
.addField("x-vcap-request-id")
.addPrefixedFields("x-baggage-", Arrays.asList("country-code", "user-id"))
.build()
);Later, you can call the following code to affect the country code of the current trace context:
ExtraFieldPropagation.set("x-country-code", "FO"); String countryCode = ExtraFieldPropagation.get("x-country-code");
Alternatively, if you have a reference to a trace context, you can use it explicitly, as shown in the following example:
ExtraFieldPropagation.set(span.context(), "x-country-code", "FO"); String countryCode = ExtraFieldPropagation.get(span.context(), "x-country-code");
| Important |
|---|---|
A difference from previous versions of Sleuth is that, with Brave, you must pass the list of baggage keys.
There are two properties to achieve this.
With the |
In order to automatically set the baggage values to Slf4j’s MDC, you have to set
the spring.sleuth.log.slf4j.whitelisted-mdc-keys property with a list of whitelisted
baggage and propagation keys. E.g. spring.sleuth.log.slf4j.whitelisted-mdc-keys=foo will set the value of the foo baggage into MDC.
| Important |
|---|---|
Remember that adding entries to MDC can drastically decrease the performance of your application! |
If you want to add the baggage entries as tags, to make it possible to search for spans via the baggage entries, you can set the value of
spring.sleuth.propagation.tag.whitelisted-keys with a list of whitelisted baggage keys. To disable the feature you have to pass the spring.sleuth.propagation.tag.enabled=false property.
The TraceContext.Extractor<C> reads trace identifiers and sampling status from an incoming request or message.
The carrier is usually a request object or headers.
This utility is used in standard instrumentation (such as HttpServerHandler) but can also be used for custom RPC or messaging code.
TraceContextOrSamplingFlags is usually used only with Tracer.nextSpan(extracted), unless you are
sharing span IDs between a client and a server.
A normal instrumentation pattern is to create a span representing the server side of an RPC.
Extractor.extract might return a complete trace context when applied to an incoming client request.
Tracer.joinSpan attempts to continue this trace, using the same span ID if supported or creating a child span
if not. When the span ID is shared, the reported data includes a flag saying so.
The following image shows an example of B3 propagation:
┌───────────────────┐ ┌───────────────────┐
Incoming Headers │ TraceContext │ │ TraceContext │
┌───────────────────┐(extract)│ ┌───────────────┐ │(join)│ ┌───────────────┐ │
│ X─B3-TraceId │─────────┼─┼> TraceId │ │──────┼─┼> TraceId │ │
│ │ │ │ │ │ │ │ │ │
│ X─B3-ParentSpanId │─────────┼─┼> ParentSpanId │ │──────┼─┼> ParentSpanId │ │
│ │ │ │ │ │ │ │ │ │
│ X─B3-SpanId │─────────┼─┼> SpanId │ │──────┼─┼> SpanId │ │
└───────────────────┘ │ │ │ │ │ │ │ │
│ │ │ │ │ │ Shared: true │ │
│ └───────────────┘ │ │ └───────────────┘ │
└───────────────────┘ └───────────────────┘Some propagation systems forward only the parent span ID, detected when Propagation.Factory.supportsJoin() == false.
In this case, a new span ID is always provisioned, and the incoming context determines the parent ID.
The following image shows an example of AWS propagation:
┌───────────────────┐ ┌───────────────────┐
x-amzn-trace-id │ TraceContext │ │ TraceContext │
┌───────────────────┐(extract)│ ┌───────────────┐ │(join)│ ┌───────────────┐ │
│ Root │─────────┼─┼> TraceId │ │──────┼─┼> TraceId │ │
│ │ │ │ │ │ │ │ │ │
│ Parent │─────────┼─┼> SpanId │ │──────┼─┼> ParentSpanId │ │
└───────────────────┘ │ └───────────────┘ │ │ │ │ │
└───────────────────┘ │ │ SpanId: New │ │
│ └───────────────┘ │
└───────────────────┘Note: Some span reporters do not support sharing span IDs.
For example, if you set Tracing.Builder.spanReporter(amazonXrayOrGoogleStackdrive), you should disable join by setting Tracing.Builder.supportsJoin(false).
Doing so forces a new child span on Tracer.joinSpan().
TraceContext.Extractor<C> is implemented by a Propagation.Factory plugin.
Internally, this code creates the union type, TraceContextOrSamplingFlags, with one of the following:
* TraceContext if trace and span IDs were present.
* TraceIdContext if a trace ID was present but span IDs were not present.
* SamplingFlags if no identifiers were present.
Some Propagation implementations carry extra data from the point of extraction (for example, reading incoming headers) to injection (for example, writing outgoing headers).
For example, it might carry a request ID.
When implementations have extra data, they handle it as follows:
* If a TraceContext were extracted, add the extra data as TraceContext.extra().
* Otherwise, add it as TraceContextOrSamplingFlags.extra(), which Tracer.nextSpan handles.
Brave supports a “current tracing component” concept, which should only be used when you have no other way to get a reference. This was made for JDBC connections, as they often initialize prior to the tracing component.
The most recent tracing component instantiated is available through Tracing.current().
You can also use Tracing.currentTracer() to get only the tracer.
If you use either of these methods, do not cache the result.
Instead, look them up each time you need them.
Brave supports a “current span” concept which represents the in-flight operation.
You can use Tracer.currentSpan() to add custom tags to a span and Tracer.nextSpan() to create a child of whatever is in-flight.
| Important |
|---|---|
In Sleuth, you can autowire the |
When writing new instrumentation, it is important to place a span you created in scope as the current span.
Not only does doing so let users access it with Tracer.currentSpan(), but it also allows customizations such as SLF4J MDC to see the current trace IDs.
Tracer.withSpanInScope(Span) facilitates this and is most conveniently employed by using the try-with-resources idiom.
Whenever external code might be invoked (such as proceeding an interceptor or otherwise), place the span in scope, as shown in the following example:
@Autowired Tracer tracer; try (SpanInScope ws = tracer.withSpanInScope(span)) { return inboundRequest.invoke(); } finally { // note the scope is independent of the span span.finish(); }
In edge cases, you may need to clear the current span temporarily (for example, launching a task that should not be associated with the current request). To do tso, pass null to withSpanInScope, as shown in the following example:
@Autowired Tracer tracer; try (SpanInScope cleared = tracer.withSpanInScope(null)) { startBackgroundThread(); }
Spring Cloud Sleuth automatically instruments all your Spring applications, so you should not have to do anything to activate it.
The instrumentation is added by using a variety of technologies according to the stack that is available. For example, for a servlet web application, we use a Filter, and, for Spring Integration, we use ChannelInterceptors.
You can customize the keys used in span tags.
To limit the volume of span data, an HTTP request is, by default, tagged only with a handful of metadata, such as the status code, the host, and the URL.
You can add request headers by configuring spring.sleuth.keys.http.headers (a list of header names).
| Note |
|---|---|
Tags are collected and exported only if there is a |
You can do the following operations on the Span by means of brave.Tracer:
- start: When you start a span, its name is assigned and the start timestamp is recorded.
- close: The span gets finished (the end time of the span is recorded) and, if the span is sampled, it is eligible for collection (for example, to Zipkin).
- continue: A new instance of span is created. It is a copy of the one that it continues.
- detach: The span does not get stopped or closed. It only gets removed from the current thread.
- create with explicit parent: You can create a new span and set an explicit parent for it.
| Tip |
|---|---|
Spring Cloud Sleuth creates an instance of |
You can manually create spans by using the Tracer, as shown in the following example:
// Start a span. If there was a span present in this thread it will become // the `newSpan`'s parent. Span newSpan = this.tracer.nextSpan().name("calculateTax"); try (Tracer.SpanInScope ws = this.tracer.withSpanInScope(newSpan.start())) { // ... // You can tag a span newSpan.tag("taxValue", taxValue); // ... // You can log an event on a span newSpan.annotate("taxCalculated"); } finally { // Once done remember to finish the span. This will allow collecting // the span to send it to Zipkin newSpan.finish(); }
In the preceding example, we could see how to create a new instance of the span. If there is already a span in this thread, it becomes the parent of the new span.
| Important |
|---|---|
Always clean after you create a span. Also, always finish any span that you want to send to Zipkin. |
| Important |
|---|---|
If your span contains a name greater than 50 chars, that name is truncated to 50 chars. Your names have to be explicit and concrete. Big names lead to latency issues and sometimes even exceptions. |
Sometimes, you do not want to create a new span but you want to continue one. An example of such a situation might be as follows:
- AOP: If there was already a span created before an aspect was reached, you might not want to create a new span.
- Hystrix: Executing a Hystrix command is most likely a logical part of the current processing. It is in fact merely a technical implementation detail that you would not necessarily want to reflect in tracing as a separate being.
To continue a span, you can use brave.Tracer, as shown in the following example:
// let's assume that we're in a thread Y and we've received // the `initialSpan` from thread X Span continuedSpan = this.tracer.toSpan(newSpan.context()); try { // ... // You can tag a span continuedSpan.tag("taxValue", taxValue); // ... // You can log an event on a span continuedSpan.annotate("taxCalculated"); } finally { // Once done remember to flush the span. That means that // it will get reported but the span itself is not yet finished continuedSpan.flush(); }
You might want to start a new span and provide an explicit parent of that span.
Assume that the parent of a span is in one thread and you want to start a new span in another thread.
In Brave, whenever you call nextSpan(), it creates a span in reference to the span that is currently in scope.
You can put the span in scope and then call nextSpan(), as shown in the following example:
// let's assume that we're in a thread Y and we've received // the `initialSpan` from thread X. `initialSpan` will be the parent // of the `newSpan` Span newSpan = null; try (Tracer.SpanInScope ws = this.tracer.withSpanInScope(initialSpan)) { newSpan = this.tracer.nextSpan().name("calculateCommission"); // ... // You can tag a span newSpan.tag("commissionValue", commissionValue); // ... // You can log an event on a span newSpan.annotate("commissionCalculated"); } finally { // Once done remember to finish the span. This will allow collecting // the span to send it to Zipkin. The tags and events set on the // newSpan will not be present on the parent if (newSpan != null) { newSpan.finish(); } }
| Important |
|---|---|
After creating such a span, you must finish it. Otherwise it is not reported (for example, to Zipkin). |
Picking a span name is not a trivial task. A span name should depict an operation name. The name should be low cardinality, so it should not include identifiers.
Since there is a lot of instrumentation going on, some span names are artificial:
controller-method-namewhen received by a Controller with a method name ofcontrollerMethodNameasyncfor asynchronous operations done with wrappedCallableandRunnableinterfaces.- Methods annotated with
@Scheduledreturn the simple name of the class.
Fortunately, for asynchronous processing, you can provide explicit naming.
You can name the span explicitly by using the @SpanName annotation, as shown in the following example:
@SpanName("calculateTax") class TaxCountingRunnable implements Runnable { @Override public void run() { // perform logic } } }
In this case, when processed in the following manner, the span is named calculateTax:
Runnable runnable = new TraceRunnable(this.tracing, spanNamer, new TaxCountingRunnable()); Future<?> future = executorService.submit(runnable); // ... some additional logic ... future.get();
It is pretty rare to create separate classes for Runnable or Callable.
Typically, one creates an anonymous instance of those classes.
You cannot annotate such classes.
To overcome that limitation, if there is no @SpanName annotation present, we check whether the class has a custom implementation of the toString() method.
Running such code leads to creating a span named calculateTax, as shown in the following example:
Runnable runnable = new TraceRunnable(this.tracing, spanNamer, new Runnable() { @Override public void run() { // perform logic } @Override public String toString() { return "calculateTax"; } }); Future<?> future = executorService.submit(runnable); // ... some additional logic ... future.get();
You can manage spans with a variety of annotations.
There are a number of good reasons to manage spans with annotations, including:
- API-agnostic means to collaborate with a span. Use of annotations lets users add to a span with no library dependency on a span api. Doing so lets Sleuth change its core API to create less impact to user code.
- Reduced surface area for basic span operations. Without this feature, you must use the span api, which has lifecycle commands that could be used incorrectly. By only exposing scope, tag, and log functionality, you can collaborate without accidentally breaking span lifecycle.
- Collaboration with runtime generated code. With libraries such as Spring Data and Feign, the implementations of interfaces are generated at runtime. Consequently, span wrapping of objects was tedious. Now you can provide annotations over interfaces and the arguments of those interfaces.
If you do not want to create local spans manually, you can use the @NewSpan annotation.
Also, we provide the @SpanTag annotation to add tags in an automated fashion.
Now we can consider some examples of usage.
@NewSpan void testMethod();
Annotating the method without any parameter leads to creating a new span whose name equals the annotated method name.
@NewSpan("customNameOnTestMethod4") void testMethod4();
If you provide the value in the annotation (either directly or by setting the name parameter), the created span has the provided value as the name.
// method declaration @NewSpan(name = "customNameOnTestMethod5") void testMethod5(@SpanTag("testTag") String param); // and method execution this.testBean.testMethod5("test");
You can combine both the name and a tag. Let’s focus on the latter.
In this case, the value of the annotated method’s parameter runtime value becomes the value of the tag.
In our sample, the tag key is testTag, and the tag value is test.
@NewSpan(name = "customNameOnTestMethod3") @Override public void testMethod3() { }
You can place the @NewSpan annotation on both the class and an interface.
If you override the interface’s method and provide a different value for the @NewSpan annotation, the most
concrete one wins (in this case customNameOnTestMethod3 is set).
If you want to add tags and annotations to an existing span, you can use the @ContinueSpan annotation, as shown in the following example:
// method declaration @ContinueSpan(log = "testMethod11") void testMethod11(@SpanTag("testTag11") String param); // method execution this.testBean.testMethod11("test"); this.testBean.testMethod13();
(Note that, in contrast with the @NewSpan annotation ,you can also add logs with the log parameter.)
That way, the span gets continued and:
- Log entries named
testMethod11.beforeandtestMethod11.afterare created. - If an exception is thrown, a log entry named
testMethod11.afterFailureis also created. - A tag with a key of
testTag11and a value oftestis created.
There are 3 different ways to add tags to a span. All of them are controlled by the SpanTag annotation.
The precedence is as follows:
- Try with a bean of
TagValueResolvertype and a provided name. - If the bean name has not been provided, try to evaluate an expression.
We search for a
TagValueExpressionResolverbean. The default implementation uses SPEL expression resolution. IMPORTANT You can only reference properties from the SPEL expression. Method execution is not allowed due to security constraints. - If we do not find any expression to evaluate, return the
toString()value of the parameter.
The value of the tag for the following method is computed by an implementation of TagValueResolver interface.
Its class name has to be passed as the value of the resolver attribute.
Consider the following annotated method:
@NewSpan public void getAnnotationForTagValueResolver( @SpanTag(key = "test", resolver = TagValueResolver.class) String test) { }
Now further consider the following TagValueResolver bean implementation:
@Bean(name = "myCustomTagValueResolver") public TagValueResolver tagValueResolver() { return parameter -> "Value from myCustomTagValueResolver"; }
The two preceding examples lead to setting a tag value equal to Value from myCustomTagValueResolver.
Consider the following annotated method:
@NewSpan public void getAnnotationForTagValueExpression( @SpanTag(key = "test", expression = "'hello' + ' characters'") String test) { }
No custom implementation of a TagValueExpressionResolver leads to evaluation of the SPEL expression, and a tag with a value of 4 characters is set on the span.
If you want to use some other expression resolution mechanism, you can create your own implementation of the bean.
If a customization of client / server parsing of the HTTP related spans is required,
just register a bean of type brave.http.HttpClientParser or
brave.http.HttpServerParser. If client /server sampling is required, just
register a bean of type brave.http.HttpSampler and name the bean
sleuthClientSampler for client sampler and sleuthServerSampler for server sampler.
For your convenience the @ClientSampler and @ServerSampler
annotations can be used to inject the proper beans or to
reference the bean names via their static String NAME fields.
Check out Brave’s code to see an example of how to make a path-based sampler https://github.com/openzipkin/brave/tree/master/instrumentation/http#sampling-policy
If you want to completely rewrite the HttpTracing bean you can use the SkipPatternProvider
interface to retrieve the URL Pattern for spans that should be not sampled. Below you can see
an example of usage of SkipPatternProvider inside a server side, HttpSampler.
@Configuration class Config { @Bean(name = ServerSampler.NAME) HttpSampler myHttpSampler(SkipPatternProvider provider) { Pattern pattern = provider.skipPattern(); return new HttpSampler() { @Override public <Req> Boolean trySample(HttpAdapter<Req, ?> adapter, Req request) { String url = adapter.path(request); boolean shouldSkip = pattern.matcher(url).matches(); if (shouldSkip) { return false; } return null; } }; } }
You can also modify the behavior of the TracingFilter, which is the component that is responsible for processing the input HTTP request and adding tags basing on the HTTP response.
You can customize the tags or modify the response headers by registering your own instance of the TracingFilter bean.
In the following example, we register the TracingFilter bean, add the ZIPKIN-TRACE-ID response header containing the current Span’s trace id, and add a tag with key custom and a value tag to the span.
@Component @Order(TraceWebServletAutoConfiguration.TRACING_FILTER_ORDER + 1) class MyFilter extends GenericFilterBean { private final Tracer tracer; MyFilter(Tracer tracer) { this.tracer = tracer; } @Override public void doFilter(ServletRequest request, ServletResponse response, FilterChain chain) throws IOException, ServletException { Span currentSpan = this.tracer.currentSpan(); if (currentSpan == null) { chain.doFilter(request, response); return; } // for readability we're returning trace id in a hex form ((HttpServletResponse) response).addHeader("ZIPKIN-TRACE-ID", currentSpan.context().traceIdString()); // we can also add some custom tags currentSpan.tag("custom", "tag"); chain.doFilter(request, response); } }
By default, Sleuth assumes that, when you send a span to Zipkin, you want the span’s service name to be equal to the value of the spring.application.name property.
That is not always the case, though.
There are situations in which you want to explicitly provide a different service name for all spans coming from your application.
To achieve that, you can pass the following property to your application to override that value (the example is for a service named myService):
spring.zipkin.service.name: myServiceBefore reporting spans (for example, to Zipkin) you may want to modify that span in some way.
You can do so by using the FinishedSpanHandler interface.
In Sleuth, we generate spans with a fixed name.
Some users want to modify the name depending on values of tags.
You can implement the FinishedSpanHandler interface to alter that name.
The following example shows how to register two beans that implement FinishedSpanHandler:
@Bean FinishedSpanHandler handlerOne() { return new FinishedSpanHandler() { @Override public boolean handle(TraceContext traceContext, MutableSpan span) { span.name("foo"); return true; // keep this span } }; } @Bean FinishedSpanHandler handlerTwo() { return new FinishedSpanHandler() { @Override public boolean handle(TraceContext traceContext, MutableSpan span) { span.name(span.name() + " bar"); return true; // keep this span } }; }
The preceding example results in changing the name of the reported span to foo bar, just before it gets reported (for example, to Zipkin).
| Important |
|---|---|
This section is about defining host from service discovery. It is NOT about finding Zipkin through service discovery. |
To define the host that corresponds to a particular span, we need to resolve the host name and port. The default approach is to take these values from server properties. If those are not set, we try to retrieve the host name from the network interfaces.
If you have the discovery client enabled and prefer to retrieve the host address from the registered instance in a service registry, you have to set the spring.zipkin.locator.discovery.enabled property (it is applicable for both HTTP-based and Stream-based span reporting), as follows:
spring.zipkin.locator.discovery.enabled: true
By default, if you add spring-cloud-starter-zipkin as a dependency to your project, when the span is closed, it is sent to Zipkin over HTTP.
The communication is asynchronous.
You can configure the URL by setting the spring.zipkin.baseUrl property, as follows:
spring.zipkin.baseUrl: http://192.168.99.100:9411/
If you want to find Zipkin through service discovery, you can pass the Zipkin’s service ID inside the URL, as shown in the following example for zipkinserver service ID:
spring.zipkin.baseUrl: http://zipkinserver/To disable this feature just set spring.zipkin.discoveryClientEnabled to `false.
When the Discovery Client feature is enabled, Sleuth uses
LoadBalancerClient to find the URL of the Zipkin Server. It means
that you can set up the load balancing configuration e.g. via Ribbon.
zipkinserver: ribbon: ListOfServers: host1,host2
If you have web, rabbit, or kafka together on the classpath, you might need to pick the means by which you would like to send spans to zipkin.
To do so, set web, rabbit, or kafka to the spring.zipkin.sender.type property.
The following example shows setting the sender type for web:
spring.zipkin.sender.type: webTo customize the RestTemplate that sends spans to Zipkin via HTTP, you can register
the ZipkinRestTemplateCustomizer bean.
@Configuration class MyConfig { @Bean ZipkinRestTemplateCustomizer myCustomizer() { return new ZipkinRestTemplateCustomizer() { @Override void customize(RestTemplate restTemplate) { // customize the RestTemplate } }; } }
If, however, you would like to control the full process of creating the RestTemplate
object, you will have to create a bean of zipkin2.reporter.Sender type.
@Bean Sender myRestTemplateSender(ZipkinProperties zipkin, ZipkinRestTemplateCustomizer zipkinRestTemplateCustomizer) { RestTemplate restTemplate = mySuperCustomRestTemplate(); zipkinRestTemplateCustomizer.customize(restTemplate); return myCustomSender(zipkin, restTemplate); }
| Important |
|---|---|
We recommend using Zipkin’s native support for message-based span sending. Starting from the Edgware release, the Zipkin Stream server is deprecated. In the Finchley release, it got removed. |
If for some reason you need to create the deprecated Stream Zipkin server, see the Dalston Documentation.
Spring Cloud Sleuth is compatible with OpenTracing.
If you have OpenTracing on the classpath, we automatically register the OpenTracing Tracer bean.
If you wish to disable this, set spring.sleuth.opentracing.enabled to false
If you wrap your logic in Runnable or Callable, you can wrap those classes in their Sleuth representative, as shown in the following example for Runnable:
Runnable runnable = new Runnable() { @Override public void run() { // do some work } @Override public String toString() { return "spanNameFromToStringMethod"; } }; // Manual `TraceRunnable` creation with explicit "calculateTax" Span name Runnable traceRunnable = new TraceRunnable(this.tracing, spanNamer, runnable, "calculateTax"); // Wrapping `Runnable` with `Tracing`. That way the current span will be available // in the thread of `Runnable` Runnable traceRunnableFromTracer = this.tracing.currentTraceContext() .wrap(runnable);
The following example shows how to do so for Callable:
Callable<String> callable = new Callable<String>() { @Override public String call() throws Exception { return someLogic(); } @Override public String toString() { return "spanNameFromToStringMethod"; } }; // Manual `TraceCallable` creation with explicit "calculateTax" Span name Callable<String> traceCallable = new TraceCallable<>(this.tracing, spanNamer, callable, "calculateTax"); // Wrapping `Callable` with `Tracing`. That way the current span will be available // in the thread of `Callable` Callable<String> traceCallableFromTracer = this.tracing.currentTraceContext() .wrap(callable);
That way, you ensure that a new span is created and closed for each execution.
We register a custom HystrixConcurrencyStrategy called TraceCallable that wraps all Callable instances in their Sleuth representative.
The strategy either starts or continues a span, depending on whether tracing was already going on before the Hystrix command was called.
To disable the custom Hystrix Concurrency Strategy, set the spring.sleuth.hystrix.strategy.enabled to false.
Assume that you have the following HystrixCommand:
HystrixCommand<String> hystrixCommand = new HystrixCommand<String>(setter) { @Override protected String run() throws Exception { return someLogic(); } };
To pass the tracing information, you have to wrap the same logic in the Sleuth version of the HystrixCommand, which is called
TraceCommand, as shown in the following example:
TraceCommand<String> traceCommand = new TraceCommand<String>(tracer, setter) { @Override public String doRun() throws Exception { return someLogic(); } };
We registering a custom RxJavaSchedulersHook that wraps all Action0 instances in their Sleuth representative, which is called TraceAction.
The hook either starts or continues a span, depending on whether tracing was already going on before the Action was scheduled.
To disable the custom RxJavaSchedulersHook, set the spring.sleuth.rxjava.schedulers.hook.enabled to false.
You can define a list of regular expressions for thread names for which you do not want spans to be created.
To do so, provide a comma-separated list of regular expressions in the spring.sleuth.rxjava.schedulers.ignoredthreads property.
| Important |
|---|---|
The suggest approach to reactive programming and Sleuth is to use the Reactor support. |
Features from this section can be disabled by setting the spring.sleuth.web.enabled property with value equal to false.
Through the TracingFilter, all sampled incoming requests result in creation of a Span.
That Span’s name is http: + the path to which the request was sent.
For example, if the request was sent to /this/that then the name will be http:/this/that.
You can configure which URIs you would like to skip by setting the spring.sleuth.web.skipPattern property.
If you have ManagementServerProperties on classpath, its value of contextPath gets appended to the provided skip pattern.
If you want to reuse the Sleuth’s default skip patterns and just append your own, pass those patterns by using the spring.sleuth.web.additionalSkipPattern.
By default, all the spring boot actuator endpoints are automatically added to the skip pattern.
If you want to disable this behaviour set spring.sleuth.web.ignore-auto-configured-skip-patterns
to true.
To change the order of tracing filter registration, please set the
spring.sleuth.web.filter-order property.
To disable the filter that logs uncaught exceptions you can disable the
spring.sleuth.web.exception-throwing-filter-enabled property.
Since we want the span names to be precise, we use a TraceHandlerInterceptor that either wraps an existing HandlerInterceptor or is added directly to the list of existing HandlerInterceptors.
The TraceHandlerInterceptor adds a special request attribute to the given HttpServletRequest.
If the the TracingFilter does not see this attribute, it creates a “fallback” span, which is an additional span created on the server side so that the trace is presented properly in the UI.
If that happens, there is probably missing instrumentation.
In that case, please file an issue in Spring Cloud Sleuth.
If your controller returns a Callable or a WebAsyncTask, Spring Cloud Sleuth continues the existing span instead of creating a new one.
Through TraceWebFilter, all sampled incoming requests result in creation of a Span.
That Span’s name is http: + the path to which the request was sent.
For example, if the request was sent to /this/that, the name is http:/this/that.
You can configure which URIs you would like to skip by using the spring.sleuth.web.skipPattern property.
If you have ManagementServerProperties on the classpath, its value of contextPath gets appended to the provided skip pattern.
If you want to reuse Sleuth’s default skip patterns and append your own, pass those patterns by using the spring.sleuth.web.additionalSkipPattern.
To change the order of tracing filter registration, please set the
spring.sleuth.web.filter-order property.
Via the integration with Brave, Spring Cloud Sleuth supports Dubbo.
It’s enough to add the brave-instrumentation-dubbo-rpc dependency:
<dependency> <groupId>io.zipkin.brave</groupId> <artifactId>brave-instrumentation-dubbo-rpc</artifactId> </dependency>
You need to also set a dubbo.properties file with the following contents:
dubbo.provider.filter=tracing dubbo.consumer.filter=tracing
You can read more about Brave - Dubbo integration here. An example of Spring Cloud Sleuth and Dubbo can be found here.
We inject a RestTemplate interceptor to ensure that all the tracing information is passed to the requests.
Each time a call is made, a new Span is created.
It gets closed upon receiving the response.
To block the synchronous RestTemplate features, set spring.sleuth.web.client.enabled to false.
| Important |
|---|---|
You have to register |
| Important |
|---|---|
Starting with Sleuth |
To block the AsyncRestTemplate features, set spring.sleuth.web.async.client.enabled to false.
To disable creation of the default TraceAsyncClientHttpRequestFactoryWrapper, set spring.sleuth.web.async.client.factory.enabled
to false.
If you do not want to create AsyncRestClient at all, set spring.sleuth.web.async.client.template.enabled to false.
Sometimes you need to use multiple implementations of the Asynchronous Rest Template.
In the following snippet, you can see an example of how to set up such a custom AsyncRestTemplate:
@Configuration @EnableAutoConfiguration static class Config { @Bean(name = "customAsyncRestTemplate") public AsyncRestTemplate traceAsyncRestTemplate() { return new AsyncRestTemplate(asyncClientFactory(), clientHttpRequestFactory()); } private ClientHttpRequestFactory clientHttpRequestFactory() { ClientHttpRequestFactory clientHttpRequestFactory = new CustomClientHttpRequestFactory(); // CUSTOMIZE HERE return clientHttpRequestFactory; } private AsyncClientHttpRequestFactory asyncClientFactory() { AsyncClientHttpRequestFactory factory = new CustomAsyncClientHttpRequestFactory(); // CUSTOMIZE HERE return factory; } }
We inject a ExchangeFilterFunction implementation that creates a span and, through on-success and on-error callbacks, takes care of closing client-side spans.
To block this feature, set spring.sleuth.web.client.enabled to false.
| Important |
|---|---|
You have to register |
If you use the Traverson library, you can inject a RestTemplate as a bean into your Traverson object.
Since RestTemplate is already intercepted, you get full support for tracing in your client. The following pseudo code
shows how to do that:
@Autowired RestTemplate restTemplate; Traverson traverson = new Traverson(URI.create("http://some/address"), MediaType.APPLICATION_JSON, MediaType.APPLICATION_JSON_UTF8).setRestOperations(restTemplate); // use Traverson
We instrument the HttpClientBuilder and HttpAsyncClientBuilder so that
tracing context gets injected to the sent requests.
To block these features, set spring.sleuth.web.client.enabled to false.
We instrument the Netty’s HttpClient.
To block this feature, set spring.sleuth.web.client.enabled to false.
| Important |
|---|---|
You have to register |
By default, Spring Cloud Sleuth provides integration with Feign through TraceFeignClientAutoConfiguration.
You can disable it entirely by setting spring.sleuth.feign.enabled to false.
If you do so, no Feign-related instrumentation take place.
Part of Feign instrumentation is done through a FeignBeanPostProcessor.
You can disable it by setting spring.sleuth.feign.processor.enabled to false.
If you set it to false, Spring Cloud Sleuth does not instrument any of your custom Feign components.
However, all the default instrumentation is still there.
Spring Cloud Sleuth provides instrumentation for gRPC through TraceGrpcAutoConfiguration. You can disable it entirely by setting spring.sleuth.grpc.enabled to false.
| Important |
|---|---|
The gRPC integration relies on two external libraries to instrument clients and servers and both of those libraries must be on the class path to enable the instrumentation. |
Maven:
<dependency> <groupId>io.github.lognet</groupId> <artifactId>grpc-spring-boot-starter</artifactId> </dependency> <dependency> <groupId>io.zipkin.brave</groupId> <artifactId>brave-instrumentation-grpc</artifactId> </dependency>
Gradle:
compile("io.github.lognet:grpc-spring-boot-starter")
compile("io.zipkin.brave:brave-instrumentation-grpc")Spring Cloud Sleuth leverages grpc-spring-boot-starter to register Brave’s gRPC server interceptor with all services annotated with @GRpcService.
gRPC clients leverage a ManagedChannelBuilder to construct a ManagedChannel used to communicate to the gRPC server. The native ManagedChannelBuilder provides static methods as entry points for construction of ManagedChannel instances, however, this mechanism is outside the influence of the Spring application context.
| Important |
|---|---|
Spring Cloud Sleuth provides a |
Sleuth creates a TracingManagedChannelBuilderCustomizer which inject Brave’s client interceptor into the SpringAwareManagedChannelBuilder.
Grpc Spring Boot Starter automatically detects the presence of Spring Cloud Sleuth and brave’s instrumentation for gRPC and registers the necessary client and/or server tooling.
In Spring Cloud Sleuth, we instrument async-related components so that the tracing information is passed between threads.
You can disable this behavior by setting the value of spring.sleuth.async.enabled to false.
If you annotate your method with @Async, we automatically create a new Span with the following characteristics:
- If the method is annotated with
@SpanName, the value of the annotation is the Span’s name. - If the method is not annotated with
@SpanName, the Span name is the annotated method name. - The span is tagged with the method’s class name and method name.
In Spring Cloud Sleuth, we instrument scheduled method execution so that the tracing information is passed between threads.
You can disable this behavior by setting the value of spring.sleuth.scheduled.enabled to false.
If you annotate your method with @Scheduled, we automatically create a new span with the following characteristics:
- The span name is the annotated method name.
- The span is tagged with the method’s class name and method name.
If you want to skip span creation for some @Scheduled annotated classes, you can set the spring.sleuth.scheduled.skipPattern with a regular expression that matches the fully qualified name of the @Scheduled annotated class.
If you use spring-cloud-sleuth-stream and spring-cloud-netflix-hystrix-stream together, a span is created for each Hystrix metrics and sent to Zipkin.
This behavior may be annoying. That’s why, by default, spring.sleuth.scheduled.skipPattern=org.springframework.cloud.netflix.hystrix.stream.HystrixStreamTask.
We provide LazyTraceExecutor, TraceableExecutorService, and TraceableScheduledExecutorService. Those implementations create spans each time a new task is submitted, invoked, or scheduled.
The following example shows how to pass tracing information with TraceableExecutorService when working with CompletableFuture:
CompletableFuture<Long> completableFuture = CompletableFuture.supplyAsync(() -> {
// perform some logic
return 1_000_000L;
}, new TraceableExecutorService(beanFactory, executorService,
// 'calculateTax' explicitly names the span - this param is optional
"calculateTax")); | Important |
|---|---|
Sleuth does not work with |
If there are beans that implement the Executor interface that you would like
to exclude from span creation, you can use the spring.sleuth.async.ignored-beans
property where you can provide a list of bean names.
Sometimes, you need to set up a custom instance of the AsyncExecutor.
The following example shows how to set up such a custom Executor:
@Configuration @EnableAutoConfiguration @EnableAsync // add the infrastructure role to ensure that the bean gets auto-proxied @Role(BeanDefinition.ROLE_INFRASTRUCTURE) static class CustomExecutorConfig extends AsyncConfigurerSupport { @Autowired BeanFactory beanFactory; @Override public Executor getAsyncExecutor() { ThreadPoolTaskExecutor executor = new ThreadPoolTaskExecutor(); // CUSTOMIZE HERE executor.setCorePoolSize(7); executor.setMaxPoolSize(42); executor.setQueueCapacity(11); executor.setThreadNamePrefix("MyExecutor-"); // DON'T FORGET TO INITIALIZE executor.initialize(); return new LazyTraceExecutor(this.beanFactory, executor); } }
| Tip |
|---|---|
To ensure that your configuration gets post processed, remember
to add the |
Features from this section can be disabled by setting the spring.sleuth.messaging.enabled property with value equal to false.
Spring Cloud Sleuth integrates with Spring Integration.
It creates spans for publish and subscribe events.
To disable Spring Integration instrumentation, set spring.sleuth.integration.enabled to false.
You can provide the spring.sleuth.integration.patterns pattern to explicitly provide the names of channels that you want to include for tracing.
By default, all channels but hystrixStreamOutput channel are included.
| Important |
|---|---|
When using the |
If you want to customize the way tracing context is read from and written to message headers, it’s enough for you to register beans of types:
Propagation.Setter<MessageHeaderAccessor, String>- for writing headers to the messagePropagation.Getter<MessageHeaderAccessor, String>- for reading headers from the message
We instrument the RabbitTemplate so that tracing headers get injected
into the message.
To block this feature, set spring.sleuth.messaging.rabbit.enabled to false.
We instrument the Spring Kafka’s ProducerFactory and ConsumerFactory
so that tracing headers get injected into the created Spring Kafka’s
Producer and Consumer.
To block this feature, set spring.sleuth.messaging.kafka.enabled to false.
You can see the running examples deployed in the Pivotal Web Services. Check them out at the following links:
- Zipkin for apps presented in the samples to the top. First make a request to Service 1 and then check out the trace in Zipkin.
- Zipkin for Brewery on PWS, its Github Code. Ensure that you’ve picked the lookback period of 7 days. If there are no traces, go to Presenting application and order some beers. Then check Zipkin for traces.
1.0.0.BUILD-SNAPSHOT
This project provides Consul integrations for Spring Boot apps through autoconfiguration and binding to the Spring Environment and other Spring programming model idioms. With a few simple annotations you can quickly enable and configure the common patterns inside your application and build large distributed systems with Consul based components. The patterns provided include Service Discovery, Control Bus and Configuration. Intelligent Routing (Zuul) and Client Side Load Balancing (Ribbon), Circuit Breaker (Hystrix) are provided by integration with Spring Cloud Netflix.
Please see the installation documentation for instructions on how to install Consul.
A Consul Agent client must be available to all Spring Cloud Consul applications. By default, the Agent client is expected to be at localhost:8500. See the Agent documentation for specifics on how to start an Agent client and how to connect to a cluster of Consul Agent Servers. For development, after you have installed consul, you may start a Consul Agent using the following command:
./src/main/bash/local_run_consul.sh
This will start an agent in server mode on port 8500, with the ui available at http://localhost:8500
Service Discovery is one of the key tenets of a microservice based architecture. Trying to hand configure each client or some form of convention can be very difficult to do and can be very brittle. Consul provides Service Discovery services via an HTTP API and DNS. Spring Cloud Consul leverages the HTTP API for service registration and discovery. This does not prevent non-Spring Cloud applications from leveraging the DNS interface. Consul Agents servers are run in a cluster that communicates via a gossip protocol and uses the Raft consensus protocol.
To activate Consul Service Discovery use the starter with group org.springframework.cloud and artifact id spring-cloud-starter-consul-discovery. See the Spring Cloud Project page for details on setting up your build system with the current Spring Cloud Release Train.
When a client registers with Consul, it provides meta-data about itself such as host and port, id, name and tags. An HTTP Check is created by default that Consul hits the /health endpoint every 10 seconds. If the health check fails, the service instance is marked as critical.
Example Consul client:
@SpringBootApplication @RestController public class Application { @RequestMapping("/") public String home() { return "Hello world"; } public static void main(String[] args) { new SpringApplicationBuilder(Application.class).web(true).run(args); } }
(i.e. utterly normal Spring Boot app). If the Consul client is located somewhere other than localhost:8500, the configuration is required to locate the client. Example:
application.yml.
spring:
cloud:
consul:
host: localhost
port: 8500
| Caution |
|---|---|
If you use Spring Cloud Consul Config, the above values will need to be placed in |
The default service name, instance id and port, taken from the Environment, are ${spring.application.name}, the Spring Context ID and ${server.port} respectively.
To disable the Consul Discovery Client you can set spring.cloud.consul.discovery.enabled to false. Consul Discovery Client will also be disabled when spring.cloud.discovery.enabled is set to false.
To disable the service registration you can set spring.cloud.consul.discovery.register to false.
When management server port is set to something different than the application port, by setting management.server.port property, management service will be registered as a separate service than the application service. For example:
application.yml.
spring:
application:
name: myApp
management:
server:
port: 4452
Above configuration will register following 2 services:
- Application Service:
ID: myApp Name: myApp
- Management Service:
ID: myApp-management Name: myApp-management
Management service will inherit its instanceId and serviceName from the application service. For example:
application.yml.
spring:
application:
name: myApp
management:
server:
port: 4452
spring:
cloud:
consul:
discovery:
instance-id: custom-service-id
serviceName: myprefix-${spring.application.name}
Above configuration will register following 2 services:
- Application Service:
ID: custom-service-id Name: myprefix-myApp
- Management Service:
ID: custom-service-id-management Name: myprefix-myApp-management
Further customization is possible via following properties:
/** Port to register the management service under (defaults to management port) */ spring.cloud.consul.discovery.management-port /** Suffix to use when registering management service (defaults to "management" */ spring.cloud.consul.discovery.management-suffix /** Tags to use when registering management service (defaults to "management" */ spring.cloud.consul.discovery.management-tags
The health check for a Consul instance defaults to "/health", which is the default locations of a useful endpoint in a Spring Boot Actuator application. You need to change these, even for an Actuator application if you use a non-default context path or servlet path (e.g. server.servletPath=/foo) or management endpoint path (e.g. management.server.servlet.context-path=/admin). The interval that Consul uses to check the health endpoint may also be configured. "10s" and "1m" represent 10 seconds and 1 minute respectively. Example:
application.yml.
spring:
cloud:
consul:
discovery:
healthCheckPath: ${management.server.servlet.context-path}/health
healthCheckInterval: 15s
You can disable the health check by setting management.health.consul.enabled=false.
Consul does not yet support metadata on services. Spring Cloud’s ServiceInstance has a Map<String, String> metadata field. Spring Cloud Consul uses Consul tags to approximate metadata until Consul officially supports metadata. Tags with the form key=value will be split and used as a Map key and value respectively. Tags without the equal = sign, will be used as both the key and value.
application.yml.
spring:
cloud:
consul:
discovery:
tags: foo=bar, baz
The above configuration will result in a map with foo→bar and baz→baz.
By default a consul instance is registered with an ID that is equal to its Spring Application Context ID. By default, the Spring Application Context ID is ${spring.application.name}:comma,separated,profiles:${server.port}. For most cases, this will allow multiple instances of one service to run on one machine. If further uniqueness is required, Using Spring Cloud you can override this by providing a unique identifier in spring.cloud.consul.discovery.instanceId. For example:
application.yml.
spring:
cloud:
consul:
discovery:
instanceId: ${spring.application.name}:${vcap.application.instance_id:${spring.application.instance_id:${random.value}}}
With this metadata, and multiple service instances deployed on localhost, the random value will kick in there to make the instance unique. In Cloudfoundry the vcap.application.instance_id will be populated automatically in a Spring Boot application, so the random value will not be needed.
Headers can be applied to health check requests. For example, if you’re trying to register a Spring Cloud Config server that uses Vault Backend:
application.yml.
spring:
cloud:
consul:
discovery:
health-check-headers:
X-Config-Token: 6442e58b-d1ea-182e-cfa5-cf9cddef0722
According to the HTTP standard, each header can have more than one values, in which case, an array can be supplied:
application.yml.
spring:
cloud:
consul:
discovery:
health-check-headers:
X-Config-Token:
- "6442e58b-d1ea-182e-cfa5-cf9cddef0722"
- "Some other value"
Spring Cloud has support for Feign (a REST client builder) and also Spring RestTemplate
for looking up services using the logical service names/ids instead of physical URLs. Both Feign and the discovery-aware RestTemplate utilize Ribbon for client-side load balancing.
If you want to access service STORES using the RestTemplate simply declare:
@LoadBalanced
@Bean
public RestTemplate loadbalancedRestTemplate() {
new RestTemplate();
}and use it like this (notice how we use the STORES service name/id from Consul instead of a fully qualified domainname):
@Autowired
RestTemplate restTemplate;
public String getFirstProduct() {
return this.restTemplate.getForObject("https://STORES/products/1", String.class);
}If you have Consul clusters in multiple datacenters and you want to access a service in another datacenter a service name/id alone is not enough. In that case
you use property spring.cloud.consul.discovery.datacenters.STORES=dc-west where STORES is the service name/id and dc-west is the datacenter
where the STORES service lives.
You can also use the org.springframework.cloud.client.discovery.DiscoveryClient which provides a simple API for discovery clients that is not specific to Netflix, e.g.
@Autowired
private DiscoveryClient discoveryClient;
public String serviceUrl() {
List<ServiceInstance> list = discoveryClient.getInstances("STORES");
if (list != null && list.size() > 0 ) {
return list.get(0).getUri();
}
return null;
}The Consul Catalog Watch takes advantage of the ability of consul to watch services. The Catalog Watch makes a blocking Consul HTTP API call to determine if any services have changed. If there is new service data a Heartbeat Event is published.
To change the frequency of when the Config Watch is called change spring.cloud.consul.config.discovery.catalog-services-watch-delay. The default value is 1000, which is in milliseconds. The delay is the amount of time after the end of the previous invocation and the start of the next.
To disable the Catalog Watch set spring.cloud.consul.discovery.catalogServicesWatch.enabled=false.
The watch uses a Spring TaskScheduler to schedule the call to consul. By default it is a ThreadPoolTaskScheduler with a poolSize of 1. To change the TaskScheduler, create a bean of type TaskScheduler named with the ConsulDiscoveryClientConfiguration.CATALOG_WATCH_TASK_SCHEDULER_NAME constant.
Consul provides a Key/Value Store for storing configuration and other metadata. Spring Cloud Consul Config is an alternative to the Config Server and Client. Configuration is loaded into the Spring Environment during the special "bootstrap" phase. Configuration is stored in the /config folder by default. Multiple PropertySource instances are created based on the application’s name and the active profiles that mimicks the Spring Cloud Config order of resolving properties. For example, an application with the name "testApp" and with the "dev" profile will have the following property sources created:
config/testApp,dev/ config/testApp/ config/application,dev/ config/application/
The most specific property source is at the top, with the least specific at the bottom. Properties in the config/application folder are applicable to all applications using consul for configuration. Properties in the config/testApp folder are only available to the instances of the service named "testApp".
Configuration is currently read on startup of the application. Sending a HTTP POST to /refresh will cause the configuration to be reloaded. Section 69.3, “Config Watch” will also automatically detect changes and reload the application context.
To get started with Consul Configuration use the starter with group org.springframework.cloud and artifact id spring-cloud-starter-consul-config. See the Spring Cloud Project page for details on setting up your build system with the current Spring Cloud Release Train.
This will enable auto-configuration that will setup Spring Cloud Consul Config.
Consul Config may be customized using the following properties:
bootstrap.yml.
spring:
cloud:
consul:
config:
enabled: true
prefix: configuration
defaultContext: apps
profileSeparator: '::'
enabledsetting this value to "false" disables Consul Configprefixsets the base folder for configuration valuesdefaultContextsets the folder name used by all applicationsprofileSeparatorsets the value of the separator used to separate the profile name in property sources with profiles
The Consul Config Watch takes advantage of the ability of consul to watch a key prefix. The Config Watch makes a blocking Consul HTTP API call to determine if any relevant configuration data has changed for the current application. If there is new configuration data a Refresh Event is published. This is equivalent to calling the /refresh actuator endpoint.
To change the frequency of when the Config Watch is called change spring.cloud.consul.config.watch.delay. The default value is 1000, which is in milliseconds. The delay is the amount of time after the end of the previous invocation and the start of the next.
To disable the Config Watch set spring.cloud.consul.config.watch.enabled=false.
The watch uses a Spring TaskScheduler to schedule the call to consul. By default it is a ThreadPoolTaskScheduler with a poolSize of 1. To change the TaskScheduler, create a bean of type TaskScheduler named with the ConsulConfigAutoConfiguration.CONFIG_WATCH_TASK_SCHEDULER_NAME constant.
It may be more convenient to store a blob of properties in YAML or Properties format as opposed to individual key/value pairs. Set the spring.cloud.consul.config.format property to YAML or PROPERTIES. For example to use YAML:
bootstrap.yml.
spring:
cloud:
consul:
config:
format: YAML
YAML must be set in the appropriate data key in consul. Using the defaults above the keys would look like:
config/testApp,dev/data config/testApp/data config/application,dev/data config/application/data
You could store a YAML document in any of the keys listed above.
You can change the data key using spring.cloud.consul.config.data-key.
git2consul is a Consul community project that loads files from a git repository to individual keys into Consul. By default the names of the keys are names of the files. YAML and Properties files are supported with file extensions of .yml and .properties respectively. Set the spring.cloud.consul.config.format property to FILES. For example:
bootstrap.yml.
spring:
cloud:
consul:
config:
format: FILES
Given the following keys in /config, the development profile and an application name of foo:
.gitignore application.yml bar.properties foo-development.properties foo-production.yml foo.properties master.ref
the following property sources would be created:
config/foo-development.properties config/foo.properties config/application.yml
The value of each key needs to be a properly formatted YAML or Properties file.
It may be convenient in certain circumstances (like local development or certain test scenarios) to not fail if consul isn’t available for configuration. Setting spring.cloud.consul.config.failFast=false in bootstrap.yml will cause the configuration module to log a warning rather than throw an exception. This will allow the application to continue startup normally.
If you expect that the consul agent may occasionally be unavailable when
your app starts, you can ask it to keep trying after a failure. You need to add
spring-retry and spring-boot-starter-aop to your classpath. The default
behaviour is to retry 6 times with an initial backoff interval of 1000ms and an
exponential multiplier of 1.1 for subsequent backoffs. You can configure these
properties (and others) using spring.cloud.consul.retry.* configuration properties.
This works with both Spring Cloud Consul Config and Discovery registration.
| Tip |
|---|---|
To take full control of the retry add a |
To get started with the Consul Bus use the starter with group org.springframework.cloud and artifact id spring-cloud-starter-consul-bus. See the Spring Cloud Project page for details on setting up your build system with the current Spring Cloud Release Train.
See the Spring Cloud Bus documentation for the available actuator endpoints and howto send custom messages.
Applications can use the Hystrix Circuit Breaker provided by the Spring Cloud Netflix project by including this starter in the projects pom.xml: spring-cloud-starter-hystrix. Hystrix doesn’t depend on the Netflix Discovery Client. The @EnableHystrix annotation should be placed on a configuration class (usually the main class). Then methods can be annotated with @HystrixCommand to be protected by a circuit breaker. See the documentation for more details.
Turbine (provided by the Spring Cloud Netflix project), aggregates multiple instances Hystrix metrics streams, so the dashboard can display an aggregate view. Turbine uses the DiscoveryClient interface to lookup relevant instances. To use Turbine with Spring Cloud Consul, configure the Turbine application in a manner similar to the following examples:
pom.xml.
<dependency>
<groupId>org.springframework.cloud</groupId>
<artifactId>spring-cloud-netflix-turbine</artifactId>
</dependency>
<dependency>
<groupId>org.springframework.cloud</groupId>
<artifactId>spring-cloud-starter-consul-discovery</artifactId>
</dependency>
Notice that the Turbine dependency is not a starter. The turbine starter includes support for Netflix Eureka.
application.yml.
spring.application.name: turbine
applications: consulhystrixclient
turbine:
aggregator:
clusterConfig: ${applications}
appConfig: ${applications}
The clusterConfig and appConfig sections must match, so it’s useful to put the comma-separated list of service ID’s into a separate configuration property.
Turbine.java.
@EnableTurbine
@SpringBootApplication
public class Turbine {
public static void main(String[] args) {
SpringApplication.run(DemoturbinecommonsApplication.class, args);
}
}
This project provides Zookeeper integrations for Spring Boot applications through autoconfiguration and binding to the Spring Environment and other Spring programming model idioms. With a few annotations, you can quickly enable and configure the common patterns inside your application and build large distributed systems with Zookeeper based components. The provided patterns include Service Discovery and Configuration. Integration with Spring Cloud Netflix provides Intelligent Routing (Zuul), Client Side Load Balancing (Ribbon), and Circuit Breaker (Hystrix).
See the installation documentation for instructions on how to install Zookeeper.
Spring Cloud Zookeeper uses Apache Curator behind the scenes. While Zookeeper 3.5.x is still considered "beta" by the Zookeeper development team, the reality is that it is used in production by many users. However, Zookeeper 3.4.x is also used in production. Prior to Apache Curator 4.0, both versions of Zookeeper were supported via two versions of Apache Curator. Starting with Curator 4.0 both versions of Zookeeper are supported via the same Curator libraries.
In case you are integrating with version 3.4 you need to change the Zookeeper dependency
that comes shipped with curator, and thus spring-cloud-zookeeper.
To do so simply exclude that dependency and add the 3.4.x version like shown below.
maven.
<dependency> <groupId>org.springframework.cloud</groupId> <artifactId>spring-cloud-starter-zookeeper-all</artifactId> <exclusions> <exclusion> <groupId>org.apache.zookeeper</groupId> <artifactId>zookeeper</artifactId> </exclusion> </exclusions> </dependency> <dependency> <groupId>org.apache.zookeeper</groupId> <artifactId>zookeeper</artifactId> <version>3.4.12</version> <exclusions> <exclusion> <groupId>org.slf4j</groupId> <artifactId>slf4j-log4j12</artifactId> </exclusion> </exclusions> </dependency>
gradle.
compile('org.springframework.cloud:spring-cloud-starter-zookeeper-all') { exclude group: 'org.apache.zookeeper', module: 'zookeeper' } compile('org.apache.zookeeper:zookeeper:3.4.12') { exclude group: 'org.slf4j', module: 'slf4j-log4j12' }
Service Discovery is one of the key tenets of a microservice based architecture. Trying to hand-configure each client or some form of convention can be difficult to do and can be brittle. Curator(A Java library for Zookeeper) provides Service Discovery through a Service Discovery Extension. Spring Cloud Zookeeper uses this extension for service registration and discovery.
Including a dependency on
org.springframework.cloud:spring-cloud-starter-zookeeper-discovery enables
autoconfiguration that sets up Spring Cloud Zookeeper Discovery.
| Note |
|---|---|
For web functionality, you still need to include
|
| Caution |
|---|---|
When working with version 3.4 of Zookeeper you need to change the way you include the dependency as described here. |
When a client registers with Zookeeper, it provides metadata (such as host and port, ID, and name) about itself.
The following example shows a Zookeeper client:
@SpringBootApplication @RestController public class Application { @RequestMapping("/") public String home() { return "Hello world"; } public static void main(String[] args) { new SpringApplicationBuilder(Application.class).web(true).run(args); } }
| Note |
|---|---|
The preceding example is a normal Spring Boot application. |
If Zookeeper is located somewhere other than localhost:2181, the configuration must
provide the location of the server, as shown in the following example:
application.yml.
spring:
cloud:
zookeeper:
connect-string: localhost:2181
| Caution |
|---|---|
If you use Spring Cloud Zookeeper Config, the
values shown in the preceding example need to be in |
The default service name, instance ID, and port (taken from the Environment) are
${spring.application.name}, the Spring Context ID, and ${server.port}, respectively.
Having spring-cloud-starter-zookeeper-discovery on the classpath makes the app into both
a Zookeeper “service” (that is, it registers itself) and a “client” (that is, it can
query Zookeeper to locate other services).
If you would like to disable the Zookeeper Discovery Client, you can set
spring.cloud.zookeeper.discovery.enabled to false.
Spring Cloud has support for
Feign
(a REST client builder) and
Spring
RestTemplate, using logical service names instead of physical URLs.
You can also use the org.springframework.cloud.client.discovery.DiscoveryClient, which
provides a simple API for discovery clients that is not specific to Netflix, as shown in
the following example:
@Autowired private DiscoveryClient discoveryClient; public String serviceUrl() { List<ServiceInstance> list = discoveryClient.getInstances("STORES"); if (list != null && list.size() > 0 ) { return list.get(0).getUri().toString(); } return null; }
Spring Cloud Netflix supplies useful tools that work regardless of which DiscoveryClient
implementation you use. Feign, Turbine, Ribbon, and Zuul all work with Spring Cloud
Zookeeper.
Spring Cloud Zookeeper implements the ServiceRegistry interface, letting developers
register arbitrary services in a programmatic way.
The ServiceInstanceRegistration class offers a builder() method to create a
Registration object that can be used by the ServiceRegistry, as shown in the following
example:
@Autowired private ZookeeperServiceRegistry serviceRegistry; public void registerThings() { ZookeeperRegistration registration = ServiceInstanceRegistration.builder() .defaultUriSpec() .address("anyUrl") .port(10) .name("/a/b/c/d/anotherservice") .build(); this.serviceRegistry.register(registration); }
Netflix Eureka supports having instances that are OUT_OF_SERVICE registered with the
server. These instances are not returned as active service instances. This is useful for
behaviors such as blue/green deployments. (Note that the Curator Service Discovery recipe
does not support this behavior.) Taking advantage of the flexible payload has let Spring
Cloud Zookeeper implement OUT_OF_SERVICE by updating some specific metadata and then
filtering on that metadata in the Ribbon ZookeeperServerList. The ZookeeperServerList
filters out all non-null instance statuses that do not equal UP. If the instance status
field is empty, it is considered to be UP for backwards compatibility. To change the
status of an instance, make a POST with OUT_OF_SERVICE to the ServiceRegistry
instance status actuator endpoint, as shown in the following example:
$ http POST http://localhost:8081/service-registry status=OUT_OF_SERVICE
| Note |
|---|---|
The preceding example uses the |
The following topics cover how to work with Spring Cloud Zookeeper dependencies:
Spring Cloud Zookeeper gives you a possibility to provide dependencies of your application
as properties. As dependencies, you can understand other applications that are registered
in Zookeeper and which you would like to call through
Feign
(a REST client builder) and Spring RestTemplate.
You can also use the Zookeeper Dependency Watchers functionality to control and monitor the state of your dependencies.
Including a dependency on
org.springframework.cloud:spring-cloud-starter-zookeeper-discovery enables
autoconfiguration that sets up Spring Cloud Zookeeper Dependencies. Even if you provide
the dependencies in your properties, you can turn off the dependencies. To do so, set the
spring.cloud.zookeeper.dependency.enabled property to false (it defaults to true).
Consider the following example of dependency representation:
application.yml.
spring.application.name: yourServiceName
spring.cloud.zookeeper:
dependencies:
newsletter:
path: /path/where/newsletter/has/registered/in/zookeeper
loadBalancerType: ROUND_ROBIN
contentTypeTemplate: application/vnd.newsletter.$version+json
version: v1
headers:
header1:
- value1
header2:
- value2
required: false
stubs: org.springframework:foo:stubs
mailing:
path: /path/where/mailing/has/registered/in/zookeeper
loadBalancerType: ROUND_ROBIN
contentTypeTemplate: application/vnd.mailing.$version+json
version: v1
required: true
The next few sections go through each part of the dependency one by one. The root property
name is spring.cloud.zookeeper.dependencies.
Below the root property you have to represent each dependency as an alias. This is due to
the constraints of Ribbon, which requires that the application ID be placed in the URL.
Consequently, you cannot pass any complex path, suchas /myApp/myRoute/name). The alias
is the name you use instead of the serviceId for DiscoveryClient, Feign, or
RestTemplate.
In the previous examples, the aliases are newsletter and mailing. The following
example shows Feign usage with a newsletter alias:
@FeignClient("newsletter") public interface NewsletterService { @RequestMapping(method = RequestMethod.GET, value = "/newsletter") String getNewsletters(); }
The path is represented by the path YAML property and is the path under which the
dependency is registered under Zookeeper. As described in the
previous section, Ribbon
operates on URLs. As a result, this path is not compliant with its requirement.
That is why Spring Cloud Zookeeper maps the alias to the proper path.
The load balancer type is represented by loadBalancerType YAML property.
If you know what kind of load-balancing strategy has to be applied when calling this particular dependency, you can provide it in the YAML file, and it is automatically applied. You can choose one of the following load balancing strategies:
- STICKY: Once chosen, the instance is always called.
- RANDOM: Picks an instance randomly.
- ROUND_ROBIN: Iterates over instances over and over again.
The Content-Type template and version are represented by the contentTypeTemplate and
version YAML properties.
If you version your API in the Content-Type header, you do not want to add this header
to each of your requests. Also, if you want to call a new version of the API, you do not
want to roam around your code to bump up the API version. That is why you can provide a
contentTypeTemplate with a special $version placeholder. That placeholder will be filled by the value of the
version YAML property. Consider the following example of a contentTypeTemplate:
application/vnd.newsletter.$version+json
Further consider the following version:
v1
The combination of contentTypeTemplate and version results in the creation of a
Content-Type header for each request, as follows:
application/vnd.newsletter.v1+json
Default headers are represented by the headers map in YAML.
Sometimes, each call to a dependency requires setting up of some default headers. To not
do that in code, you can set them up in the YAML file, as shown in the following example
headers section:
headers:
Accept:
- text/html
- application/xhtml+xml
Cache-Control:
- no-cacheThat headers section results in adding the Accept and Cache-Control headers with
appropriate list of values in your HTTP request.
Required dependencies are represented by required property in YAML.
If one of your dependencies is required to be up when your application boots, you can set
the required: true property in the YAML file.
If your application cannot localize the required dependency during boot time, it throws an exception, and the Spring Context fails to set up. In other words, your application cannot start if the required dependency is not registered in Zookeeper.
You can read more about Spring Cloud Zookeeper Presence Checker later in this document.
You can provide a colon-separated path to the JAR containing stubs of the dependency, as shown in the following example:
stubs: org.springframework:myApp:stubs
where:
org.springframeworkis thegroupId.myAppis theartifactId.stubsis the classifier. (Note thatstubsis the default value.)
Because stubs is the default classifier, the preceding example is equal to the following
example:
stubs: org.springframework:myApp
You can set the following properties to enable or disable parts of Zookeeper Dependencies functionalities:
spring.cloud.zookeeper.dependencies: If you do not set this property, you cannot use Zookeeper Dependencies.spring.cloud.zookeeper.dependency.ribbon.enabled(enabled by default): Ribbon requires either explicit global configuration or a particular one for a dependency. By turning on this property, runtime load balancing strategy resolution is possible, and you can use theloadBalancerTypesection of the Zookeeper Dependencies. The configuration that needs this property has an implementation ofLoadBalancerClientthat delegates to theILoadBalancerpresented in the next bullet.spring.cloud.zookeeper.dependency.ribbon.loadbalancer(enabled by default): Thanks to this property, the customILoadBalancerknows that the part of the URI passed to Ribbon might actually be the alias that has to be resolved to a proper path in Zookeeper. Without this property, you cannot register applications under nested paths.spring.cloud.zookeeper.dependency.headers.enabled(enabled by default): This property registers aRibbonClientthat automatically appends appropriate headers and content types with their versions, as presented in the Dependency configuration. Without this setting, those two parameters do not work.spring.cloud.zookeeper.dependency.resttemplate.enabled(enabled by default): When enabled, this property modifies the request headers of a@LoadBalanced-annotatedRestTemplatesuch that it passes headers and content type with the version set in dependency configuration. Without this setting, those two parameters do not work.
The Dependency Watcher mechanism lets you register listeners to your dependencies. The
functionality is, in fact, an implementation of the Observator pattern. When a
dependency changes, its state (to either UP or DOWN), some custom logic can be applied.
Spring Cloud Zookeeper Dependencies functionality needs to be enabled for you to use the Dependency Watcher mechanism.
To register a listener, you must implement an interface called
org.springframework.cloud.zookeeper.discovery.watcher.DependencyWatcherListener and
register it as a bean. The interface gives you one method:
void stateChanged(String dependencyName, DependencyState newState);If you want to register a listener for a particular dependency, the dependencyName would
be the discriminator for your concrete implementation. newState provides you with
information about whether your dependency has changed to CONNECTED or DISCONNECTED.
Bound with the Dependency Watcher is the functionality called Presence Checker. It lets you provide custom behavior when your application boots, to react according to the state of your dependencies.
The default implementation of the abstract
org.springframework.cloud.zookeeper.discovery.watcher.presence.DependencyPresenceOnStartupVerifier
class is the
org.springframework.cloud.zookeeper.discovery.watcher.presence.DefaultDependencyPresenceOnStartupVerifier,
which works in the following way.
- If the dependency is marked us
requiredand is not in Zookeeper, when your application boots, it throws an exception and shuts down. - If the dependency is not
required, theorg.springframework.cloud.zookeeper.discovery.watcher.presence.LogMissingDependencyCheckerlogs that the dependency is missing at theWARNlevel.
Because the DefaultDependencyPresenceOnStartupVerifier is registered only when there is
no bean of type DependencyPresenceOnStartupVerifier, this functionality can be
overridden.
Zookeeper provides a
hierarchical namespace
that lets clients store arbitrary data, such as configuration data. Spring Cloud Zookeeper
Config is an alternative to the
Config Server and Client.
Configuration is loaded into the Spring Environment during the special “bootstrap”
phase. Configuration is stored in the /config namespace by default. Multiple
PropertySource instances are created, based on the application’s name and the active
profiles, to mimic the Spring Cloud Config order of resolving properties. For example, an
application with a name of testApp and with the dev profile has the following property
sources created for it:
config/testApp,devconfig/testAppconfig/application,devconfig/application
The most specific property source is at the top, with the least specific at the bottom.
Properties in the config/application namespace apply to all applications that use
zookeeper for configuration. Properties in the config/testApp namespace are available
only to the instances of the service named testApp.
Configuration is currently read on startup of the application. Sending a HTTP POST
request to /refresh causes the configuration to be reloaded. Watching the configuration
namespace (which Zookeeper supports) is not currently implemented.
Including a dependency on
org.springframework.cloud:spring-cloud-starter-zookeeper-config enables
autoconfiguration that sets up Spring Cloud Zookeeper Config.
| Caution |
|---|---|
When working with version 3.4 of Zookeeper you need to change the way you include the dependency as described here. |
Zookeeper Config may be customized by setting the following properties:
bootstrap.yml.
spring:
cloud:
zookeeper:
config:
enabled: true
root: configuration
defaultContext: apps
profileSeparator: '::'
enabled: Setting this value tofalsedisables Zookeeper Config.root: Sets the base namespace for configuration values.defaultContext: Sets the name used by all applications.profileSeparator: Sets the value of the separator used to separate the profile name in property sources with profiles.
You can add authentication information for Zookeeper ACLs by calling the addAuthInfo
method of a CuratorFramework bean. One way to accomplish this is to provide your own
CuratorFramework bean, as shown in the following example:
@BoostrapConfiguration public class CustomCuratorFrameworkConfig { @Bean public CuratorFramework curatorFramework() { CuratorFramework curator = new CuratorFramework(); curator.addAuthInfo("digest", "user:password".getBytes()); return curator; } }
Consult
the ZookeeperAutoConfiguration class
to see how the CuratorFramework bean’s default configuration.
Alternatively, you can add your credentials from a class that depends on the existing
CuratorFramework bean, as shown in the following example:
@BoostrapConfiguration public class DefaultCuratorFrameworkConfig { public ZookeeperConfig(CuratorFramework curator) { curator.addAuthInfo("digest", "user:password".getBytes()); } }
The creation of this bean must occur during the boostrapping phase. You can register
configuration classes to run during this phase by annotating them with
@BootstrapConfiguration and including them in a comma-separated list that you set as the
value of the org.springframework.cloud.bootstrap.BootstrapConfiguration property in the
resources/META-INF/spring.factories file, as shown in the following example:
resources/META-INF/spring.factories.
org.springframework.cloud.bootstrap.BootstrapConfiguration=\ my.project.CustomCuratorFrameworkConfig,\ my.project.DefaultCuratorFrameworkConfig
Spring Cloud Security offers a set of primitives for building secure applications and services with minimum fuss. A declarative model which can be heavily configured externally (or centrally) lends itself to the implementation of large systems of co-operating, remote components, usually with a central indentity management service. It is also extremely easy to use in a service platform like Cloud Foundry. Building on Spring Boot and Spring Security OAuth2 we can quickly create systems that implement common patterns like single sign on, token relay and token exchange.
| Note |
|---|---|
Spring Cloud is released under the non-restrictive Apache 2.0 license. If you would like to contribute to this section of the documentation or if you find an error, please find the source code and issue trackers in the project at github. |
Here’s a Spring Cloud "Hello World" app with HTTP Basic authentication and a single user account:
app.groovy.
@Grab('spring-boot-starter-security') @Controller class Application { @RequestMapping('/') String home() { 'Hello World' } }
You can run it with spring run app.groovy and watch the logs for the password (username is "user"). So far this is just the default for a Spring Boot app.
Here’s a Spring Cloud app with OAuth2 SSO:
app.groovy.
@Controller @EnableOAuth2Sso class Application { @RequestMapping('/') String home() { 'Hello World' } }
Spot the difference? This app will actually behave exactly the same as the previous one, because it doesn’t know it’s OAuth2 credentals yet.
You can register an app in github quite easily, so try that if you want a production app on your own domain. If you are happy to test on localhost:8080, then set up these properties in your application configuration:
application.yml.
security: oauth2: client: clientId: bd1c0a783ccdd1c9b9e4 clientSecret: 1a9030fbca47a5b2c28e92f19050bb77824b5ad1 accessTokenUri: https://github.com/login/oauth/access_token userAuthorizationUri: https://github.com/login/oauth/authorize clientAuthenticationScheme: form resource: userInfoUri: https://api.github.com/user preferTokenInfo: false
run the app above and it will redirect to github for authorization. If you are already signed into github you won’t even notice that it has authenticated. These credentials will only work if your app is running on port 8080.
To limit the scope that the client asks for when it obtains an access token
you can set security.oauth2.client.scope (comma separated or an array in YAML). By
default the scope is empty and it is up to to Authorization Server to
decide what the defaults should be, usually depending on the settings in
the client registration that it holds.
| Note |
|---|---|
The examples above are all Groovy scripts. If you want to write the same code in Java (or Groovy) you need to add Spring Security OAuth2 to the classpath (e.g. see the sample here). |
You want to protect an API resource with an OAuth2 token? Here’s a simple example (paired with the client above):
app.groovy.
@Grab('spring-cloud-starter-security') @RestController @EnableResourceServer class Application { @RequestMapping('/') def home() { [message: 'Hello World'] } }
and
application.yml.
security: oauth2: resource: userInfoUri: https://api.github.com/user preferTokenInfo: false
| Note |
|---|---|
All of the OAuth2 SSO and resource server features moved to Spring Boot in version 1.3. You can find documentation in the Spring Boot user guide. |
A Token Relay is where an OAuth2 consumer acts as a Client and forwards the incoming token to outgoing resource requests. The consumer can be a pure Client (like an SSO application) or a Resource Server.
If your app also has a Spring Cloud Gateway embedded reverse proxy then you can ask it to forward OAuth2 access tokens downstream to the services it is proxying. Thus the SSO app above can be enhanced simply like this:
App.java.
@Autowired private TokenRelayGatewayFilterFactory filterFactory; @Bean public RouteLocator customRouteLocator(RouteLocatorBuilder builder) { return builder.routes() .route("resource", r -> r.path("/resource") .filters(f -> f.filter(filterFactory.apply())) .uri("http://localhost:9000")) .build(); }
or this
application.yaml.
spring: cloud: gateway: routes: - id: resource uri: http://localhost:9000 predicates: - Path=/resource filters: - TokenRelay=
and it will (in addition to logging the user in and grabbing a token)
pass the authentication token downstream to the services (in this case
/resource).
To enable this for Spring Cloud Gateway add the following dependencies
org.springframework.boot:spring-boot-starter-oauth2-clientorg.springframework.cloud:spring-cloud-starter-security
How does it work? The filter extracts an access token from the currently authenticated user, and puts it in a request header for the downstream requests.
For a full working sample see this project.
If your app is a user facing OAuth2 client (i.e. has declared
@EnableOAuth2Sso or @EnableOAuth2Client) then it has an
OAuth2ClientContext in request scope from Spring Boot. You can
create your own OAuth2RestTemplate from this context and an
autowired OAuth2ProtectedResourceDetails, and then the context will
always forward the access token downstream, also refreshing the access
token automatically if it expires. (These are features of Spring
Security and Spring Boot.)
| Note |
|---|---|
Spring Boot (1.4.1) does not create an
|
If your app also has a
Spring
Cloud Zuul embedded reverse proxy (using @EnableZuulProxy) then you
can ask it to forward OAuth2 access tokens downstream to the services
it is proxying. Thus the SSO app above can be enhanced simply like
this:
app.groovy.
@Controller @EnableOAuth2Sso @EnableZuulProxy class Application { }
and it will (in addition to logging the user in and grabbing a token)
pass the authentication token downstream to the /proxy/*
services. If those services are implemented with
@EnableResourceServer then they will get a valid token in the
correct header.
How does it work? The @EnableOAuth2Sso annotation pulls in
spring-cloud-starter-security (which you could do manually in a
traditional app), and that in turn triggers some autoconfiguration for
a ZuulFilter, which itself is activated because Zuul is on the
classpath (via @EnableZuulProxy). The
filter
just extracts an access token from the currently authenticated user,
and puts it in a request header for the downstream requests.
| Note |
|---|---|
Spring Boot does not create an |
If your app has @EnableResourceServer you might want to relay the
incoming token downstream to other services. If you use a
RestTemplate to contact the downstream services then this is just a
matter of how to create the template with the right context.
If your service uses UserInfoTokenServices to authenticate incoming
tokens (i.e. it is using the security.oauth2.user-info-uri
configuration), then you can simply create an OAuth2RestTemplate
using an autowired OAuth2ClientContext (it will be populated by the
authentication process before it hits the backend code). Equivalently
(with Spring Boot 1.4), you could inject a
UserInfoRestTemplateFactory and grab its OAuth2RestTemplate in
your configuration. For example:
MyConfiguration.java.
@Bean public OAuth2RestTemplate restTemplate(UserInfoRestTemplateFactory factory) { return factory.getUserInfoRestTemplate(); }
This rest template will then have the same OAuth2ClientContext
(request-scoped) that is used by the authentication filter, so you can
use it to send requests with the same access token.
If your app is not using UserInfoTokenServices but is still a client
(i.e. it declares @EnableOAuth2Client or @EnableOAuth2Sso), then
with Spring Security Cloud any OAuth2RestOperations that the user
creates from an @Autowired OAuth2Context will also forward
tokens. This feature is implemented by default as an MVC handler
interceptor, so it only works in Spring MVC. If you are not using MVC
you could use a custom filter or AOP interceptor wrapping an
AccessTokenContextRelay to provide the same feature.
Here’s a basic example showing the use of an autowired rest template created elsewhere ("foo.com" is a Resource Server accepting the same tokens as the surrounding app):
MyController.java.
@Autowired private OAuth2RestOperations restTemplate; @RequestMapping("/relay") public String relay() { ResponseEntity<String> response = restTemplate.getForEntity("https://foo.com/bar", String.class); return "Success! (" + response.getBody() + ")"; }
If you don’t want to forward tokens (and that is a valid
choice, since you might want to act as yourself, rather than the
client that sent you the token), then you only need to create your own
OAuth2Context instead of autowiring the default one.
Feign clients will also pick up an interceptor that uses the
OAuth2ClientContext if it is available, so they should also do a
token relay anywhere where a RestTemplate would.
You can control the authorization behaviour downstream of an
@EnableZuulProxy through the proxy.auth.* settings. Example:
application.yml.
proxy: auth: routes: customers: oauth2 stores: passthru recommendations: none
In this example the "customers" service gets an OAuth2 token relay, the "stores" service gets a passthrough (the authorization header is just passed downstream), and the "recommendations" service has its authorization header removed. The default behaviour is to do a token relay if there is a token available, and passthru otherwise.
See ProxyAuthenticationProperties for full details.
Spring Cloud for Cloudfoundry makes it easy to run Spring Cloud apps in Cloud Foundry (the Platform as a Service). Cloud Foundry has the notion of a "service", which is middlware that you "bind" to an app, essentially providing it with an environment variable containing credentials (e.g. the location and username to use for the service).
The spring-cloud-cloudfoundry-commons module configures the
Reactor-based Cloud Foundry Java client, v 3.0, and can be used standalone.
The spring-cloud-cloudfoundry-web project provides basic support for
some enhanced features of webapps in Cloud Foundry: binding
automatically to single-sign-on services and optionally enabling
sticky routing for discovery.
The spring-cloud-cloudfoundry-discovery project provides an
implementation of Spring Cloud Commons DiscoveryClient so you can
@EnableDiscoveryClient and provide your credentials as
spring.cloud.cloudfoundry.discovery.[username,password] (also *.url if you are not connecting to Pivotal Web Services) and then you
can use the DiscoveryClient directly or via a LoadBalancerClient.
The first time you use it the discovery client might be slow owing to the fact that it has to get an access token from Cloud Foundry.
Here’s a Spring Cloud app with Cloud Foundry discovery:
app.groovy.
@Grab('org.springframework.cloud:spring-cloud-cloudfoundry') @RestController @EnableDiscoveryClient class Application { @Autowired DiscoveryClient client @RequestMapping('/') String home() { 'Hello from ' + client.getLocalServiceInstance() } }
If you run it without any service bindings:
$ spring jar app.jar app.groovy $ cf push -p app.jar
It will show its app name in the home page.
The DiscoveryClient can lists all the apps in a space, according to
the credentials it is authenticated with, where the space defaults to
the one the client is running in (if any). If neither org nor space
are configured, they default per the user’s profile in Cloud Foundry.
| Note |
|---|---|
All of the OAuth2 SSO and resource server features moved to Spring Boot in version 1.3. You can find documentation in the Spring Boot user guide. |
This project provides automatic binding from CloudFoundry service
credentials to the Spring Boot features. If you have a CloudFoundry
service called "sso", for instance, with credentials containing
"client_id", "client_secret" and "auth_domain", it will bind
automatically to the Spring OAuth2 client that you enable with
@EnableOAuth2Sso (from Spring Boot). The name of the service can be
parameterized using spring.oauth2.sso.serviceId.
Documentation Authors: Adam Dudczak, Mathias Düsterhöft, Marcin Grzejszczak, Dennis Kieselhorst, Jakub Kubryński, Karol Lassak, Olga Maciaszek-Sharma, Mariusz Smykuła, Dave Syer, Jay Bryant
1.0.0.BUILD-SNAPSHOT
You need confidence when pushing new features to a new application or service in a distributed system. This project provides support for Consumer Driven Contracts and service schemas in Spring applications (for both HTTP and message-based interactions), covering a range of options for writing tests, publishing them as assets, and asserting that a contract is kept by producers and consumers.
Spring Cloud Contract Verifier enables Consumer Driven Contract (CDC) development of JVM-based applications. It moves TDD to the level of software architecture.
Spring Cloud Contract Verifier ships with Contract Definition Language (CDL). Contract definitions are used to produce the following resources:
- JSON stub definitions to be used by WireMock when doing integration testing on the client code (client tests). Test code must still be written by hand, and test data is produced by Spring Cloud Contract Verifier.
- Messaging routes, if you’re using a messaging service. We integrate with Spring Integration, Spring Cloud Stream, Spring AMQP, and Apache Camel. You can also set your own integrations.
- Acceptance tests (in JUnit 4, JUnit 5 or Spock) are used to verify if server-side implementation of the API is compliant with the contract (server tests). A full test is generated by Spring Cloud Contract Verifier.
Before becoming Spring Cloud Contract, this project was called Accurest. It was created by Marcin Grzejszczak and Jakub Kubrynski from (codearte.io.
The 0.1.0 release took place on 26 Jan 2015 and it became stable with 1.0.0 release on 29 Feb 2016.
Assume that we have a system consisting of multiple microservices:

If we wanted to test the application in top left corner to determine whether it can communicate with other services, we could do one of two things:
- Deploy all microservices and perform end-to-end tests.
- Mock other microservices in unit/integration tests.
Both have their advantages but also a lot of disadvantages.
Deploy all microservices and perform end to end tests
Advantages:
- Simulates production.
- Tests real communication between services.
Disadvantages:
- To test one microservice, we have to deploy 6 microservices, a couple of databases, etc.
- The environment where the tests run is locked for a single suite of tests (nobody else would be able to run the tests in the meantime).
- They take a long time to run.
- The feedback comes very late in the process.
- They are extremely hard to debug.
Mock other microservices in unit/integration tests
Advantages:
- They provide very fast feedback.
- They have no infrastructure requirements.
Disadvantages:
- The implementor of the service creates stubs that might have nothing to do with reality.
- You can go to production with passing tests and failing production.
To solve the aforementioned issues, Spring Cloud Contract Verifier with Stub Runner was created. The main idea is to give you very fast feedback, without the need to set up the whole world of microservices. If you work on stubs, then the only applications you need are those that your application directly uses.

Spring Cloud Contract Verifier gives you the certainty that the stubs that you use were created by the service that you’re calling. Also, if you can use them, it means that they were tested against the producer’s side. In short, you can trust those stubs.
The main purposes of Spring Cloud Contract Verifier with Stub Runner are:
- To ensure that WireMock/Messaging stubs (used when developing the client) do exactly what the actual server-side implementation does.
- To promote ATDD method and Microservices architectural style.
- To provide a way to publish changes in contracts that are immediately visible on both sides.
- To generate boilerplate test code to be used on the server side.
| Important |
|---|---|
Spring Cloud Contract Verifier’s purpose is NOT to start writing business features in the contracts. Assume that we have a business use case of fraud check. If a user can be a fraud for 100 different reasons, we would assume that you would create 2 contracts, one for the positive case and one for the negative case. Contract tests are used to test contracts between applications and not to simulate full behavior. |
This section explores how Spring Cloud Contract Verifier with Stub Runner works.
This very brief tour walks through using Spring Cloud Contract:
You can find a somewhat longer tour here.
To start working with Spring Cloud Contract, add files with REST/ messaging contracts
expressed in either Groovy DSL or YAML to the contracts directory, which is set by the
contractsDslDir property. By default, it is $rootDir/src/test/resources/contracts.
Then add the Spring Cloud Contract Verifier dependency and plugin to your build file, as shown in the following example:
<dependency> <groupId>org.springframework.cloud</groupId> <artifactId>spring-cloud-starter-contract-verifier</artifactId> <scope>test</scope> </dependency>
The following listing shows how to add the plugin, which should go in the build/plugins portion of the file:
<plugin> <groupId>org.springframework.cloud</groupId> <artifactId>spring-cloud-contract-maven-plugin</artifactId> <version>${spring-cloud-contract.version}</version> <extensions>true</extensions> </plugin>
Running ./mvnw clean install automatically generates tests that verify the application
compliance with the added contracts. By default, the tests get generated under
org.springframework.cloud.contract.verifier.tests..
As the implementation of the functionalities described by the contracts is not yet present, the tests fail.
To make them pass, you must add the correct implementation of either handling HTTP
requests or messages. Also, you must add a correct base test class for auto-generated
tests to the project. This class is extended by all the auto-generated tests, and it
should contain all the setup necessary to run them (for example RestAssuredMockMvc
controller setup or messaging test setup).
Once the implementation and the test base class are in place, the tests pass, and both the application and the stub artifacts are built and installed in the local Maven repository. The changes can now be merged, and both the application and the stub artifacts may be published in an online repository.
Spring Cloud Contract Stub Runner can be used in the integration tests to get a running
WireMock instance or messaging route that simulates the actual service.
To do so, add the dependency to Spring Cloud Contract Stub Runner, as shown in the
following example:
<dependency> <groupId>org.springframework.cloud</groupId> <artifactId>spring-cloud-starter-contract-stub-runner</artifactId> <scope>test</scope> </dependency>
You can get the Producer-side stubs installed in your Maven repository in either of two ways:
By checking out the Producer side repository and adding contracts and generating the stubs by running the following commands:
$ cd local-http-server-repo $ ./mvnw clean install -DskipTestsTip The tests are being skipped because the Producer-side contract implementation is not in place yet, so the automatically-generated contract tests fail.
By getting already-existing producer service stubs from a remote repository. To do so, pass the stub artifact IDs and artifact repository URL as
Spring Cloud Contract Stub Runnerproperties, as shown in the following example:stubrunner: ids: 'com.example:http-server-dsl:+:stubs:8080' repositoryRoot: http://repo.spring.io/libs-snapshot
Now you can annotate your test class with @AutoConfigureStubRunner. In the annotation,
provide the group-id and artifact-id values for Spring Cloud Contract Stub Runner to
run the collaborators' stubs for you, as shown in the following example:
@RunWith(SpringRunner.class) @SpringBootTest(webEnvironment=WebEnvironment.NONE) @AutoConfigureStubRunner(ids = {"com.example:http-server-dsl:+:stubs:6565"}, stubsMode = StubRunnerProperties.StubsMode.LOCAL) public class LoanApplicationServiceTests {
| Tip |
|---|---|
Use the |
Now, in your integration test, you can receive stubbed versions of HTTP responses or messages that are expected to be emitted by the collaborator service.
This brief tour walks through using Spring Cloud Contract:
You can find an even more brief tour here.
To start working with Spring Cloud Contract, add files with REST/ messaging contracts
expressed in either Groovy DSL or YAML to the contracts directory, which is set by the
contractsDslDir property. By default, it is $rootDir/src/test/resources/contracts.
For the HTTP stubs, a contract defines what kind of response should be returned for a given request (taking into account the HTTP methods, URLs, headers, status codes, and so on). The following example shows how an HTTP stub contract in Groovy DSL:
package contracts org.springframework.cloud.contract.spec.Contract.make { request { method 'PUT' url '/fraudcheck' body([ "client.id": $(regex('[0-9]{10}')), loanAmount: 99999 ]) headers { contentType('application/json') } } response { status OK() body([ fraudCheckStatus: "FRAUD", "rejection.reason": "Amount too high" ]) headers { contentType('application/json') } } }
The same contract expressed in YAML would look like the following example:
request: method: PUT url: /fraudcheck body: "client.id": 1234567890 loanAmount: 99999 headers: Content-Type: application/json matchers: body: - path: $.['client.id'] type: by_regex value: "[0-9]{10}" response: status: 200 body: fraudCheckStatus: "FRAUD" "rejection.reason": "Amount too high" headers: Content-Type: application/json;charset=UTF-8
In the case of messaging, you can define:
- The input and the output messages can be defined (taking into account from and where it was sent, the message body, and the header).
- The methods that should be called after the message is received.
- The methods that, when called, should trigger a message.
The following example shows a Camel messaging contract expressed in Groovy DSL:
def contractDsl = Contract.make {
label 'some_label'
input {
messageFrom('jms:delete')
messageBody([
bookName: 'foo'
])
messageHeaders {
header('sample', 'header')
}
assertThat('bookWasDeleted()')
}
}The following example shows the same contract expressed in YAML:
label: some_label
input:
messageFrom: jms:delete
messageBody:
bookName: 'foo'
messageHeaders:
sample: header
assertThat: bookWasDeleted()Then you can add Spring Cloud Contract Verifier dependency and plugin to your build file, as shown in the following example:
<dependency> <groupId>org.springframework.cloud</groupId> <artifactId>spring-cloud-starter-contract-verifier</artifactId> <scope>test</scope> </dependency>
The following listing shows how to add the plugin, which should go in the build/plugins portion of the file:
<plugin> <groupId>org.springframework.cloud</groupId> <artifactId>spring-cloud-contract-maven-plugin</artifactId> <version>${spring-cloud-contract.version}</version> <extensions>true</extensions> </plugin>
Running ./mvnw clean install automatically generates tests that verify the application
compliance with the added contracts. By default, the generated tests are under
org.springframework.cloud.contract.verifier.tests..
The following example shows a sample auto-generated test for an HTTP contract:
@Test public void validate_shouldMarkClientAsFraud() throws Exception { // given: MockMvcRequestSpecification request = given() .header("Content-Type", "application/vnd.fraud.v1+json") .body("{\"client.id\":\"1234567890\",\"loanAmount\":99999}"); // when: ResponseOptions response = given().spec(request) .put("/fraudcheck"); // then: assertThat(response.statusCode()).isEqualTo(200); assertThat(response.header("Content-Type")).matches("application/vnd.fraud.v1.json.*"); // and: DocumentContext parsedJson = JsonPath.parse(response.getBody().asString()); assertThatJson(parsedJson).field("['fraudCheckStatus']").matches("[A-Z]{5}"); assertThatJson(parsedJson).field("['rejection.reason']").isEqualTo("Amount too high"); }
The preceding example uses Spring’s MockMvc to run the tests. This is the default test
mode for HTTP contracts. However, JAX-RS client and explicit HTTP invocations can also be
used. (To do so, change the testMode property of the plugin to JAX-RS or EXPLICIT,
respectively.)
Since 2.1.0, it is also possible to use RestAssuredWebTestClient`with Spring’s reactive `WebTestClient
run under the hood. This is particularly recommended while working with Reactive, Web-Flux-based applications.
In order to use WebTestClient set testMode to WEBTESTCLIENT.
Here is an example of a test generated in WEBTESTCLIENT test mode:
[source,java,indent=0]
@Test
public void validate_shouldRejectABeerIfTooYoung() throws Exception {
// given:
WebTestClientRequestSpecification request = given()
.header("Content-Type", "application/json")
.body("{\"age\":10}");
// when:
WebTestClientResponse response = given().spec(request)
.post("/check");
// then:
assertThat(response.statusCode()).isEqualTo(200);
assertThat(response.header("Content-Type")).matches("application/json.*");
// and:
DocumentContext parsedJson = JsonPath.parse(response.getBody().asString());
assertThatJson(parsedJson).field("['status']").isEqualTo("NOT_OK");
}Apart from the default JUnit 4, you can instead use JUnit 5 or Spock tests, by setting the plugin
testFramework property to either JUNIT5 or Spock.
| Tip |
|---|---|
You can now also generate WireMock scenarios based on the contracts, by including an order number followed by an underscore at the beginning of the contract file names. |
The following example shows an auto-generated test in Spock for a messaging stub contract:
[source,groovy,indent=0]
given:
ContractVerifierMessage inputMessage = contractVerifierMessaging.create(
\'\'\'{"bookName":"foo"}\'\'\',
['sample': 'header']
)
when:
contractVerifierMessaging.send(inputMessage, 'jms:delete')
then:
noExceptionThrown()
bookWasDeleted()As the implementation of the functionalities described by the contracts is not yet present, the tests fail.
To make them pass, you must add the correct implementation of handling either HTTP
requests or messages. Also, you must add a correct base test class for auto-generated
tests to the project. This class is extended by all the auto-generated tests and should
contain all the setup necessary to run them (for example, RestAssuredMockMvc controller
setup or messaging test setup).
Once the implementation and the test base class are in place, the tests pass, and both the application and the stub artifacts are built and installed in the local Maven repository. Information about installing the stubs jar to the local repository appears in the logs, as shown in the following example:
[INFO] --- spring-cloud-contract-maven-plugin:1.0.0.BUILD-SNAPSHOT:generateStubs (default-generateStubs) @ http-server --- [INFO] Building jar: /some/path/http-server/target/http-server-0.0.1-SNAPSHOT-stubs.jar [INFO] [INFO] --- maven-jar-plugin:2.6:jar (default-jar) @ http-server --- [INFO] Building jar: /some/path/http-server/target/http-server-0.0.1-SNAPSHOT.jar [INFO] [INFO] --- spring-boot-maven-plugin:1.5.5.BUILD-SNAPSHOT:repackage (default) @ http-server --- [INFO] [INFO] --- maven-install-plugin:2.5.2:install (default-install) @ http-server --- [INFO] Installing /some/path/http-server/target/http-server-0.0.1-SNAPSHOT.jar to /path/to/your/.m2/repository/com/example/http-server/0.0.1-SNAPSHOT/http-server-0.0.1-SNAPSHOT.jar [INFO] Installing /some/path/http-server/pom.xml to /path/to/your/.m2/repository/com/example/http-server/0.0.1-SNAPSHOT/http-server-0.0.1-SNAPSHOT.pom [INFO] Installing /some/path/http-server/target/http-server-0.0.1-SNAPSHOT-stubs.jar to /path/to/your/.m2/repository/com/example/http-server/0.0.1-SNAPSHOT/http-server-0.0.1-SNAPSHOT-stubs.jar
You can now merge the changes and publish both the application and the stub artifacts in an online repository.
Docker Project
In order to enable working with contracts while creating applications in non-JVM
technologies, the springcloud/spring-cloud-contract Docker image has been created. It
contains a project that automatically generates tests for HTTP contracts and executes them
in EXPLICIT test mode. Then, if the tests pass, it generates Wiremock stubs and,
optionally, publishes them to an artifact manager. In order to use the image, you can
mount the contracts into the /contracts directory and set a few environment variables.
Spring Cloud Contract Stub Runner can be used in the integration tests to get a running
WireMock instance or messaging route that simulates the actual service.
To get started, add the dependency to Spring Cloud Contract Stub Runner:
<dependency> <groupId>org.springframework.cloud</groupId> <artifactId>spring-cloud-starter-contract-stub-runner</artifactId> <scope>test</scope> </dependency>
You can get the Producer-side stubs installed in your Maven repository in either of two ways:
By checking out the Producer side repository and adding contracts and generating the stubs by running the following commands:
$ cd local-http-server-repo $ ./mvnw clean install -DskipTestsNote The tests are skipped because the Producer-side contract implementation is not yet in place, so the automatically-generated contract tests fail.
Getting already existing producer service stubs from a remote repository. To do so, pass the stub artifact IDs and artifact repository URl as
Spring Cloud Contract Stub Runnerproperties, as shown in the following example:stubrunner: ids: 'com.example:http-server-dsl:+:stubs:8080' repositoryRoot: http://repo.spring.io/libs-snapshot
Now you can annotate your test class with @AutoConfigureStubRunner. In the annotation,
provide the group-id and artifact-id for Spring Cloud Contract Stub Runner to run
the collaborators' stubs for you, as shown in the following example:
@RunWith(SpringRunner.class) @SpringBootTest(webEnvironment=WebEnvironment.NONE) @AutoConfigureStubRunner(ids = {"com.example:http-server-dsl:+:stubs:6565"}, stubsMode = StubRunnerProperties.StubsMode.LOCAL) public class LoanApplicationServiceTests {
| Tip |
|---|---|
Use the |
In your integration test, you can receive stubbed versions of HTTP responses or messages that are expected to be emitted by the collaborator service. You can see entries similar to the following in the build logs:
2016-07-19 14:22:25.403 INFO 41050 --- [ main] o.s.c.c.stubrunner.AetherStubDownloader : Desired version is + - will try to resolve the latest version 2016-07-19 14:22:25.438 INFO 41050 --- [ main] o.s.c.c.stubrunner.AetherStubDownloader : Resolved version is 0.0.1-SNAPSHOT 2016-07-19 14:22:25.439 INFO 41050 --- [ main] o.s.c.c.stubrunner.AetherStubDownloader : Resolving artifact com.example:http-server:jar:stubs:0.0.1-SNAPSHOT using remote repositories [] 2016-07-19 14:22:25.451 INFO 41050 --- [ main] o.s.c.c.stubrunner.AetherStubDownloader : Resolved artifact com.example:http-server:jar:stubs:0.0.1-SNAPSHOT to /path/to/your/.m2/repository/com/example/http-server/0.0.1-SNAPSHOT/http-server-0.0.1-SNAPSHOT-stubs.jar 2016-07-19 14:22:25.465 INFO 41050 --- [ main] o.s.c.c.stubrunner.AetherStubDownloader : Unpacking stub from JAR [URI: file:/path/to/your/.m2/repository/com/example/http-server/0.0.1-SNAPSHOT/http-server-0.0.1-SNAPSHOT-stubs.jar] 2016-07-19 14:22:25.475 INFO 41050 --- [ main] o.s.c.c.stubrunner.AetherStubDownloader : Unpacked file to [/var/folders/0p/xwq47sq106x1_g3dtv6qfm940000gq/T/contracts100276532569594265] 2016-07-19 14:22:27.737 INFO 41050 --- [ main] o.s.c.c.stubrunner.StubRunnerExecutor : All stubs are now running RunningStubs [namesAndPorts={com.example:http-server:0.0.1-SNAPSHOT:stubs=8080}]
As consumers of services, we need to define what exactly we want to achieve. We need to formulate our expectations. That is why we write contracts.
Assume that you want to send a request containing the ID of a client company and the amount it wants to borrow from us. You also want to send it to the /fraudcheck url via the PUT method.
Groovy DSL.
/* * Copyright 2013-2019 the original author or authors. * * Licensed under the Apache License, Version 2.0 (the "License"); * you may not use this file except in compliance with the License. * You may obtain a copy of the License at * * https://www.apache.org/licenses/LICENSE-2.0 * * Unless required by applicable law or agreed to in writing, software * distributed under the License is distributed on an "AS IS" BASIS, * WITHOUT WARRANTIES OR CONDITIONS OF ANY KIND, either express or implied. * See the License for the specific language governing permissions and * limitations under the License. */ package contracts org.springframework.cloud.contract.spec.Contract.make { request { // (1) method 'PUT' // (2) url '/fraudcheck' // (3) body([ // (4) "client.id": $(regex('[0-9]{10}')), loanAmount : 99999 ]) headers { // (5) contentType('application/json') } } response { // (6) status OK() // (7) body([ // (8) fraudCheckStatus : "FRAUD", "rejection.reason": "Amount too high" ]) headers { // (9) contentType('application/json') } } } /* From the Consumer perspective, when shooting a request in the integration test: (1) - If the consumer sends a request (2) - With the "PUT" method (3) - to the URL "/fraudcheck" (4) - with the JSON body that * has a field `client.id` that matches a regular expression `[0-9]{10}` * has a field `loanAmount` that is equal to `99999` (5) - with header `Content-Type` equal to `application/json` (6) - then the response will be sent with (7) - status equal `200` (8) - and JSON body equal to { "fraudCheckStatus": "FRAUD", "rejectionReason": "Amount too high" } (9) - with header `Content-Type` equal to `application/json` From the Producer perspective, in the autogenerated producer-side test: (1) - A request will be sent to the producer (2) - With the "PUT" method (3) - to the URL "/fraudcheck" (4) - with the JSON body that * has a field `client.id` that will have a generated value that matches a regular expression `[0-9]{10}` * has a field `loanAmount` that is equal to `99999` (5) - with header `Content-Type` equal to `application/json` (6) - then the test will assert if the response has been sent with (7) - status equal `200` (8) - and JSON body equal to { "fraudCheckStatus": "FRAUD", "rejectionReason": "Amount too high" } (9) - with header `Content-Type` matching `application/json.*` */
YAML.
request: # (1)
method: PUT # (2)
url: /fraudcheck # (3)
body: # (4)
"client.id": 1234567890
loanAmount: 99999
headers: # (5)
Content-Type: application/json
matchers:
body:
- path: $.['client.id'] # (6)
type: by_regex
value: "[0-9]{10}"
response: # (7)
status: 200 # (8)
body: # (9)
fraudCheckStatus: "FRAUD"
"rejection.reason": "Amount too high"
headers: # (10)
Content-Type: application/json;charset=UTF-8
#From the Consumer perspective, when shooting a request in the integration test:
#
#(1) - If the consumer sends a request
#(2) - With the "PUT" method
#(3) - to the URL "/fraudcheck"
#(4) - with the JSON body that
# * has a field `client.id`
# * has a field `loanAmount` that is equal to `99999`
#(5) - with header `Content-Type` equal to `application/json`
#(6) - and a `client.id` json entry matches the regular expression `[0-9]{10}`
#(7) - then the response will be sent with
#(8) - status equal `200`
#(9) - and JSON body equal to
# { "fraudCheckStatus": "FRAUD", "rejectionReason": "Amount too high" }
#(10) - with header `Content-Type` equal to `application/json`
#
#From the Producer perspective, in the autogenerated producer-side test:
#
#(1) - A request will be sent to the producer
#(2) - With the "PUT" method
#(3) - to the URL "/fraudcheck"
#(4) - with the JSON body that
# * has a field `client.id` `1234567890`
# * has a field `loanAmount` that is equal to `99999`
#(5) - with header `Content-Type` equal to `application/json`
#(7) - then the test will assert if the response has been sent with
#(8) - status equal `200`
#(9) - and JSON body equal to
# { "fraudCheckStatus": "FRAUD", "rejectionReason": "Amount too high" }
#(10) - with header `Content-Type` equal to `application/json;charset=UTF-8`
Spring Cloud Contract generates stubs, which you can use during client-side testing. You get a running WireMock instance/Messaging route that simulates the service. You would like to feed that instance with a proper stub definition.
At some point in time, you need to send a request to the Fraud Detection service.
ResponseEntity<FraudServiceResponse> response = restTemplate.exchange( "http://localhost:" + port + "/fraudcheck", HttpMethod.PUT, new HttpEntity<>(request, httpHeaders), FraudServiceResponse.class);
Annotate your test class with @AutoConfigureStubRunner. In the annotation provide the group id and artifact id for the Stub Runner to download stubs of your collaborators.
@RunWith(SpringRunner.class) @SpringBootTest(webEnvironment = WebEnvironment.NONE) @AutoConfigureStubRunner(ids = { "com.example:http-server-dsl:+:stubs:6565" }, stubsMode = StubRunnerProperties.StubsMode.LOCAL) public class LoanApplicationServiceTests {
After that, during the tests, Spring Cloud Contract automatically finds the stubs (simulating the real service) in the Maven repository and exposes them on a configured (or random) port.
Since you are developing your stub, you need to be sure that it actually resembles your concrete implementation. You cannot have a situation where your stub acts in one way and your application behaves in a different way, especially in production.
To ensure that your application behaves the way you define in your stub, tests are generated from the stub you provide.
The autogenerated test looks, more or less, like this:
@Test public void validate_shouldMarkClientAsFraud() throws Exception { // given: MockMvcRequestSpecification request = given() .header("Content-Type", "application/vnd.fraud.v1+json") .body("{\"client.id\":\"1234567890\",\"loanAmount\":99999}"); // when: ResponseOptions response = given().spec(request) .put("/fraudcheck"); // then: assertThat(response.statusCode()).isEqualTo(200); assertThat(response.header("Content-Type")).matches("application/vnd.fraud.v1.json.*"); // and: DocumentContext parsedJson = JsonPath.parse(response.getBody().asString()); assertThatJson(parsedJson).field("['fraudCheckStatus']").matches("[A-Z]{5}"); assertThatJson(parsedJson).field("['rejection.reason']").isEqualTo("Amount too high"); }
Consider an example of Fraud Detection and the Loan Issuance process. The business scenario is such that we want to issue loans to people but do not want them to steal from us. The current implementation of our system grants loans to everybody.
Assume that Loan Issuance is a client to the Fraud Detection server. In the current
sprint, we must develop a new feature: if a client wants to borrow too much money, then
we mark the client as a fraud.
Technical remark - Fraud Detection has an artifact-id of http-server, while Loan
Issuance has an artifact-id of http-client, and both have a group-id of com.example.
Social remark - both client and server development teams need to communicate directly and discuss changes while going through the process. CDC is all about communication.
The server side code is available here and the client code here.
| Tip |
|---|---|
In this case, the producer owns the contracts. Physically, all the contract are in the producer’s repository. |
If using the SNAPSHOT / Milestone / Release Candidate versions please add the following section to your build:
Maven.
<repositories> <repository> <id>spring-snapshots</id> <name>Spring Snapshots</name> <url>https://repo.spring.io/snapshot</url> <snapshots> <enabled>true</enabled> </snapshots> </repository> <repository> <id>spring-milestones</id> <name>Spring Milestones</name> <url>https://repo.spring.io/milestone</url> <snapshots> <enabled>false</enabled> </snapshots> </repository> <repository> <id>spring-releases</id> <name>Spring Releases</name> <url>https://repo.spring.io/release</url> <snapshots> <enabled>false</enabled> </snapshots> </repository> </repositories> <pluginRepositories> <pluginRepository> <id>spring-snapshots</id> <name>Spring Snapshots</name> <url>https://repo.spring.io/snapshot</url> <snapshots> <enabled>true</enabled> </snapshots> </pluginRepository> <pluginRepository> <id>spring-milestones</id> <name>Spring Milestones</name> <url>https://repo.spring.io/milestone</url> <snapshots> <enabled>false</enabled> </snapshots> </pluginRepository> <pluginRepository> <id>spring-releases</id> <name>Spring Releases</name> <url>https://repo.spring.io/release</url> <snapshots> <enabled>false</enabled> </snapshots> </pluginRepository> </pluginRepositories>
Gradle.
repositories {
mavenCentral()
mavenLocal()
maven { url "http://repo.spring.io/snapshot" }
maven { url "http://repo.spring.io/milestone" }
maven { url "http://repo.spring.io/release" }
}
As a developer of the Loan Issuance service (a consumer of the Fraud Detection server), you might do the following steps:
- Start doing TDD by writing a test for your feature.
- Write the missing implementation.
- Clone the Fraud Detection service repository locally.
- Define the contract locally in the repo of Fraud Detection service.
- Add the Spring Cloud Contract Verifier plugin.
- Run the integration tests.
- File a pull request.
- Create an initial implementation.
- Take over the pull request.
- Write the missing implementation.
- Deploy your app.
- Work online.
Start doing TDD by writing a test for your feature.
@Test public void shouldBeRejectedDueToAbnormalLoanAmount() { // given: LoanApplication application = new LoanApplication(new Client("1234567890"), 99999); // when: LoanApplicationResult loanApplication = service.loanApplication(application); // then: assertThat(loanApplication.getLoanApplicationStatus()) .isEqualTo(LoanApplicationStatus.LOAN_APPLICATION_REJECTED); assertThat(loanApplication.getRejectionReason()).isEqualTo("Amount too high"); }
Assume that you have written a test of your new feature. If a loan application for a big amount is received, the system should reject that loan application with some description.
Write the missing implementation.
At some point in time, you need to send a request to the Fraud Detection service. Assume
that you need to send the request containing the ID of the client and the amount the
client wants to borrow. You want to send it to the /fraudcheck url via the PUT method.
ResponseEntity<FraudServiceResponse> response = restTemplate.exchange( "http://localhost:" + port + "/fraudcheck", HttpMethod.PUT, new HttpEntity<>(request, httpHeaders), FraudServiceResponse.class);
For simplicity, the port of the Fraud Detection service is set to 8080, and the
application runs on 8090.
If you start the test at this point, it breaks, because no service currently runs on port
8080.
Clone the Fraud Detection service repository locally.
You can start by playing around with the server side contract. To do so, you must first clone it.
$ git clone https://your-git-server.com/server-side.git local-http-server-repo
Define the contract locally in the repo of Fraud Detection service.
As a consumer, you need to define what exactly you want to achieve. You need to formulate your expectations. To do so, write the following contract:
| Important |
|---|---|
Place the contract under |
Groovy DSL.
/* * Copyright 2013-2019 the original author or authors. * * Licensed under the Apache License, Version 2.0 (the "License"); * you may not use this file except in compliance with the License. * You may obtain a copy of the License at * * https://www.apache.org/licenses/LICENSE-2.0 * * Unless required by applicable law or agreed to in writing, software * distributed under the License is distributed on an "AS IS" BASIS, * WITHOUT WARRANTIES OR CONDITIONS OF ANY KIND, either express or implied. * See the License for the specific language governing permissions and * limitations under the License. */ package contracts org.springframework.cloud.contract.spec.Contract.make { request { // (1) method 'PUT' // (2) url '/fraudcheck' // (3) body([ // (4) "client.id": $(regex('[0-9]{10}')), loanAmount : 99999 ]) headers { // (5) contentType('application/json') } } response { // (6) status OK() // (7) body([ // (8) fraudCheckStatus : "FRAUD", "rejection.reason": "Amount too high" ]) headers { // (9) contentType('application/json') } } } /* From the Consumer perspective, when shooting a request in the integration test: (1) - If the consumer sends a request (2) - With the "PUT" method (3) - to the URL "/fraudcheck" (4) - with the JSON body that * has a field `client.id` that matches a regular expression `[0-9]{10}` * has a field `loanAmount` that is equal to `99999` (5) - with header `Content-Type` equal to `application/json` (6) - then the response will be sent with (7) - status equal `200` (8) - and JSON body equal to { "fraudCheckStatus": "FRAUD", "rejectionReason": "Amount too high" } (9) - with header `Content-Type` equal to `application/json` From the Producer perspective, in the autogenerated producer-side test: (1) - A request will be sent to the producer (2) - With the "PUT" method (3) - to the URL "/fraudcheck" (4) - with the JSON body that * has a field `client.id` that will have a generated value that matches a regular expression `[0-9]{10}` * has a field `loanAmount` that is equal to `99999` (5) - with header `Content-Type` equal to `application/json` (6) - then the test will assert if the response has been sent with (7) - status equal `200` (8) - and JSON body equal to { "fraudCheckStatus": "FRAUD", "rejectionReason": "Amount too high" } (9) - with header `Content-Type` matching `application/json.*` */
YAML.
request: # (1)
method: PUT # (2)
url: /fraudcheck # (3)
body: # (4)
"client.id": 1234567890
loanAmount: 99999
headers: # (5)
Content-Type: application/json
matchers:
body:
- path: $.['client.id'] # (6)
type: by_regex
value: "[0-9]{10}"
response: # (7)
status: 200 # (8)
body: # (9)
fraudCheckStatus: "FRAUD"
"rejection.reason": "Amount too high"
headers: # (10)
Content-Type: application/json;charset=UTF-8
#From the Consumer perspective, when shooting a request in the integration test:
#
#(1) - If the consumer sends a request
#(2) - With the "PUT" method
#(3) - to the URL "/fraudcheck"
#(4) - with the JSON body that
# * has a field `client.id`
# * has a field `loanAmount` that is equal to `99999`
#(5) - with header `Content-Type` equal to `application/json`
#(6) - and a `client.id` json entry matches the regular expression `[0-9]{10}`
#(7) - then the response will be sent with
#(8) - status equal `200`
#(9) - and JSON body equal to
# { "fraudCheckStatus": "FRAUD", "rejectionReason": "Amount too high" }
#(10) - with header `Content-Type` equal to `application/json`
#
#From the Producer perspective, in the autogenerated producer-side test:
#
#(1) - A request will be sent to the producer
#(2) - With the "PUT" method
#(3) - to the URL "/fraudcheck"
#(4) - with the JSON body that
# * has a field `client.id` `1234567890`
# * has a field `loanAmount` that is equal to `99999`
#(5) - with header `Content-Type` equal to `application/json`
#(7) - then the test will assert if the response has been sent with
#(8) - status equal `200`
#(9) - and JSON body equal to
# { "fraudCheckStatus": "FRAUD", "rejectionReason": "Amount too high" }
#(10) - with header `Content-Type` equal to `application/json;charset=UTF-8`
The YML contract is quite straight-forward. However when you take a look at the Contract
written using a statically typed Groovy DSL - you might wonder what the
value(client(…), server(…)) parts are. By using this notation, Spring Cloud
Contract lets you define parts of a JSON block, a URL, etc., which are dynamic. In case
of an identifier or a timestamp, you need not hardcode a value. You want to allow some
different ranges of values. To enable ranges of values, you can set regular expressions
matching those values for the consumer side. You can provide the body by means of either
a map notation or String with interpolations.
Consult the Chapter 93, Contract DSL section for more information. We highly recommend using the map notation!
| Tip |
|---|---|
You must understand the map notation in order to set up contracts. Please read the Groovy docs regarding JSON. |
The previously shown contract is an agreement between two sides that:
if an HTTP request is sent with all of
- a
PUTmethod on the/fraudcheckendpoint, - a JSON body with a
client.idthat matches the regular expression[0-9]{10}andloanAmountequal to99999, - and a
Content-Typeheader with a value ofapplication/vnd.fraud.v1+json,
- a
then an HTTP response is sent to the consumer that
- has status
200, - contains a JSON body with the
fraudCheckStatusfield containing a valueFRAUDand therejectionReasonfield having valueAmount too high, - and a
Content-Typeheader with a value ofapplication/vnd.fraud.v1+json.
- has status
Once you are ready to check the API in practice in the integration tests, you need to install the stubs locally.
Add the Spring Cloud Contract Verifier plugin.
We can add either a Maven or a Gradle plugin. In this example, you see how to add Maven.
First, add the Spring Cloud Contract BOM.
<dependencyManagement> <dependencies> <dependency> <groupId>org.springframework.cloud</groupId> <artifactId>spring-cloud-dependencies</artifactId> <version>${spring-cloud-release.version}</version> <type>pom</type> <scope>import</scope> </dependency> </dependencies> </dependencyManagement>
Next, add the Spring Cloud Contract Verifier Maven plugin
<plugin> <groupId>org.springframework.cloud</groupId> <artifactId>spring-cloud-contract-maven-plugin</artifactId> <version>${spring-cloud-contract.version}</version> <extensions>true</extensions> <configuration> <packageWithBaseClasses>com.example.fraud</packageWithBaseClasses> <convertToYaml>true</convertToYaml> </configuration> </plugin>
Since the plugin was added, you get the Spring Cloud Contract Verifier features which,
from the provided contracts:
- generate and run tests
- produce and install stubs
You do not want to generate tests since you, as the consumer, want only to play with the stubs. You need to skip the test generation and execution. When you execute:
$ cd local-http-server-repo
$ ./mvnw clean install -DskipTestsIn the logs, you see something like this:
[INFO] --- spring-cloud-contract-maven-plugin:1.0.0.BUILD-SNAPSHOT:generateStubs (default-generateStubs) @ http-server --- [INFO] Building jar: /some/path/http-server/target/http-server-0.0.1-SNAPSHOT-stubs.jar [INFO] [INFO] --- maven-jar-plugin:2.6:jar (default-jar) @ http-server --- [INFO] Building jar: /some/path/http-server/target/http-server-0.0.1-SNAPSHOT.jar [INFO] [INFO] --- spring-boot-maven-plugin:1.5.5.BUILD-SNAPSHOT:repackage (default) @ http-server --- [INFO] [INFO] --- maven-install-plugin:2.5.2:install (default-install) @ http-server --- [INFO] Installing /some/path/http-server/target/http-server-0.0.1-SNAPSHOT.jar to /path/to/your/.m2/repository/com/example/http-server/0.0.1-SNAPSHOT/http-server-0.0.1-SNAPSHOT.jar [INFO] Installing /some/path/http-server/pom.xml to /path/to/your/.m2/repository/com/example/http-server/0.0.1-SNAPSHOT/http-server-0.0.1-SNAPSHOT.pom [INFO] Installing /some/path/http-server/target/http-server-0.0.1-SNAPSHOT-stubs.jar to /path/to/your/.m2/repository/com/example/http-server/0.0.1-SNAPSHOT/http-server-0.0.1-SNAPSHOT-stubs.jar
The following line is extremely important:
[INFO] Installing /some/path/http-server/target/http-server-0.0.1-SNAPSHOT-stubs.jar to /path/to/your/.m2/repository/com/example/http-server/0.0.1-SNAPSHOT/http-server-0.0.1-SNAPSHOT-stubs.jar
It confirms that the stubs of the http-server have been installed in the local
repository.
Run the integration tests.
In order to profit from the Spring Cloud Contract Stub Runner functionality of automatic
stub downloading, you must do the following in your consumer side project (Loan
Application service):
Add the Spring Cloud Contract BOM:
<dependencyManagement> <dependencies> <dependency> <groupId>org.springframework.cloud</groupId> <artifactId>spring-cloud-dependencies</artifactId> <version>${spring-cloud-release-train.version}</version> <type>pom</type> <scope>import</scope> </dependency> </dependencies> </dependencyManagement>
Add the dependency to Spring Cloud Contract Stub Runner:
<dependency> <groupId>org.springframework.cloud</groupId> <artifactId>spring-cloud-starter-contract-stub-runner</artifactId> <scope>test</scope> </dependency>
Annotate your test class with @AutoConfigureStubRunner. In the annotation, provide the
group-id and artifact-id for the Stub Runner to download the stubs of your
collaborators. (Optional step) Because you’re playing with the collaborators offline, you
can also provide the offline work switch (StubRunnerProperties.StubsMode.LOCAL).
@RunWith(SpringRunner.class) @SpringBootTest(webEnvironment = WebEnvironment.NONE) @AutoConfigureStubRunner(ids = { "com.example:http-server-dsl:+:stubs:6565" }, stubsMode = StubRunnerProperties.StubsMode.LOCAL) public class LoanApplicationServiceTests {
Now, when you run your tests, you see something like this:
2016-07-19 14:22:25.403 INFO 41050 --- [ main] o.s.c.c.stubrunner.AetherStubDownloader : Desired version is + - will try to resolve the latest version 2016-07-19 14:22:25.438 INFO 41050 --- [ main] o.s.c.c.stubrunner.AetherStubDownloader : Resolved version is 0.0.1-SNAPSHOT 2016-07-19 14:22:25.439 INFO 41050 --- [ main] o.s.c.c.stubrunner.AetherStubDownloader : Resolving artifact com.example:http-server:jar:stubs:0.0.1-SNAPSHOT using remote repositories [] 2016-07-19 14:22:25.451 INFO 41050 --- [ main] o.s.c.c.stubrunner.AetherStubDownloader : Resolved artifact com.example:http-server:jar:stubs:0.0.1-SNAPSHOT to /path/to/your/.m2/repository/com/example/http-server/0.0.1-SNAPSHOT/http-server-0.0.1-SNAPSHOT-stubs.jar 2016-07-19 14:22:25.465 INFO 41050 --- [ main] o.s.c.c.stubrunner.AetherStubDownloader : Unpacking stub from JAR [URI: file:/path/to/your/.m2/repository/com/example/http-server/0.0.1-SNAPSHOT/http-server-0.0.1-SNAPSHOT-stubs.jar] 2016-07-19 14:22:25.475 INFO 41050 --- [ main] o.s.c.c.stubrunner.AetherStubDownloader : Unpacked file to [/var/folders/0p/xwq47sq106x1_g3dtv6qfm940000gq/T/contracts100276532569594265] 2016-07-19 14:22:27.737 INFO 41050 --- [ main] o.s.c.c.stubrunner.StubRunnerExecutor : All stubs are now running RunningStubs [namesAndPorts={com.example:http-server:0.0.1-SNAPSHOT:stubs=8080}]
This output means that Stub Runner has found your stubs and started a server for your app
with group id com.example, artifact id http-server with version 0.0.1-SNAPSHOT of
the stubs and with stubs classifier on port 8080.
File a pull request.
What you have done until now is an iterative process. You can play around with the contract, install it locally, and work on the consumer side until the contract works as you wish.
Once you are satisfied with the results and the test passes, publish a pull request to the server side. Currently, the consumer side work is done.
As a developer of the Fraud Detection server (a server to the Loan Issuance service):
Create an initial implementation.
As a reminder, you can see the initial implementation here:
@RequestMapping(value = "/fraudcheck", method = PUT) public FraudCheckResult fraudCheck(@RequestBody FraudCheck fraudCheck) { return new FraudCheckResult(FraudCheckStatus.OK, NO_REASON); }
Take over the pull request.
$ git checkout -b contract-change-pr master $ git pull https://your-git-server.com/server-side-fork.git contract-change-pr
You must add the dependencies needed by the autogenerated tests:
<dependency> <groupId>org.springframework.cloud</groupId> <artifactId>spring-cloud-starter-contract-verifier</artifactId> <scope>test</scope> </dependency>
In the configuration of the Maven plugin, pass the packageWithBaseClasses property
<plugin> <groupId>org.springframework.cloud</groupId> <artifactId>spring-cloud-contract-maven-plugin</artifactId> <version>${spring-cloud-contract.version}</version> <extensions>true</extensions> <configuration> <packageWithBaseClasses>com.example.fraud</packageWithBaseClasses> <convertToYaml>true</convertToYaml> </configuration> </plugin>
| Important |
|---|---|
This example uses "convention based" naming by setting the
|
All the generated tests extend that class. Over there, you can set up your Spring Context
or whatever is necessary. In this case, use Rest Assured MVC to
start the server side FraudDetectionController.
/* * Copyright 2013-2019 the original author or authors. * * Licensed under the Apache License, Version 2.0 (the "License"); * you may not use this file except in compliance with the License. * You may obtain a copy of the License at * * https://www.apache.org/licenses/LICENSE-2.0 * * Unless required by applicable law or agreed to in writing, software * distributed under the License is distributed on an "AS IS" BASIS, * WITHOUT WARRANTIES OR CONDITIONS OF ANY KIND, either express or implied. * See the License for the specific language governing permissions and * limitations under the License. */ package com.example.fraud; import io.restassured.module.mockmvc.RestAssuredMockMvc; import org.junit.Before; public class FraudBase { @Before public void setup() { RestAssuredMockMvc.standaloneSetup(new FraudDetectionController(), new FraudStatsController(stubbedStatsProvider())); } private StatsProvider stubbedStatsProvider() { return fraudType -> { switch (fraudType) { case DRUNKS: return 100; case ALL: return 200; } return 0; }; } public void assertThatRejectionReasonIsNull(Object rejectionReason) { assert rejectionReason == null; } }
Now, if you run the ./mvnw clean install, you get something like this:
Results :
Tests in error:
ContractVerifierTest.validate_shouldMarkClientAsFraud:32 » IllegalState Parsed...This error occurs because you have a new contract from which a test was generated and it failed since you have not implemented the feature. The auto-generated test would look like this:
@Test public void validate_shouldMarkClientAsFraud() throws Exception { // given: MockMvcRequestSpecification request = given() .header("Content-Type", "application/vnd.fraud.v1+json") .body("{\"client.id\":\"1234567890\",\"loanAmount\":99999}"); // when: ResponseOptions response = given().spec(request) .put("/fraudcheck"); // then: assertThat(response.statusCode()).isEqualTo(200); assertThat(response.header("Content-Type")).matches("application/vnd.fraud.v1.json.*"); // and: DocumentContext parsedJson = JsonPath.parse(response.getBody().asString()); assertThatJson(parsedJson).field("['fraudCheckStatus']").matches("[A-Z]{5}"); assertThatJson(parsedJson).field("['rejection.reason']").isEqualTo("Amount too high"); }
If you used the Groovy DSL, you can see, all the producer() parts of the Contract that were present in the
value(consumer(…), producer(…)) blocks got injected into the test.
In case of using YAML, the same applied for the matchers sections of the response.
Note that, on the producer side, you are also doing TDD. The expectations are expressed
in the form of a test. This test sends a request to our own application with the URL,
headers, and body defined in the contract. It also is expecting precisely defined values
in the response. In other words, you have the red part of red, green, and
refactor. It is time to convert the red into the green.
Write the missing implementation.
Because you know the expected input and expected output, you can write the missing implementation:
@RequestMapping(value = "/fraudcheck", method = PUT) public FraudCheckResult fraudCheck(@RequestBody FraudCheck fraudCheck) { if (amountGreaterThanThreshold(fraudCheck)) { return new FraudCheckResult(FraudCheckStatus.FRAUD, AMOUNT_TOO_HIGH); } return new FraudCheckResult(FraudCheckStatus.OK, NO_REASON); }
When you execute ./mvnw clean install again, the tests pass. Since the Spring Cloud
Contract Verifier plugin adds the tests to the generated-test-sources, you can
actually run those tests from your IDE.
Deploy your app.
Once you finish your work, you can deploy your change. First, merge the branch:
$ git checkout master $ git merge --no-ff contract-change-pr $ git push origin master
Your CI might run something like ./mvnw clean deploy, which would publish both the
application and the stub artifacts.
As a developer of the Loan Issuance service (a consumer of the Fraud Detection server):
Merge branch to master.
$ git checkout master $ git merge --no-ff contract-change-pr
Work online.
Now you can disable the offline work for Spring Cloud Contract Stub Runner and indicate
where the repository with your stubs is located. At this moment the stubs of the server
side are automatically downloaded from Nexus/Artifactory. You can set the value of
stubsMode to REMOTE. The following code shows an example of
achieving the same thing by changing the properties.
stubrunner: ids: 'com.example:http-server-dsl:+:stubs:8080' repositoryRoot: http://repo.spring.io/libs-snapshot
That’s it!
The best way to add dependencies is to use the proper starter dependency.
For stub-runner, use spring-cloud-starter-stub-runner. When you use a plugin, add
spring-cloud-starter-contract-verifier.
Here are some resources related to Spring Cloud Contract Verifier and Stub Runner. Note that some may be outdated, because the Spring Cloud Contract Verifier project is under constant development.
You can check out the video from the Warsaw JUG about Spring Cloud Contract:
You can find some samples at samples.
For the time being Spring Cloud Contract is a JVM based tool. So it could be your first pick when you’re already creating software for the JVM. This project has a lot of really interesting features but especially quite a few of them definitely make Spring Cloud Contract Verifier stand out on the "market" of Consumer Driven Contract (CDC) tooling. Out of many the most interesting are:
- Possibility to do CDC with messaging
- Clear and easy to use, statically typed DSL
- Possibility to copy paste your current JSON file to the contract and only edit its elements
- Automatic generation of tests from the defined Contract
- Stub Runner functionality - the stubs are automatically downloaded at runtime from Nexus / Artifactory
- Spring Cloud integration - no discovery service is needed for integration tests
- Spring Cloud Contract integrates with Pact out of the box and provides easy hooks to extend its functionality
- Via Docker adds support for any language & framework used
One of the biggest challenges related to stubs is their reusability. Only if they can be vastly used, will they serve their purpose. What typically makes that difficult are the hard-coded values of request / response elements. For example dates or ids. Imagine the following JSON request
{ "time" : "2016-10-10 20:10:15", "id" : "9febab1c-6f36-4a0b-88d6-3b6a6d81cd4a", "body" : "foo" }
and JSON response
{ "time" : "2016-10-10 21:10:15", "id" : "c4231e1f-3ca9-48d3-b7e7-567d55f0d051", "body" : "bar" }
Imagine the pain required to set proper value of the time field (let’s assume that this content is generated by the
database) by changing the clock in the system or providing stub implementations of data providers. The same is related
to the field called id. Will you create a stubbed implementation of UUID generator? Makes little sense…
So as a consumer you would like to send a request that matches any form of a time or any UUID. That way your system
will work as usual - will generate data and you won’t have to stub anything out. Let’s assume that in case of the aforementioned
JSON the most important part is the body field. You can focus on that and provide matching for other fields. In other words
you would like the stub to work like this:
{ "time" : "SOMETHING THAT MATCHES TIME", "id" : "SOMETHING THAT MATCHES UUID", "body" : "foo" }
As far as the response goes as a consumer you need a concrete value that you can operate on. So such a JSON is valid
{ "time" : "2016-10-10 21:10:15", "id" : "c4231e1f-3ca9-48d3-b7e7-567d55f0d051", "body" : "bar" }
As you could see in the previous sections we generate tests from contracts. So from the producer’s side the situation looks much different. We’re parsing the provided contract and in the test we want to send a real request to your endpoints. So for the case of a producer for the request we can’t have any sort of matching. We need concrete values that the producer’s backend can work on. Such a JSON would be a valid one:
{ "time" : "2016-10-10 20:10:15", "id" : "9febab1c-6f36-4a0b-88d6-3b6a6d81cd4a", "body" : "foo" }
On the other hand from the point of view of the validity of the contract the response doesn’t necessarily have to
contain concrete values of time or id. Let’s say that you generate those on the producer side - again, you’d
have to do a lot of stubbing to ensure that you always return the same values. That’s why from the producer’s side
what you might want is the following response:
{ "time" : "SOMETHING THAT MATCHES TIME", "id" : "SOMETHING THAT MATCHES UUID", "body" : "bar" }
How can you then provide one time a matcher for the consumer and a concrete value for the producer and vice versa? In Spring Cloud Contract we’re allowing you to provide a dynamic value. That means that it can differ for both sides of the communication. You can pass the values:
Either via the value method
value(consumer(...), producer(...)) value(stub(...), test(...)) value(client(...), server(...))
or using the $() method
$(consumer(...), producer(...)) $(stub(...), test(...)) $(client(...), server(...))
You can read more about this in the Chapter 93, Contract DSL section.
Calling value() or $() tells Spring Cloud Contract that you will be passing a dynamic value.
Inside the consumer() method you pass the value that should be used on the consumer side (in the generated stub).
Inside the producer() method you pass the value that should be used on the producer side (in the generated test).
| Tip |
|---|---|
If on one side you have passed the regular expression and you haven’t passed the other, then the other side will get auto-generated. |
Most often you will use that method together with the regex helper method. E.g. consumer(regex('[0-9]{10}')).
To sum it up the contract for the aforementioned scenario would look more or less like this (the regular expression for time and UUID are simplified and most likely invalid but we want to keep things very simple in this example):
org.springframework.cloud.contract.spec.Contract.make {
request {
method 'GET'
url '/someUrl'
body([
time : value(consumer(regex('[0-9]{4}-[0-9]{2}-[0-9]{2} [0-2][0-9]-[0-5][0-9]-[0-5][0-9]')),
id: value(consumer(regex('[0-9a-zA-z]{8}-[0-9a-zA-z]{4}-[0-9a-zA-z]{4}-[0-9a-zA-z]{12}'))
body: "foo"
])
}
response {
status OK()
body([
time : value(producer(regex('[0-9]{4}-[0-9]{2}-[0-9]{2} [0-2][0-9]-[0-5][0-9]-[0-5][0-9]')),
id: value([producer(regex('[0-9a-zA-z]{8}-[0-9a-zA-z]{4}-[0-9a-zA-z]{4}-[0-9a-zA-z]{12}'))
body: "bar"
])
}
} | Important |
|---|---|
Please read the Groovy docs related to JSON to understand how to properly structure the request / response bodies. |
Let’s try to answer a question what versioning really means. If you’re referring to the API version then there are different approaches.
- use Hypermedia, links and do not version your API by any means
- pass versions through headers / urls
I will not try to answer a question which approach is better. Whatever suits your needs and allows you to generate business value should be picked.
Let’s assume that you do version your API. In that case you should provide as many contracts as many versions you support. You can create a subfolder for every version or append it to the contract name - whatever suits you more.
If by versioning you mean the version of the JAR that contains the stubs then there are essentially two main approaches.
Let’s assume that you’re doing Continuous Delivery / Deployment which means that you’re generating a new version of the jar each time you go through the pipeline and that jar can go to production at any time. For example your jar version looks like this (it got built on the 20.10.2016 at 20:15:21) :
1.0.0.20161020-201521-RELEASE
In that case your generated stub jar will look like this.
1.0.0.20161020-201521-RELEASE-stubs.jar
In this case you should inside your application.yml or @AutoConfigureStubRunner when referencing stubs provide the
latest version of the stubs. You can do that by passing the + sign. Example
@AutoConfigureStubRunner(ids = {"com.example:http-server-dsl:+:stubs:8080"})If the versioning however is fixed (e.g. 1.0.4.RELEASE or 2.1.1) then you have to set the concrete value of the jar
version. Example for 2.1.1.
@AutoConfigureStubRunner(ids = {"com.example:http-server-dsl:2.1.1:stubs:8080"})You can manipulate the classifier to run the tests against current development version of the stubs of other services
or the ones that were deployed to production. If you alter your build to deploy the stubs with the prod-stubs classifier
once you reach production deployment then you can run tests in one case with dev stubs and one with prod stubs.
Example of tests using development version of stubs
@AutoConfigureStubRunner(ids = {"com.example:http-server-dsl:+:stubs:8080"})Example of tests using production version of stubs
@AutoConfigureStubRunner(ids = {"com.example:http-server-dsl:+:prod-stubs:8080"})You can pass those values also via properties from your deployment pipeline.
Another way of storing contracts other than having them with the producer is keeping them in a common place. It can be related to security issues where the consumers can’t clone the producer’s code. Also if you keep contracts in a single place then you, as a producer, will know how many consumers you have and which consumer you will break with your local changes.
Let’s assume that we have a producer with coordinates com.example:server and 3 consumers: client1,
client2, client3. Then in the repository with common contracts you would have the following setup
(which you can checkout here):
├── com
│ └── example
│ └── server
│ ├── client1
│ │ └── expectation.groovy
│ ├── client2
│ │ └── expectation.groovy
│ ├── client3
│ │ └── expectation.groovy
│ └── pom.xml
├── mvnw
├── mvnw.cmd
├── pom.xml
└── src
└── assembly
└── contracts.xmlAs you can see under the slash-delimited groupid / artifact id folder (com/example/server) you have
expectations of the 3 consumers (client1, client2 and client3). Expectations are the standard Groovy DSL
contract files as described throughout this documentation. This repository has to produce a JAR file that maps
one to one to the contents of the repo.
Example of a pom.xml inside the server folder.
<?xml version="1.0" encoding="UTF-8"?> <project xmlns:xsi="http://www.w3.org/2001/XMLSchema-instance" xmlns="http://maven.apache.org/POM/4.0.0" xsi:schemaLocation="http://maven.apache.org/POM/4.0.0 http://maven.apache.org/xsd/maven-4.0.0.xsd"> <modelVersion>4.0.0</modelVersion> <groupId>com.example</groupId> <artifactId>server</artifactId> <version>0.0.1-SNAPSHOT</version> <name>Server Stubs</name> <description>POM used to install locally stubs for consumer side</description> <parent> <groupId>org.springframework.boot</groupId> <artifactId>spring-boot-starter-parent</artifactId> <version>2.1.3.RELEASE</version> <relativePath/> </parent> <properties> <project.build.sourceEncoding>UTF-8</project.build.sourceEncoding> <java.version>1.8</java.version> <spring-cloud-contract.version>2.1.2.BUILD-SNAPSHOT</spring-cloud-contract.version> <spring-cloud-release.version>Greenwich.BUILD-SNAPSHOT </spring-cloud-release.version> <excludeBuildFolders>true</excludeBuildFolders> </properties> <dependencyManagement> <dependencies> <dependency> <groupId>org.springframework.cloud</groupId> <artifactId>spring-cloud-dependencies</artifactId> <version>${spring-cloud-release.version}</version> <type>pom</type> <scope>import</scope> </dependency> </dependencies> </dependencyManagement> <build> <plugins> <plugin> <groupId>org.springframework.cloud</groupId> <artifactId>spring-cloud-contract-maven-plugin</artifactId> <version>${spring-cloud-contract.version}</version> <extensions>true</extensions> <configuration> <!-- By default it would search under src/test/resources/ --> <contractsDirectory>${project.basedir}</contractsDirectory> </configuration> </plugin> </plugins> </build> <repositories> <repository> <id>spring-snapshots</id> <name>Spring Snapshots</name> <url>https://repo.spring.io/snapshot</url> <snapshots> <enabled>true</enabled> </snapshots> </repository> <repository> <id>spring-milestones</id> <name>Spring Milestones</name> <url>https://repo.spring.io/milestone</url> <snapshots> <enabled>false</enabled> </snapshots> </repository> <repository> <id>spring-releases</id> <name>Spring Releases</name> <url>https://repo.spring.io/release</url> <snapshots> <enabled>false</enabled> </snapshots> </repository> </repositories> <pluginRepositories> <pluginRepository> <id>spring-snapshots</id> <name>Spring Snapshots</name> <url>https://repo.spring.io/snapshot</url> <snapshots> <enabled>true</enabled> </snapshots> </pluginRepository> <pluginRepository> <id>spring-milestones</id> <name>Spring Milestones</name> <url>https://repo.spring.io/milestone</url> <snapshots> <enabled>false</enabled> </snapshots> </pluginRepository> <pluginRepository> <id>spring-releases</id> <name>Spring Releases</name> <url>https://repo.spring.io/release</url> <snapshots> <enabled>false</enabled> </snapshots> </pluginRepository> </pluginRepositories> </project>
As you can see there are no dependencies other than the Spring Cloud Contract Maven Plugin.
Those poms are necessary for the consumer side to run mvn clean install -DskipTests to locally install
stubs of the producer project.
The pom.xml in the root folder can look like this:
<?xml version="1.0" encoding="UTF-8"?> <project xmlns:xsi="http://www.w3.org/2001/XMLSchema-instance" xmlns="http://maven.apache.org/POM/4.0.0" xsi:schemaLocation="http://maven.apache.org/POM/4.0.0 http://maven.apache.org/xsd/maven-4.0.0.xsd"> <modelVersion>4.0.0</modelVersion> <groupId>com.example.standalone</groupId> <artifactId>contracts</artifactId> <version>0.0.1-SNAPSHOT</version> <name>Contracts</name> <description>Contains all the Spring Cloud Contracts, well, contracts. JAR used by the producers to generate tests and stubs </description> <properties> <project.build.sourceEncoding>UTF-8</project.build.sourceEncoding> </properties> <build> <plugins> <plugin> <groupId>org.apache.maven.plugins</groupId> <artifactId>maven-assembly-plugin</artifactId> <executions> <execution> <id>contracts</id> <phase>prepare-package</phase> <goals> <goal>single</goal> </goals> <configuration> <attach>true</attach> <descriptor>${basedir}/src/assembly/contracts.xml</descriptor> <!-- If you want an explicit classifier remove the following line --> <appendAssemblyId>false</appendAssemblyId> </configuration> </execution> </executions> </plugin> </plugins> </build> </project>
It’s using the assembly plugin in order to build the JAR with all the contracts. Example of such setup is here:
<assembly xmlns:xsi="http://www.w3.org/2001/XMLSchema-instance" xmlns="http://maven.apache.org/plugins/maven-assembly-plugin/assembly/1.1.3" xsi:schemaLocation="http://maven.apache.org/plugins/maven-assembly-plugin/assembly/1.1.3 http://maven.apache.org/xsd/assembly-1.1.3.xsd"> <id>project</id> <formats> <format>jar</format> </formats> <includeBaseDirectory>false</includeBaseDirectory> <fileSets> <fileSet> <directory>${project.basedir}</directory> <outputDirectory>/</outputDirectory> <useDefaultExcludes>true</useDefaultExcludes> <excludes> <exclude>**/${project.build.directory}/**</exclude> <exclude>mvnw</exclude> <exclude>mvnw.cmd</exclude> <exclude>.mvn/**</exclude> <exclude>src/**</exclude> </excludes> </fileSet> </fileSets> </assembly>
The workflow would look similar to the one presented in the Step by step guide to CDC. The only difference
is that the producer doesn’t own the contracts anymore. So the consumer and the producer have to work on
common contracts in a common repository.
When the consumer wants to work on the contracts offline, instead of cloning the producer code, the
consumer team clones the common repository, goes to the required producer’s folder (e.g. com/example/server)
and runs mvn clean install -DskipTests to install locally the stubs converted from the contracts.
| Tip |
|---|---|
You need to have Maven installed locally |
As a producer it’s enough to alter the Spring Cloud Contract Verifier to provide the URL and the dependency of the JAR containing the contracts:
<plugin> <groupId>org.springframework.cloud</groupId> <artifactId>spring-cloud-contract-maven-plugin</artifactId> <configuration> <contractsMode>REMOTE</contractsMode> <contractsRepositoryUrl> http://link/to/your/nexus/or/artifactory/or/sth </contractsRepositoryUrl> <contractDependency> <groupId>com.example.standalone</groupId> <artifactId>contracts</artifactId> </contractDependency> </configuration> </plugin>
With this setup the JAR with groupid com.example.standalone and artifactid contracts will be downloaded
from http://link/to/your/nexus/or/artifactory/or/sth. It will be then unpacked in a local temporary folder
and contracts present under the com/example/server will be picked as the ones used to generate the
tests and the stubs. Due to this convention the producer team will know which consumer teams will be broken
when some incompatible changes are done.
The rest of the flow looks the same.
To avoid messaging contracts duplication in the common repo, when few producers writing messages to one topic, we could create the structure when the rest contracts would be placed in a folder per producer and messaging contracts in the folder per topic.
To make it possible to work on the producer side we should specify an inclusion pattern for
filtering common repository jar by messaging topics we are interested in. includedFilesMaven Spring Cloud Contract plugincontractsPathgroupid/artifactid
<plugin> <groupId>org.springframework.cloud</groupId> <artifactId>spring-cloud-contract-maven-plugin</artifactId> <version>${spring-cloud-contract.version}</version> <configuration> <contractsMode>REMOTE</contractsMode> <contractsRepositoryUrl>http://link/to/your/nexus/or/artifactory/or/sth</contractsRepositoryUrl> <contractDependency> <groupId>com.example</groupId> <artifactId>common-repo-with-contracts</artifactId> <version>+</version> </contractDependency> <contractsPath>/</contractsPath> <baseClassMappings> <baseClassMapping> <contractPackageRegex>.*messaging.*</contractPackageRegex> <baseClassFQN>com.example.services.MessagingBase</baseClassFQN> </baseClassMapping> <baseClassMapping> <contractPackageRegex>.*rest.*</contractPackageRegex> <baseClassFQN>com.example.services.TestBase</baseClassFQN> </baseClassMapping> </baseClassMappings> <includedFiles> <includedFile>**/${project.artifactId}/**</includedFile> <includedFile>**/${first-topic}/**</includedFile> <includedFile>**/${second-topic}/**</includedFile> </includedFiles> </configuration> </plugin>
- Add a custom configuration for the common-repo dependency:
ext {
conractsGroupId = "com.example"
contractsArtifactId = "common-repo"
contractsVersion = "1.2.3"
}
configurations {
contracts {
transitive = false
}
}- Add the common-repo dependency to your classpath:
dependencies {
contracts "${conractsGroupId}:${contractsArtifactId}:${contractsVersion}"
testCompile "${conractsGroupId}:${contractsArtifactId}:${contractsVersion}"
}- Download the dependency to an appropriate folder:
task getContracts(type: Copy) {
from configurations.contracts
into new File(project.buildDir, "downloadedContracts")
}- Unzip JAR:
task unzipContracts(type: Copy) {
def zipFile = new File(project.buildDir, "downloadedContracts/${contractsArtifactId}-${contractsVersion}.jar")
def outputDir = file("${buildDir}/unpackedContracts")
from zipTree(zipFile)
into outputDir
}- Cleanup unused contracts:
task deleteUnwantedContracts(type: Delete) {
delete fileTree(dir: "${buildDir}/unpackedContracts",
include: "**/*",
excludes: [
"**/${project.name}/**"",
"**/${first-topic}/**",
"**/${second-topic}/**"])
}- Create task dependencies:
unzipContracts.dependsOn("getContracts") deleteUnwantedContracts.dependsOn("unzipContracts") build.dependsOn("deleteUnwantedContracts")
- Configure plugin by specifying the directory containing contracts using
contractsDslDirproperty
contracts {
contractsDslDir = new File("${buildDir}/unpackedContracts")
}In the polyglot world, there are languages that don’t use binary storages like Artifactory or Nexus. Starting from Spring Cloud Contract version 2.0.0 we provide mechanisms to store contracts and stubs in a SCM repository. Currently the only supported SCM is Git.
The repository would have to the following setup (which you can checkout here):
.
└── META-INF
└── com.example
└── beer-api-producer-git
└── 0.0.1-SNAPSHOT
├── contracts
│ └── beer-api-consumer
│ ├── messaging
│ │ ├── shouldSendAcceptedVerification.groovy
│ │ └── shouldSendRejectedVerification.groovy
│ └── rest
│ ├── shouldGrantABeerIfOldEnough.groovy
│ └── shouldRejectABeerIfTooYoung.groovy
└── mappings
└── beer-api-consumer
└── rest
├── shouldGrantABeerIfOldEnough.json
└── shouldRejectABeerIfTooYoung.jsonUnder META-INF folder:
- we group applications via
groupId(e.g.com.example) - then each application is represented via the
artifactId(e.g.beer-api-producer-git) next, the version of the application (e.g.
0.0.1-SNAPSHOT). Starting from Spring Cloud Contract version2.1.0, you can specify the versions as follows (assuming that your versions follow the semantic versioning)+orlatest- to find the latest version of your stubs (assuming that the snapshots are always the latest artifact for a given revision number). That means:- if you have a version
1.0.0.RELEASE,2.0.0.BUILD-SNAPSHOTand2.0.0.RELEASEwe will assume that the latest is2.0.0.BUILD-SNAPSHOT - if you have a version
1.0.0.RELEASEand2.0.0.RELEASEwe will assume that the latest is2.0.0.RELEASE - if you have a version called
latestor+we will pick that folder
- if you have a version
release- to find the latest release version of your stubs. That means:- if you have a version
1.0.0.RELEASE,2.0.0.BUILD-SNAPSHOTand2.0.0.RELEASEwe will assume that the latest is2.0.0.RELEASE - if you have a version called
releasewe will pick that folder
- if you have a version
finally, there are two folders:
contracts- the good practice is to store the contracts required by each consumer in the folder with the consumer name (e.g.beer-api-consumer). That way you can use thestubs-per-consumerfeature. Further directory structure is arbitrary.mappings- in this folder the Maven / Gradle Spring Cloud Contract plugins will push the stub server mappings. On the consumer side, Stub Runner will scan this folder to start stub servers with stub definitions. The folder structure will be a copy of the one created in thecontractssubfolder.
In order to control the type and location of the source of contracts (whether it’s a binary storage or an SCM repository), you can use the protocol in the URL of the repository. Spring Cloud Contract iterates over registered protocol resolvers and tries to fetch the contracts (via a plugin) or stubs (via Stub Runner).
For the SCM functionality, currently, we support the Git repository. To use it,
in the property, where the repository URL needs to be placed you just have to prefix
the connection URL with git://. Here you can find a couple of examples:
git://file:///foo/bar git://https://github.com/spring-cloud-samples/spring-cloud-contract-nodejs-contracts-git.git git://[email protected]:spring-cloud-samples/spring-cloud-contract-nodejs-contracts-git.git
For the producer, to use the SCM approach, we can reuse the
same mechanism we use for external contracts. We route Spring Cloud Contract
to use the SCM implementation via the URL that contains
the git:// protocol.
| Important |
|---|---|
You have to manually add the |
Maven.
<plugin> <groupId>org.springframework.cloud</groupId> <artifactId>spring-cloud-contract-maven-plugin</artifactId> <version>${spring-cloud-contract.version}</version> <extensions>true</extensions> <configuration> <!-- Base class mappings etc. --> <!-- We want to pick contracts from a Git repository --> <contractsRepositoryUrl>git://https://github.com/spring-cloud-samples/spring-cloud-contract-nodejs-contracts-git.git</contractsRepositoryUrl> <!-- We reuse the contract dependency section to set up the path to the folder that contains the contract definitions. In our case the path will be /groupId/artifactId/version/contracts --> <contractDependency> <groupId>${project.groupId}</groupId> <artifactId>${project.artifactId}</artifactId> <version>${project.version}</version> </contractDependency> <!-- The contracts mode can't be classpath --> <contractsMode>REMOTE</contractsMode> </configuration> <executions> <execution> <phase>package</phase> <goals> <!-- By default we will not push the stubs back to SCM, you have to explicitly add it as a goal --> <goal>pushStubsToScm</goal> </goals> </execution> </executions> </plugin>
Gradle.
contracts {
// We want to pick contracts from a Git repository
contractDependency {
stringNotation = "${project.group}:${project.name}:${project.version}"
}
/*
We reuse the contract dependency section to set up the path
to the folder that contains the contract definitions. In our case the
path will be /groupId/artifactId/version/contracts
*/
contractRepository {
repositoryUrl = "git://https://github.com/spring-cloud-samples/spring-cloud-contract-nodejs-contracts-git.git"
}
// The mode can't be classpath
contractsMode = "REMOTE"
// Base class mappings etc.
}
/*
In this scenario we want to publish stubs to SCM whenever
the `publish` task is executed
*/
publish.dependsOn("publishStubsToScm")
With such a setup:
- Git project will be cloned to a temporary directory
- The SCM stub downloader will go to
META-INF/groupId/artifactId/version/contractsfolder to find contracts. E.g. forcom.example:foo:1.0.0the path would beMETA-INF/com.example/foo/1.0.0/contracts - Tests will be generated from the contracts
- Stubs will be created from the contracts
- Once the tests pass, the stubs will be committed in the cloned repository
- Finally, a push will be done to that repo’s
origin
Another option to use the SCM as the destination for stubs and contracts is to store the contracts locally, with the producer, and only push the contracts and the stubs to SCM. Below, you can find the setup required to achieve this using Maven and Gradle.
Maven.
<plugin> <groupId>org.springframework.cloud</groupId> <artifactId>spring-cloud-contract-maven-plugin</artifactId> <version>${spring-cloud-contract.version}</version> <extensions>true</extensions> <!-- In the default configuration, we want to use the contracts stored locally --> <configuration> <baseClassMappings> <baseClassMapping> <contractPackageRegex>.*messaging.*</contractPackageRegex> <baseClassFQN>com.example.BeerMessagingBase</baseClassFQN> </baseClassMapping> <baseClassMapping> <contractPackageRegex>.*rest.*</contractPackageRegex> <baseClassFQN>com.example.BeerRestBase</baseClassFQN> </baseClassMapping> </baseClassMappings> <basePackageForTests>com.example</basePackageForTests> </configuration> <executions> <execution> <phase>package</phase> <goals> <!-- By default we will not push the stubs back to SCM, you have to explicitly add it as a goal --> <goal>pushStubsToScm</goal> </goals> <configuration> <!-- We want to pick contracts from a Git repository --> <contractsRepositoryUrl>git://file://${env.ROOT}/target/contract_empty_git/ </contractsRepositoryUrl> <!-- Example of URL via git protocol --> <!--<contractsRepositoryUrl>git://[email protected]:spring-cloud-samples/spring-cloud-contract-samples.git</contractsRepositoryUrl>--> <!-- Example of URL via http protocol --> <!--<contractsRepositoryUrl>git://https://github.com/spring-cloud-samples/spring-cloud-contract-samples.git</contractsRepositoryUrl>--> <!-- We reuse the contract dependency section to set up the path to the folder that contains the contract definitions. In our case the path will be /groupId/artifactId/version/contracts --> <contractDependency> <groupId>${project.groupId}</groupId> <artifactId>${project.artifactId}</artifactId> <version>${project.version}</version> </contractDependency> <!-- The mode can't be classpath --> <contractsMode>LOCAL</contractsMode> </configuration> </execution> </executions> </plugin>
Gradle.
contracts {
// Base package for generated tests
basePackageForTests = "com.example"
baseClassMappings {
baseClassMapping(".*messaging.*", "com.example.BeerMessagingBase")
baseClassMapping(".*rest.*", "com.example.BeerRestBase")
}
}
/*
In this scenario we want to publish stubs to SCM whenever
the `publish` task is executed
*/
publishStubsToScm {
// We want to modify the default set up of the plugin when publish stubs to scm is called
customize {
// We want to pick contracts from a Git repository
contractDependency {
stringNotation = "${project.group}:${project.name}:${project.version}"
}
/*
We reuse the contract dependency section to set up the path
to the folder that contains the contract definitions. In our case the
path will be /groupId/artifactId/version/contracts
*/
contractRepository {
repositoryUrl = "git://file://${System.getenv("ROOT")}/target/contract_empty_git/"
}
// The mode can't be classpath
contractsMode = "LOCAL"
}
}
publish.dependsOn("publishStubsToScm")
publishToMavenLocal.dependsOn("publishStubsToScm")
With such a setup:
- Contracts from the default
src/test/resources/contractsdirectory will be picked - Tests will be generated from the contracts
- Stubs will be created from the contracts
Once the tests pass
- Git project will be cloned to a temporary directory
- The stubs and contracts will be committed in the cloned repository
- Finally, a push will be done to that repo’s
origin
It is also possible to keep the contracts in the producer repository, but keep the stubs in an external git repo. This is most useful when you want to use the base consumer-producer collaboration flow, but do not have a possibility to use an artifact repository for storing the stubs.
In order to do that, use the usual producer setup, and then add the pushStubsToScm goal and set
contractsRepositoryUrl to the repository where you want to keep the stubs.
On the consumer side when passing the repositoryRoot parameter,
either from the @AutoConfigureStubRunner annotation, the
JUnit rule, JUnit 5 extension or properties, it’s enough to pass the URL of the
SCM repository, prefixed with the protocol. For example
@AutoConfigureStubRunner(
stubsMode="REMOTE",
repositoryRoot="git://https://github.com/spring-cloud-samples/spring-cloud-contract-nodejs-contracts-git.git",
ids="com.example:bookstore:0.0.1.RELEASE"
)With such a setup:
- Git project will be cloned to a temporary directory
- The SCM stub downloader will go to
META-INF/groupId/artifactId/version/folder to find stub definitions and contracts. E.g. forcom.example:foo:1.0.0the path would beMETA-INF/com.example/foo/1.0.0/ - Stub servers will be started and fed with mappings
- Messaging definitions will be read and used in the messaging tests
When using Pact you can use the Pact Broker to store and share Pact definitions. Starting from Spring Cloud Contract 2.0.0 one can fetch Pact files from the Pact Broker to generate tests and stubs.
As a prerequisite the Pact Converter and Pact Stub Downloader
are required. You have to add them via the spring-cloud-contract-pact dependency.
You can read more about it in the Section 95.1.1, “Pact Converter” section.
| Important |
|---|---|
Pact follows the Consumer Contract convention. That means that the Consumer creates the Pact definitions first, then shares the files with the Producer. Those expectations are generated from the Consumer’s code and can break the Producer if the expectations are not met. |
The consumer uses Pact framework to generate Pact files. The Pact files are sent to the Pact Broker. An example of such setup can be found here.
For the producer, to use the Pact files from the Pact Broker, we can reuse the
same mechanism we use for external contracts. We route Spring Cloud Contract
to use the Pact implementation via the URL that contains
the pact:// protocol. It’s enough to pass the URL to the
Pact Broker. An example of such setup can be found here.
Maven.
<plugin> <groupId>org.springframework.cloud</groupId> <artifactId>spring-cloud-contract-maven-plugin</artifactId> <version>${spring-cloud-contract.version}</version> <extensions>true</extensions> <configuration> <!-- Base class mappings etc. --> <!-- We want to pick contracts from a Git repository --> <contractsRepositoryUrl>pact://http://localhost:8085</contractsRepositoryUrl> <!-- We reuse the contract dependency section to set up the path to the folder that contains the contract definitions. In our case the path will be /groupId/artifactId/version/contracts --> <contractDependency> <groupId>${project.groupId}</groupId> <artifactId>${project.artifactId}</artifactId> <!-- When + is passed, a latest tag will be applied when fetching pacts --> <version>+</version> </contractDependency> <!-- The contracts mode can't be classpath --> <contractsMode>REMOTE</contractsMode> </configuration> <!-- Don't forget to add spring-cloud-contract-pact to the classpath! --> <dependencies> <dependency> <groupId>org.springframework.cloud</groupId> <artifactId>spring-cloud-contract-pact</artifactId> <version>${spring-cloud-contract.version}</version> </dependency> </dependencies> </plugin>
Gradle.
buildscript {
repositories {
//...
}
dependencies {
// ...
// Don't forget to add spring-cloud-contract-pact to the classpath!
classpath "org.springframework.cloud:spring-cloud-contract-pact:${contractVersion}"
}
}
contracts {
// When + is passed, a latest tag will be applied when fetching pacts
contractDependency {
stringNotation = "${project.group}:${project.name}:+"
}
contractRepository {
repositoryUrl = "pact://http://localhost:8085"
}
// The mode can't be classpath
contractsMode = "REMOTE"
// Base class mappings etc.
}
With such a setup:
- Pact files will be downloaded from the Pact Broker
- Spring Cloud Contract will convert the Pact files into tests and stubs
- The JAR with the stubs gets automatically created as usual
In the scenario where you don’t want to do Consumer Contract approach (for every single consumer define the expectations) but you’d prefer to do Producer Contracts (the producer provides the contracts and publishes stubs), it’s enough to use Spring Cloud Contract with Stub Runner option. An example of such setup can be found here.
First, remember to add Stub Runner and Spring Cloud Contract Pact module as test dependencies.
Maven.
<dependencyManagement> <dependencies> <dependency> <groupId>org.springframework.cloud</groupId> <artifactId>spring-cloud-dependencies</artifactId> <version>${spring-cloud.version}</version> <type>pom</type> <scope>import</scope> </dependency> </dependencies> </dependencyManagement> <!-- Don't forget to add spring-cloud-contract-pact to the classpath! --> <dependencies> <!-- ... --> <dependency> <groupId>org.springframework.cloud</groupId> <artifactId>spring-cloud-starter-contract-stub-runner</artifactId> <scope>test</scope> </dependency> <dependency> <groupId>org.springframework.cloud</groupId> <artifactId>spring-cloud-contract-pact</artifactId> <scope>test</scope> </dependency> </dependencies>
Gradle.
dependencyManagement {
imports {
mavenBom "org.springframework.cloud:spring-cloud-dependencies:${springCloudVersion}"
}
}
dependencies {
//...
testCompile("org.springframework.cloud:spring-cloud-starter-contract-stub-runner")
// Don't forget to add spring-cloud-contract-pact to the classpath!
testCompile("org.springframework.cloud:spring-cloud-contract-pact")
}
Next, just pass the URL of the Pact Broker to repositoryRoot, prefixed
with pact:// protocol. E.g. pact://http://localhost:8085
@RunWith(SpringRunner.class) @SpringBootTest @AutoConfigureStubRunner(stubsMode = StubRunnerProperties.StubsMode.REMOTE, ids = "com.example:beer-api-producer-pact", repositoryRoot = "pact://http://localhost:8085") public class BeerControllerTest { //Inject the port of the running stub @StubRunnerPort("beer-api-producer-pact") int producerPort; //... }
With such a setup:
- Pact files will be downloaded from the Pact Broker
- Spring Cloud Contract will convert the Pact files into stub definitions
- The stub servers will be started and fed with stubs
For more information about Pact support you can go to the Section 95.7, “Using the Pact Stub Downloader” section.
The generated tests all boil down to RestAssured in some form or fashion which relies on Apache HttpClient. HttpClient has a facility called wire logging which logs the entire request and response to HttpClient. Spring Boot has a logging common application property for doing this sort of thing, just add this to your application properties
logging.level.org.apache.http.wire=DEBUGStarting from version 1.2.0 we turn on WireMock logging to
info and the WireMock notifier to being verbose. Now you will
exactly know what request was received by WireMock server and which
matching response definition was picked.
To turn off this feature just bump WireMock logging to ERROR
logging.level.com.github.tomakehurst.wiremock=ERRORYou can use the mappingsOutputFolder property on @AutoConfigureStubRunner, StubRunnerRule or
`StubRunnerExtension`to dump all mappings per artifact id. Also the port at which the given stub server
was started will be attached.
You can set up Spring Cloud Contract Verifier in the following ways:
To learn how to set up the Gradle project for Spring Cloud Contract Verifier, read the following sections:
- Section 89.1.1, “Prerequisites”
- Section 89.1.2, “Add Gradle Plugin with Dependencies”
- Section 89.1.3, “Gradle and Rest Assured 2.0”
- Section 89.1.4, “Snapshot Versions for Gradle”
- Section 89.1.5, “Add stubs”
- Section 89.1.7, “Default Setup”
- Section 89.1.8, “Configure Plugin”
- Section 89.1.9, “Configuration Options”
- Section 89.1.10, “Single Base Class for All Tests”
- Section 89.1.11, “Different Base Classes for Contracts”
- Section 89.1.12, “Invoking Generated Tests”
- Section 89.1.13, “Pushing stubs to SCM”
- Section 89.1.14, “Spring Cloud Contract Verifier on the Consumer Side”
In order to use Spring Cloud Contract Verifier with WireMock, you muse use either a Gradle or a Maven plugin.
| Warning |
|---|---|
If you want to use Spock in your projects, you must add separately the
|
To add a Gradle plugin with dependencies, use code similar to this:
buildscript {
repositories {
mavenCentral()
}
dependencies {
classpath "org.springframework.boot:spring-boot-gradle-plugin:${springboot_version}"
classpath "org.springframework.cloud:spring-cloud-contract-gradle-plugin:${verifier_version}"
}
}
apply plugin: 'groovy'
apply plugin: 'spring-cloud-contract'
dependencyManagement {
imports {
mavenBom "org.springframework.cloud:spring-cloud-contract-dependencies:${verifier_version}"
}
}
dependencies {
testCompile 'org.codehaus.groovy:groovy-all:2.4.6'
// example with adding Spock core and Spock Spring
testCompile 'org.spockframework:spock-core:1.0-groovy-2.4'
testCompile 'org.spockframework:spock-spring:1.0-groovy-2.4'
testCompile 'org.springframework.cloud:spring-cloud-starter-contract-verifier'
}By default, Rest Assured 3.x is added to the classpath. However, to use Rest Assured 2.x you can add it to the plugins classpath, as shown here:
buildscript {
repositories {
mavenCentral()
}
dependencies {
classpath "org.springframework.boot:spring-boot-gradle-plugin:${springboot_version}"
classpath "org.springframework.cloud:spring-cloud-contract-gradle-plugin:${verifier_version}"
classpath "com.jayway.restassured:rest-assured:2.5.0"
classpath "com.jayway.restassured:spring-mock-mvc:2.5.0"
}
}
depenendencies {
// all dependencies
// you can exclude rest-assured from spring-cloud-contract-verifier
testCompile "com.jayway.restassured:rest-assured:2.5.0"
testCompile "com.jayway.restassured:spring-mock-mvc:2.5.0"
}That way, the plugin automatically sees that Rest Assured 2.x is present on the classpath and modifies the imports accordingly.
Add the additional snapshot repository to your build.gradle to use snapshot versions, which are automatically uploaded after every successful build, as shown here:
buildscript {
repositories {
mavenCentral()
mavenLocal()
maven { url "http://repo.spring.io/snapshot" }
maven { url "http://repo.spring.io/milestone" }
maven { url "http://repo.spring.io/release" }
}
}By default, Spring Cloud Contract Verifier is looking for stubs in the
src/test/resources/contracts directory.
The directory containing stub definitions is treated as a class name, and each stub definition is treated as a single test. Spring Cloud Contract Verifier assumes that it contains at least one level of directories that are to be used as the test class name. If more than one level of nested directories is present, all except the last one is used as the package name. For example, with following structure:
src/test/resources/contracts/myservice/shouldCreateUser.groovy src/test/resources/contracts/myservice/shouldReturnUser.groovy
Spring Cloud Contract Verifier creates a test class named defaultBasePackage.MyService
with two methods:
shouldCreateUser()shouldReturnUser()
The plugin registers itself to be invoked before a check task. If you want it to be
part of your build process, you need to do nothing more. If you just want to generate
tests, invoke the generateContractTests task.
The default Gradle Plugin setup creates the following Gradle part of the build (in pseudocode):
contracts {
testFramework ='JUNIT'
testMode = 'MockMvc'
generatedTestSourcesDir = project.file("${project.buildDir}/generated-test-sources/contracts")
generatedTestResourcesDir = project.file("${project.buildDir}/generated-test-resources/contracts")
contractsDslDir = "${project.rootDir}/src/test/resources/contracts"
basePackageForTests = 'org.springframework.cloud.verifier.tests'
stubsOutputDir = project.file("${project.buildDir}/stubs")
// the following properties are used when you want to provide where the JAR with contract lays
contractDependency {
stringNotation = ''
}
contractsPath = ''
contractsWorkOffline = false
contractRepository {
cacheDownloadedContracts(true)
}
}
tasks.create(type: Jar, name: 'verifierStubsJar', dependsOn: 'generateClientStubs') {
baseName = project.name
classifier = contracts.stubsSuffix
from contractVerifier.stubsOutputDir
}
project.artifacts {
archives task
}
tasks.create(type: Copy, name: 'copyContracts') {
from contracts.contractsDslDir
into contracts.stubsOutputDir
}
verifierStubsJar.dependsOn 'copyContracts'
publishing {
publications {
stubs(MavenPublication) {
artifactId project.name
artifact verifierStubsJar
}
}
}To change the default configuration, add a contracts snippet to your Gradle config, as
shown here:
contracts {
testMode = 'MockMvc'
baseClassForTests = 'org.mycompany.tests'
generatedTestSourcesDir = project.file('src/generatedContract')
}- testMode: Defines the mode for acceptance tests. By default, the mode is MockMvc, which is based on Spring’s MockMvc. It can also be changed to WebTestClient, JaxRsClient or to Explicit for real HTTP calls.
- imports: Creates an array with imports that should be included in generated tests (for example ['org.myorg.Matchers']). By default, it creates an empty array.
- staticImports: Creates an array with static imports that should be included in generated tests(for example ['org.myorg.Matchers.*']). By default, it creates an empty array.
- basePackageForTests: Specifies the base package for all generated tests. If not set,
the value is picked from
baseClassForTests’s package and from `packageWithBaseClasses. If neither of these values are set, then the value is set toorg.springframework.cloud.contract.verifier.tests. - baseClassForTests: Creates a base class for all generated tests. By default, if you
use Spock classes, the class is
spock.lang.Specification. - packageWithBaseClasses: Defines a package where all the base classes reside. This setting takes precedence over baseClassForTests.
- baseClassMappings: Explicitly maps a contract package to a FQN of a base class. This setting takes precedence over packageWithBaseClasses and baseClassForTests.
- ruleClassForTests: Specifies a rule that should be added to the generated test classes.
- ignoredFiles: Uses an
Antmatcherto allow defining stub files for which processing should be skipped. By default, it is an empty array. - contractsDslDir: Specifies the directory containing contracts written using the
GroovyDSL. By default, its value is
$rootDir/src/test/resources/contracts. - generatedTestSourcesDir: Specifies the test source directory where tests generated
from the Groovy DSL should be placed. By default its value is
$buildDir/generated-test-sources/contracts. - generatedTestResourcesDir: Specifies the test resource directory where resources used by the tests generated
from the Groovy DSL should be placed. By default its value is
$buildDir/generated-test-resources/contracts. - stubsOutputDir: Specifies the directory where the generated WireMock stubs from the Groovy DSL should be placed.
- testFramework: Specifies the target test framework to be used. Currently, Spock, JUnit 4 (
TestFramework.JUNIT) and JUnit 5 are supported with JUnit 4 being the default framework. - contractsProperties: a map containing properties to be passed to Spring Cloud Contract components. Those properties might be used by e.g. inbuilt or custom Stub Downloaders.
The following properties are used when you want to specify the location of the JAR containing the contracts:
- contractDependency: Specifies the Dependency that provides
groupid:artifactid:version:classifiercoordinates. You can use thecontractDependencyclosure to set it up. - contractsPath: Specifies the path to the jar. If contract dependencies are
downloaded, the path defaults to
groupid/artifactidwheregroupidis slash separated. Otherwise, it scans contracts under the provided directory. - contractsMode: Specifies the mode of downloading contracts (whether the JAR is available offline, remotely etc.)
- deleteStubsAfterTest: If set to
falsewill not remove any downloaded contracts from temporary directories
Below you can find a list of experimental features you can turn on via the plugin:
- convertToYaml: converts all DSLs to the declarative, YAML format. This can be extremely useful when you’re using external libraries in your Groovy DSLs. By turning this feature on (by setting it to
true) you will not need to add the library dependency on the consumer side. - assertJsonSize: You can check the size of JSON arrays in the generated tests. This feature is disabled by default.
When using Spring Cloud Contract Verifier in default MockMvc, you need to create a base specification for all generated acceptance tests. In this class, you need to point to an endpoint, which should be verified.
abstract class BaseMockMvcSpec extends Specification { def setup() { RestAssuredMockMvc.standaloneSetup(new PairIdController()) } void isProperCorrelationId(Integer correlationId) { assert correlationId == 123456 } void isEmpty(String value) { assert value == null } }
If you use Explicit mode, you can use a base class to initialize the whole tested app
as you might see in regular integration tests. If you use the JAXRSCLIENT mode, this
base class should also contain a protected WebTarget webTarget field. Right now, the
only option to test the JAX-RS API is to start a web server.
If your base classes differ between contracts, you can tell the Spring Cloud Contract plugin which class should get extended by the autogenerated tests. You have two options:
- Follow a convention by providing the
packageWithBaseClasses - Provide explicit mapping via
baseClassMappings
By Convention
The convention is such that if you have a contract under (for example)
src/test/resources/contract/foo/bar/baz/ and set the value of the
packageWithBaseClasses property to com.example.base, then Spring Cloud Contract
Verifier assumes that there is a BarBazBase class under the com.example.base package.
In other words, the system takes the last two parts of the package, if they exist, and
forms a class with a Base suffix. This rule takes precedence over baseClassForTests.
Here is an example of how it works in the contracts closure:
packageWithBaseClasses = 'com.example.base'By Mapping
You can manually map a regular expression of the contract’s package to fully qualified
name of the base class for the matched contract. You have to provide a list called
baseClassMappings that consists baseClassMapping objects that takes a
contractPackageRegex to baseClassFQN mapping. Consider the following example:
baseClassForTests = "com.example.FooBase" baseClassMappings { baseClassMapping('.*/com/.*', 'com.example.ComBase') baseClassMapping('.*/bar/.*': 'com.example.BarBase') }
Let’s assume that you have contracts under
- src/test/resources/contract/com/
- src/test/resources/contract/foo/
By providing the baseClassForTests, we have a fallback in case mapping did not succeed.
(You could also provide the packageWithBaseClasses as a fallback.) That way, the tests
generated from src/test/resources/contract/com/ contracts extend the
com.example.ComBase, whereas the rest of the tests extend com.example.FooBase.
To ensure that the provider side is compliant with defined contracts, you need to invoke:
./gradlew generateContractTests testIf you’re using the SCM repository to keep the contracts and
stubs, you might want to automate the step of pushing stubs to
the repository. To do that, it’s enough to call the pushStubsToScm
task. Example:
$ ./gradlew pushStubsToScm
Under Section 95.6, “Using the SCM Stub Downloader” you can find all possible
configuration options that you can pass either via
the contractsProperties field e.g. contracts { contractsProperties = [foo:"bar"] },
via contractsProperties method e.g. contracts { contractsProperties([foo:"bar"]) },
a system property or an environment variable.
In a consuming service, you need to configure the Spring Cloud Contract Verifier plugin
in exactly the same way as in case of provider. If you do not want to use Stub Runner
then you need to copy contracts stored in src/test/resources/contracts and generate
WireMock JSON stubs using:
./gradlew generateClientStubs
| Note |
|---|---|
The |
When present, JSON stubs can be used in automated tests of consuming a service.
@ContextConfiguration(loader == SpringApplicationContextLoader, classes == Application) class LoanApplicationServiceSpec extends Specification { @ClassRule @Shared WireMockClassRule wireMockRule == new WireMockClassRule() @Autowired LoanApplicationService sut def 'should successfully apply for loan'() { given: LoanApplication application = new LoanApplication(client: new Client(clientPesel: '12345678901'), amount: 123.123) when: LoanApplicationResult loanApplication == sut.loanApplication(application) then: loanApplication.loanApplicationStatus == LoanApplicationStatus.LOAN_APPLIED loanApplication.rejectionReason == null } }
LoanApplication makes a call to FraudDetection service. This request is handled by a
WireMock server configured with stubs generated by Spring Cloud Contract Verifier.
To learn how to set up the Maven project for Spring Cloud Contract Verifier, read the following sections:
- Section 89.2.1, “Add maven plugin”
- Section 89.2.2, “Maven and Rest Assured 2.0”
- Section 89.2.3, “Snapshot versions for Maven”
- Section 89.2.4, “Add stubs”
- Section 89.2.5, “Run plugin”
- Section 89.2.6, “Configure plugin”
- Section 89.2.7, “Configuration Options”
- Section 89.2.8, “Single Base Class for All Tests”
- Section 89.2.9, “Different base classes for contracts”
- Section 89.2.10, “Invoking generated tests”
- Section 89.2.11, “Pushing stubs to SCM”
- Section 89.2.12, “Maven Plugin and STS”
Add the Spring Cloud Contract BOM in a fashion similar to this:
<dependencyManagement> <dependencies> <dependency> <groupId>org.springframework.cloud</groupId> <artifactId>spring-cloud-dependencies</artifactId> <version>${spring-cloud-release.version}</version> <type>pom</type> <scope>import</scope> </dependency> </dependencies> </dependencyManagement>
Next, add the Spring Cloud Contract Verifier Maven plugin:
<plugin> <groupId>org.springframework.cloud</groupId> <artifactId>spring-cloud-contract-maven-plugin</artifactId> <version>${spring-cloud-contract.version}</version> <extensions>true</extensions> <configuration> <packageWithBaseClasses>com.example.fraud</packageWithBaseClasses> <convertToYaml>true</convertToYaml> </configuration> </plugin>
You can read more in the
Spring
Cloud Contract Maven Plugin Documentation (example for 2.0.0.RELEASE version).
By default, Rest Assured 3.x is added to the classpath. However, you can use Rest Assured 2.x by adding it to the plugins classpath, as shown here:
<plugin>
<groupId>org.springframework.cloud</groupId>
<artifactId>spring-cloud-contract-maven-plugin</artifactId>
<version>${spring-cloud-contract.version}</version>
<extensions>true</extensions>
<configuration>
<packageWithBaseClasses>com.example</packageWithBaseClasses>
</configuration>
<dependencies>
<dependency>
<groupId>org.springframework.cloud</groupId>
<artifactId>spring-cloud-contract-verifier</artifactId>
<version>${spring-cloud-contract.version}</version>
</dependency>
<dependency>
<groupId>com.jayway.restassured</groupId>
<artifactId>rest-assured</artifactId>
<version>2.5.0</version>
<scope>compile</scope>
</dependency>
<dependency>
<groupId>com.jayway.restassured</groupId>
<artifactId>spring-mock-mvc</artifactId>
<version>2.5.0</version>
<scope>compile</scope>
</dependency>
</dependencies>
</plugin>
<dependencies>
<!-- all dependencies -->
<!-- you can exclude rest-assured from spring-cloud-contract-verifier -->
<dependency>
<groupId>com.jayway.restassured</groupId>
<artifactId>rest-assured</artifactId>
<version>2.5.0</version>
<scope>test</scope>
</dependency>
<dependency>
<groupId>com.jayway.restassured</groupId>
<artifactId>spring-mock-mvc</artifactId>
<version>2.5.0</version>
<scope>test</scope>
</dependency>
</dependencies>That way, the plugin automatically sees that Rest Assured 3.x is present on the classpath and modifies the imports accordingly.
For Snapshot and Milestone versions, you have to add the following section to your
pom.xml, as shown here:
<repositories> <repository> <id>spring-snapshots</id> <name>Spring Snapshots</name> <url>https://repo.spring.io/snapshot</url> <snapshots> <enabled>true</enabled> </snapshots> </repository> <repository> <id>spring-milestones</id> <name>Spring Milestones</name> <url>https://repo.spring.io/milestone</url> <snapshots> <enabled>false</enabled> </snapshots> </repository> <repository> <id>spring-releases</id> <name>Spring Releases</name> <url>https://repo.spring.io/release</url> <snapshots> <enabled>false</enabled> </snapshots> </repository> </repositories> <pluginRepositories> <pluginRepository> <id>spring-snapshots</id> <name>Spring Snapshots</name> <url>https://repo.spring.io/snapshot</url> <snapshots> <enabled>true</enabled> </snapshots> </pluginRepository> <pluginRepository> <id>spring-milestones</id> <name>Spring Milestones</name> <url>https://repo.spring.io/milestone</url> <snapshots> <enabled>false</enabled> </snapshots> </pluginRepository> <pluginRepository> <id>spring-releases</id> <name>Spring Releases</name> <url>https://repo.spring.io/release</url> <snapshots> <enabled>false</enabled> </snapshots> </pluginRepository> </pluginRepositories>
By default, Spring Cloud Contract Verifier is looking for stubs in the
src/test/resources/contracts directory. The directory containing stub definitions is
treated as a class name, and each stub definition is treated as a single test. We assume
that it contains at least one directory to be used as test class name. If there is more
than one level of nested directories, all except the last one is used as package name.
For example, with following structure:
src/test/resources/contracts/myservice/shouldCreateUser.groovy src/test/resources/contracts/myservice/shouldReturnUser.groovy
Spring Cloud Contract Verifier creates a test class named defaultBasePackage.MyService
with two methods
shouldCreateUser()shouldReturnUser()
The plugin goal generateTests is assigned to be invoked in the phase called
generate-test-sources. If you want it to be part of your build process, you need not do
anything. If you just want to generate tests, invoke the generateTests goal.
To change the default configuration, just add a configuration section to the plugin
definition or the execution definition, as shown here:
<plugin> <groupId>org.springframework.cloud</groupId> <artifactId>spring-cloud-contract-maven-plugin</artifactId> <executions> <execution> <goals> <goal>convert</goal> <goal>generateStubs</goal> <goal>generateTests</goal> </goals> </execution> </executions> <configuration> <basePackageForTests>org.springframework.cloud.verifier.twitter.place</basePackageForTests> <baseClassForTests>org.springframework.cloud.verifier.twitter.place.BaseMockMvcSpec</baseClassForTests> </configuration> </plugin>
- testMode: Defines the mode for acceptance tests. By default, the mode is MockMvc, which is based on Spring’s MockMvc. It can also be changed to WebTestClient, JaxRsClient or to Explicit for real HTTP calls.
- basePackageForTests: Specifies the base package for all generated tests. If not set,
the value is picked from
baseClassForTests’s package and from `packageWithBaseClasses. If neither of these values are set, then the value is set toorg.springframework.cloud.contract.verifier.tests. - ruleClassForTests: Specifies a rule that should be added to the generated test classes.
- baseClassForTests: Creates a base class for all generated tests. By default, if you
use Spock classes, the class is
spock.lang.Specification. - contractsDirectory: Specifies a directory containing contracts written with the
GroovyDSL. The default directory is
/src/test/resources/contracts. - generatedTestSourcesDir: Specifies the test source directory where tests generated
from the Groovy DSL should be placed. By default its value is
$buildDir/generated-test-sources/contracts. - generatedTestResourcesDir: Specifies the test resource directory where resources used by the tests generated
- testFramework: Specifies the target test framework to be used. Currently, Spock, JUnit 4 (
TestFramework.JUNIT) and JUnit 5 are supported with JUnit 4 being the default framework. - packageWithBaseClasses: Defines a package where all the base classes reside. This
setting takes precedence over baseClassForTests. The convention is such that, if you
have a contract under (for example)
src/test/resources/contract/foo/bar/baz/and set the value of thepackageWithBaseClassesproperty tocom.example.base, then Spring Cloud Contract Verifier assumes that there is aBarBazBaseclass under thecom.example.basepackage. In other words, the system takes the last two parts of the package, if they exist, and forms a class with aBasesuffix. - baseClassMappings: Specifies a list of base class mappings that provide
contractPackageRegex, which is checked against the package where the contract is located, andbaseClassFQN, which maps to the fully qualified name of the base class for the matched contract. For example, if you have a contract undersrc/test/resources/contract/foo/bar/baz/and map the property.* → com.example.base.BaseClass, then the test class generated from these contracts extendscom.example.base.BaseClass. This setting takes precedence over packageWithBaseClasses and baseClassForTests. - contractsProperties: a map containing properties to be passed to Spring Cloud Contract components. Those properties might be used by e.g. inbuilt or custom Stub Downloaders.
If you want to download your contract definitions from a Maven repository, you can use the following options:
- contractDependency: The contract dependency that contains all the packaged contracts.
- contractsPath: The path to the concrete contracts in the JAR with packaged contracts.
Defaults to
groupid/artifactidwheregropuidis slash separated. - contractsMode: Picks the mode in which stubs will be found and registered
- deleteStubsAfterTest: If set to
falsewill not remove any downloaded contracts from temporary directories - contractsRepositoryUrl: URL to a repo with the artifacts that have contracts. If it is not provided, use the current Maven ones.
- contractsRepositoryUsername: The user name to be used to connect to the repo with contracts.
- contractsRepositoryPassword: The password to be used to connect to the repo with contracts.
- contractsRepositoryProxyHost: The proxy host to be used to connect to the repo with contracts.
- contractsRepositoryProxyPort: The proxy port to be used to connect to the repo with contracts.
We cache only non-snapshot, explicitly provided versions (for example
+ or 1.0.0.BUILD-SNAPSHOT won’t get cached). By default, this feature is turned on.
Below you can find a list of experimental features you can turn on via the plugin:
- convertToYaml: converts all DSLs to the declarative, YAML format. This can be extremely useful when you’re using external libraries in your Groovy DSLs. By turning this feature on (by setting it to
true) you will not need to add the library dependency on the consumer side. - assertJsonSize: You can check the size of JSON arrays in the generated tests. This feature is disabled by default.
When using Spring Cloud Contract Verifier in default MockMvc, you need to create a base specification for all generated acceptance tests. In this class, you need to point to an endpoint, which should be verified.
package org.mycompany.tests import org.mycompany.ExampleSpringController import com.jayway.restassured.module.mockmvc.RestAssuredMockMvc import spock.lang.Specification class MvcSpec extends Specification { def setup() { RestAssuredMockMvc.standaloneSetup(new ExampleSpringController()) } }
You can also setup the whole context if necessary.
import io.restassured.module.mockmvc.RestAssuredMockMvc; import org.junit.Before; import org.junit.runner.RunWith; import org.springframework.beans.factory.annotation.Autowired; import org.springframework.boot.test.context.SpringBootTest; import org.springframework.test.context.junit4.SpringRunner; import org.springframework.web.context.WebApplicationContext; @RunWith(SpringRunner.class) @SpringBootTest(webEnvironment = WebEnvironment.RANDOM_PORT, classes = SomeConfig.class, properties="some=property") public abstract class BaseTestClass { @Autowired WebApplicationContext context; @Before public void setup() { RestAssuredMockMvc.webAppContextSetup(this.context); } }
If you use EXPLICIT mode, you can use a base class to initialize the whole tested app
similarly, as you might find in regular integration tests.
import io.restassured.RestAssured; import org.junit.Before; import org.junit.runner.RunWith; import org.springframework.beans.factory.annotation.Autowired; import org.springframework.boot.test.context.SpringBootTest; import org.springframework.boot.web.server.LocalServerPort import org.springframework.test.context.junit4.SpringRunner; import org.springframework.web.context.WebApplicationContext; @RunWith(SpringRunner.class) @SpringBootTest(webEnvironment = WebEnvironment.RANDOM_PORT, classes = SomeConfig.class, properties="some=property") public abstract class BaseTestClass { @LocalServerPort int port; @Before public void setup() { RestAssured.baseURI = "http://localhost:" + this.port; } }
If you use the JAXRSCLIENT mode, this base class should also contain a protected WebTarget webTarget field. Right
now, the only option to test the JAX-RS API is to start a web server.
If your base classes differ between contracts, you can tell the Spring Cloud Contract plugin which class should get extended by the autogenerated tests. You have two options:
- Follow a convention by providing the
packageWithBaseClasses - provide explicit mapping via
baseClassMappings
By Convention
The convention is such that if you have a contract under (for example)
src/test/resources/contract/foo/bar/baz/ and set the value of the
packageWithBaseClasses property to com.example.base, then Spring Cloud Contract
Verifier assumes that there is a BarBazBase class under the com.example.base package.
In other words, the system takes the last two parts of the package, if they exist, and
forms a class with a Base suffix. This rule takes precedence over baseClassForTests.
Here is an example of how it works in the contracts closure:
<plugin> <groupId>org.springframework.cloud</groupId> <artifactId>spring-cloud-contract-maven-plugin</artifactId> <configuration> <packageWithBaseClasses>hello</packageWithBaseClasses> </configuration> </plugin>
By Mapping
You can manually map a regular expression of the contract’s package to fully qualified
name of the base class for the matched contract. You have to provide a list called
baseClassMappings that consists baseClassMapping objects that takes a
contractPackageRegex to baseClassFQN mapping. Consider the following example:
<plugin> <groupId>org.springframework.cloud</groupId> <artifactId>spring-cloud-contract-maven-plugin</artifactId> <configuration> <baseClassForTests>com.example.FooBase</baseClassForTests> <baseClassMappings> <baseClassMapping> <contractPackageRegex>.*com.*</contractPackageRegex> <baseClassFQN>com.example.TestBase</baseClassFQN> </baseClassMapping> </baseClassMappings> </configuration> </plugin>
Assume that you have contracts under these two locations:
* src/test/resources/contract/com/
* src/test/resources/contract/foo/
By providing the baseClassForTests, we have a fallback in case mapping did not succeed.
(You can also provide the packageWithBaseClasses as a fallback.) That way, the tests
generated from src/test/resources/contract/com/ contracts extend the
com.example.ComBase, whereas the rest of the tests extend com.example.FooBase.
The Spring Cloud Contract Maven Plugin generates verification code in a directory called
/generated-test-sources/contractVerifier and attaches this directory to testCompile
goal.
For Groovy Spock code, use the following:
<plugin> <groupId>org.codehaus.gmavenplus</groupId> <artifactId>gmavenplus-plugin</artifactId> <version>1.5</version> <executions> <execution> <goals> <goal>testCompile</goal> </goals> </execution> </executions> <configuration> <testSources> <testSource> <directory>${project.basedir}/src/test/groovy</directory> <includes> <include>**/*.groovy</include> </includes> </testSource> <testSource> <directory>${project.build.directory}/generated-test-sources/contractVerifier</directory> <includes> <include>**/*.groovy</include> </includes> </testSource> </testSources> </configuration> </plugin>
To ensure that provider side is compliant with defined contracts, you need to invoke
mvn generateTest test.
If you’re using the SCM repository to keep the contracts and
stubs, you might want to automate the step of pushing stubs to
the repository. To do that, it’s enough to add the pushStubsToScm
goal. Example:
<plugin> <groupId>org.springframework.cloud</groupId> <artifactId>spring-cloud-contract-maven-plugin</artifactId> <version>${spring-cloud-contract.version}</version> <extensions>true</extensions> <configuration> <!-- Base class mappings etc. --> <!-- We want to pick contracts from a Git repository --> <contractsRepositoryUrl>git://https://github.com/spring-cloud-samples/spring-cloud-contract-nodejs-contracts-git.git</contractsRepositoryUrl> <!-- We reuse the contract dependency section to set up the path to the folder that contains the contract definitions. In our case the path will be /groupId/artifactId/version/contracts --> <contractDependency> <groupId>${project.groupId}</groupId> <artifactId>${project.artifactId}</artifactId> <version>${project.version}</version> </contractDependency> <!-- The contracts mode can't be classpath --> <contractsMode>REMOTE</contractsMode> </configuration> <executions> <execution> <phase>package</phase> <goals> <!-- By default we will not push the stubs back to SCM, you have to explicitly add it as a goal --> <goal>pushStubsToScm</goal> </goals> </execution> </executions> </plugin>
Under Section 95.6, “Using the SCM Stub Downloader” you can find all possible
configuration options that you can pass either via
the <configuration><contractProperties> map, a system property
or an environment variable.
If you see the following exception while using STS:

When you click on the error marker you should see something like this:
plugin:1.1.0.M1:convert:default-convert:process-test-resources) org.apache.maven.plugin.PluginExecutionException: Execution default-convert of goal org.springframework.cloud:spring- cloud-contract-maven-plugin:1.1.0.M1:convert failed. at org.apache.maven.plugin.DefaultBuildPluginManager.executeMojo(DefaultBuildPluginManager.java:145) at org.eclipse.m2e.core.internal.embedder.MavenImpl.execute(MavenImpl.java:331) at org.eclipse.m2e.core.internal.embedder.MavenImpl$11.call(MavenImpl.java:1362) at ... org.eclipse.core.internal.jobs.Worker.run(Worker.java:55) Caused by: java.lang.NullPointerException at org.eclipse.m2e.core.internal.builder.plexusbuildapi.EclipseIncrementalBuildContext.hasDelta(EclipseIncrementalBuildContext.java:53) at org.sonatype.plexus.build.incremental.ThreadBuildContext.hasDelta(ThreadBuildContext.java:59) at
In order to fix this issue, provide the following section in your pom.xml:
<build> <pluginManagement> <plugins> <!--This plugin's configuration is used to store Eclipse m2e settings only. It has no influence on the Maven build itself. --> <plugin> <groupId>org.eclipse.m2e</groupId> <artifactId>lifecycle-mapping</artifactId> <version>1.0.0</version> <configuration> <lifecycleMappingMetadata> <pluginExecutions> <pluginExecution> <pluginExecutionFilter> <groupId>org.springframework.cloud</groupId> <artifactId>spring-cloud-contract-maven-plugin</artifactId> <versionRange>[1.0,)</versionRange> <goals> <goal>convert</goal> </goals> </pluginExecutionFilter> <action> <execute /> </action> </pluginExecution> </pluginExecutions> </lifecycleMappingMetadata> </configuration> </plugin> </plugins> </pluginManagement> </build>
You can select the Spock Framework for creating and executing the auto-generated contract verification tests with both Maven and Gradle plugin. However, whereas with Gradle its really straightforward, in Maven you will require some additional setup in order to make the tests compile and execute properly.
First of all, you will have to use a plugin, such as GMavenPlus plugin, to add Groovy to your project. In GMavenPlus plugin, you will need to explicitly set test sources, including both the path where your base test classes are defined and the path were the generated contract tests are added. Please refer to the example below:
If you uphold to the Spock convention of ending the test class names with Spec, you will also need to adjust your Maven
Surefire plugin setup, like in the following example:
The Maven and Gradle plugin that add the tasks that create the stubs jar for you. One problem that arises is that, when reusing the stubs, you can mistakenly import all of that stub’s dependencies. When building a Maven artifact, even though you have a couple of different jars, all of them share one pom:
├── github-webhook-0.0.1.BUILD-20160903.075506-1-stubs.jar ├── github-webhook-0.0.1.BUILD-20160903.075506-1-stubs.jar.sha1 ├── github-webhook-0.0.1.BUILD-20160903.075655-2-stubs.jar ├── github-webhook-0.0.1.BUILD-20160903.075655-2-stubs.jar.sha1 ├── github-webhook-0.0.1.BUILD-SNAPSHOT.jar ├── github-webhook-0.0.1.BUILD-SNAPSHOT.pom ├── github-webhook-0.0.1.BUILD-SNAPSHOT-stubs.jar ├── ... └── ...
There are three possibilities of working with those dependencies so as not to have any issues with transitive dependencies:
- Mark all application dependencies as optional
- Create a separate artifactid for the stubs
- Exclude dependencies on the consumer side
Mark all application dependencies as optional
If, in the github-webhook application, you mark all of your dependencies as optional,
when you include the github-webhook stubs in another application (or when that
dependency gets downloaded by Stub Runner) then, since all of the dependencies are
optional, they will not get downloaded.
Create a separate artifactid for the stubs
If you create a separate artifactid, then you can set it up in whatever way you wish.
For example, you might decide to have no dependencies at all.
Exclude dependencies on the consumer side
As a consumer, if you add the stub dependency to your classpath, you can explicitly exclude the unwanted dependencies.
You can handle scenarios with Spring Cloud Contract Verifier. All you need to do is to stick to the proper naming convention while creating your contracts. The convention requires including an order number followed by an underscore. This will work regardles of whether you’re working with YAML or Groovy. Example:
my_contracts_dir\
scenario1\
1_login.groovy
2_showCart.groovy
3_logout.groovySuch a tree causes Spring Cloud Contract Verifier to generate WireMock’s scenario with a
name of scenario1 and the three following steps:
- login marked as
Startedpointing to… - showCart marked as
Step1pointing to… - logout marked as
Step2which will close the scenario.
More details about WireMock scenarios can be found at http://wiremock.org/docs/stateful-behaviour/
Spring Cloud Contract Verifier also generates tests with a guaranteed order of execution.
We’re publishing a springcloud/spring-cloud-contract Docker image
that contains a project that will generate tests and execute them in EXPLICIT mode
against a running application.
| Tip |
|---|---|
The |
Since the Docker image can be used by non JVM projects, it’s good to explain the basic terms behind Spring Cloud Contract packaging defaults.
Part of the following definitions were taken from the Maven Glossary
Project: Maven thinks in terms of projects. Everything that you will build are projects. Those projects follow a well defined “Project Object Model”. Projects can depend on other projects, in which case the latter are called “dependencies”. A project may consistent of several subprojects, however these subprojects are still treated equally as projects.Artifact: An artifact is something that is either produced or used by a project. Examples of artifacts produced by Maven for a project include: JARs, source and binary distributions. Each artifact is uniquely identified by a group id and an artifact ID which is unique within a group.JAR: JAR stands for Java ARchive. It’s a format based on the ZIP file format. Spring Cloud Contract packages the contracts and generated stubs in a JAR file.GroupId: A group ID is a universally unique identifier for a project. While this is often just the project name (eg. commons-collections), it is helpful to use a fully-qualified package name to distinguish it from other projects with a similar name (eg. org.apache.maven). Typically, when published to the Artifact Manager, theGroupIdwill get slash separated and form part of the URL. E.g. for group idcom.exampleand artifact idapplicationwould be/com/example/application/.Classifier: The Maven dependency notation looks as follows:groupId:artifactId:version:classifier. The classifier is additional suffix passed to the dependency. E.g.stubs,sources. The same dependency e.g.com.example:applicationcan produce multiple artifacts that differ from each other with the classifier.Artifact manager: When you generate binaries / sources / packages, you would like them to be available for others to download / reference or reuse. In case of the JVM world those artifacts would be JARs, for Ruby these are gems and for Docker those would be Docker images. You can store those artifacts in a manager. Examples of such managers can be Artifactory or Nexus.
The image searches for contracts under the /contracts folder.
The output from running the tests will be available under
/spring-cloud-contract/build folder (it’s useful for debugging
purposes).
It’s enough for you to mount your contracts, pass the environment variables and the image will:
- generate the contract tests
- execute the tests against the provided URL
- generate the WireMock stubs
- (optional - turned on by default) publish the stubs to a Artifact Manager
The Docker image requires some environment variables to point to your running application, to the Artifact manager instance etc.
PROJECT_GROUP- your project’s group id. Defaults tocom.examplePROJECT_VERSION- your project’s version. Defaults to0.0.1-SNAPSHOTPROJECT_NAME- artifact id. Defaults toexampleREPO_WITH_BINARIES_URL- URL of your Artifact Manager. Defaults tohttp://localhost:8081/artifactory/libs-release-localwhich is the default URL of Artifactory running locallyREPO_WITH_BINARIES_USERNAME- (optional) username when the Artifact Manager is securedREPO_WITH_BINARIES_PASSWORD- (optional) password when the Artifact Manager is securedPUBLISH_ARTIFACTS- if set totruethen will publish artifact to binary storage. Defaults totrue.
These environment variables are used when contracts lay in an external repository. To enable
this feature you must set the EXTERNAL_CONTRACTS_ARTIFACT_ID environment variable.
EXTERNAL_CONTRACTS_GROUP_ID- group id of the project with contracts. Defaults tocom.exampleEXTERNAL_CONTRACTS_ARTIFACT_ID- artifact id of the project with contracts.EXTERNAL_CONTRACTS_CLASSIFIER- classifier of the project with contracts. Empty by defaultEXTERNAL_CONTRACTS_VERSION- version of the project with contracts. Defaults to+, equivalent to picking the latestEXTERNAL_CONTRACTS_REPO_WITH_BINARIES_URL- URL of your Artifact Manager. Defaults to value ofREPO_WITH_BINARIES_URLenv var. If that’s not set, defaults tohttp://localhost:8081/artifactory/libs-release-localwhich is the default URL of Artifactory running locallyEXTERNAL_CONTRACTS_PATH- path to contracts for the given project, inside the project with contracts. Defaults to slash separatedEXTERNAL_CONTRACTS_GROUP_IDconcatenated with/andEXTERNAL_CONTRACTS_ARTIFACT_ID. E.g. for group idfoo.barand artifact idbaz, would result infoo/bar/bazcontracts path.EXTERNAL_CONTRACTS_WORK_OFFLINE- if set totruethen will retrieve artifact with contracts from the container’s.m2. Mount your local.m2as a volume available at the container’s/root/.m2path. You must not set bothEXTERNAL_CONTRACTS_WORK_OFFLINEandEXTERNAL_CONTRACTS_REPO_WITH_BINARIES_URL.
These environment variables are used when tests are executed:
APPLICATION_BASE_URL- url against which tests should be executed. Remember that it has to be accessible from the Docker container (e.g.localhostwill not work)APPLICATION_USERNAME- (optional) username for basic authentication to your applicationAPPLICATION_PASSWORD- (optional) password for basic authentication to your application
Let’s take a look at a simple MVC application
$ git clone https://github.com/spring-cloud-samples/spring-cloud-contract-nodejs
$ cd bookstoreThe contracts are available under /contracts folder.
Since we want to run tests, we could just execute:
$ npm testhowever, for learning purposes, let’s split it into pieces:
# Stop docker infra (nodejs, artifactory) $ ./stop_infra.sh # Start docker infra (nodejs, artifactory) $ ./setup_infra.sh # Kill & Run app $ pkill -f "node app" $ nohup node app & # Prepare environment variables $ SC_CONTRACT_DOCKER_VERSION="..." $ APP_IP="192.168.0.100" $ APP_PORT="3000" $ ARTIFACTORY_PORT="8081" $ APPLICATION_BASE_URL="http://${APP_IP}:${APP_PORT}" $ ARTIFACTORY_URL="http://${APP_IP}:${ARTIFACTORY_PORT}/artifactory/libs-release-local" $ CURRENT_DIR="$( pwd )" $ CURRENT_FOLDER_NAME=${PWD##*/} $ PROJECT_VERSION="0.0.1.RELEASE" # Execute contract tests $ docker run --rm -e "APPLICATION_BASE_URL=${APPLICATION_BASE_URL}" -e "PUBLISH_ARTIFACTS=true" -e "PROJECT_NAME=${CURRENT_FOLDER_NAME}" -e "REPO_WITH_BINARIES_URL=${ARTIFACTORY_URL}" -e "PROJECT_VERSION=${PROJECT_VERSION}" -v "${CURRENT_DIR}/contracts/:/contracts:ro" -v "${CURRENT_DIR}/node_modules/spring-cloud-contract/output:/spring-cloud-contract-output/" springcloud/spring-cloud-contract:"${SC_CONTRACT_DOCKER_VERSION}" # Kill app $ pkill -f "node app"
What will happen is that via bash scripts:
- infrastructure will be set up (MongoDb, Artifactory). In real life scenario you would just run the NodeJS application with mocked database. In this example we want to show how we can benefit from Spring Cloud Contract in no time.
due to those constraints the contracts also represent the stateful situation
- first request is a
POSTthat causes data to get inserted to the database - second request is a
GETthat returns a list of data with 1 previously inserted element
- first request is a
- the NodeJS application will be started (on port
3000) contract tests will be generated via Docker and tests will be executed against the running application
- the contracts will be taken from
/contractsfolder. - the output of the test execution is available under
node_modules/spring-cloud-contract/output.
- the contracts will be taken from
- the stubs will be uploaded to Artifactory. You can check them out under http://localhost:8081/artifactory/libs-release-local/com/example/bookstore/0.0.1.RELEASE/ . The stubs will be here http://localhost:8081/artifactory/libs-release-local/com/example/bookstore/0.0.1.RELEASE/bookstore-0.0.1.RELEASE-stubs.jar.
To see how the client side looks like check out the Section 91.9, “Stub Runner Docker” section.
Spring Cloud Contract Verifier lets you verify applications that use messaging as a means of communication. All of the integrations shown in this document work with Spring, but you can also create one of your own and use that.
You can use one of the following four integration configurations:
- Apache Camel
- Spring Integration
- Spring Cloud Stream
- Spring AMQP
Since we use Spring Boot, if you have added one of these libraries to the classpath, all the messaging configuration is automatically set up.
| Important |
|---|---|
Remember to put |
| Important |
|---|---|
If you want to use Spring Cloud Stream, remember to add a dependency on
|
Maven.
<dependency> <groupId>org.springframework.cloud</groupId> <artifactId>spring-cloud-stream-test-support</artifactId> <scope>test</scope> </dependency>
Gradle.
testCompile "org.springframework.cloud:spring-cloud-stream-test-support"
The main interface used by the tests is
org.springframework.cloud.contract.verifier.messaging.MessageVerifier.
It defines how to send and receive messages. You can create your own implementation to
achieve the same goal.
In a test, you can inject a ContractVerifierMessageExchange to send and receive
messages that follow the contract. Then add @AutoConfigureMessageVerifier to your test.
Here’s an example:
@RunWith(SpringTestRunner.class) @SpringBootTest @AutoConfigureMessageVerifier public static class MessagingContractTests { @Autowired private MessageVerifier verifier; ... }
| Note |
|---|---|
If your tests require stubs as well, then |
Having the input or outputMessage sections in your DSL results in creation of tests
on the publisher’s side. By default, JUnit 4 tests are created. However, there is also a
possibility to create JUnit 5 or Spock tests.
There are 3 main scenarios that we should take into consideration:
- Scenario 1: There is no input message that produces an output message. The output message is triggered by a component inside the application (for example, scheduler).
- Scenario 2: The input message triggers an output message.
- Scenario 3: The input message is consumed and there is no output message.
| Important |
|---|---|
The destination passed to |
For the given contract:
Groovy DSL.
def contractDsl = Contract.make {
label 'some_label'
input {
triggeredBy('bookReturnedTriggered()')
}
outputMessage {
sentTo('activemq:output')
body('''{ "bookName" : "foo" }''')
headers {
header('BOOK-NAME', 'foo')
messagingContentType(applicationJson())
}
}
}
YAML.
label: some_label
input:
triggeredBy: bookReturnedTriggered
outputMessage:
sentTo: activemq:output
body:
bookName: foo
headers:
BOOK-NAME: foo
contentType: application/json
The following JUnit test is created:
''' // when: bookReturnedTriggered(); // then: ContractVerifierMessage response = contractVerifierMessaging.receive("activemq:output"); assertThat(response).isNotNull(); assertThat(response.getHeader("BOOK-NAME")).isNotNull(); assertThat(response.getHeader("BOOK-NAME").toString()).isEqualTo("foo"); assertThat(response.getHeader("contentType")).isNotNull(); assertThat(response.getHeader("contentType").toString()).isEqualTo("application/json"); // and: DocumentContext parsedJson = JsonPath.parse(contractVerifierObjectMapper.writeValueAsString(response.getPayload())); assertThatJson(parsedJson).field("bookName").isEqualTo("foo"); '''
And the following Spock test would be created:
''' when: bookReturnedTriggered() then: ContractVerifierMessage response = contractVerifierMessaging.receive('activemq:output') assert response != null response.getHeader('BOOK-NAME')?.toString() == 'foo' response.getHeader('contentType')?.toString() == 'application/json' and: DocumentContext parsedJson = JsonPath.parse(contractVerifierObjectMapper.writeValueAsString(response.payload)) assertThatJson(parsedJson).field("bookName").isEqualTo("foo") '''
For the given contract:
Groovy DSL.
def contractDsl = Contract.make {
label 'some_label'
input {
messageFrom('jms:input')
messageBody([
bookName: 'foo'
])
messageHeaders {
header('sample', 'header')
}
}
outputMessage {
sentTo('jms:output')
body([
bookName: 'foo'
])
headers {
header('BOOK-NAME', 'foo')
}
}
}
YAML.
label: some_label
input:
messageFrom: jms:input
messageBody:
bookName: 'foo'
messageHeaders:
sample: header
outputMessage:
sentTo: jms:output
body:
bookName: foo
headers:
BOOK-NAME: foo
The following JUnit test is created:
''' // given: ContractVerifierMessage inputMessage = contractVerifierMessaging.create( "{\\"bookName\\":\\"foo\\"}" , headers() .header("sample", "header")); // when: contractVerifierMessaging.send(inputMessage, "jms:input"); // then: ContractVerifierMessage response = contractVerifierMessaging.receive("jms:output"); assertThat(response).isNotNull(); assertThat(response.getHeader("BOOK-NAME")).isNotNull(); assertThat(response.getHeader("BOOK-NAME").toString()).isEqualTo("foo"); // and: DocumentContext parsedJson = JsonPath.parse(contractVerifierObjectMapper.writeValueAsString(response.getPayload())); assertThatJson(parsedJson).field("bookName").isEqualTo("foo"); '''
And the following Spock test would be created:
"""\ given: ContractVerifierMessage inputMessage = contractVerifierMessaging.create( '''{"bookName":"foo"}''', ['sample': 'header'] ) when: contractVerifierMessaging.send(inputMessage, 'jms:input') then: ContractVerifierMessage response = contractVerifierMessaging.receive('jms:output') assert response !- null response.getHeader('BOOK-NAME')?.toString() == 'foo' and: DocumentContext parsedJson = JsonPath.parse(contractVerifierObjectMapper.writeValueAsString(response.payload)) assertThatJson(parsedJson).field("bookName").isEqualTo("foo") """
For the given contract:
Groovy DSL.
def contractDsl = Contract.make {
label 'some_label'
input {
messageFrom('jms:delete')
messageBody([
bookName: 'foo'
])
messageHeaders {
header('sample', 'header')
}
assertThat('bookWasDeleted()')
}
}
YAML.
label: some_label
input:
messageFrom: jms:delete
messageBody:
bookName: 'foo'
messageHeaders:
sample: header
assertThat: bookWasDeleted()
The following JUnit test is created:
''' // given: ContractVerifierMessage inputMessage = contractVerifierMessaging.create( "{\\"bookName\\":\\"foo\\"}" , headers() .header("sample", "header")); // when: contractVerifierMessaging.send(inputMessage, "jms:delete"); // then: bookWasDeleted(); '''
And the following Spock test would be created:
''' given: ContractVerifierMessage inputMessage = contractVerifierMessaging.create( \'\'\'{"bookName":"foo"}\'\'\', ['sample': 'header'] ) when: contractVerifierMessaging.send(inputMessage, 'jms:delete') then: noExceptionThrown() bookWasDeleted() '''
Unlike the HTTP part, in messaging, we need to publish the Groovy DSL inside the JAR with a stub. Then it is parsed on the consumer side and proper stubbed routes are created.
For more information, see Chapter 92, Stub Runner for Messaging section.
Maven.
<dependencies> <dependency> <groupId>org.springframework.cloud</groupId> <artifactId>spring-cloud-starter-stream-rabbit</artifactId> </dependency> <dependency> <groupId>org.springframework.cloud</groupId> <artifactId>spring-cloud-starter-contract-stub-runner</artifactId> <scope>test</scope> </dependency> <dependency> <groupId>org.springframework.cloud</groupId> <artifactId>spring-cloud-stream-test-support</artifactId> <scope>test</scope> </dependency> </dependencies> <dependencyManagement> <dependencies> <dependency> <groupId>org.springframework.cloud</groupId> <artifactId>spring-cloud-dependencies</artifactId> <version>Greenwich.BUILD-SNAPSHOT</version> <type>pom</type> <scope>import</scope> </dependency> </dependencies> </dependencyManagement>
Gradle.
ext {
contractsDir = file("mappings")
stubsOutputDirRoot = file("${project.buildDir}/production/${project.name}-stubs/")
}
// Automatically added by plugin:
// copyContracts - copies contracts to the output folder from which JAR will be created
// verifierStubsJar - JAR with a provided stub suffix
// the presented publication is also added by the plugin but you can modify it as you wish
publishing {
publications {
stubs(MavenPublication) {
artifactId "${project.name}-stubs"
artifact verifierStubsJar
}
}
}
One of the issues that you might encounter while using Spring Cloud Contract Verifier is passing the generated WireMock JSON stubs from the server side to the client side (or to various clients). The same takes place in terms of client-side generation for messaging.
Copying the JSON files and setting the client side for messaging manually is out of the question. That is why we introduced Spring Cloud Contract Stub Runner. It can automatically download and run the stubs for you.
Add the additional snapshot repository to your build.gradle file to use snapshot
versions, which are automatically uploaded after every successful build:
Maven.
<repositories> <repository> <id>spring-snapshots</id> <name>Spring Snapshots</name> <url>https://repo.spring.io/snapshot</url> <snapshots> <enabled>true</enabled> </snapshots> </repository> <repository> <id>spring-milestones</id> <name>Spring Milestones</name> <url>https://repo.spring.io/milestone</url> <snapshots> <enabled>false</enabled> </snapshots> </repository> <repository> <id>spring-releases</id> <name>Spring Releases</name> <url>https://repo.spring.io/release</url> <snapshots> <enabled>false</enabled> </snapshots> </repository> </repositories> <pluginRepositories> <pluginRepository> <id>spring-snapshots</id> <name>Spring Snapshots</name> <url>https://repo.spring.io/snapshot</url> <snapshots> <enabled>true</enabled> </snapshots> </pluginRepository> <pluginRepository> <id>spring-milestones</id> <name>Spring Milestones</name> <url>https://repo.spring.io/milestone</url> <snapshots> <enabled>false</enabled> </snapshots> </pluginRepository> <pluginRepository> <id>spring-releases</id> <name>Spring Releases</name> <url>https://repo.spring.io/release</url> <snapshots> <enabled>false</enabled> </snapshots> </pluginRepository> </pluginRepositories>
Gradle.
buildscript {
repositories {
mavenCentral()
mavenLocal()
maven { url "http://repo.spring.io/snapshot" }
maven { url "http://repo.spring.io/milestone" }
maven { url "http://repo.spring.io/release" }
}
The easiest approach would be to centralize the way stubs are kept. For example, you can keep them as jars in a Maven repository.
| Tip |
|---|---|
For both Maven and Gradle, the setup comes ready to work. However, you can customize it if you want to. |
Maven.
<!-- First disable the default jar setup in the properties section --> <!-- we don't want the verifier to do a jar for us --> <spring.cloud.contract.verifier.skip>true</spring.cloud.contract.verifier.skip> <!-- Next add the assembly plugin to your build --> <!-- we want the assembly plugin to generate the JAR --> <plugin> <groupId>org.apache.maven.plugins</groupId> <artifactId>maven-assembly-plugin</artifactId> <executions> <execution> <id>stub</id> <phase>prepare-package</phase> <goals> <goal>single</goal> </goals> <inherited>false</inherited> <configuration> <attach>true</attach> <descriptors> $../../../../src/assembly/stub.xml </descriptors> </configuration> </execution> </executions> </plugin> <!-- Finally setup your assembly. Below you can find the contents of src/main/assembly/stub.xml --> <assembly xmlns="http://maven.apache.org/plugins/maven-assembly-plugin/assembly/1.1.3" xmlns:xsi="http://www.w3.org/2001/XMLSchema-instance" xsi:schemaLocation="http://maven.apache.org/plugins/maven-assembly-plugin/assembly/1.1.3 http://maven.apache.org/xsd/assembly-1.1.3.xsd"> <id>stubs</id> <formats> <format>jar</format> </formats> <includeBaseDirectory>false</includeBaseDirectory> <fileSets> <fileSet> <directory>src/main/java</directory> <outputDirectory>/</outputDirectory> <includes> <include>**com/example/model/*.*</include> </includes> </fileSet> <fileSet> <directory>${project.build.directory}/classes</directory> <outputDirectory>/</outputDirectory> <includes> <include>**com/example/model/*.*</include> </includes> </fileSet> <fileSet> <directory>${project.build.directory}/snippets/stubs</directory> <outputDirectory>META-INF/${project.groupId}/${project.artifactId}/${project.version}/mappings</outputDirectory> <includes> <include>**/*</include> </includes> </fileSet> <fileSet> <directory>$../../../../src/test/resources/contracts</directory> <outputDirectory>META-INF/${project.groupId}/${project.artifactId}/${project.version}/contracts</outputDirectory> <includes> <include>**/*.groovy</include> </includes> </fileSet> </fileSets> </assembly>
Gradle.
ext {
contractsDir = file("mappings")
stubsOutputDirRoot = file("${project.buildDir}/production/${project.name}-stubs/")
}
// Automatically added by plugin:
// copyContracts - copies contracts to the output folder from which JAR will be created
// verifierStubsJar - JAR with a provided stub suffix
// the presented publication is also added by the plugin but you can modify it as you wish
publishing {
publications {
stubs(MavenPublication) {
artifactId "${project.name}-stubs"
artifact verifierStubsJar
}
}
}
Runs stubs for service collaborators. Treating stubs as contracts of services allows to use stub-runner as an implementation of Consumer Driven Contracts.
Stub Runner allows you to automatically download the stubs of the provided dependencies (or pick those from the classpath), start WireMock servers for them and feed them with proper stub definitions. For messaging, special stub routes are defined.
You can pick the following options of acquiring stubs
- Aether based solution that downloads JARs with stubs from Artifactory / Nexus
- Classpath scanning solution that searches classpath via pattern to retrieve stubs
- Write your own implementation of the
org.springframework.cloud.contract.stubrunner.StubDownloaderBuilderfor full customization
The latter example is described in the Custom Stub Runner section.
You can control the stub downloading via the stubsMode switch. It picks value from the
StubRunnerProperties.StubsMode enum. You can use the following options
StubRunnerProperties.StubsMode.CLASSPATH(default value) - will pick stubs from the classpathStubRunnerProperties.StubsMode.LOCAL- will pick stubs from a local storage (e.g..m2)StubRunnerProperties.StubsMode.REMOTE- will pick stubs from a remote location
Example:
@AutoConfigureStubRunner(repositoryRoot="http://foo.bar", ids = "com.example:beer-api-producer:+:stubs:8095", stubsMode = StubRunnerProperties.StubsMode.LOCAL)
If you set the stubsMode property to StubRunnerProperties.StubsMode.CLASSPATH
(or set nothing since CLASSPATH is the default value) then classpath will get scanned.
Let’s look at the following example:
@AutoConfigureStubRunner(ids = {
"com.example:beer-api-producer:+:stubs:8095",
"com.example.foo:bar:1.0.0:superstubs:8096"
})If you’ve added the dependencies to your classpath
Maven.
<dependency> <groupId>com.example</groupId> <artifactId>beer-api-producer-restdocs</artifactId> <classifier>stubs</classifier> <version>0.0.1-SNAPSHOT</version> <scope>test</scope> <exclusions> <exclusion> <groupId>*</groupId> <artifactId>*</artifactId> </exclusion> </exclusions> </dependency> <dependency> <groupId>com.example.foo</groupId> <artifactId>bar</artifactId> <classifier>superstubs</classifier> <version>1.0.0</version> <scope>test</scope> <exclusions> <exclusion> <groupId>*</groupId> <artifactId>*</artifactId> </exclusion> </exclusions> </dependency>
Gradle.
testCompile("com.example:beer-api-producer-restdocs:0.0.1-SNAPSHOT:stubs") { transitive = false } testCompile("com.example.foo:bar:1.0.0:superstubs") { transitive = false }
Then the following locations on your classpath will get scanned. For com.example:beer-api-producer-restdocs
- /META-INF/com.example/beer-api-producer-restdocs/*/.*
- /contracts/com.example/beer-api-producer-restdocs/*/.*
- /mappings/com.example/beer-api-producer-restdocs/*/.*
and com.example.foo:bar
- /META-INF/com.example.foo/bar/*/.*
- /contracts/com.example.foo/bar/*/.*
- /mappings/com.example.foo/bar/*/.*
| Tip |
|---|---|
As you can see you have to explicitly provide the group and artifact ids when packaging the producer stubs. |
The producer would setup the contracts like this:
└── src
└── test
└── resources
└── contracts
└── com.example
└── beer-api-producer-restdocs
└── nested
└── contract3.groovyTo achieve proper stub packaging.
Or using the Maven assembly plugin or
Gradle Jar task you have to create the following
structure in your stubs jar.
└── META-INF
└── com.example
└── beer-api-producer-restdocs
└── 2.0.0
├── contracts
│ └── nested
│ └── contract2.groovy
└── mappings
└── mapping.jsonBy maintaining this structure classpath gets scanned and you can profit from the messaging / HTTP stubs without the need to download artifacts.
Stub Runner has a notion of a HttpServerStub that abstracts the underlaying
concrete implementation of the HTTP server (e.g. WireMock is one of the implementations).
Sometimes, you need to perform some additional tuning of the stub servers,
that is concrete for the given implementation. To do that, Stub Runner gives you
the httpServerStubConfigurer property that is available in the annotation,
JUnit rule, and is accessible via system properties, where you can provide
your implementation of the org.springframework.cloud.contract.stubrunner.HttpServerStubConfigurer interface. The implementations can alter
the configuration files for the given HTTP server stub.
Spring Cloud Contract Stub Runner comes with an implementation that you
can extend, for WireMock - org.springframework.cloud.contract.stubrunner.provider.wiremock.WireMockHttpServerStubConfigurer. In the configure method
you can provide your own, custom configuration for the given stub. The use
case might be starting WireMock for the given artifact id, on an HTTPs port. Example:
WireMockHttpServerStubConfigurer implementation.
@CompileStatic static class HttpsForFraudDetection extends WireMockHttpServerStubConfigurer { private static final Log log = LogFactory.getLog(HttpsForFraudDetection) @Override WireMockConfiguration configure(WireMockConfiguration httpStubConfiguration, HttpServerStubConfiguration httpServerStubConfiguration) { if (httpServerStubConfiguration.stubConfiguration.artifactId == "fraudDetectionServer") { int httpsPort = SocketUtils.findAvailableTcpPort() log.info("Will set HTTPs port [" + httpsPort + "] for fraud detection server") return httpStubConfiguration .httpsPort(httpsPort) } return httpStubConfiguration } }
You can then reuse it via the annotation
@AutoConfigureStubRunner(mappingsOutputFolder = "target/outputmappings/",
httpServerStubConfigurer = HttpsForFraudDetection)Whenever an https port is found, it will take precedence over the http one.
You can set the following options to the main class:
-c, --classifier Suffix for the jar containing stubs (e. g. 'stubs' if the stub jar would have a 'stubs' classifier for stubs: foobar-stubs ). Defaults to 'stubs' (default: stubs) --maxPort, --maxp <Integer> Maximum port value to be assigned to the WireMock instance. Defaults to 15000 (default: 15000) --minPort, --minp <Integer> Minimum port value to be assigned to the WireMock instance. Defaults to 10000 (default: 10000) -p, --password Password to user when connecting to repository --phost, --proxyHost Proxy host to use for repository requests --pport, --proxyPort [Integer] Proxy port to use for repository requests -r, --root Location of a Jar containing server where you keep your stubs (e.g. http: //nexus. net/content/repositories/repository) -s, --stubs Comma separated list of Ivy representation of jars with stubs. Eg. groupid:artifactid1,groupid2: artifactid2:classifier --sm, --stubsMode Stubs mode to be used. Acceptable values [CLASSPATH, LOCAL, REMOTE] -u, --username Username to user when connecting to repository
Stubs are defined in JSON documents, whose syntax is defined in WireMock documentation
Example:
{
"request": {
"method": "GET",
"url": "/ping"
},
"response": {
"status": 200,
"body": "pong",
"headers": {
"Content-Type": "text/plain"
}
}
}Every stubbed collaborator exposes list of defined mappings under __/admin/ endpoint.
You can also use the mappingsOutputFolder property to dump the mappings to files.
For annotation based approach it would look like this
@AutoConfigureStubRunner(ids="a.b.c:loanIssuance,a.b.c:fraudDetectionServer", mappingsOutputFolder = "target/outputmappings/")
and for the JUnit approach like this:
@ClassRule @Shared StubRunnerRule rule = new StubRunnerRule() .repoRoot("http://some_url") .downloadStub("a.b.c", "loanIssuance") .downloadStub("a.b.c:fraudDetectionServer") .withMappingsOutputFolder("target/outputmappings")
Then if you check out the folder target/outputmappings you would see the following structure
. ├── fraudDetectionServer_13705 └── loanIssuance_12255
That means that there were two stubs registered. fraudDetectionServer was registered at port 13705
and loanIssuance at port 12255. If we take a look at one of the files we would see (for WireMock)
mappings available for the given server:
[{ "id" : "f9152eb9-bf77-4c38-8289-90be7d10d0d7", "request" : { "url" : "/name", "method" : "GET" }, "response" : { "status" : 200, "body" : "fraudDetectionServer" }, "uuid" : "f9152eb9-bf77-4c38-8289-90be7d10d0d7" }, ... ]
Stub Runner comes with a JUnit rule thanks to which you can very easily download and run stubs for given group and artifact id:
@ClassRule public static StubRunnerRule rule = new StubRunnerRule().repoRoot(repoRoot()) .stubsMode(StubRunnerProperties.StubsMode.REMOTE) .downloadStub("org.springframework.cloud.contract.verifier.stubs", "loanIssuance") .downloadStub( "org.springframework.cloud.contract.verifier.stubs:fraudDetectionServer"); @BeforeClass @AfterClass public static void setupProps() { System.clearProperty("stubrunner.repository.root"); System.clearProperty("stubrunner.classifier"); }
There’s also a StubRunnerExtension available for JUnit 5. StubRunnerRule and StubRunnerExtension work in a very
similar fashion. After the rule/ extension is executed, Stub Runner connects to your Maven repository and for the given list of dependencies tries to:
- download them
- cache them locally
- unzip them to a temporary folder
- start a WireMock server for each Maven dependency on a random port from the provided range of ports / provided port
- feed the WireMock server with all JSON files that are valid WireMock definitions
- can also send messages (remember to pass an implementation of
MessageVerifierinterface)
Stub Runner uses Eclipse Aether mechanism to download the Maven dependencies. Check their docs for more information.
Since the StubRunnerRule and StubRunnerExtension implement the StubFinder they allow you to find the started stubs:
package org.springframework.cloud.contract.stubrunner; import java.net.URL; import java.util.Collection; import java.util.Map; import org.springframework.cloud.contract.spec.Contract; /** * Contract for finding registered stubs. * * @author Marcin Grzejszczak */ public interface StubFinder extends StubTrigger { /** * For the given groupId and artifactId tries to find the matching URL of the running * stub. * @param groupId - might be null. In that case a search only via artifactId takes * place * @param artifactId - artifact id of the stub * @return URL of a running stub or throws exception if not found * @throws StubNotFoundException in case of not finding a stub */ URL findStubUrl(String groupId, String artifactId) throws StubNotFoundException; /** * For the given Ivy notation {@code [groupId]:artifactId:[version]:[classifier]} * tries to find the matching URL of the running stub. You can also pass only * {@code artifactId}. * @param ivyNotation - Ivy representation of the Maven artifact * @return URL of a running stub or throws exception if not found * @throws StubNotFoundException in case of not finding a stub */ URL findStubUrl(String ivyNotation) throws StubNotFoundException; /** * @return all running stubs */ RunningStubs findAllRunningStubs(); /** * @return the list of Contracts */ Map<StubConfiguration, Collection<Contract>> getContracts(); }
Example of usage in Spock tests:
@ClassRule @Shared StubRunnerRule rule = new StubRunnerRule() .stubsMode(StubRunnerProperties.StubsMode.REMOTE) .repoRoot(StubRunnerRuleSpec.getResource("/m2repo/repository").toURI().toString()) .downloadStub("org.springframework.cloud.contract.verifier.stubs", "loanIssuance") .downloadStub("org.springframework.cloud.contract.verifier.stubs:fraudDetectionServer") .withMappingsOutputFolder("target/outputmappingsforrule") def 'should start WireMock servers'() { expect: 'WireMocks are running' rule.findStubUrl('org.springframework.cloud.contract.verifier.stubs', 'loanIssuance') != null rule.findStubUrl('loanIssuance') != null rule.findStubUrl('loanIssuance') == rule.findStubUrl('org.springframework.cloud.contract.verifier.stubs', 'loanIssuance') rule.findStubUrl('org.springframework.cloud.contract.verifier.stubs:fraudDetectionServer') != null and: rule.findAllRunningStubs().isPresent('loanIssuance') rule.findAllRunningStubs().isPresent('org.springframework.cloud.contract.verifier.stubs', 'fraudDetectionServer') rule.findAllRunningStubs().isPresent('org.springframework.cloud.contract.verifier.stubs:fraudDetectionServer') and: 'Stubs were registered' "${rule.findStubUrl('loanIssuance').toString()}/name".toURL().text == 'loanIssuance' "${rule.findStubUrl('fraudDetectionServer').toString()}/name".toURL().text == 'fraudDetectionServer' } def 'should output mappings to output folder'() { when: def url = rule.findStubUrl('fraudDetectionServer') then: new File("target/outputmappingsforrule", "fraudDetectionServer_${url.port}").exists() }
Example of usage in JUnit tests:
@Test public void should_start_wiremock_servers() throws Exception { // expect: 'WireMocks are running' then(rule.findStubUrl("org.springframework.cloud.contract.verifier.stubs", "loanIssuance")).isNotNull(); then(rule.findStubUrl("loanIssuance")).isNotNull(); then(rule.findStubUrl("loanIssuance")).isEqualTo(rule.findStubUrl( "org.springframework.cloud.contract.verifier.stubs", "loanIssuance")); then(rule.findStubUrl( "org.springframework.cloud.contract.verifier.stubs:fraudDetectionServer")) .isNotNull(); // and: then(rule.findAllRunningStubs().isPresent("loanIssuance")).isTrue(); then(rule.findAllRunningStubs().isPresent( "org.springframework.cloud.contract.verifier.stubs", "fraudDetectionServer")).isTrue(); then(rule.findAllRunningStubs().isPresent( "org.springframework.cloud.contract.verifier.stubs:fraudDetectionServer")) .isTrue(); // and: 'Stubs were registered' then(httpGet(rule.findStubUrl("loanIssuance").toString() + "/name")) .isEqualTo("loanIssuance"); then(httpGet(rule.findStubUrl("fraudDetectionServer").toString() + "/name")) .isEqualTo("fraudDetectionServer"); } private String httpGet(String url) throws Exception { try (InputStream stream = URI.create(url).toURL().openStream()) { return StreamUtils.copyToString(stream, Charset.forName("UTF-8")); } } }
JUnit 5 Extension example:
// Visible for Junit @RegisterExtension static StubRunnerExtension stubRunnerExtension = new StubRunnerExtension() .repoRoot(repoRoot()).stubsMode(StubRunnerProperties.StubsMode.REMOTE) .downloadStub("org.springframework.cloud.contract.verifier.stubs", "loanIssuance") .downloadStub( "org.springframework.cloud.contract.verifier.stubs:fraudDetectionServer") .withMappingsOutputFolder("target/outputmappingsforrule"); @BeforeAll @AfterAll static void setupProps() { System.clearProperty("stubrunner.repository.root"); System.clearProperty("stubrunner.classifier"); } private static String repoRoot() { try { return StubRunnerRuleJUnitTest.class.getResource("/m2repo/repository/") .toURI().toString(); } catch (Exception e) { return ""; } }
Check the Common properties for JUnit and Spring for more information on how to apply global configuration of Stub Runner.
| Important |
|---|---|
To use the JUnit rule or JUnit 5 extension together with messaging, you have to provide an implementation of the
|
The stub downloader honors Maven settings for a different local repository folder. Authentication details for repositories and profiles are currently not taken into account, so you need to specify it using the properties mentioned above.
You can also run your stubs on fixed ports. You can do it in two different ways. One is to pass it in the properties, and the other via fluent API of JUnit rule.
When using the StubRunnerRule or StubRunnerExtension you can add a stub to download and then pass the port for the last downloaded stub.
@ClassRule public static StubRunnerRule rule = new StubRunnerRule().repoRoot(repoRoot()) .stubsMode(StubRunnerProperties.StubsMode.REMOTE) .downloadStub("org.springframework.cloud.contract.verifier.stubs", "loanIssuance") .withPort(12345).downloadStub( "org.springframework.cloud.contract.verifier.stubs:fraudDetectionServer:12346"); @BeforeClass @AfterClass public static void setupProps() { System.clearProperty("stubrunner.repository.root"); System.clearProperty("stubrunner.classifier"); }
You can see that for this example the following test is valid:
then(rule.findStubUrl("loanIssuance")) .isEqualTo(URI.create("http://localhost:12345").toURL()); then(rule.findStubUrl("fraudDetectionServer")) .isEqualTo(URI.create("http://localhost:12346").toURL());
Sets up Spring configuration of the Stub Runner project.
By providing a list of stubs inside your configuration file the Stub Runner automatically downloads and registers in WireMock the selected stubs.
If you want to find the URL of your stubbed dependency you can autowire the StubFinder interface and use
its methods as presented below:
@ContextConfiguration(classes = Config, loader = SpringBootContextLoader) @SpringBootTest(properties = [" stubrunner.cloud.enabled=false", 'foo=${stubrunner.runningstubs.fraudDetectionServer.port}', 'fooWithGroup=${stubrunner.runningstubs.org.springframework.cloud.contract.verifier.stubs.fraudDetectionServer.port}']) @AutoConfigureStubRunner(mappingsOutputFolder = "target/outputmappings/", httpServerStubConfigurer = HttpsForFraudDetection) @ActiveProfiles("test") class StubRunnerConfigurationSpec extends Specification { @Autowired StubFinder stubFinder @Autowired Environment environment @StubRunnerPort("fraudDetectionServer") int fraudDetectionServerPort @StubRunnerPort("org.springframework.cloud.contract.verifier.stubs:fraudDetectionServer") int fraudDetectionServerPortWithGroupId @Value('${foo}') Integer foo @BeforeClass @AfterClass void setupProps() { System.clearProperty("stubrunner.repository.root") System.clearProperty("stubrunner.classifier") } def 'should start WireMock servers'() { expect: 'WireMocks are running' stubFinder.findStubUrl('org.springframework.cloud.contract.verifier.stubs', 'loanIssuance') != null stubFinder.findStubUrl('loanIssuance') != null stubFinder.findStubUrl('loanIssuance') == stubFinder.findStubUrl('org.springframework.cloud.contract.verifier.stubs', 'loanIssuance') stubFinder.findStubUrl('loanIssuance') == stubFinder.findStubUrl('org.springframework.cloud.contract.verifier.stubs:loanIssuance') stubFinder.findStubUrl('org.springframework.cloud.contract.verifier.stubs:loanIssuance:0.0.1-SNAPSHOT') == stubFinder.findStubUrl('org.springframework.cloud.contract.verifier.stubs:loanIssuance:0.0.1-SNAPSHOT:stubs') stubFinder.findStubUrl('org.springframework.cloud.contract.verifier.stubs:fraudDetectionServer') != null and: stubFinder.findAllRunningStubs().isPresent('loanIssuance') stubFinder.findAllRunningStubs().isPresent('org.springframework.cloud.contract.verifier.stubs', 'fraudDetectionServer') stubFinder.findAllRunningStubs().isPresent('org.springframework.cloud.contract.verifier.stubs:fraudDetectionServer') and: 'Stubs were registered' "${stubFinder.findStubUrl('loanIssuance').toString()}/name".toURL().text == 'loanIssuance' "${stubFinder.findStubUrl('fraudDetectionServer').toString()}/name".toURL().text == 'fraudDetectionServer' and: 'Fraud Detection is an HTTPS endpoint' stubFinder.findStubUrl('fraudDetectionServer').toString().startsWith("https") } def 'should throw an exception when stub is not found'() { when: stubFinder.findStubUrl('nonExistingService') then: thrown(StubNotFoundException) when: stubFinder.findStubUrl('nonExistingGroupId', 'nonExistingArtifactId') then: thrown(StubNotFoundException) } def 'should register started servers as environment variables'() { expect: environment.getProperty("stubrunner.runningstubs.loanIssuance.port") != null stubFinder.findAllRunningStubs().getPort("loanIssuance") == (environment.getProperty("stubrunner.runningstubs.loanIssuance.port") as Integer) and: environment.getProperty("stubrunner.runningstubs.fraudDetectionServer.port") != null stubFinder.findAllRunningStubs().getPort("fraudDetectionServer") == (environment.getProperty("stubrunner.runningstubs.fraudDetectionServer.port") as Integer) and: environment.getProperty("stubrunner.runningstubs.fraudDetectionServer.port") != null stubFinder.findAllRunningStubs().getPort("fraudDetectionServer") == (environment.getProperty("stubrunner.runningstubs.org.springframework.cloud.contract.verifier.stubs.fraudDetectionServer.port") as Integer) } def 'should be able to interpolate a running stub in the passed test property'() { given: int fraudPort = stubFinder.findAllRunningStubs().getPort("fraudDetectionServer") expect: fraudPort > 0 environment.getProperty("foo", Integer) == fraudPort environment.getProperty("fooWithGroup", Integer) == fraudPort foo == fraudPort } @Issue("#573") def 'should be able to retrieve the port of a running stub via an annotation'() { given: int fraudPort = stubFinder.findAllRunningStubs().getPort("fraudDetectionServer") expect: fraudPort > 0 fraudDetectionServerPort == fraudPort fraudDetectionServerPortWithGroupId == fraudPort } def 'should dump all mappings to a file'() { when: def url = stubFinder.findStubUrl("fraudDetectionServer") then: new File("target/outputmappings/", "fraudDetectionServer_${url.port}").exists() } @Configuration @EnableAutoConfiguration static class Config {} @CompileStatic static class HttpsForFraudDetection extends WireMockHttpServerStubConfigurer { private static final Log log = LogFactory.getLog(HttpsForFraudDetection) @Override WireMockConfiguration configure(WireMockConfiguration httpStubConfiguration, HttpServerStubConfiguration httpServerStubConfiguration) { if (httpServerStubConfiguration.stubConfiguration.artifactId == "fraudDetectionServer") { int httpsPort = SocketUtils.findAvailableTcpPort() log.info("Will set HTTPs port [" + httpsPort + "] for fraud detection server") return httpStubConfiguration .httpsPort(httpsPort) } return httpStubConfiguration } } }
for the following configuration file:
stubrunner:
repositoryRoot: classpath:m2repo/repository/
ids:
- org.springframework.cloud.contract.verifier.stubs:loanIssuance
- org.springframework.cloud.contract.verifier.stubs:fraudDetectionServer
- org.springframework.cloud.contract.verifier.stubs:bootService
stubs-mode: remoteInstead of using the properties you can also use the properties inside the @AutoConfigureStubRunner.
Below you can find an example of achieving the same result by setting values on the annotation.
@AutoConfigureStubRunner( ids = ["org.springframework.cloud.contract.verifier.stubs:loanIssuance", "org.springframework.cloud.contract.verifier.stubs:fraudDetectionServer", "org.springframework.cloud.contract.verifier.stubs:bootService"], stubsMode = StubRunnerProperties.StubsMode.REMOTE, repositoryRoot = "classpath:m2repo/repository/")
Stub Runner Spring registers environment variables in the following manner
for every registered WireMock server. Example for Stub Runner ids
com.example:foo, com.example:bar.
stubrunner.runningstubs.foo.portstubrunner.runningstubs.com.example.foo.portstubrunner.runningstubs.bar.portstubrunner.runningstubs.com.example.bar.port
Which you can reference in your code.
You can also use the @StubRunnerPort annotation to inject the port of a running stub.
Value of the annotation can be the groupid:artifactid or just the artifactid. Example for Stub Runner ids
com.example:foo, com.example:bar.
@StubRunnerPort("foo") int fooPort; @StubRunnerPort("com.example:bar") int barPort;
Stub Runner can integrate with Spring Cloud.
For real life examples you can check the
The most important feature of Stub Runner Spring Cloud is the fact that it’s stubbing
DiscoveryClientRibbonServerList
that means that regardless of the fact whether you’re using Zookeeper, Consul, Eureka or anything else, you don’t need that in your tests.
We’re starting WireMock instances of your dependencies and we’re telling your application whenever you’re using Feign, load balanced RestTemplate
or DiscoveryClient directly, to call those stubbed servers instead of calling the real Service Discovery tool.
For example this test will pass
def 'should make service discovery work'() { expect: 'WireMocks are running' "${stubFinder.findStubUrl('loanIssuance').toString()}/name".toURL().text == 'loanIssuance' "${stubFinder.findStubUrl('fraudDetectionServer').toString()}/name".toURL().text == 'fraudDetectionServer' and: 'Stubs can be reached via load service discovery' restTemplate.getForObject('http://loanIssuance/name', String) == 'loanIssuance' restTemplate.getForObject('http://someNameThatShouldMapFraudDetectionServer/name', String) == 'fraudDetectionServer' }
for the following configuration file
stubrunner:
idsToServiceIds:
ivyNotation: someValueInsideYourCode
fraudDetectionServer: someNameThatShouldMapFraudDetectionServerIn your integration tests you typically don’t want to call neither a discovery service (e.g. Eureka) or Config Server. That’s why you create an additional test configuration in which you want to disable these features.
Due to certain limitations of spring-cloud-commons to achieve this you have disable these properties
via a static block like presented below (example for Eureka)
//Hack to work around https://github.com/spring-cloud/spring-cloud-commons/issues/156 static { System.setProperty("eureka.client.enabled", "false"); System.setProperty("spring.cloud.config.failFast", "false"); }
You can match the artifactId of the stub with the name of your app by using the stubrunner.idsToServiceIds: map.
You can disable Stub Runner Ribbon support by providing: stubrunner.cloud.ribbon.enabled equal to false
You can disable Stub Runner support by providing: stubrunner.cloud.enabled equal to false
| Tip |
|---|---|
By default all service discovery will be stubbed. That means that regardless of the fact if you have
an existing |
The default Maven configuration used by Stub Runner can be tweaked either via the following system properties or environment variables
maven.repo.local- path to the custom maven local repository locationorg.apache.maven.user-settings- path to custom maven user settings locationorg.apache.maven.global-settings- path to maven global settings location
Spring Cloud Contract Stub Runner Boot is a Spring Boot application that exposes REST endpoints to trigger the messaging labels and to access started WireMock servers.
One of the use-cases is to run some smoke (end to end) tests on a deployed application. You can check out the Spring Cloud Pipelines project for more information.
Just add the
compile "org.springframework.cloud:spring-cloud-starter-stub-runner"Annotate a class with @EnableStubRunnerServer, build a fat-jar and you’re ready to go!
For the properties check the Stub Runner Spring section.
You can download a standalone JAR from Maven (e.g. for version 2.0.1.RELEASE), as follows:
$ wget -O stub-runner.jar 'https://search.maven.org/remotecontent?filepath=org/springframework/cloud/spring-cloud-contract-stub-runner-boot/2.0.1.RELEASE/spring-cloud-contract-stub-runner-boot-2.0.1.RELEASE.jar'
$ java -jar stub-runner.jar --stubrunner.ids=... --stubrunner.repositoryRoot=...Starting from 1.4.0.RELEASE version of the Spring Cloud CLI
project you can start Stub Runner Boot by executing spring cloud stubrunner.
In order to pass the configuration just create a stubrunner.yml file in the current working directory
or a subdirectory called config or in ~/.spring-cloud. The file could look like this
(example for running stubs installed locally)
stubrunner.yml.
stubrunner:
stubsMode: LOCAL
ids:
- com.example:beer-api-producer:+:9876
and then just call spring cloud stubrunner from your terminal window to start
the Stub Runner server. It will be available at port 8750.
- GET
/stubs- returns a list of all running stubs inivy:integernotation - GET
/stubs/{ivy}- returns a port for the givenivynotation (when calling the endpointivycan also beartifactIdonly)
For Messaging
- GET
/triggers- returns a list of all running labels inivy : [ label1, label2 …]notation - POST
/triggers/{label}- executes a trigger withlabel - POST
/triggers/{ivy}/{label}- executes a trigger withlabelfor the givenivynotation (when calling the endpointivycan also beartifactIdonly)
@ContextConfiguration(classes = StubRunnerBoot, loader = SpringBootContextLoader) @SpringBootTest(properties = "spring.cloud.zookeeper.enabled=false") @ActiveProfiles("test") class StubRunnerBootSpec extends Specification { @Autowired StubRunning stubRunning def setup() { RestAssuredMockMvc.standaloneSetup(new HttpStubsController(stubRunning), new TriggerController(stubRunning)) } def 'should return a list of running stub servers in "full ivy:port" notation'() { when: String response = RestAssuredMockMvc.get('/stubs').body.asString() then: def root = new JsonSlurper().parseText(response) root.'org.springframework.cloud.contract.verifier.stubs:bootService:0.0.1-SNAPSHOT:stubs' instanceof Integer } def 'should return a port on which a [#stubId] stub is running'() { when: def response = RestAssuredMockMvc.get("/stubs/${stubId}") then: response.statusCode == 200 Integer.valueOf(response.body.asString()) > 0 where: stubId << ['org.springframework.cloud.contract.verifier.stubs:bootService:+:stubs', 'org.springframework.cloud.contract.verifier.stubs:bootService:0.0.1-SNAPSHOT:stubs', 'org.springframework.cloud.contract.verifier.stubs:bootService:+', 'org.springframework.cloud.contract.verifier.stubs:bootService', 'bootService'] } def 'should return 404 when missing stub was called'() { when: def response = RestAssuredMockMvc.get("/stubs/a:b:c:d") then: response.statusCode == 404 } def 'should return a list of messaging labels that can be triggered when version and classifier are passed'() { when: String response = RestAssuredMockMvc.get('/triggers').body.asString() then: def root = new JsonSlurper().parseText(response) root.'org.springframework.cloud.contract.verifier.stubs:bootService:0.0.1-SNAPSHOT:stubs'?.containsAll(["delete_book", "return_book_1", "return_book_2"]) } def 'should trigger a messaging label'() { given: StubRunning stubRunning = Mock() RestAssuredMockMvc.standaloneSetup(new HttpStubsController(stubRunning), new TriggerController(stubRunning)) when: def response = RestAssuredMockMvc.post("/triggers/delete_book") then: response.statusCode == 200 and: 1 * stubRunning.trigger('delete_book') } def 'should trigger a messaging label for a stub with [#stubId] ivy notation'() { given: StubRunning stubRunning = Mock() RestAssuredMockMvc.standaloneSetup(new HttpStubsController(stubRunning), new TriggerController(stubRunning)) when: def response = RestAssuredMockMvc.post("/triggers/$stubId/delete_book") then: response.statusCode == 200 and: 1 * stubRunning.trigger(stubId, 'delete_book') where: stubId << ['org.springframework.cloud.contract.verifier.stubs:bootService:stubs', 'org.springframework.cloud.contract.verifier.stubs:bootService', 'bootService'] } def 'should throw exception when trigger is missing'() { when: RestAssuredMockMvc.post("/triggers/missing_label") then: Exception e = thrown(Exception) e.message.contains("Exception occurred while trying to return [missing_label] label.") e.message.contains("Available labels are") e.message.contains("org.springframework.cloud.contract.verifier.stubs:loanIssuance:0.0.1-SNAPSHOT:stubs=[]") e.message.contains("org.springframework.cloud.contract.verifier.stubs:bootService:0.0.1-SNAPSHOT:stubs=") } }
One of the possibilities of using Stub Runner Boot is to use it as a feed of stubs for "smoke-tests". What does it mean? Let’s assume that you don’t want to deploy 50 microservice to a test environment in order to check if your application is working fine. You’ve already executed a suite of tests during the build process but you would also like to ensure that the packaging of your application is fine. What you can do is to deploy your application to an environment, start it and run a couple of tests on it to see if it’s working fine. We can call those tests smoke-tests since their idea is to check only a handful of testing scenarios.
The problem with this approach is such that if you’re doing microservices most likely you’re using a service discovery tool. Stub Runner Boot allows you to solve this issue by starting the required stubs and register them in a service discovery tool. Let’s take a look at an example of such a setup with Eureka. Let’s assume that Eureka was already running.
@SpringBootApplication @EnableStubRunnerServer @EnableEurekaClient @AutoConfigureStubRunner public class StubRunnerBootEurekaExample { public static void main(String[] args) { SpringApplication.run(StubRunnerBootEurekaExample.class, args); } }
As you can see we want to start a Stub Runner Boot server @EnableStubRunnerServer, enable Eureka client @EnableEurekaClient
and we want to have the stub runner feature turned on @AutoConfigureStubRunner.
Now let’s assume that we want to start this application so that the stubs get automatically registered.
We can do it by running the app java -jar ${SYSTEM_PROPS} stub-runner-boot-eureka-example.jar where
${SYSTEM_PROPS} would contain the following list of properties
* -Dstubrunner.repositoryRoot=http://repo.spring.io/snapshots (1) * -Dstubrunner.cloud.stubbed.discovery.enabled=false (2) * -Dstubrunner.ids=org.springframework.cloud.contract.verifier.stubs:loanIssuance,org. * springframework.cloud.contract.verifier.stubs:fraudDetectionServer,org.springframework. * cloud.contract.verifier.stubs:bootService (3) * -Dstubrunner.idsToServiceIds.fraudDetectionServer= * someNameThatShouldMapFraudDetectionServer (4) * * (1) - we tell Stub Runner where all the stubs reside (2) - we don't want the default * behaviour where the discovery service is stubbed. That's why the stub registration will * be picked (3) - we provide a list of stubs to download (4) - we provide a list of
That way your deployed application can send requests to started WireMock servers via the service
discovery. Most likely points 1-3 could be set by default in application.yml cause they are not
likely to change. That way you can provide only the list of stubs to download whenever you start
the Stub Runner Boot.
There are cases in which 2 consumers of the same endpoint want to have 2 different responses.
| Tip |
|---|---|
This approach also allows you to immediately know which consumer is using which part of your API. You can remove part of a response that your API produces and you can see which of your autogenerated tests fails. If none fails then you can safely delete that part of the response cause nobody is using it. |
Let’s look at the following example for contract defined for the producer called producer.
There are 2 consumers: foo-consumer and bar-consumer.
Consumer foo-service
request {
url '/foo'
method GET()
}
response {
status OK()
body(
foo: "foo"
}
}Consumer bar-service
request {
url '/foo'
method GET()
}
response {
status OK()
body(
bar: "bar"
}
}You can’t produce for the same request 2 different responses. That’s why you can properly package the
contracts and then profit from the stubsPerConsumer feature.
On the producer side the consumers can have a folder that contains contracts related only to them.
By setting the stubrunner.stubs-per-consumer flag to true we no longer register all stubs but only those that
correspond to the consumer application’s name. In other words we’ll scan the path of every stub and
if it contains the subfolder with name of the consumer in the path only then will it get registered.
On the foo producer side the contracts would look like this
.
└── contracts
├── bar-consumer
│ ├── bookReturnedForBar.groovy
│ └── shouldCallBar.groovy
└── foo-consumer
├── bookReturnedForFoo.groovy
└── shouldCallFoo.groovyBeing the bar-consumer consumer you can either set the spring.application.name or the stubrunner.consumer-name to bar-consumer
Or set the test as follows:
@ContextConfiguration(classes = Config, loader = SpringBootContextLoader) @SpringBootTest(properties = ["spring.application.name=bar-consumer"]) @AutoConfigureStubRunner(ids = "org.springframework.cloud.contract.verifier.stubs:producerWithMultipleConsumers", repositoryRoot = "classpath:m2repo/repository/", stubsMode = StubRunnerProperties.StubsMode.REMOTE, stubsPerConsumer = true) class StubRunnerStubsPerConsumerSpec extends Specification { ... }
Then only the stubs registered under a path that contains the bar-consumer in its name (i.e. those from the
src/test/resources/contracts/bar-consumer/some/contracts/… folder) will be allowed to be referenced.
Or set the consumer name explicitly
@ContextConfiguration(classes = Config, loader = SpringBootContextLoader) @SpringBootTest @AutoConfigureStubRunner(ids = "org.springframework.cloud.contract.verifier.stubs:producerWithMultipleConsumers", repositoryRoot = "classpath:m2repo/repository/", consumerName = "foo-consumer", stubsMode = StubRunnerProperties.StubsMode.REMOTE, stubsPerConsumer = true) class StubRunnerStubsPerConsumerWithConsumerNameSpec extends Specification { ... }
Then only the stubs registered under a path that contains the foo-consumer in its name (i.e. those from the
src/test/resources/contracts/foo-consumer/some/contracts/… folder) will be allowed to be referenced.
You can check out issue 224 for more information about the reasons behind this change.
This section briefly describes common properties, including:
You can set repetitive properties by using system properties or Spring configuration properties. Here are their names with their default values:
| Property name | Default value | Description |
|---|---|---|
stubrunner.minPort | 10000 | Minimum value of a port for a started WireMock with stubs. |
stubrunner.maxPort | 15000 | Maximum value of a port for a started WireMock with stubs. |
stubrunner.repositoryRoot | Maven repo URL. If blank, then call the local maven repo. | |
stubrunner.classifier | stubs | Default classifier for the stub artifacts. |
stubrunner.stubsMode | CLASSPATH | The way you want to fetch and register the stubs |
stubrunner.ids | Array of Ivy notation stubs to download. | |
stubrunner.username | Optional username to access the tool that stores the JARs with stubs. | |
stubrunner.password | Optional password to access the tool that stores the JARs with stubs. | |
stubrunner.stubsPerConsumer | false | Set to |
stubrunner.consumerName | If you want to use a stub for each consumer and want to override the consumer name just change this value. |
You can provide the stubs to download via the stubrunner.ids system property. They
follow this pattern:
groupId:artifactId:version:classifier:port
Note that version, classifier and port are optional.
- If you do not provide the
port, a random one will be picked. - If you do not provide the
classifier, the default is used. (Note that you can pass an empty classifier this way:groupId:artifactId:version:). - If you do not provide the
version, then the+will be passed and the latest one is downloaded.
port means the port of the WireMock server.
| Important |
|---|---|
Starting with version 1.0.4, you can provide a range of versions that you would like the Stub Runner to take into consideration. You can read more about the Aether versioning ranges here. |
We’re publishing a spring-cloud/spring-cloud-contract-stub-runner Docker image
that will start the standalone version of Stub Runner.
If you want to learn more about the basics of Maven, artifact ids, group ids, classifiers and Artifact Managers, just click here Section 89.5, “Docker Project”.
Just execute the docker image. You can pass any of the Section 91.8.1, “Common Properties for JUnit and Spring”
as environment variables. The convention is that all the
letters should be upper case. The camel case notation should
and the dot (.) should be separated via underscore (_). E.g.
the stubrunner.repositoryRoot property should be represented
as a STUBRUNNER_REPOSITORY_ROOT environment variable.
We’d like to use the stubs created in this Section 89.5.4, “Server side (nodejs)” step.
Let’s assume that we want to run the stubs on port 9876. The NodeJS code
is available here:
$ git clone https://github.com/spring-cloud-samples/spring-cloud-contract-nodejs
$ cd bookstoreLet’s run the Stub Runner Boot application with the stubs.
# Provide the Spring Cloud Contract Docker version $ SC_CONTRACT_DOCKER_VERSION="..." # The IP at which the app is running and Docker container can reach it $ APP_IP="192.168.0.100" # Spring Cloud Contract Stub Runner properties $ STUBRUNNER_PORT="8083" # Stub coordinates 'groupId:artifactId:version:classifier:port' $ STUBRUNNER_IDS="com.example:bookstore:0.0.1.RELEASE:stubs:9876" $ STUBRUNNER_REPOSITORY_ROOT="http://${APP_IP}:8081/artifactory/libs-release-local" # Run the docker with Stub Runner Boot $ docker run --rm -e "STUBRUNNER_IDS=${STUBRUNNER_IDS}" -e "STUBRUNNER_REPOSITORY_ROOT=${STUBRUNNER_REPOSITORY_ROOT}" -e "STUBRUNNER_STUBS_MODE=REMOTE" -p "${STUBRUNNER_PORT}:${STUBRUNNER_PORT}" -p "9876:9876" springcloud/spring-cloud-contract-stub-runner:"${SC_CONTRACT_DOCKER_VERSION}"
What’s happening is that
- a standalone Stub Runner application got started
- it downloaded the stub with coordinates
com.example:bookstore:0.0.1.RELEASE:stubson port9876 - it got downloaded from Artifactory running at
http://192.168.0.100:8081/artifactory/libs-release-local - after a while Stub Runner will be running on port
8083 - and the stubs will be running at port
9876
On the server side we built a stateful stub. Let’s use curl to assert that the stubs are setup properly.
# let's execute the first request (no response is returned) $ curl -H "Content-Type:application/json" -X POST --data '{ "title" : "Title", "genre" : "Genre", "description" : "Description", "author" : "Author", "publisher" : "Publisher", "pages" : 100, "image_url" : "https://d213dhlpdb53mu.cloudfront.net/assets/pivotal-square-logo-41418bd391196c3022f3cd9f3959b3f6d7764c47873d858583384e759c7db435.svg", "buy_url" : "https://pivotal.io" }' http://localhost:9876/api/books # Now time for the second request $ curl -X GET http://localhost:9876/api/books # You will receive contents of the JSON
| Important |
|---|---|
If you want use the stubs that you have built locally, on your host,
then you should pass the environment variable |
Stub Runner can run the published stubs in memory. It can integrate with the following frameworks:
- Spring Integration
- Spring Cloud Stream
- Apache Camel
- Spring AMQP
It also provides entry points to integrate with any other solution on the market.
| Important |
|---|---|
If you have multiple frameworks on the classpath Stub Runner will need to
define which one should be used. Let’s assume that you have both AMQP, Spring Cloud Stream and Spring Integration
on the classpath. Then you need to set |
To trigger a message, use the StubTrigger interface:
package org.springframework.cloud.contract.stubrunner; import java.util.Collection; import java.util.Map; /** * Contract for triggering stub messages. * * @author Marcin Grzejszczak */ public interface StubTrigger { /** * Triggers an event by a given label for a given {@code groupid:artifactid} notation. * You can use only {@code artifactId} too. * * Feature related to messaging. * @param ivyNotation ivy notation of a stub * @param labelName name of the label to trigger * @return true - if managed to run a trigger */ boolean trigger(String ivyNotation, String labelName); /** * Triggers an event by a given label. * * Feature related to messaging. * @param labelName name of the label to trigger * @return true - if managed to run a trigger */ boolean trigger(String labelName); /** * Triggers all possible events. * * Feature related to messaging. * @return true - if managed to run a trigger */ boolean trigger(); /** * Feature related to messaging. * @return a mapping of ivy notation of a dependency to all the labels it has. */ Map<String, Collection<String>> labels(); }
For convenience, the StubFinder interface extends StubTrigger, so you only need one
or the other in your tests.
StubTrigger gives you the following options to trigger a message:
stubFinder.trigger('org.springframework.cloud.contract.verifier.stubs:streamService', 'return_book_1')
Spring Cloud Contract Verifier Stub Runner’s messaging module gives you an easy way to integrate with Apache Camel. For the provided artifacts it will automatically download the stubs and register the required routes.
It’s enough to have both Apache Camel and Spring Cloud Contract Stub Runner on classpath.
Remember to annotate your test class with @AutoConfigureStubRunner.
If you need to disable this functionality just pass stubrunner.camel.enabled=false property.
Let us assume that we have the following Maven repository with a deployed stubs for the
camelService application.
└── .m2
└── repository
└── io
└── codearte
└── accurest
└── stubs
└── camelService
├── 0.0.1-SNAPSHOT
│ ├── camelService-0.0.1-SNAPSHOT.pom
│ ├── camelService-0.0.1-SNAPSHOT-stubs.jar
│ └── maven-metadata-local.xml
└── maven-metadata-local.xmlAnd the stubs contain the following structure:
├── META-INF
│ └── MANIFEST.MF
└── repository
├── accurest
│ ├── bookDeleted.groovy
│ ├── bookReturned1.groovy
│ └── bookReturned2.groovy
└── mappingsLet’s consider the following contracts (let' number it with 1):
Contract.make {
label 'return_book_1'
input {
triggeredBy('bookReturnedTriggered()')
}
outputMessage {
sentTo('jms:output')
body('''{ "bookName" : "foo" }''')
headers {
header('BOOK-NAME', 'foo')
}
}
}and number 2
Contract.make {
label 'return_book_2'
input {
messageFrom('jms:input')
messageBody([
bookName: 'foo'
])
messageHeaders {
header('sample', 'header')
}
}
outputMessage {
sentTo('jms:output')
body([
bookName: 'foo'
])
headers {
header('BOOK-NAME', 'foo')
}
}
}So as to trigger a message via the return_book_1 label we’ll use the StubTigger interface as follows
stubFinder.trigger('return_book_1')Next we’ll want to listen to the output of the message sent to jms:output
Exchange receivedMessage = consumerTemplate.receive('jms:output', 5000)
And the received message would pass the following assertions
receivedMessage != null assertThatBodyContainsBookNameFoo(receivedMessage.in.body) receivedMessage.in.headers.get('BOOK-NAME') == 'foo'
Since the route is set for you it’s enough to just send a message to the jms:output destination.
producerTemplate. sendBodyAndHeaders('jms:input', new BookReturned('foo'), [sample: 'header'])
Next we’ll want to listen to the output of the message sent to jms:output
Exchange receivedMessage = consumerTemplate.receive('jms:output', 5000)
And the received message would pass the following assertions
receivedMessage != null assertThatBodyContainsBookNameFoo(receivedMessage.in.body) receivedMessage.in.headers.get('BOOK-NAME') == 'foo'
Spring Cloud Contract Verifier Stub Runner’s messaging module gives you an easy way to integrate with Spring Integration. For the provided artifacts, it automatically downloads the stubs and registers the required routes.
You can have both Spring Integration and Spring Cloud Contract Stub Runner on the
classpath. Remember to annotate your test class with @AutoConfigureStubRunner.
If you need to disable this functionality, set the
stubrunner.integration.enabled=false property.
Assume that you have the following Maven repository with deployed stubs for the
integrationService application:
└── .m2
└── repository
└── io
└── codearte
└── accurest
└── stubs
└── integrationService
├── 0.0.1-SNAPSHOT
│ ├── integrationService-0.0.1-SNAPSHOT.pom
│ ├── integrationService-0.0.1-SNAPSHOT-stubs.jar
│ └── maven-metadata-local.xml
└── maven-metadata-local.xmlFurther assume the stubs contain the following structure:
├── META-INF
│ └── MANIFEST.MF
└── repository
├── accurest
│ ├── bookDeleted.groovy
│ ├── bookReturned1.groovy
│ └── bookReturned2.groovy
└── mappingsConsider the following contracts (numbered 1):
Contract.make {
label 'return_book_1'
input {
triggeredBy('bookReturnedTriggered()')
}
outputMessage {
sentTo('output')
body('''{ "bookName" : "foo" }''')
headers {
header('BOOK-NAME', 'foo')
}
}
}Now consider 2:
Contract.make {
label 'return_book_2'
input {
messageFrom('input')
messageBody([
bookName: 'foo'
])
messageHeaders {
header('sample', 'header')
}
}
outputMessage {
sentTo('output')
body([
bookName: 'foo'
])
headers {
header('BOOK-NAME', 'foo')
}
}
}and the following Spring Integration Route:
<?xml version="1.0" encoding="UTF-8"?> <beans:beans xmlns:xsi="http://www.w3.org/2001/XMLSchema-instance" xmlns:beans="http://www.springframework.org/schema/beans" xmlns="http://www.springframework.org/schema/integration" xsi:schemaLocation="http://www.springframework.org/schema/beans http://www.springframework.org/schema/beans/spring-beans.xsd http://www.springframework.org/schema/integration http://www.springframework.org/schema/integration/spring-integration.xsd"> <!-- REQUIRED FOR TESTING --> <bridge input-channel="output" output-channel="outputTest"/> <channel id="outputTest"> <queue/> </channel> </beans:beans>
These examples lend themselves to three scenarios:
To trigger a message via the return_book_1 label, use the StubTigger interface, as
follows:
stubFinder.trigger('return_book_1')To listen to the output of the message sent to output:
Message<?> receivedMessage = messaging.receive('outputTest')The received message would pass the following assertions:
receivedMessage != null assertJsons(receivedMessage.payload) receivedMessage.headers.get('BOOK-NAME') == 'foo'
Since the route is set for you, you can send a message to the output
destination:
messaging.send(new BookReturned('foo'), [sample: 'header'], 'input')
To listen to the output of the message sent to output:
Message<?> receivedMessage = messaging.receive('outputTest')The received message passes the following assertions:
receivedMessage != null assertJsons(receivedMessage.payload) receivedMessage.headers.get('BOOK-NAME') == 'foo'
Spring Cloud Contract Verifier Stub Runner’s messaging module gives you an easy way to integrate with Spring Stream. For the provided artifacts, it automatically downloads the stubs and registers the required routes.
| Warning |
|---|---|
If Stub Runner’s integration with Stream the |
| Important |
|---|---|
If you want to use Spring Cloud Stream remember, to add a dependency on
|
Maven.
<dependency> <groupId>org.springframework.cloud</groupId> <artifactId>spring-cloud-stream-test-support</artifactId> <scope>test</scope> </dependency>
Gradle.
testCompile "org.springframework.cloud:spring-cloud-stream-test-support"
You can have both Spring Cloud Stream and Spring Cloud Contract Stub Runner on the
classpath. Remember to annotate your test class with @AutoConfigureStubRunner.
If you need to disable this functionality, set the stubrunner.stream.enabled=false
property.
Assume that you have the following Maven repository with a deployed stubs for the
streamService application:
└── .m2
└── repository
└── io
└── codearte
└── accurest
└── stubs
└── streamService
├── 0.0.1-SNAPSHOT
│ ├── streamService-0.0.1-SNAPSHOT.pom
│ ├── streamService-0.0.1-SNAPSHOT-stubs.jar
│ └── maven-metadata-local.xml
└── maven-metadata-local.xmlFurther assume the stubs contain the following structure:
├── META-INF
│ └── MANIFEST.MF
└── repository
├── accurest
│ ├── bookDeleted.groovy
│ ├── bookReturned1.groovy
│ └── bookReturned2.groovy
└── mappingsConsider the following contracts (numbered 1):
Contract.make {
label 'return_book_1'
input { triggeredBy('bookReturnedTriggered()') }
outputMessage {
sentTo('returnBook')
body('''{ "bookName" : "foo" }''')
headers { header('BOOK-NAME', 'foo') }
}
}Now consider 2:
Contract.make {
label 'return_book_2'
input {
messageFrom('bookStorage')
messageBody([
bookName: 'foo'
])
messageHeaders { header('sample', 'header') }
}
outputMessage {
sentTo('returnBook')
body([
bookName: 'foo'
])
headers { header('BOOK-NAME', 'foo') }
}
}Now consider the following Spring configuration:
stubrunner.repositoryRoot: classpath:m2repo/repository/ stubrunner.ids: org.springframework.cloud.contract.verifier.stubs:streamService:0.0.1-SNAPSHOT:stubs stubrunner.stubs-mode: remote spring: cloud: stream: bindings: output: destination: returnBook input: destination: bookStorage server: port: 0 debug: true
These examples lend themselves to three scenarios:
To trigger a message via the return_book_1 label, use the StubTrigger interface as
follows:
stubFinder.trigger('return_book_1')To listen to the output of the message sent to a channel whose destination is
returnBook:
Message<?> receivedMessage = messaging.receive('returnBook')The received message passes the following assertions:
receivedMessage != null assertJsons(receivedMessage.payload) receivedMessage.headers.get('BOOK-NAME') == 'foo'
Since the route is set for you, you can send a message to the bookStorage
destination:
messaging.send(new BookReturned('foo'), [sample: 'header'], 'bookStorage')
To listen to the output of the message sent to returnBook:
Message<?> receivedMessage = messaging.receive('returnBook')The received message passes the following assertions:
receivedMessage != null assertJsons(receivedMessage.payload) receivedMessage.headers.get('BOOK-NAME') == 'foo'
Spring Cloud Contract Verifier Stub Runner’s messaging module provides an easy way to integrate with Spring AMQP’s Rabbit Template. For the provided artifacts, it automatically downloads the stubs and registers the required routes.
The integration tries to work standalone (that is, without interaction with a running
RabbitMQ message broker). It expects a RabbitTemplate on the application context and
uses it as a spring boot test named @SpyBean. As a result, it can use the mockito spy
functionality to verify and inspect messages sent by the application.
On the message consumer side, the stub runner considers all @RabbitListener annotated
endpoints and all SimpleMessageListenerContainer objects on the application context.
As messages are usually sent to exchanges in AMQP, the message contract contains the exchange name as the destination. Message listeners on the other side are bound to queues. Bindings connect an exchange to a queue. If message contracts are triggered, the Spring AMQP stub runner integration looks for bindings on the application context that match this exchange. Then it collects the queues from the Spring exchanges and tries to find message listeners bound to these queues. The message is triggered for all matching message listeners.
If you need to work with routing keys, it’s enough to pass them via the amqp_receivedRoutingKey
messaging header.
You can have both Spring AMQP and Spring Cloud Contract Stub Runner on the classpath and
set the property stubrunner.amqp.enabled=true. Remember to annotate your test class
with @AutoConfigureStubRunner.
| Important |
|---|---|
If you already have Stream and Integration on the classpath, you need
to disable them explicitly by setting the |
Assume that you have the following Maven repository with a deployed stubs for the
spring-cloud-contract-amqp-test application.
└── .m2
└── repository
└── com
└── example
└── spring-cloud-contract-amqp-test
├── 0.4.0-SNAPSHOT
│ ├── spring-cloud-contract-amqp-test-0.4.0-SNAPSHOT.pom
│ ├── spring-cloud-contract-amqp-test-0.4.0-SNAPSHOT-stubs.jar
│ └── maven-metadata-local.xml
└── maven-metadata-local.xmlFurther assume that the stubs contain the following structure:
├── META-INF
│ └── MANIFEST.MF
└── contracts
└── shouldProduceValidPersonData.groovyConsider the following contract:
Contract.make {
// Human readable description
description 'Should produce valid person data'
// Label by means of which the output message can be triggered
label 'contract-test.person.created.event'
// input to the contract
input {
// the contract will be triggered by a method
triggeredBy('createPerson()')
}
// output message of the contract
outputMessage {
// destination to which the output message will be sent
sentTo 'contract-test.exchange'
headers {
header('contentType': 'application/json')
header('__TypeId__': 'org.springframework.cloud.contract.stubrunner.messaging.amqp.Person')
}
// the body of the output message
body([
id : $(consumer(9), producer(regex("[0-9]+"))),
name: "me"
])
}
}Now consider the following Spring configuration:
stubrunner: repositoryRoot: classpath:m2repo/repository/ ids: org.springframework.cloud.contract.verifier.stubs.amqp:spring-cloud-contract-amqp-test:0.4.0-SNAPSHOT:stubs stubs-mode: remote amqp: enabled: true server: port: 0
To trigger a message using the contract above, use the StubTrigger interface as
follows:
stubTrigger.trigger("contract-test.person.created.event")The message has a destination of contract-test.exchange, so the Spring AMQP stub runner
integration looks for bindings related to this exchange.
@Bean public Binding binding() { return BindingBuilder.bind(new Queue("test.queue")) .to(new DirectExchange("contract-test.exchange")).with("#"); }
The binding definition binds the queue test.queue. As a result, the following listener
definition is matched and invoked with the contract message.
@Bean public SimpleMessageListenerContainer simpleMessageListenerContainer( ConnectionFactory connectionFactory, MessageListenerAdapter listenerAdapter) { SimpleMessageListenerContainer container = new SimpleMessageListenerContainer(); container.setConnectionFactory(connectionFactory); container.setQueueNames("test.queue"); container.setMessageListener(listenerAdapter); return container; }
Also, the following annotated listener matches and is invoked:
@RabbitListener(bindings = @QueueBinding(value = @Queue("test.queue"), exchange = @Exchange(value = "contract-test.exchange", ignoreDeclarationExceptions = "true"))) public void handlePerson(Person person) { this.person = person; }
| Note |
|---|---|
The message is directly handed over to the |
Spring Cloud Contract supports out of the box 2 types of DSL. One written in
Groovy and one written in YAML.
If you decide to write the contract in Groovy, do not be alarmed if you have not used Groovy before. Knowledge of the language is not really needed, as the Contract DSL uses only a tiny subset of it (only literals, method calls and closures). Also, the DSL is statically typed, to make it programmer-readable without any knowledge of the DSL itself.
| Important |
|---|---|
Remember that, inside the Groovy contract file, you have to provide the fully
qualified name to the |
| Tip |
|---|---|
Spring Cloud Contract supports defining multiple contracts in a single file. |
The following is a complete example of a Groovy contract definition:
The following is a complete example of a YAML contract definition:
description: Some description
name: some name
priority: 8
ignored: true
request:
url: /foo
queryParameters:
a: b
b: c
method: PUT
headers:
foo: bar
fooReq: baz
body:
foo: bar
matchers:
body:
- path: $.foo
type: by_regex
value: bar
headers:
- key: foo
regex: bar
response:
status: 200
headers:
foo2: bar
foo3: foo33
fooRes: baz
body:
foo2: bar
foo3: baz
nullValue: null
matchers:
body:
- path: $.foo2
type: by_regex
value: bar
- path: $.foo3
type: by_command
value: executeMe($it)
- path: $.nullValue
type: by_null
value: null
headers:
- key: foo2
regex: bar
- key: foo3
command: andMeToo($it) | Tip |
|---|---|
You can compile contracts to stubs mapping using standalone maven command:
|
| Warning |
|---|---|
Spring Cloud Contract Verifier does not properly support XML. Please use JSON or help us implement this feature. |
| Warning |
|---|---|
The support for verifying the size of JSON arrays is experimental. If you want
to turn it on, please set the value of the following system property to |
| Warning |
|---|---|
Because JSON structure can have any form, it can be impossible to parse it
properly when using the Groovy DSL and the |
The following sections describe the most common top-level elements:
You can add a description to your contract. The description is arbitrary text. The
following code shows an example:
Groovy DSL.
org.springframework.cloud.contract.spec.Contract.make {
description('''
given:
An input
when:
Sth happens
then:
Output
''')
}
YAML.
description: Some description
name: some name
priority: 8
ignored: true
request:
url: /foo
queryParameters:
a: b
b: c
method: PUT
headers:
foo: bar
fooReq: baz
body:
foo: bar
matchers:
body:
- path: $.foo
type: by_regex
value: bar
headers:
- key: foo
regex: bar
response:
status: 200
headers:
foo2: bar
foo3: foo33
fooRes: baz
body:
foo2: bar
foo3: baz
nullValue: null
matchers:
body:
- path: $.foo2
type: by_regex
value: bar
- path: $.foo3
type: by_command
value: executeMe($it)
- path: $.nullValue
type: by_null
value: null
headers:
- key: foo2
regex: bar
- key: foo3
command: andMeToo($it)
You can provide a name for your contract. Assume that you provided the following name:
should register a user. If you do so, the name of the autogenerated test is
validate_should_register_a_user. Also, the name of the stub in a WireMock stub is
should_register_a_user.json.
| Important |
|---|---|
You must ensure that the name does not contain any characters that make the generated test not compile. Also, remember that, if you provide the same name for multiple contracts, your autogenerated tests fail to compile and your generated stubs override each other. |
Groovy DSL.
org.springframework.cloud.contract.spec.Contract.make {
name("some_special_name")
}
YAML.
name: some name
If you want to ignore a contract, you can either set a value of ignored contracts in the
plugin configuration or set the ignored property on the contract itself:
Groovy DSL.
org.springframework.cloud.contract.spec.Contract.make {
ignored()
}
YAML.
ignored: true
Starting with version 1.2.0, you can pass values from files. Assume that you have the
following resources in our project.
└── src
└── test
└── resources
└── contracts
├── readFromFile.groovy
├── request.json
└── response.jsonFurther assume that your contract is as follows:
Groovy DSL.
/* * Copyright 2013-2019 the original author or authors. * * Licensed under the Apache License, Version 2.0 (the "License"); * you may not use this file except in compliance with the License. * You may obtain a copy of the License at * * https://www.apache.org/licenses/LICENSE-2.0 * * Unless required by applicable law or agreed to in writing, software * distributed under the License is distributed on an "AS IS" BASIS, * WITHOUT WARRANTIES OR CONDITIONS OF ANY KIND, either express or implied. * See the License for the specific language governing permissions and * limitations under the License. */ import org.springframework.cloud.contract.spec.Contract Contract.make { request { method('PUT') headers { contentType(applicationJson()) } body(file("request.json")) url("/1") } response { status OK() body(file("response.json")) headers { contentType(applicationJson()) } } }
YAML.
request: method: GET url: /foo bodyFromFile: request.json response: status: 200 bodyFromFile: response.json
Further assume that the JSON files is as follows:
request.json
{ "status": "REQUEST" }
response.json
{ "status": "RESPONSE" }
When test or stub generation takes place, the contents of the file is passed to the body of a request or a response. The name of the file needs to be a file with location relative to the folder in which the contract lays.
If you need to pass the contents of a file in a binary form
it’s enough for you to use the fileAsBytes method in Groovy DSL or bodyFromFileAsBytes field in YAML.
Groovy DSL.
import org.springframework.cloud.contract.spec.Contract Contract.make { request { url("/1") method(PUT()) headers { contentType(applicationOctetStream()) } body(fileAsBytes("request.pdf")) } response { status 200 body(fileAsBytes("response.pdf")) headers { contentType(applicationOctetStream()) } } }
YAML.
request:
url: /1
method: PUT
headers:
Content-Type: application/octet-stream
bodyFromFileAsBytes: request.pdf
response:
status: 200
bodyFromFileAsBytes: response.pdf
headers:
Content-Type: application/octet-stream
| Important |
|---|---|
You should use this approach whenever you want to work with binary payloads both for HTTP and messaging. |
The following methods can be called in the top-level closure of a contract definition.
request and response are mandatory. priority is optional.
Groovy DSL.
org.springframework.cloud.contract.spec.Contract.make {
// Definition of HTTP request part of the contract
// (this can be a valid request or invalid depending
// on type of contract being specified).
request {
method GET()
url "/foo"
//...
}
// Definition of HTTP response part of the contract
// (a service implementing this contract should respond
// with following response after receiving request
// specified in "request" part above).
response {
status 200
//...
}
// Contract priority, which can be used for overriding
// contracts (1 is highest). Priority is optional.
priority 1
}
YAML.
priority: 8 request: ... response: ...
| Important |
|---|---|
If you want to make your contract have a higher value of priority
you need to pass a lower number to the |
The HTTP protocol requires only method and url to be specified in a request. The same information is mandatory in request definition of the Contract.
Groovy DSL.
org.springframework.cloud.contract.spec.Contract.make {
request {
// HTTP request method (GET/POST/PUT/DELETE).
method 'GET'
// Path component of request URL is specified as follows.
urlPath('/users')
}
response {
//...
status 200
}
}
YAML.
method: PUT url: /foo
It is possible to specify an absolute rather than relative url, but using urlPath is
the recommended way, as doing so makes the tests host-independent.
Groovy DSL.
org.springframework.cloud.contract.spec.Contract.make {
request {
method 'GET'
// Specifying `url` and `urlPath` in one contract is illegal.
url('http://localhost:8888/users')
}
response {
//...
status 200
}
}
YAML.
request: method: PUT urlPath: /foo
request may contain query parameters.
Groovy DSL.
org.springframework.cloud.contract.spec.Contract.make {
request {
//...
method GET()
urlPath('/users') {
// Each parameter is specified in form
// `'paramName' : paramValue` where parameter value
// may be a simple literal or one of matcher functions,
// all of which are used in this example.
queryParameters {
// If a simple literal is used as value
// default matcher function is used (equalTo)
parameter 'limit': 100
// `equalTo` function simply compares passed value
// using identity operator (==).
parameter 'filter': equalTo("email")
// `containing` function matches strings
// that contains passed substring.
parameter 'gender': value(consumer(containing("[mf]")), producer('mf'))
// `matching` function tests parameter
// against passed regular expression.
parameter 'offset': value(consumer(matching("[0-9]+")), producer(123))
// `notMatching` functions tests if parameter
// does not match passed regular expression.
parameter 'loginStartsWith': value(consumer(notMatching(".{0,2}")), producer(3))
}
}
//...
}
response {
//...
status 200
}
}
YAML.
request:
...
queryParameters:
a: b
b: c
headers:
foo: bar
fooReq: baz
cookies:
foo: bar
fooReq: baz
body:
foo: bar
matchers:
body:
- path: $.foo
type: by_regex
value: bar
headers:
- key: foo
regex: bar
response:
status: 200
fixedDelayMilliseconds: 1000
headers:
foo2: bar
foo3: foo33
fooRes: baz
body:
foo2: bar
foo3: baz
nullValue: null
matchers:
body:
- path: $.foo2
type: by_regex
value: bar
- path: $.foo3
type: by_command
value: executeMe($it)
- path: $.nullValue
type: by_null
value: null
headers:
- key: foo2
regex: bar
- key: foo3
command: andMeToo($it)
cookies:
- key: foo2
regex: bar
- key: foo3
predefined:
request may contain additional request headers, as shown in the following example:
Groovy DSL.
org.springframework.cloud.contract.spec.Contract.make {
request {
//...
method GET()
url "/foo"
// Each header is added in form `'Header-Name' : 'Header-Value'`.
// there are also some helper methods
headers {
header 'key': 'value'
contentType(applicationJson())
}
//...
}
response {
//...
status 200
}
}
YAML.
request: ... headers: foo: bar fooReq: baz
request may contain additional request cookies, as shown in the following example:
Groovy DSL.
org.springframework.cloud.contract.spec.Contract.make {
request {
//...
method GET()
url "/foo"
// Each Cookies is added in form `'Cookie-Key' : 'Cookie-Value'`.
// there are also some helper methods
cookies {
cookie 'key': 'value'
cookie('another_key', 'another_value')
}
//...
}
response {
//...
status 200
}
}
YAML.
request: ... cookies: foo: bar fooReq: baz
request may contain a request body:
Groovy DSL.
org.springframework.cloud.contract.spec.Contract.make {
request {
//...
method GET()
url "/foo"
// Currently only JSON format of request body is supported.
// Format will be determined from a header or body's content.
body '''{ "login" : "john", "name": "John The Contract" }'''
}
response {
//...
status 200
}
}
YAML.
request: ... body: foo: bar
request may contain multipart elements. To include multipart elements, use the
multipart method/section, as shown in the following examples
Groovy DSL.
YAML.
request:
method: PUT
url: /multipart
headers:
Content-Type: multipart/form-data;boundary=AaB03x
multipart:
params:
# key (parameter name), value (parameter value) pair
formParameter: '"formParameterValue"'
someBooleanParameter: true
named:
- paramName: file
fileName: filename.csv
fileContent: file content
matchers:
multipart:
params:
- key: formParameter
regex: ".+"
- key: someBooleanParameter
predefined: any_boolean
named:
- paramName: file
fileName:
predefined: non_empty
fileContent:
predefined: non_empty
response:
status: 200
In the preceding example, we define parameters in either of two ways:
Groovy DSL
- Directly, by using the map notation, where the value can be a dynamic property (such as
formParameter: $(consumer(…), producer(…))). - By using the
named(…)method that lets you set a named parameter. A named parameter can set anameandcontent. You can call it either via a method with two arguments, such asnamed("fileName", "fileContent"), or via a map notation, such asnamed(name: "fileName", content: "fileContent").
YAML
- The multipart parameters are set via
multipart.paramssection - The named parameters (the
fileNameandfileContentfor a given parameter name) can be set via themultipart.namedsection. That section contains theparamName(name of the parameter),fileName(name of the file),fileContent(content of the file) fields The dynamic bits can be set via the
matchers.multipartsection- for parameters use the
paramssection that can acceptregexor apredefinedregular expression - for named params use the
namedsection where first you define the parameter name viaparamNameand then you can pass the parametrization of eitherfileNameorfileContentviaregexor apredefinedregular expression
- for parameters use the
From this contract, the generated test is as follows:
// given: MockMvcRequestSpecification request = given() .header("Content-Type", "multipart/form-data;boundary=AaB03x") .param("formParameter", "\"formParameterValue\"") .param("someBooleanParameter", "true") .multiPart("file", "filename.csv", "file content".getBytes()); // when: ResponseOptions response = given().spec(request) .put("/multipart"); // then: assertThat(response.statusCode()).isEqualTo(200);
The WireMock stub is as follows:
''' { "request" : { "url" : "/multipart", "method" : "PUT", "headers" : { "Content-Type" : { "matches" : "multipart/form-data;boundary=AaB03x.*" } }, "bodyPatterns" : [ { "matches" : ".*--(.*)\\r\\nContent-Disposition: form-data; name=\\"formParameter\\"\\r\\n(Content-Type: .*\\r\\n)?(Content-Transfer-Encoding: .*\\r\\n)?(Content-Length: \\\\d+\\r\\n)?\\r\\n\\".+\\"\\r\\n--\\\\1.*" }, { "matches" : ".*--(.*)\\r\\nContent-Disposition: form-data; name=\\"someBooleanParameter\\"\\r\\n(Content-Type: .*\\r\\n)?(Content-Transfer-Encoding: .*\\r\\n)?(Content-Length: \\\\d+\\r\\n)?\\r\\n(true|false)\\r\\n--\\\\1.*" }, { "matches" : ".*--(.*)\\r\\nContent-Disposition: form-data; name=\\"file\\"; filename=\\"[\\\\S\\\\s]+\\"\\r\\n(Content-Type: .*\\r\\n)?(Content-Transfer-Encoding: .*\\r\\n)?(Content-Length: \\\\d+\\r\\n)?\\r\\n[\\\\S\\\\s]+\\r\\n--\\\\1.*" } ] }, "response" : { "status" : 200, "transformers" : [ "response-template", "foo-transformer" ] } } '''
The response must contain an HTTP status code and may contain other information. The following code shows an example:
Groovy DSL.
org.springframework.cloud.contract.spec.Contract.make {
request {
//...
method GET()
url "/foo"
}
response {
// Status code sent by the server
// in response to request specified above.
status OK()
}
}
YAML.
response: ... status: 200
Besides status, the response may contain headers, cookies and a body, both of which are specified the same way as in the request (see the previous paragraph).
| Tip |
|---|---|
Via the Groovy DSL you can reference the |
The contract can contain some dynamic properties: timestamps, IDs, and so on. You do not want to force the consumers to stub their clocks to always return the same value of time so that it gets matched by the stub.
For Groovy DSL you can provide the dynamic parts in your contracts
in two ways: pass them directly in the body or set them in a separate section called
bodyMatchers.
| Note |
|---|---|
Before 2.0.0 these were set using |
For YAML you can only use the matchers section.
| Important |
|---|---|
This section is valid only for Groovy DSL. Check out the Section 93.5.7, “Dynamic Properties in the Matchers Sections” section for YAML examples of a similar feature. |
You can set the properties inside the body either with the value method or, if you use
the Groovy map notation, with $(). The following example shows how to set dynamic
properties with the value method:
value(consumer(...), producer(...)) value(c(...), p(...)) value(stub(...), test(...)) value(client(...), server(...))
The following example shows how to set dynamic properties with $():
$(consumer(...), producer(...)) $(c(...), p(...)) $(stub(...), test(...)) $(client(...), server(...))
Both approaches work equally well. stub and client methods are aliases over the consumer
method. Subsequent sections take a closer look at what you can do with those values.
| Important |
|---|---|
This section is valid only for Groovy DSL. Check out the Section 93.5.7, “Dynamic Properties in the Matchers Sections” section for YAML examples of a similar feature. |
You can use regular expressions to write your requests in Contract DSL. Doing so is particularly useful when you want to indicate that a given response should be provided for requests that follow a given pattern. Also, you can use regular expressions when you need to use patterns and not exact values both for your test and your server side tests.
The following example shows how to use regular expressions to write a request:
org.springframework.cloud.contract.spec.Contract.make {
request {
method('GET')
url $(consumer(~/\/[0-9]{2}/), producer('/12'))
}
response {
status OK()
body(
id: $(anyNumber()),
surname: $(
consumer('Kowalsky'),
producer(regex('[a-zA-Z]+'))
),
name: 'Jan',
created: $(consumer('2014-02-02 12:23:43'), producer(execute('currentDate(it)'))),
correlationId: value(consumer('5d1f9fef-e0dc-4f3d-a7e4-72d2220dd827'),
producer(regex('[a-fA-F0-9]{8}-[a-fA-F0-9]{4}-[a-fA-F0-9]{4}-[a-fA-F0-9]{4}-[a-fA-F0-9]{12}'))
)
)
headers {
header 'Content-Type': 'text/plain'
}
}
}You can also provide only one side of the communication with a regular expression. If you do so, then the contract engine automatically provides the generated string that matches the provided regular expression. The following code shows an example:
org.springframework.cloud.contract.spec.Contract.make {
request {
method 'PUT'
url value(consumer(regex('/foo/[0-9]{5}')))
body([
requestElement: $(consumer(regex('[0-9]{5}')))
])
headers {
header('header', $(consumer(regex('application\\/vnd\\.fraud\\.v1\\+json;.*'))))
}
}
response {
status OK()
body([
responseElement: $(producer(regex('[0-9]{7}')))
])
headers {
contentType("application/vnd.fraud.v1+json")
}
}
}In the preceding example, the opposite side of the communication has the respective data generated for request and response.
Spring Cloud Contract comes with a series of predefined regular expressions that you can use in your contracts, as shown in the following example:
protected static final Pattern TRUE_OR_FALSE = Pattern.compile(/(true|false)/) protected static final Pattern ALPHA_NUMERIC = Pattern.compile('[a-zA-Z0-9]+') protected static final Pattern ONLY_ALPHA_UNICODE = Pattern.compile(/[\p{L}]*/) protected static final Pattern NUMBER = Pattern.compile('-?(\\d*\\.\\d+|\\d+)') protected static final Pattern INTEGER = Pattern.compile('-?(\\d+)') protected static final Pattern POSITIVE_INT = Pattern.compile('([1-9]\\d*)') protected static final Pattern DOUBLE = Pattern.compile('-?(\\d*\\.\\d+)') protected static final Pattern HEX = Pattern.compile('[a-fA-F0-9]+') protected static final Pattern IP_ADDRESS = Pattern. compile('([01]?\\d\\d?|2[0-4]\\d|25[0-5])\\.([01]?\\d\\d?|2[0-4]\\d|25[0-5])\\.([01]?\\d\\d?|2[0-4]\\d|25[0-5])\\.([01]?\\d\\d?|2[0-4]\\d|25[0-5])') protected static final Pattern HOSTNAME_PATTERN = Pattern. compile('((http[s]?|ftp):/)/?([^:/\\s]+)(:[0-9]{1,5})?') protected static final Pattern EMAIL = Pattern. compile('[a-zA-Z0-9._%+-]+@[a-zA-Z0-9.-]+\\.[a-zA-Z]{2,6}') protected static final Pattern URL = UrlHelper.URL protected static final Pattern HTTPS_URL = UrlHelper.HTTPS_URL protected static final Pattern UUID = Pattern. compile('[a-f0-9]{8}-[a-f0-9]{4}-[a-f0-9]{4}-[a-f0-9]{4}-[a-f0-9]{12}') protected static final Pattern ANY_DATE = Pattern. compile('(\\d\\d\\d\\d)-(0[1-9]|1[012])-(0[1-9]|[12][0-9]|3[01])') protected static final Pattern ANY_DATE_TIME = Pattern. compile('([0-9]{4})-(1[0-2]|0[1-9])-(3[01]|0[1-9]|[12][0-9])T(2[0-3]|[01][0-9]):([0-5][0-9]):([0-5][0-9])') protected static final Pattern ANY_TIME = Pattern. compile('(2[0-3]|[01][0-9]):([0-5][0-9]):([0-5][0-9])') protected static final Pattern NON_EMPTY = Pattern.compile(/[\S\s]+/) protected static final Pattern NON_BLANK = Pattern.compile(/^\s*\S[\S\s]*/) protected static final Pattern ISO8601_WITH_OFFSET = Pattern. compile(/([0-9]{4})-(1[0-2]|0[1-9])-(3[01]|0[1-9]|[12][0-9])T(2[0-3]|[01][0-9]):([0-5][0-9]):([0-5][0-9])(\.\d{3})?(Z|[+-][01]\d:[0-5]\d)/) protected static Pattern anyOf(String... values) { return Pattern.compile(values.collect({ "^$it\$" }).join("|")) } RegexProperty onlyAlphaUnicode() { return new RegexProperty(ONLY_ALPHA_UNICODE).asString() } RegexProperty alphaNumeric() { return new RegexProperty(ALPHA_NUMERIC).asString() } RegexProperty number() { return new RegexProperty(NUMBER).asDouble() } RegexProperty positiveInt() { return new RegexProperty(POSITIVE_INT).asInteger() } RegexProperty anyBoolean() { return new RegexProperty(TRUE_OR_FALSE).asBooleanType() } RegexProperty anInteger() { return new RegexProperty(INTEGER).asInteger() } RegexProperty aDouble() { return new RegexProperty(DOUBLE).asDouble() } RegexProperty ipAddress() { return new RegexProperty(IP_ADDRESS).asString() } RegexProperty hostname() { return new RegexProperty(HOSTNAME_PATTERN).asString() } RegexProperty email() { return new RegexProperty(EMAIL).asString() } RegexProperty url() { return new RegexProperty(URL).asString() } RegexProperty httpsUrl() { return new RegexProperty(HTTPS_URL).asString() } RegexProperty uuid() { return new RegexProperty(UUID).asString() } RegexProperty isoDate() { return new RegexProperty(ANY_DATE).asString() } RegexProperty isoDateTime() { return new RegexProperty(ANY_DATE_TIME).asString() } RegexProperty isoTime() { return new RegexProperty(ANY_TIME).asString() } RegexProperty iso8601WithOffset() { return new RegexProperty(ISO8601_WITH_OFFSET).asString() } RegexProperty nonEmpty() { return new RegexProperty(NON_EMPTY).asString() } RegexProperty nonBlank() { return new RegexProperty(NON_BLANK).asString() }
In your contract, you can use it as shown in the following example:
Contract dslWithOptionalsInString = Contract.make {
priority 1
request {
method POST()
url '/users/password'
headers {
contentType(applicationJson())
}
body(
email: $(consumer(optional(regex(email()))), producer('[email protected]')),
callback_url: $(consumer(regex(hostname())), producer('http://partners.com'))
)
}
response {
status 404
headers {
contentType(applicationJson())
}
body(
code: value(consumer("123123"), producer(optional("123123"))),
message: "User not found by email = [${value(producer(regex(email())), consumer('[email protected]'))}]"
)
}
}To make matters even simpler you can use a set of predefined objects that will automatically assume that you want a regular expression to be passed.
All of those methods start with any prefix:
T anyAlphaUnicode() T anyAlphaNumeric() T anyNumber() T anyInteger() T anyPositiveInt() T anyDouble() T anyHex() T aBoolean() T anyIpAddress() T anyHostname() T anyEmail() T anyUrl() T anyHttpsUrl() T anyUuid() T anyDate() T anyDateTime() T anyTime() T anyIso8601WithOffset() T anyNonBlankString() T anyNonEmptyString() T anyOf(String... values)
and this is an example of how you can reference those methods:
Contract contractDsl = Contract.make {
label 'trigger_event'
input {
triggeredBy('toString()')
}
outputMessage {
sentTo 'topic.rateablequote'
body([
alpha : $(anyAlphaUnicode()),
number : $(anyNumber()),
anInteger : $(anyInteger()),
positiveInt : $(anyPositiveInt()),
aDouble : $(anyDouble()),
aBoolean : $(aBoolean()),
ip : $(anyIpAddress()),
hostname : $(anyHostname()),
email : $(anyEmail()),
url : $(anyUrl()),
httpsUrl : $(anyHttpsUrl()),
uuid : $(anyUuid()),
date : $(anyDate()),
dateTime : $(anyDateTime()),
time : $(anyTime()),
iso8601WithOffset: $(anyIso8601WithOffset()),
nonBlankString : $(anyNonBlankString()),
nonEmptyString : $(anyNonEmptyString()),
anyOf : $(anyOf('foo', 'bar'))
])
}
} | Important |
|---|---|
This section is valid only for Groovy DSL. Check out the Section 93.5.7, “Dynamic Properties in the Matchers Sections” section for YAML examples of a similar feature. |
It is possible to provide optional parameters in your contract. However, you can provide optional parameters only for the following:
- STUB side of the Request
- TEST side of the Response
The following example shows how to provide optional parameters:
org.springframework.cloud.contract.spec.Contract.make {
priority 1
request {
method 'POST'
url '/users/password'
headers {
contentType(applicationJson())
}
body(
email: $(consumer(optional(regex(email()))), producer('[email protected]')),
callback_url: $(consumer(regex(hostname())), producer('http://partners.com'))
)
}
response {
status 404
headers {
header 'Content-Type': 'application/json'
}
body(
code: value(consumer("123123"), producer(optional("123123")))
)
}
}By wrapping a part of the body with the optional() method, you create a regular
expression that must be present 0 or more times.
If you use Spock for, the following test would be generated from the previous example:
""" given: def request = given() .header("Content-Type", "application/json") .body('''{"email":"[email protected]","callback_url":"http://partners.com"}''') when: def response = given().spec(request) .post("/users/password") then: response.statusCode == 404 response.header('Content-Type') == 'application/json' and: DocumentContext parsedJson = JsonPath.parse(response.body.asString()) assertThatJson(parsedJson).field("['code']").matches("(123123)?") """
The following stub would also be generated:
''' { "request" : { "url" : "/users/password", "method" : "POST", "bodyPatterns" : [ { "matchesJsonPath" : "$[?(@.['email'] =~ /([a-zA-Z0-9._%+-]+@[a-zA-Z0-9.-]+\\\\.[a-zA-Z]{2,6})?/)]" }, { "matchesJsonPath" : "$[?(@.['callback_url'] =~ /((http[s]?|ftp):\\\\/)\\\\/?([^:\\\\/\\\\s]+)(:[0-9]{1,5})?/)]" } ], "headers" : { "Content-Type" : { "equalTo" : "application/json" } } }, "response" : { "status" : 404, "body" : "{\\"code\\":\\"123123\\",\\"message\\":\\"User not found by email == [not.existing@user.com]\\"}", "headers" : { "Content-Type" : "application/json" } }, "priority" : 1 } '''
| Important |
|---|---|
This section is valid only for Groovy DSL. Check out the Section 93.5.7, “Dynamic Properties in the Matchers Sections” section for YAML examples of a similar feature. |
You can define a method call that executes on the server side during the test. Such a method can be added to the class defined as "baseClassForTests" in the configuration. The following code shows an example of the contract portion of the test case:
org.springframework.cloud.contract.spec.Contract.make {
request {
method 'PUT'
url $(consumer(regex('^/api/[0-9]{2}$')), producer('/api/12'))
headers {
header 'Content-Type': 'application/json'
}
body '''\
[{
"text": "Gonna see you at Warsaw"
}]
'''
}
response {
body(
path: $(consumer('/api/12'), producer(regex('^/api/[0-9]{2}$'))),
correlationId: $(consumer('1223456'), producer(execute('isProperCorrelationId($it)')))
)
status OK()
}
}The following code shows the base class portion of the test case:
abstract class BaseMockMvcSpec extends Specification { def setup() { RestAssuredMockMvc.standaloneSetup(new PairIdController()) } void isProperCorrelationId(Integer correlationId) { assert correlationId == 123456 } void isEmpty(String value) { assert value == null } }
| Important |
|---|---|
You cannot use both a String and |
The type of the object read from the JSON can be one of the following, depending on the JSON path:
String: If you point to aStringvalue in the JSON.JSONArray: If you point to aListin the JSON.Map: If you point to aMapin the JSON.Number: If you point toInteger,Doubleetc. in the JSON.Boolean: If you point to aBooleanin the JSON.
In the request part of the contract, you can specify that the body should be taken from
a method.
| Important |
|---|---|
You must provide both the consumer and the producer side. The |
The following example shows how to read an object from JSON:
Contract contractDsl = Contract.make {
request {
method 'GET'
url '/something'
body(
$(c('foo'), p(execute('hashCode()')))
)
}
response {
status OK()
}
}The preceding example results in calling the hashCode() method in the request body.
It should resemble the following code:
// given: MockMvcRequestSpecification request = given() .body(hashCode()); // when: ResponseOptions response = given().spec(request) .get("/something"); // then: assertThat(response.statusCode()).isEqualTo(200);
The best situation is to provide fixed values, but sometimes you need to reference a request in your response.
If you’re writing contracts using Groovy DSL, you can use the fromRequest() method, which lets
you reference a bunch of elements from the HTTP request. You can use the following
options:
fromRequest().url(): Returns the request URL and query parameters.fromRequest().query(String key): Returns the first query parameter with a given name.fromRequest().query(String key, int index): Returns the nth query parameter with a given name.fromRequest().path(): Returns the full path.fromRequest().path(int index): Returns the nth path element.fromRequest().header(String key): Returns the first header with a given name.fromRequest().header(String key, int index): Returns the nth header with a given name.fromRequest().body(): Returns the full request body.fromRequest().body(String jsonPath): Returns the element from the request that matches the JSON Path.
If you’re using the YAML contract definition you have to use the
Handlebars {{{ }}} notation with custom, Spring Cloud Contract
functions to achieve this.
{{{ request.url }}}: Returns the request URL and query parameters.{{{ request.query.key.[index] }}}: Returns the nth query parameter with a given name. E.g. for keyfoo, first entry{{{ request.query.foo.[0] }}}{{{ request.path }}}: Returns the full path.{{{ request.path.[index] }}}: Returns the nth path element. E.g. for first entry`{{{ request.path.[0] }}}{{{ request.headers.key }}}: Returns the first header with a given name.{{{ request.headers.key.[index] }}}: Returns the nth header with a given name.{{{ request.body }}}: Returns the full request body.{{{ jsonpath this 'your.json.path' }}}: Returns the element from the request that matches the JSON Path. E.g. for json path$.foo-{{{ jsonpath this '$.foo' }}}
Consider the following contract:
Groovy DSL.
YAML.
request:
method: GET
url: /api/v1/xxxx
queryParameters:
foo:
- bar
- bar2
headers:
Authorization:
- secret
- secret2
body:
foo: bar
baz: 5
response:
status: 200
headers:
Authorization: "foo {{{ request.headers.Authorization.0 }}} bar"
body:
url: "{{{ request.url }}}"
path: "{{{ request.path }}}"
pathIndex: "{{{ request.path.1 }}}"
param: "{{{ request.query.foo }}}"
paramIndex: "{{{ request.query.foo.1 }}}"
authorization: "{{{ request.headers.Authorization.0 }}}"
authorization2: "{{{ request.headers.Authorization.1 }}"
fullBody: "{{{ request.body }}}"
responseFoo: "{{{ jsonpath this '$.foo' }}}"
responseBaz: "{{{ jsonpath this '$.baz' }}}"
responseBaz2: "Bla bla {{{ jsonpath this '$.foo' }}} bla bla"
Running a JUnit test generation leads to a test that resembles the following example:
// given: MockMvcRequestSpecification request = given() .header("Authorization", "secret") .header("Authorization", "secret2") .body("{\"foo\":\"bar\",\"baz\":5}"); // when: ResponseOptions response = given().spec(request) .queryParam("foo","bar") .queryParam("foo","bar2") .get("/api/v1/xxxx"); // then: assertThat(response.statusCode()).isEqualTo(200); assertThat(response.header("Authorization")).isEqualTo("foo secret bar"); // and: DocumentContext parsedJson = JsonPath.parse(response.getBody().asString()); assertThatJson(parsedJson).field("['fullBody']").isEqualTo("{\"foo\":\"bar\",\"baz\":5}"); assertThatJson(parsedJson).field("['authorization']").isEqualTo("secret"); assertThatJson(parsedJson).field("['authorization2']").isEqualTo("secret2"); assertThatJson(parsedJson).field("['path']").isEqualTo("/api/v1/xxxx"); assertThatJson(parsedJson).field("['param']").isEqualTo("bar"); assertThatJson(parsedJson).field("['paramIndex']").isEqualTo("bar2"); assertThatJson(parsedJson).field("['pathIndex']").isEqualTo("v1"); assertThatJson(parsedJson).field("['responseBaz']").isEqualTo(5); assertThatJson(parsedJson).field("['responseFoo']").isEqualTo("bar"); assertThatJson(parsedJson).field("['url']").isEqualTo("/api/v1/xxxx?foo=bar&foo=bar2"); assertThatJson(parsedJson).field("['responseBaz2']").isEqualTo("Bla bla bar bla bla");
As you can see, elements from the request have been properly referenced in the response.
The generated WireMock stub should resemble the following example:
{ "request" : { "urlPath" : "/api/v1/xxxx", "method" : "POST", "headers" : { "Authorization" : { "equalTo" : "secret2" } }, "queryParameters" : { "foo" : { "equalTo" : "bar2" } }, "bodyPatterns" : [ { "matchesJsonPath" : "$[?(@.['baz'] == 5)]" }, { "matchesJsonPath" : "$[?(@.['foo'] == 'bar')]" } ] }, "response" : { "status" : 200, "body" : "{\"authorization\":\"{{{request.headers.Authorization.[0]}}}\",\"path\":\"{{{request.path}}}\",\"responseBaz\":{{{jsonpath this '$.baz'}}} ,\"param\":\"{{{request.query.foo.[0]}}}\",\"pathIndex\":\"{{{request.path.[1]}}}\",\"responseBaz2\":\"Bla bla {{{jsonpath this '$.foo'}}} bla bla\",\"responseFoo\":\"{{{jsonpath this '$.foo'}}}\",\"authorization2\":\"{{{request.headers.Authorization.[1]}}}\",\"fullBody\":\"{{{escapejsonbody}}}\",\"url\":\"{{{request.url}}}\",\"paramIndex\":\"{{{request.query.foo.[1]}}}\"}", "headers" : { "Authorization" : "{{{request.headers.Authorization.[0]}}};foo" }, "transformers" : [ "response-template" ] } }
Sending a request such as the one presented in the request part of the contract results
in sending the following response body:
{ "url" : "/api/v1/xxxx?foo=bar&foo=bar2", "path" : "/api/v1/xxxx", "pathIndex" : "v1", "param" : "bar", "paramIndex" : "bar2", "authorization" : "secret", "authorization2" : "secret2", "fullBody" : "{\"foo\":\"bar\",\"baz\":5}", "responseFoo" : "bar", "responseBaz" : 5, "responseBaz2" : "Bla bla bar bla bla" }
| Important |
|---|---|
This feature works only with WireMock having a version greater than or equal
to 2.5.1. The Spring Cloud Contract Verifier uses WireMock’s
|
escapejsonbody: Escapes the request body in a format that can be embedded in a JSON.jsonpath: For a given parameter, find an object in the request body.
WireMock lets you register custom extensions. By default, Spring Cloud Contract registers
the transformer, which lets you reference a request from a response. If you want to
provide your own extensions, you can register an implementation of the
org.springframework.cloud.contract.verifier.dsl.wiremock.WireMockExtensions interface.
Since we use the spring.factories extension approach, you can create an entry in
META-INF/spring.factories file similar to the following:
org.springframework.cloud.contract.verifier.dsl.wiremock.WireMockExtensions=\ org.springframework.cloud.contract.stubrunner.provider.wiremock.TestWireMockExtensions org.springframework.cloud.contract.spec.ContractConverter=\ org.springframework.cloud.contract.stubrunner.TestCustomYamlContractConverter
The following is an example of a custom extension:
TestWireMockExtensions.groovy.
/* * Copyright 2013-2019 the original author or authors. * * Licensed under the Apache License, Version 2.0 (the "License"); * you may not use this file except in compliance with the License. * You may obtain a copy of the License at * * https://www.apache.org/licenses/LICENSE-2.0 * * Unless required by applicable law or agreed to in writing, software * distributed under the License is distributed on an "AS IS" BASIS, * WITHOUT WARRANTIES OR CONDITIONS OF ANY KIND, either express or implied. * See the License for the specific language governing permissions and * limitations under the License. */ package org.springframework.cloud.contract.verifier.dsl.wiremock import com.github.tomakehurst.wiremock.extension.Extension /** * Extension that registers the default transformer and the custom one */ class TestWireMockExtensions implements WireMockExtensions { @Override List<Extension> extensions() { return [ new DefaultResponseTransformer(), new CustomExtension() ] } } class CustomExtension implements Extension { @Override String getName() { return "foo-transformer" } }
| Important |
|---|---|
Remember to override the |
If you work with Pact, the following discussion may seem familiar. Quite a few users are used to having a separation between the body and setting the dynamic parts of a contract.
You can use the bodyMatchers section for two reasons:
- Define the dynamic values that should end up in a stub.
You can set it in the
requestorinputMessagepart of your contract. - Verify the result of your test.
This section is present in the
responseoroutputMessageside of the contract.
Currently, Spring Cloud Contract Verifier supports only JSON Path-based matchers with the following matching possibilities:
Groovy DSL
For the stubs(in tests on the Consumer’s side):
byEquality(): The value taken from the consumer’s request via the provided JSON Path must be equal to the value provided in the contract.byRegex(…): The value taken from the consumer’s request via the provided JSON Path must match the regex. You can also pass the type of the expected matched value (e.g.asString(),asLong()etc.)byDate(): The value taken from the consumer’s request via the provided JSON Path must match the regex for an ISO Date value.byTimestamp(): The value taken from the consumer’s request via the provided JSON Path must match the regex for an ISO DateTime value.byTime(): The value taken from the consumer’s request via the provided JSON Path must match the regex for an ISO Time value.
For the verification(in generated tests on the Producer’s side):
byEquality(): The value taken from the producer’s response via the provided JSON Path must be equal to the provided value in the contract.byRegex(…): The value taken from the producer’s response via the provided JSON Path must match the regex.byDate(): The value taken from the producer’s response via the provided JSON Path must match the regex for an ISO Date value.byTimestamp(): The value taken from the producer’s response via the provided JSON Path must match the regex for an ISO DateTime value.byTime(): The value taken from the producer’s response via the provided JSON Path must match the regex for an ISO Time value.byType(): The value taken from the producer’s response via the provided JSON Path needs to be of the same type as the type defined in the body of the response in the contract.byTypecan take a closure, in which you can setminOccurrenceandmaxOccurrence. For the request side, you should use the closure to assert size of the collection. That way, you can assert the size of the flattened collection. To check the size of an unflattened collection, use a custom method with thebyCommand(…)testMatcher.byCommand(…): The value taken from the producer’s response via the provided JSON Path is passed as an input to the custom method that you provide. For example,byCommand('foo($it)')results in calling afoomethod to which the value matching the JSON Path gets passed. The type of the object read from the JSON can be one of the following, depending on the JSON path:String: If you point to aStringvalue.JSONArray: If you point to aList.Map: If you point to aMap.Number: If you point toInteger,Double, or other kind of number.Boolean: If you point to aBoolean.
byNull(): The value taken from the response via the provided JSON Path must be null
YAML. Please read the Groovy section for detailed explanation of what the types mean
For YAML the structure of a matcher looks like this
- path: $.foo type: by_regex value: bar regexType: as_string
Or if you want to use one of the predefined regular expressions
[only_alpha_unicode, number, any_boolean, ip_address, hostname,
email, url, uuid, iso_date, iso_date_time, iso_time, iso_8601_with_offset, non_empty, non_blank]:
- path: $.foo type: by_regex predefined: only_alpha_unicode
Below you can find the allowed list of `type`s.
For
stubMatchers:by_equalityby_regexby_dateby_timestampby_timeby_type- there are 2 additional fields accepted:
minOccurrenceandmaxOccurrence.
- there are 2 additional fields accepted:
For
testMatchers:by_equalityby_regexby_dateby_timestampby_timeby_type- there are 2 additional fields accepted:
minOccurrenceandmaxOccurrence.
- there are 2 additional fields accepted:
by_commandby_null
You can also define which type the regular expression corresponds to via the regexType field. Below you can find the allowed list of regular expression types:
- as_integer
- as_double
- as_float,
- as_long
- as_short
- as_boolean
- as_string
Consider the following example:
Groovy DSL.
Contract contractDsl = Contract.make {
request {
method 'GET'
urlPath '/get'
body([
duck : 123,
alpha : 'abc',
number : 123,
aBoolean : true,
date : '2017-01-01',
dateTime : '2017-01-01T01:23:45',
time : '01:02:34',
valueWithoutAMatcher: 'foo',
valueWithTypeMatch : 'string',
key : [
'complex.key': 'foo'
]
])
bodyMatchers {
jsonPath('$.duck', byRegex("[0-9]{3}").asInteger())
jsonPath('$.duck', byEquality())
jsonPath('$.alpha', byRegex(onlyAlphaUnicode()).asString())
jsonPath('$.alpha', byEquality())
jsonPath('$.number', byRegex(number()).asInteger())
jsonPath('$.aBoolean', byRegex(anyBoolean()).asBooleanType())
jsonPath('$.date', byDate())
jsonPath('$.dateTime', byTimestamp())
jsonPath('$.time', byTime())
jsonPath("\$.['key'].['complex.key']", byEquality())
}
headers {
contentType(applicationJson())
}
}
response {
status OK()
body([
duck : 123,
alpha : 'abc',
number : 123,
positiveInteger : 1234567890,
negativeInteger : -1234567890,
positiveDecimalNumber: 123.4567890,
negativeDecimalNumber: -123.4567890,
aBoolean : true,
date : '2017-01-01',
dateTime : '2017-01-01T01:23:45',
time : "01:02:34",
valueWithoutAMatcher : 'foo',
valueWithTypeMatch : 'string',
valueWithMin : [
1, 2, 3
],
valueWithMax : [
1, 2, 3
],
valueWithMinMax : [
1, 2, 3
],
valueWithMinEmpty : [],
valueWithMaxEmpty : [],
key : [
'complex.key': 'foo'
],
nullValue : null
])
bodyMatchers {
// asserts the jsonpath value against manual regex
jsonPath('$.duck', byRegex("[0-9]{3}").asInteger())
// asserts the jsonpath value against the provided value
jsonPath('$.duck', byEquality())
// asserts the jsonpath value against some default regex
jsonPath('$.alpha', byRegex(onlyAlphaUnicode()).asString())
jsonPath('$.alpha', byEquality())
jsonPath('$.number', byRegex(number()).asInteger())
jsonPath('$.positiveInteger', byRegex(anInteger()).asInteger())
jsonPath('$.negativeInteger', byRegex(anInteger()).asInteger())
jsonPath('$.positiveDecimalNumber', byRegex(aDouble()).asDouble())
jsonPath('$.negativeDecimalNumber', byRegex(aDouble()).asDouble())
jsonPath('$.aBoolean', byRegex(anyBoolean()).asBooleanType())
// asserts vs inbuilt time related regex
jsonPath('$.date', byDate())
jsonPath('$.dateTime', byTimestamp())
jsonPath('$.time', byTime())
// asserts that the resulting type is the same as in response body
jsonPath('$.valueWithTypeMatch', byType())
jsonPath('$.valueWithMin', byType {
// results in verification of size of array (min 1)
minOccurrence(1)
})
jsonPath('$.valueWithMax', byType {
// results in verification of size of array (max 3)
maxOccurrence(3)
})
jsonPath('$.valueWithMinMax', byType {
// results in verification of size of array (min 1 & max 3)
minOccurrence(1)
maxOccurrence(3)
})
jsonPath('$.valueWithMinEmpty', byType {
// results in verification of size of array (min 0)
minOccurrence(0)
})
jsonPath('$.valueWithMaxEmpty', byType {
// results in verification of size of array (max 0)
maxOccurrence(0)
})
// will execute a method `assertThatValueIsANumber`
jsonPath('$.duck', byCommand('assertThatValueIsANumber($it)'))
jsonPath("\$.['key'].['complex.key']", byEquality())
jsonPath('$.nullValue', byNull())
}
headers {
contentType(applicationJson())
header('Some-Header', $(c('someValue'), p(regex('[a-zA-Z]{9}'))))
}
}
}
YAML.
request:
method: GET
urlPath: /get/1
headers:
Content-Type: application/json
cookies:
foo: 2
bar: 3
queryParameters:
limit: 10
offset: 20
filter: 'email'
sort: name
search: 55
age: 99
name: John.Doe
email: '[email protected]'
body:
duck: 123
alpha: "abc"
number: 123
aBoolean: true
date: "2017-01-01"
dateTime: "2017-01-01T01:23:45"
time: "01:02:34"
valueWithoutAMatcher: "foo"
valueWithTypeMatch: "string"
key:
"complex.key": 'foo'
nullValue: null
valueWithMin:
- 1
- 2
- 3
valueWithMax:
- 1
- 2
- 3
valueWithMinMax:
- 1
- 2
- 3
valueWithMinEmpty: []
valueWithMaxEmpty: []
matchers:
url:
regex: /get/[0-9]
# predefined:
# execute a method
#command: 'equals($it)'
queryParameters:
- key: limit
type: equal_to
value: 20
- key: offset
type: containing
value: 20
- key: sort
type: equal_to
value: name
- key: search
type: not_matching
value: '^[0-9]{2}$'
- key: age
type: not_matching
value: '^\\w*$'
- key: name
type: matching
value: 'John.*'
- key: hello
type: absent
cookies:
- key: foo
regex: '[0-9]'
- key: bar
command: 'equals($it)'
headers:
- key: Content-Type
regex: "application/json.*"
body:
- path: $.duck
type: by_regex
value: "[0-9]{3}"
- path: $.duck
type: by_equality
- path: $.alpha
type: by_regex
predefined: only_alpha_unicode
- path: $.alpha
type: by_equality
- path: $.number
type: by_regex
predefined: number
- path: $.aBoolean
type: by_regex
predefined: any_boolean
- path: $.date
type: by_date
- path: $.dateTime
type: by_timestamp
- path: $.time
type: by_time
- path: "$.['key'].['complex.key']"
type: by_equality
- path: $.nullvalue
type: by_null
- path: $.valueWithMin
type: by_type
minOccurrence: 1
- path: $.valueWithMax
type: by_type
maxOccurrence: 3
- path: $.valueWithMinMax
type: by_type
minOccurrence: 1
maxOccurrence: 3
response:
status: 200
cookies:
foo: 1
bar: 2
body:
duck: 123
alpha: "abc"
number: 123
aBoolean: true
date: "2017-01-01"
dateTime: "2017-01-01T01:23:45"
time: "01:02:34"
valueWithoutAMatcher: "foo"
valueWithTypeMatch: "string"
valueWithMin:
- 1
- 2
- 3
valueWithMax:
- 1
- 2
- 3
valueWithMinMax:
- 1
- 2
- 3
valueWithMinEmpty: []
valueWithMaxEmpty: []
key:
'complex.key': 'foo'
nulValue: null
matchers:
headers:
- key: Content-Type
regex: "application/json.*"
cookies:
- key: foo
regex: '[0-9]'
- key: bar
command: 'equals($it)'
body:
- path: $.duck
type: by_regex
value: "[0-9]{3}"
- path: $.duck
type: by_equality
- path: $.alpha
type: by_regex
predefined: only_alpha_unicode
- path: $.alpha
type: by_equality
- path: $.number
type: by_regex
predefined: number
- path: $.aBoolean
type: by_regex
predefined: any_boolean
- path: $.date
type: by_date
- path: $.dateTime
type: by_timestamp
- path: $.time
type: by_time
- path: $.valueWithTypeMatch
type: by_type
- path: $.valueWithMin
type: by_type
minOccurrence: 1
- path: $.valueWithMax
type: by_type
maxOccurrence: 3
- path: $.valueWithMinMax
type: by_type
minOccurrence: 1
maxOccurrence: 3
- path: $.valueWithMinEmpty
type: by_type
minOccurrence: 0
- path: $.valueWithMaxEmpty
type: by_type
maxOccurrence: 0
- path: $.duck
type: by_command
value: assertThatValueIsANumber($it)
- path: $.nullValue
type: by_null
value: null
headers:
Content-Type: application/json
In the preceding example, you can see the dynamic portions of the contract in the
matchers sections. For the request part, you can see that, for all fields but
valueWithoutAMatcher, the values of the regular expressions that the stub should
contain are explicitly set. For the valueWithoutAMatcher, the verification takes place
in the same way as without the use of matchers. In that case, the test performs an
equality check.
For the response side in the bodyMatchers section, we define the dynamic parts in a
similar manner. The only difference is that the byType matchers are also present. The
verifier engine checks four fields to verify whether the response from the test
has a value for which the JSON path matches the given field, is of the same type as the one
defined in the response body, and passes the following check (based on the method being called):
- For
$.valueWithTypeMatch, the engine checks whether the type is the same. - For
$.valueWithMin, the engine check the type and asserts whether the size is greater than or equal to the minimum occurrence. - For
$.valueWithMax, the engine checks the type and asserts whether the size is smaller than or equal to the maximum occurrence. - For
$.valueWithMinMax, the engine checks the type and asserts whether the size is between the min and maximum occurrence.
The resulting test would resemble the following example (note that an and section
separates the autogenerated assertions and the assertion from matchers):
// given: MockMvcRequestSpecification request = given() .header("Content-Type", "application/json") .body("{\"duck\":123,\"alpha\":\"abc\",\"number\":123,\"aBoolean\":true,\"date\":\"2017-01-01\",\"dateTime\":\"2017-01-01T01:23:45\",\"time\":\"01:02:34\",\"valueWithoutAMatcher\":\"foo\",\"valueWithTypeMatch\":\"string\",\"key\":{\"complex.key\":\"foo\"}}"); // when: ResponseOptions response = given().spec(request) .get("/get"); // then: assertThat(response.statusCode()).isEqualTo(200); assertThat(response.header("Content-Type")).matches("application/json.*"); // and: DocumentContext parsedJson = JsonPath.parse(response.getBody().asString()); assertThatJson(parsedJson).field("['valueWithoutAMatcher']").isEqualTo("foo"); // and: assertThat(parsedJson.read("$.duck", String.class)).matches("[0-9]{3}"); assertThat(parsedJson.read("$.duck", Integer.class)).isEqualTo(123); assertThat(parsedJson.read("$.alpha", String.class)).matches("[\\p{L}]*"); assertThat(parsedJson.read("$.alpha", String.class)).isEqualTo("abc"); assertThat(parsedJson.read("$.number", String.class)).matches("-?(\\d*\\.\\d+|\\d+)"); assertThat(parsedJson.read("$.aBoolean", String.class)).matches("(true|false)"); assertThat(parsedJson.read("$.date", String.class)).matches("(\\d\\d\\d\\d)-(0[1-9]|1[012])-(0[1-9]|[12][0-9]|3[01])"); assertThat(parsedJson.read("$.dateTime", String.class)).matches("([0-9]{4})-(1[0-2]|0[1-9])-(3[01]|0[1-9]|[12][0-9])T(2[0-3]|[01][0-9]):([0-5][0-9]):([0-5][0-9])"); assertThat(parsedJson.read("$.time", String.class)).matches("(2[0-3]|[01][0-9]):([0-5][0-9]):([0-5][0-9])"); assertThat((Object) parsedJson.read("$.valueWithTypeMatch")).isInstanceOf(java.lang.String.class); assertThat((Object) parsedJson.read("$.valueWithMin")).isInstanceOf(java.util.List.class); assertThat((java.lang.Iterable) parsedJson.read("$.valueWithMin", java.util.Collection.class)).as("$.valueWithMin").hasSizeGreaterThanOrEqualTo(1); assertThat((Object) parsedJson.read("$.valueWithMax")).isInstanceOf(java.util.List.class); assertThat((java.lang.Iterable) parsedJson.read("$.valueWithMax", java.util.Collection.class)).as("$.valueWithMax").hasSizeLessThanOrEqualTo(3); assertThat((Object) parsedJson.read("$.valueWithMinMax")).isInstanceOf(java.util.List.class); assertThat((java.lang.Iterable) parsedJson.read("$.valueWithMinMax", java.util.Collection.class)).as("$.valueWithMinMax").hasSizeBetween(1, 3); assertThat((Object) parsedJson.read("$.valueWithMinEmpty")).isInstanceOf(java.util.List.class); assertThat((java.lang.Iterable) parsedJson.read("$.valueWithMinEmpty", java.util.Collection.class)).as("$.valueWithMinEmpty").hasSizeGreaterThanOrEqualTo(0); assertThat((Object) parsedJson.read("$.valueWithMaxEmpty")).isInstanceOf(java.util.List.class); assertThat((java.lang.Iterable) parsedJson.read("$.valueWithMaxEmpty", java.util.Collection.class)).as("$.valueWithMaxEmpty").hasSizeLessThanOrEqualTo(0); assertThatValueIsANumber(parsedJson.read("$.duck")); assertThat(parsedJson.read("$.['key'].['complex.key']", String.class)).isEqualTo("foo");
| Important |
|---|---|
Notice that, for the |
The resulting WireMock stub is in the following example:
''' { "request" : { "urlPath" : "/get", "method" : "POST", "headers" : { "Content-Type" : { "matches" : "application/json.*" } }, "bodyPatterns" : [ { "matchesJsonPath" : "$.['list'].['some'].['nested'][?(@.['anothervalue'] == 4)]" }, { "matchesJsonPath" : "$[?(@.['valueWithoutAMatcher'] == 'foo')]" }, { "matchesJsonPath" : "$[?(@.['valueWithTypeMatch'] == 'string')]" }, { "matchesJsonPath" : "$.['list'].['someother'].['nested'][?(@.['json'] == 'with value')]" }, { "matchesJsonPath" : "$.['list'].['someother'].['nested'][?(@.['anothervalue'] == 4)]" }, { "matchesJsonPath" : "$[?(@.duck =~ /([0-9]{3})/)]" }, { "matchesJsonPath" : "$[?(@.duck == 123)]" }, { "matchesJsonPath" : "$[?(@.alpha =~ /([\\\\p{L}]*)/)]" }, { "matchesJsonPath" : "$[?(@.alpha == 'abc')]" }, { "matchesJsonPath" : "$[?(@.number =~ /(-?(\\\\d*\\\\.\\\\d+|\\\\d+))/)]" }, { "matchesJsonPath" : "$[?(@.aBoolean =~ /((true|false))/)]" }, { "matchesJsonPath" : "$[?(@.date =~ /((\\\\d\\\\d\\\\d\\\\d)-(0[1-9]|1[012])-(0[1-9]|[12][0-9]|3[01]))/)]" }, { "matchesJsonPath" : "$[?(@.dateTime =~ /(([0-9]{4})-(1[0-2]|0[1-9])-(3[01]|0[1-9]|[12][0-9])T(2[0-3]|[01][0-9]):([0-5][0-9]):([0-5][0-9]))/)]" }, { "matchesJsonPath" : "$[?(@.time =~ /((2[0-3]|[01][0-9]):([0-5][0-9]):([0-5][0-9]))/)]" }, { "matchesJsonPath" : "$.list.some.nested[?(@.json =~ /(.*)/)]" }, { "matchesJsonPath" : "$[?(@.valueWithMin.size() >= 1)]" }, { "matchesJsonPath" : "$[?(@.valueWithMax.size() <= 3)]" }, { "matchesJsonPath" : "$[?(@.valueWithMinMax.size() >= 1 && @.valueWithMinMax.size() <= 3)]" }, { "matchesJsonPath" : "$[?(@.valueWithOccurrence.size() >= 4 && @.valueWithOccurrence.size() <= 4)]" } ] }, "response" : { "status" : 200, "body" : "{\\"date\\":\\"2017-01-01\\",\\"dateTime\\":\\"2017-01-01T01:23:45\\",\\"aBoolean\\":true,\\"valueWithMax\\":[1,2,3],\\"valueWithOccurrence\\":[1,2,3,4],\\"number\\":123,\\"duck\\":123,\\"alpha\\":\\"abc\\",\\"valueWithMin\\":[1,2,3],\\"time\\":\\"01:02:34\\",\\"valueWithTypeMatch\\":\\"string\\",\\"valueWithMinMax\\":[1,2,3],\\"valueWithoutAMatcher\\":\\"foo\\"}", "headers" : { "Content-Type" : "application/json" }, "transformers" : [ "response-template" ] } } '''
| Important |
|---|---|
If you use a |
Consider the following example:
Contract.make {
request {
method 'GET'
url("/foo")
}
response {
status OK()
body(events: [[
operation : 'EXPORT',
eventId : '16f1ed75-0bcc-4f0d-a04d-3121798faf99',
status : 'OK'
], [
operation : 'INPUT_PROCESSING',
eventId : '3bb4ac82-6652-462f-b6d1-75e424a0024a',
status : 'OK'
]
]
)
bodyMatchers {
jsonPath('$.events[0].operation', byRegex('.+'))
jsonPath('$.events[0].eventId', byRegex('^([a-fA-F0-9]{8}-[a-fA-F0-9]{4}-[a-fA-F0-9]{4}-[a-fA-F0-9]{4}-[a-fA-F0-9]{12})$'))
jsonPath('$.events[0].status', byRegex('.+'))
}
}
}The preceding code leads to creating the following test (the code block shows only the assertion section):
and: DocumentContext parsedJson = JsonPath.parse(response.body.asString()) assertThatJson(parsedJson).array("['events']").contains("['eventId']").isEqualTo("16f1ed75-0bcc-4f0d-a04d-3121798faf99") assertThatJson(parsedJson).array("['events']").contains("['operation']").isEqualTo("EXPORT") assertThatJson(parsedJson).array("['events']").contains("['operation']").isEqualTo("INPUT_PROCESSING") assertThatJson(parsedJson).array("['events']").contains("['eventId']").isEqualTo("3bb4ac82-6652-462f-b6d1-75e424a0024a") assertThatJson(parsedJson).array("['events']").contains("['status']").isEqualTo("OK") and: assertThat(parsedJson.read("\$.events[0].operation", String.class)).matches(".+") assertThat(parsedJson.read("\$.events[0].eventId", String.class)).matches("^([a-fA-F0-9]{8}-[a-fA-F0-9]{4}-[a-fA-F0-9]{4}-[a-fA-F0-9]{4}-[a-fA-F0-9]{12})\$") assertThat(parsedJson.read("\$.events[0].status", String.class)).matches(".+")
As you can see, the assertion is malformed. Only the first element of the array got
asserted. In order to fix this, you should apply the assertion to the whole $.events
collection and assert it with the byCommand(…) method.
The Spring Cloud Contract Verifier supports the JAX-RS 2 Client API. The base class needs
to define protected WebTarget webTarget and server initialization. The only option for
testing JAX-RS API is to start a web server. Also, a request with a body needs to have a
content type set. Otherwise, the default of application/octet-stream gets used.
In order to use JAX-RS mode, use the following settings:
testMode == 'JAXRSCLIENT'The following example shows a generated test API:
''' // when: Response response = webTarget .path("/users") .queryParam("limit", "10") .queryParam("offset", "20") .queryParam("filter", "email") .queryParam("sort", "name") .queryParam("search", "55") .queryParam("age", "99") .queryParam("name", "Denis.Stepanov") .queryParam("email", "[email protected]") .request() .method("GET"); String responseAsString = response.readEntity(String.class); // then: assertThat(response.getStatus()).isEqualTo(200); // and: DocumentContext parsedJson = JsonPath.parse(responseAsString); assertThatJson(parsedJson).field("['property1']").isEqualTo("a"); '''
If you’re using asynchronous communication on the server side (your controllers are
returning Callable, DeferredResult, and so on), then, inside your contract, you must
provide an async() method in the response section. The following code shows an example:
Groovy DSL.
org.springframework.cloud.contract.spec.Contract.make {
request {
method GET()
url '/get'
}
response {
status OK()
body 'Passed'
async()
}
}
YAML.
response:
async: true
You can also use the fixedDelayMilliseconds method / property to add delay to your stubs.
Groovy DSL.
org.springframework.cloud.contract.spec.Contract.make {
request {
method GET()
url '/get'
}
response {
status 200
body 'Passed'
fixedDelayMilliseconds 1000
}
}
YAML.
response:
fixedDelayMilliseconds: 1000
Spring Cloud Contract supports context paths.
| Important |
|---|---|
The only change needed to fully support context paths is the switch on the PRODUCER side. Also, the autogenerated tests must use EXPLICIT mode. The consumer side remains untouched. In order for the generated test to pass, you must use EXPLICIT mode. |
Maven.
<plugin> <groupId>org.springframework.cloud</groupId> <artifactId>spring-cloud-contract-maven-plugin</artifactId> <version>${spring-cloud-contract.version}</version> <extensions>true</extensions> <configuration> <testMode>EXPLICIT</testMode> </configuration> </plugin>
Gradle.
contracts {
testMode = 'EXPLICIT'
}
That way, you generate a test that DOES NOT use MockMvc. It means that you generate real requests and you need to setup your generated test’s base class to work on a real socket.
Consider the following contract:
org.springframework.cloud.contract.spec.Contract.make {
request {
method 'GET'
url '/my-context-path/url'
}
response {
status OK()
}
}The following example shows how to set up a base class and Rest Assured:
import io.restassured.RestAssured; import org.junit.Before; import org.springframework.boot.web.server.LocalServerPort; import org.springframework.boot.test.context.SpringBootTest; @SpringBootTest(classes = ContextPathTestingBaseClass.class, webEnvironment = SpringBootTest.WebEnvironment.RANDOM_PORT) class ContextPathTestingBaseClass { @LocalServerPort int port; @Before public void setup() { RestAssured.baseURI = "http://localhost"; RestAssured.port = this.port; } }
If you do it this way:
- All of your requests in the autogenerated tests are sent to the real endpoint with your
context path included (for example,
/my-context-path/url). - Your contracts reflect that you have a context path. Your generated stubs also have
that information (for example, in the stubs, you have to call
/my-context-path/url).
Spring Cloud Contract offers two ways of working with WebFlux.
One of them is via the WebTestClient mode.
Maven.
<plugin> <groupId>org.springframework.cloud</groupId> <artifactId>spring-cloud-contract-maven-plugin</artifactId> <version>${spring-cloud-contract.version}</version> <extensions>true</extensions> <configuration> <testMode>WEBTESTCLIENT</testMode> </configuration> </plugin>
Gradle.
contracts {
testMode = 'WEBTESTCLIENT'
}
The following example shows how to set up a WebTestClient base class and RestAssured
for WebFlux:
import io.restassured.module.webtestclient.RestAssuredWebTestClient; import org.junit.Before; public abstract class BeerRestBase { @Before public void setup() { RestAssuredWebTestClient.standaloneSetup( new ProducerController(personToCheck -> personToCheck.age >= 20)); } } }
Another way is with the EXPLICIT mode in your generated tests
to work with WebFlux.
Maven.
<plugin> <groupId>org.springframework.cloud</groupId> <artifactId>spring-cloud-contract-maven-plugin</artifactId> <version>${spring-cloud-contract.version}</version> <extensions>true</extensions> <configuration> <testMode>EXPLICIT</testMode> </configuration> </plugin>
Gradle.
contracts {
testMode = 'EXPLICIT'
}
The following example shows how to set up a base class and Rest Assured for Web Flux:
@RunWith(SpringRunner.class) @SpringBootTest(classes = BeerRestBase.Config.class, webEnvironment = SpringBootTest.WebEnvironment.RANDOM_PORT, properties = "server.port=0") public abstract class BeerRestBase { // your tests go here // in this config class you define all controllers and mocked services @Configuration @EnableAutoConfiguration static class Config { @Bean PersonCheckingService personCheckingService() { return personToCheck -> personToCheck.age >= 20; } @Bean ProducerController producerController() { return new ProducerController(personCheckingService()); } } }
For REST contracts, we also support XML request and response body.
The XML body has to be passed within the body element
as a String or GString. Also body matchers can be provided for
both request and response. In place of the jsonPath(…) method, the org.springframework.cloud.contract.spec.internal.BodyMatchers.xPath
method should be used, with the desired xPath provided as the first argument
and the appropriate MatchingType as second. All the body matchers apart from byType() are supported.
Here is an example of a Groovy DSL contract with XML response body:
Contract.make {
request {
method GET()
urlPath '/get'
headers {
contentType(applicationXml())
}
}
response {
status(OK())
headers {
contentType(applicationXml())
}
body """
<test>
<duck type='xtype'>123</duck>
<alpha>abc</alpha>
<list>
<elem>abc</elem>
<elem>def</elem>
<elem>ghi</elem>
</list>
<number>123</number>
<aBoolean>true</aBoolean>
<date>2017-01-01</date>
<dateTime>2017-01-01T01:23:45</dateTime>
<time>01:02:34</time>
<valueWithoutAMatcher>foo</valueWithoutAMatcher>
<key><complex>foo</complex></key>
</test>"""
bodyMatchers {
xPath('/test/duck/text()', byRegex("[0-9]{3}"))
xPath('/test/duck/text()', byCommand('test($it)'))
xPath('/test/duck/xxx', byNull())
xPath('/test/duck/text()', byEquality())
xPath('/test/alpha/text()', byRegex(onlyAlphaUnicode()))
xPath('/test/alpha/text()', byEquality())
xPath('/test/number/text()', byRegex(number()))
xPath('/test/date/text()', byDate())
xPath('/test/dateTime/text()', byTimestamp())
xPath('/test/time/text()', byTime())
xPath('/test/*/complex/text()', byEquality())
xPath('/test/duck/@type', byEquality())
}
}
}And below is an example of a YAML contract with XML request and response bodies:
include::{verifier_core_path}/src/test/resources/yml/contract_rest_xml.ymlHere is an example of an automatically generated test for XML response body:
@Test public void validate_xmlMatches() throws Exception { // given: MockMvcRequestSpecification request = given() .header("Content-Type", "application/xml"); // when: ResponseOptions response = given().spec(request).get("/get"); // then: assertThat(response.statusCode()).isEqualTo(200); // and: DocumentBuilder documentBuilder = DocumentBuilderFactory.newInstance() .newDocumentBuilder(); Document parsedXml = documentBuilder.parse(new InputSource( new StringReader(response.getBody().asString()))); // and: assertThat(valueFromXPath(parsedXml, "/test/list/elem/text()")).isEqualTo("abc"); assertThat(valueFromXPath(parsedXml,"/test/list/elem[2]/text()")).isEqualTo("def"); assertThat(valueFromXPath(parsedXml, "/test/duck/text()")).matches("[0-9]{3}"); assertThat(nodeFromXPath(parsedXml, "/test/duck/xxx")).isNull(); assertThat(valueFromXPath(parsedXml, "/test/alpha/text()")).matches("[\\p{L}]*"); assertThat(valueFromXPath(parsedXml, "/test/*/complex/text()")).isEqualTo("foo"); assertThat(valueFromXPath(parsedXml, "/test/duck/@type")).isEqualTo("xtype"); }
The DSL for messaging looks a little bit different than the one that focuses on HTTP. The following sections explain the differences:
The output message can be triggered by calling a method (such as a Scheduler when a was
started and a message was sent), as shown in the following example:
Groovy DSL.
def dsl = Contract.make {
// Human readable description
description 'Some description'
// Label by means of which the output message can be triggered
label 'some_label'
// input to the contract
input {
// the contract will be triggered by a method
triggeredBy('bookReturnedTriggered()')
}
// output message of the contract
outputMessage {
// destination to which the output message will be sent
sentTo('output')
// the body of the output message
body('''{ "bookName" : "foo" }''')
// the headers of the output message
headers {
header('BOOK-NAME', 'foo')
}
}
}
YAML.
# Human readable description
description: Some description
# Label by means of which the output message can be triggered
label: some_label
input:
# the contract will be triggered by a method
triggeredBy: bookReturnedTriggered()
# output message of the contract
outputMessage:
# destination to which the output message will be sent
sentTo: output
# the body of the output message
body:
bookName: foo
# the headers of the output message
headers:
BOOK-NAME: foo
In the previous example case, the output message is sent to output if a method called
bookReturnedTriggered is executed. On the message publisher’s side, we generate a
test that calls that method to trigger the message. On the consumer side, you can use
the some_label to trigger the message.
The output message can be triggered by receiving a message, as shown in the following example:
Groovy DSL.
def dsl = Contract.make {
description 'Some Description'
label 'some_label'
// input is a message
input {
// the message was received from this destination
messageFrom('input')
// has the following body
messageBody([
bookName: 'foo'
])
// and the following headers
messageHeaders {
header('sample', 'header')
}
}
outputMessage {
sentTo('output')
body([
bookName: 'foo'
])
headers {
header('BOOK-NAME', 'foo')
}
}
}
YAML.
# Human readable description
description: Some description
# Label by means of which the output message can be triggered
label: some_label
# input is a message
input:
messageFrom: input
# has the following body
messageBody:
bookName: 'foo'
# and the following headers
messageHeaders:
sample: 'header'
# output message of the contract
outputMessage:
# destination to which the output message will be sent
sentTo: output
# the body of the output message
body:
bookName: foo
# the headers of the output message
headers:
BOOK-NAME: foo
In the preceding example, the output message is sent to output if a proper message is
received on the input destination. On the message publisher’s side, the engine
generates a test that sends the input message to the defined destination. On the
consumer side, you can either send a message to the input destination or use a label
(some_label in the example) to trigger the message.
| Important |
|---|---|
This section is valid only for Groovy DSL. |
In HTTP, you have a notion of client/stub and `server/test notation. You can also
use those paradigms in messaging. In addition, Spring Cloud Contract Verifier also
provides the consumer and producer methods, as presented in the following example
(note that you can use either $ or value methods to provide consumer and producer
parts):
Contract.make {
label 'some_label'
input {
messageFrom value(consumer('jms:output'), producer('jms:input'))
messageBody([
bookName: 'foo'
])
messageHeaders {
header('sample', 'header')
}
}
outputMessage {
sentTo $(consumer('jms:input'), producer('jms:output'))
body([
bookName: 'foo'
])
}
}You can define multiple contracts in one file. Such a contract might resemble the following example:
Groovy DSL.
import org.springframework.cloud.contract.spec.Contract [ Contract.make { name("should post a user") request { method 'POST' url('/users/1') } response { status OK() } }, Contract.make { request { method 'POST' url('/users/2') } response { status OK() } } ]
YAML.
--- name: should post a user request: method: POST url: /users/1 response: status: 200 --- request: method: POST url: /users/2 response: status: 200 --- request: method: POST url: /users/3 response: status: 200
In the preceding example, one contract has the name field and the other does not. This
leads to generation of two tests that look more or less like this:
package org.springframework.cloud.contract.verifier.tests.com.hello; import com.example.TestBase; import com.jayway.jsonpath.DocumentContext; import com.jayway.jsonpath.JsonPath; import com.jayway.restassured.module.mockmvc.specification.MockMvcRequestSpecification; import com.jayway.restassured.response.ResponseOptions; import org.junit.Test; import static com.jayway.restassured.module.mockmvc.RestAssuredMockMvc.*; import static com.toomuchcoding.jsonassert.JsonAssertion.assertThatJson; import static org.assertj.core.api.Assertions.assertThat; public class V1Test extends TestBase { @Test public void validate_should_post_a_user() throws Exception { // given: MockMvcRequestSpecification request = given(); // when: ResponseOptions response = given().spec(request) .post("/users/1"); // then: assertThat(response.statusCode()).isEqualTo(200); } @Test public void validate_withList_1() throws Exception { // given: MockMvcRequestSpecification request = given(); // when: ResponseOptions response = given().spec(request) .post("/users/2"); // then: assertThat(response.statusCode()).isEqualTo(200); } }
Notice that, for the contract that has the name field, the generated test method is named
validate_should_post_a_user. For the one that does not have the name, it is called
validate_withList_1. It corresponds to the name of the file WithList.groovy and the
index of the contract in the list.
The generated stubs is shown in the following example:
should post a user.json 1_WithList.json
As you can see, the first file got the name parameter from the contract. The second
got the name of the contract file (WithList.groovy) prefixed with the index (in this
case, the contract had an index of 1 in the list of contracts in the file).
| Tip |
|---|---|
As you can see, it is much better if you name your contracts because doing so makes your tests far more meaningful. |
When you want to include the requests and responses of your API using Spring REST Docs, you only need to make some minor changes to your setup if you are using MockMvc and RestAssuredMockMvc. Simply include the following dependencies if you haven’t already.
Maven.
<dependency> <groupId>org.springframework.cloud</groupId> <artifactId>spring-cloud-starter-contract-verifier</artifactId> <scope>test</scope> </dependency> <dependency> <groupId>org.springframework.restdocs</groupId> <artifactId>spring-restdocs-mockmvc</artifactId> <optional>true</optional> </dependency>
Gradle.
testCompile 'org.springframework.cloud:spring-cloud-starter-contract-verifier' testCompile 'org.springframework.restdocs:spring-restdocs-mockmvc'
Next you need to make some changes to your base class like the following example.
package com.example.fraud; import io.restassured.module.mockmvc.RestAssuredMockMvc; import org.junit.Before; import org.junit.Rule; import org.junit.rules.TestName; import org.junit.runner.RunWith; import org.springframework.beans.factory.annotation.Autowired; import org.springframework.boot.test.context.SpringBootTest; import org.springframework.restdocs.JUnitRestDocumentation; import org.springframework.test.context.junit4.SpringRunner; import org.springframework.test.web.servlet.setup.MockMvcBuilders; import org.springframework.web.context.WebApplicationContext; import static org.springframework.restdocs.mockmvc.MockMvcRestDocumentation.document; import static org.springframework.restdocs.mockmvc.MockMvcRestDocumentation.documentationConfiguration; @RunWith(SpringRunner.class) @SpringBootTest(classes = Application.class) public abstract class FraudBaseWithWebAppSetup { private static final String OUTPUT = "target/generated-snippets"; @Rule public JUnitRestDocumentation restDocumentation = new JUnitRestDocumentation(OUTPUT); @Rule public TestName testName = new TestName(); @Autowired private WebApplicationContext context; @Before public void setup() { RestAssuredMockMvc.mockMvc(MockMvcBuilders.webAppContextSetup(this.context) .apply(documentationConfiguration(this.restDocumentation)) .alwaysDo(document( getClass().getSimpleName() + "_" + testName.getMethodName())) .build()); } protected void assertThatRejectionReasonIsNull(Object rejectionReason) { assert rejectionReason == null; } }
In case you are using the standalone setup, you can set up RestAssuredMockMvc like this:
package com.example.fraud; import io.restassured.module.mockmvc.RestAssuredMockMvc; import org.junit.Before; import org.junit.Rule; import org.junit.rules.TestName; import org.springframework.restdocs.JUnitRestDocumentation; import org.springframework.test.web.servlet.setup.MockMvcBuilders; import static org.springframework.restdocs.mockmvc.MockMvcRestDocumentation.document; import static org.springframework.restdocs.mockmvc.MockMvcRestDocumentation.documentationConfiguration; public abstract class FraudBaseWithStandaloneSetup { private static final String OUTPUT = "target/generated-snippets"; @Rule public JUnitRestDocumentation restDocumentation = new JUnitRestDocumentation(OUTPUT); @Rule public TestName testName = new TestName(); @Before public void setup() { RestAssuredMockMvc.standaloneSetup(MockMvcBuilders .standaloneSetup(new FraudDetectionController()) .apply(documentationConfiguration(this.restDocumentation)) .alwaysDo(document( getClass().getSimpleName() + "_" + testName.getMethodName()))); } }
| Tip |
|---|---|
You don’t need to specify the output directory for the generated snippets since version 1.2.0.RELEASE of Spring REST Docs. |
| Important |
|---|---|
This section is valid only for Groovy DSL |
You can customize the Spring Cloud Contract Verifier by extending the DSL, as shown in the remainder of this section.
You can provide your own functions to the DSL. The key requirement for this feature is to maintain the static compatibility. Later in this document, you can see examples of:
- Creating a JAR with reusable classes.
- Referencing of these classes in the DSLs.
You can find the full example here.
The following examples show three classes that can be reused in the DSLs.
PatternUtils contains functions used by both the consumer and the producer.
package com.example; import java.util.regex.Pattern; /** * If you want to use {@link Pattern} directly in your tests * then you can create a class resembling this one. It can * contain all the {@link Pattern} you want to use in the DSL. * * <pre> * {@code * request { * body( * [ age: $(c(PatternUtils.oldEnough()))] * ) * } * </pre> * * Notice that we're using both {@code $()} for dynamic values * and {@code c()} for the consumer side. * * @author Marcin Grzejszczak */ //tag::impl[] public class PatternUtils { public static String tooYoung() { //remove::start[] return "[0-1][0-9]"; //remove::end[return] } public static Pattern oldEnough() { //remove::start[] return Pattern.compile("[2-9][0-9]"); //remove::end[return] } /** * Makes little sense but it's just an example ;) */ public static Pattern ok() { //remove::start[] return Pattern.compile("OK"); //remove::end[return] } } //end::impl[]
ConsumerUtils contains functions used by the consumer.
package com.example; import org.springframework.cloud.contract.spec.internal.ClientDslProperty; /** * DSL Properties passed to the DSL from the consumer's perspective. * That means that on the input side {@code Request} for HTTP * or {@code Input} for messaging you can have a regular expression. * On the {@code Response} for HTTP or {@code Output} for messaging * you have to have a concrete value. * * @author Marcin Grzejszczak */ //tag::impl[] public class ConsumerUtils { /** * Consumer side property. By using the {@link ClientDslProperty} * you can omit most of boilerplate code from the perspective * of dynamic values. Example * * <pre> * {@code * request { * body( * [ age: $(ConsumerUtils.oldEnough())] * ) * } * </pre> * * That way it's in the implementation that we decide what value we will pass to the consumer * and which one to the producer. * * @author Marcin Grzejszczak */ public static ClientDslProperty oldEnough() { //remove::start[] // this example is not the best one and // theoretically you could just pass the regex instead of `ServerDslProperty` but // it's just to show some new tricks :) return new ClientDslProperty(PatternUtils.oldEnough(), 40); //remove::end[return] } } //end::impl[]
ProducerUtils contains functions used by the producer.
package com.example; import org.springframework.cloud.contract.spec.internal.ServerDslProperty; /** * DSL Properties passed to the DSL from the producer's perspective. * That means that on the input side {@code Request} for HTTP * or {@code Input} for messaging you have to have a concrete value. * On the {@code Response} for HTTP or {@code Output} for messaging * you can have a regular expression. * * @author Marcin Grzejszczak */ //tag::impl[] public class ProducerUtils { /** * Producer side property. By using the {@link ProducerUtils} * you can omit most of boilerplate code from the perspective * of dynamic values. Example * * <pre> * {@code * response { * body( * [ status: $(ProducerUtils.ok())] * ) * } * </pre> * * That way it's in the implementation that we decide what value we will pass to the consumer * and which one to the producer. */ public static ServerDslProperty ok() { // this example is not the best one and // theoretically you could just pass the regex instead of `ServerDslProperty` but // it's just to show some new tricks :) return new ServerDslProperty( PatternUtils.ok(), "OK"); } } //end::impl[]
In order for the plugins and IDE to be able to reference the common JAR classes, you need to pass the dependency to your project.
First, add the common jar dependency as a test dependency. Because your contracts files are available on the test resources path, the common jar classes automatically become visible in your Groovy files. The following examples show how to test the dependency:
Maven.
<dependency> <groupId>com.example</groupId> <artifactId>beer-common</artifactId> <version>${project.version}</version> <scope>test</scope> </dependency>
Gradle.
testCompile("com.example:beer-common:0.0.1.BUILD-SNAPSHOT")
Now, you must add the dependency for the plugin to reuse at runtime, as shown in the following example:
Maven.
<plugin> <groupId>org.springframework.cloud</groupId> <artifactId>spring-cloud-contract-maven-plugin</artifactId> <version>${spring-cloud-contract.version}</version> <extensions>true</extensions> <configuration> <packageWithBaseClasses>com.example</packageWithBaseClasses> <baseClassMappings> <baseClassMapping> <contractPackageRegex>.*intoxication.*</contractPackageRegex> <baseClassFQN>com.example.intoxication.BeerIntoxicationBase</baseClassFQN> </baseClassMapping> </baseClassMappings> </configuration> <dependencies> <dependency> <groupId>com.example</groupId> <artifactId>beer-common</artifactId> <version>${project.version}</version> <scope>compile</scope> </dependency> </dependencies> </plugin>
Gradle.
classpath "com.example:beer-common:0.0.1.BUILD-SNAPSHOT"
You can now reference your classes in your DSL, as shown in the following example:
package contracts.beer.rest import com.example.ConsumerUtils import com.example.ProducerUtils import org.springframework.cloud.contract.spec.Contract Contract.make { description(""" Represents a successful scenario of getting a beer ``` given: client is old enough when: he applies for a beer then: we'll grant him the beer ``` """) request { method 'POST' url '/check' body( age: $(ConsumerUtils.oldEnough()) ) headers { contentType(applicationJson()) } } response { status 200 body(""" { "status": "${value(ProducerUtils.ok())}" } """) headers { contentType(applicationJson()) } } }
| Important |
|---|---|
You can set the Spring Cloud Contract plugin up by setting |
You may encounter cases where you have your contracts have been defined in other formats, such as YAML, RAML or PACT. In those cases, you still want to benefit from the automatic generation of tests and stubs. You can add your own implementation for generating both tests and stubs. Also, you can customize the way tests are generated (for example, you can generate tests for other languages) and the way stubs are generated (for example, you can generate stubs for other HTTP server implementations).
The ContractConverter interface lets you register your own implementation of a contract
structure converter. The following code listing shows the ContractConverter interface:
package org.springframework.cloud.contract.spec /** * Converter to be used to convert FROM {@link File} TO {@link Contract} * and from {@link Contract} to {@code T} * * @param <T > - type to which we want to convert the contract * * @author Marcin Grzejszczak * @since 1.1.0 */ interface ContractConverter<T> extends ContractStorer<T> { /** * Should this file be accepted by the converter. Can use the file extension * to check if the conversion is possible. * * @param file - file to be considered for conversion * @return - {@code true} if the given implementation can convert the file */ boolean isAccepted(File file) /** * Converts the given {@link File} to its {@link Contract} representation * * @param file - file to convert * @return - {@link Contract} representation of the file */ Collection<Contract> convertFrom(File file) /** * Converts the given {@link Contract} to a {@link T} representation * * @param contract - the parsed contract * @return - {@link T} the type to which we do the conversion */ T convertTo(Collection<Contract> contract) }
Your implementation must define the condition on which it should start the conversion. Also, you must define how to perform that conversion in both directions.
| Important |
|---|---|
Once you create your implementation, you must create a
|
The following example shows a typical spring.factories file:
org.springframework.cloud.contract.spec.ContractConverter=\ org.springframework.cloud.contract.verifier.converter.YamlContractConverter
Spring Cloud Contract includes support for Pact representation of contracts up until v4. Instead of using the Groovy DSL, you can use Pact files. In this section, we present how to add Pact support for your project. Note however that not all functionality is supported. Starting with v3 you can combine multiple matcher for the same element; you can use matchers for the body, headers, request and path; and you can use value generators. Spring Cloud Contract currently only supports multiple matchers that are combined using the AND rule logic. Next to that the request and path matchers are skipped during the conversion. When using a date, time or datetime value generator with a given format, the given format will be skipped and the ISO format will be used.
In order to properly support the Spring Cloud Contract way of doing messaging with Pact you’ll have to provide some additional meta data entries. Below you can find a list of such entries:
- to define the destination to which a message gets sent, you have to
set a
metaDataentry in the Pact file, with keysentToequal to the destination to which a message is to be sent. E.g."metaData": { "sentTo": "activemq:output" }
Consider following example of a Pact contract, which is a file under the
src/test/resources/contracts folder.
{
"provider": {
"name": "Provider"
},
"consumer": {
"name": "Consumer"
},
"interactions": [
{
"description": "",
"request": {
"method": "PUT",
"path": "/fraudcheck",
"headers": {
"Content-Type": "application/vnd.fraud.v1+json"
},
"body": {
"clientId": "1234567890",
"loanAmount": 99999
},
"generators": {
"body": {
"$.clientId": {
"type": "Regex",
"regex": "[0-9]{10}"
}
}
},
"matchingRules": {
"header": {
"Content-Type": {
"matchers": [
{
"match": "regex",
"regex": "application/vnd\\.fraud\\.v1\\+json.*"
}
],
"combine": "AND"
}
},
"body": {
"$.clientId": {
"matchers": [
{
"match": "regex",
"regex": "[0-9]{10}"
}
],
"combine": "AND"
}
}
}
},
"response": {
"status": 200,
"headers": {
"Content-Type": "application/vnd.fraud.v1+json;charset=UTF-8"
},
"body": {
"fraudCheckStatus": "FRAUD",
"rejectionReason": "Amount too high"
},
"matchingRules": {
"header": {
"Content-Type": {
"matchers": [
{
"match": "regex",
"regex": "application/vnd\\.fraud\\.v1\\+json.*"
}
],
"combine": "AND"
}
},
"body": {
"$.fraudCheckStatus": {
"matchers": [
{
"match": "regex",
"regex": "FRAUD"
}
],
"combine": "AND"
}
}
}
}
}
],
"metadata": {
"pact-specification": {
"version": "3.0.0"
},
"pact-jvm": {
"version": "3.5.13"
}
}
}The remainder of this section about using Pact refers to the preceding file.
On the producer side, you must add two additional dependencies to your plugin configuration. One is the Spring Cloud Contract Pact support, and the other represents the current Pact version that you use.
Maven.
<plugin> <groupId>org.springframework.cloud</groupId> <artifactId>spring-cloud-contract-maven-plugin</artifactId> <version>${spring-cloud-contract.version}</version> <extensions>true</extensions> <configuration> <packageWithBaseClasses>com.example.fraud</packageWithBaseClasses> </configuration> <dependencies> <dependency> <groupId>org.springframework.cloud</groupId> <artifactId>spring-cloud-contract-pact</artifactId> <version>${spring-cloud-contract.version}</version> </dependency> </dependencies> </plugin>
Gradle.
classpath "org.springframework.cloud:spring-cloud-contract-pact:${findProperty('verifierVersion') ?: verifierVersion}"
When you execute the build of your application, a test will be generated. The generated test might be as follows:
@Test public void validate_shouldMarkClientAsFraud() throws Exception { // given: MockMvcRequestSpecification request = given() .header("Content-Type", "application/vnd.fraud.v1+json") .body("{\"clientId\":\"1234567890\",\"loanAmount\":99999}"); // when: ResponseOptions response = given().spec(request) .put("/fraudcheck"); // then: assertThat(response.statusCode()).isEqualTo(200); assertThat(response.header("Content-Type")).matches("application/vnd\\.fraud\\.v1\\+json.*"); // and: DocumentContext parsedJson = JsonPath.parse(response.getBody().asString()); assertThatJson(parsedJson).field("['rejectionReason']").isEqualTo("Amount too high"); // and: assertThat(parsedJson.read("$.fraudCheckStatus", String.class)).matches("FRAUD"); }
The corresponding generated stub might be as follows:
{
"id" : "996ae5ae-6834-4db6-8fac-358ca187ab62",
"uuid" : "996ae5ae-6834-4db6-8fac-358ca187ab62",
"request" : {
"url" : "/fraudcheck",
"method" : "PUT",
"headers" : {
"Content-Type" : {
"matches" : "application/vnd\\.fraud\\.v1\\+json.*"
}
},
"bodyPatterns" : [ {
"matchesJsonPath" : "$[?(@.['loanAmount'] == 99999)]"
}, {
"matchesJsonPath" : "$[?(@.clientId =~ /([0-9]{10})/)]"
} ]
},
"response" : {
"status" : 200,
"body" : "{\"fraudCheckStatus\":\"FRAUD\",\"rejectionReason\":\"Amount too high\"}",
"headers" : {
"Content-Type" : "application/vnd.fraud.v1+json;charset=UTF-8"
},
"transformers" : [ "response-template" ]
},
}On the producer side, you must add two additional dependencies to your project dependencies. One is the Spring Cloud Contract Pact support, and the other represents the current Pact version that you use.
Maven.
<dependency> <groupId>org.springframework.cloud</groupId> <artifactId>spring-cloud-contract-pact</artifactId> <scope>test</scope> </dependency>
Gradle.
testCompile "org.springframework.cloud:spring-cloud-contract-pact"
If you want to generate tests for languages other than Java or you are not happy with the way the verifier builds Java tests, you can register your own implementation.
The SingleTestGenerator interface lets you register your own implementation. The
following code listing shows the SingleTestGenerator interface:
package org.springframework.cloud.contract.verifier.builder import org.springframework.cloud.contract.verifier.config.ContractVerifierConfigProperties import org.springframework.cloud.contract.verifier.file.ContractMetadata /** * Builds a single test. * * @since 1.1.0 */ trait SingleTestGenerator { /** * Creates contents of a single test class in which all test scenarios from * the contract metadata should be placed. * * @param properties - properties passed to the plugin * @param listOfFiles - list of parsed contracts with additional metadata * @param className - the name of the generated test class * @param classPackage - the name of the package in which the test class should be stored * @param includedDirectoryRelativePath - relative path to the included directory * @return contents of a single test class * @deprecated use{@link SingleTestGenerator#buildClass(ContractVerifierConfigProperties, Collection, String, GeneratedClassData)} */ @Deprecated abstract String buildClass(ContractVerifierConfigProperties properties, Collection<ContractMetadata> listOfFiles, String className, String classPackage, String includedDirectoryRelativePath) /** * Creates contents of a single test class in which all test scenarios from * the contract metadata should be placed. * * @param properties - properties passed to the plugin * @param listOfFiles - list of parsed contracts with additional metadata * @param generatedClassData - information about the generated class * @param includedDirectoryRelativePath - relative path to the included directory * @return contents of a single test class */ String buildClass(ContractVerifierConfigProperties properties, Collection<ContractMetadata> listOfFiles, String includedDirectoryRelativePath, GeneratedClassData generatedClassData) { String className = generatedClassData.className String classPackage = generatedClassData.classPackage String path = includedDirectoryRelativePath return buildClass(properties, listOfFiles, className, classPackage, path) } /** * Extension that should be appended to the generated test class. E.g. {@code .java} or {@code .php} * * @param properties - properties passed to the plugin */ abstract String fileExtension(ContractVerifierConfigProperties properties) static class GeneratedClassData { public final String className public final String classPackage public final java.nio.file.Path testClassPath GeneratedClassData(String className, String classPackage, java.nio.file.Path testClassPath) { this.className = className this.classPackage = classPackage this.testClassPath = testClassPath } } }
Again, you must provide a spring.factories file, such as the one shown in the following
example:
org.springframework.cloud.contract.verifier.builder.SingleTestGenerator=/ com.example.MyGenerator
If you want to generate stubs for stub servers other than WireMock, you can plug in your
own implementation of the StubGenerator interface. The following code listing shows the
StubGenerator interface:
package org.springframework.cloud.contract.verifier.converter import groovy.transform.CompileStatic import org.springframework.cloud.contract.spec.Contract import org.springframework.cloud.contract.verifier.file.ContractMetadata /** * Converts contracts into their stub representation. * * @since 1.1.0 */ @CompileStatic interface StubGenerator { /** * @return {@code true} if the converter can handle the file to convert it into a stub. */ boolean canHandleFileName(String fileName) /** * @return the collection of converted contracts into stubs. One contract can * result in multiple stubs. */ Map<Contract, String> convertContents(String rootName, ContractMetadata content) /** * @return the name of the converted stub file. If you have multiple contracts * in a single file then a prefix will be added to the generated file. If you * provide the {@link Contract#name} field then that field will override the * generated file name. * * Example: name of file with 2 contracts is {@code foo.groovy}, it will be * converted by the implementation to {@code foo.json}. The recursive file * converter will create two files {@code 0_foo.json} and {@code 1_foo.json} */ String generateOutputFileNameForInput(String inputFileName) }
Again, you must provide a spring.factories file, such as the one shown in the following
example:
# Stub converters org.springframework.cloud.contract.verifier.converter.StubGenerator=\ org.springframework.cloud.contract.verifier.wiremock.DslToWireMockClientConverter
The default implementation is the WireMock stub generation.
| Tip |
|---|---|
You can provide multiple stub generator implementations. For example, from a single DSL, you can produce both WireMock stubs and Pact files. |
If you decide to use a custom stub generation, you also need a custom way of running stubs with your different stub provider.
Assume that you use Moco to build your stubs and that you have written a stub generator and placed your stubs in a JAR file.
In order for Stub Runner to know how to run your stubs, you have to define a custom HTTP Stub server implementation, which might resemble the following example:
package org.springframework.cloud.contract.stubrunner.provider.moco import com.github.dreamhead.moco.bootstrap.arg.HttpArgs import com.github.dreamhead.moco.runner.JsonRunner import com.github.dreamhead.moco.runner.RunnerSetting import groovy.util.logging.Commons import org.springframework.cloud.contract.stubrunner.HttpServerStub import org.springframework.util.SocketUtils @Commons class MocoHttpServerStub implements HttpServerStub { private boolean started private JsonRunner runner private int port @Override int port() { if (!isRunning()) { return -1 } return port } @Override boolean isRunning() { return started } @Override HttpServerStub start() { return start(SocketUtils.findAvailableTcpPort()) } @Override HttpServerStub start(int port) { this.port = port return this } @Override HttpServerStub stop() { if (!isRunning()) { return this } this.runner.stop() return this } @Override HttpServerStub registerMappings(Collection<File> stubFiles) { List<RunnerSetting> settings = stubFiles.findAll { it.name.endsWith("json") } .collect { log.info("Trying to parse [${it.name}]") try { return RunnerSetting.aRunnerSetting().withStream(it.newInputStream()). build() } catch (Exception e) { log.warn("Exception occurred while trying to parse file [${it.name}]", e) return null } }.findAll { it } this.runner = JsonRunner.newJsonRunnerWithSetting(settings, HttpArgs.httpArgs().withPort(this.port).build()) this.runner.run() this.started = true return this } @Override String registeredMappings() { return "" } @Override boolean isAccepted(File file) { return file.name.endsWith(".json") } }
Then, you can register it in your spring.factories file, as shown in the following
example:
org.springframework.cloud.contract.stubrunner.HttpServerStub=\ org.springframework.cloud.contract.stubrunner.provider.moco.MocoHttpServerStub
Now you can run stubs with Moco.
| Important |
|---|---|
If you do not provide any implementation, then the default (WireMock) implementation is used. If you provide more than one, the first one on the list is used. |
You can customize the way your stubs are downloaded by creating an implementation of the
StubDownloaderBuilder interface, as shown in the following example:
package com.example; class CustomStubDownloaderBuilder implements StubDownloaderBuilder { @Override public StubDownloader build(final StubRunnerOptions stubRunnerOptions) { return new StubDownloader() { @Override public Map.Entry<StubConfiguration, File> downloadAndUnpackStubJar( StubConfiguration config) { File unpackedStubs = retrieveStubs(); return new AbstractMap.SimpleEntry<>( new StubConfiguration(config.getGroupId(), config.getArtifactId(), version, config.getClassifier()), unpackedStubs); } File retrieveStubs() { // here goes your custom logic to provide a folder where all the stubs reside } }
Then you can register it in your spring.factories file, as shown in the following
example:
# Example of a custom Stub Downloader Provider org.springframework.cloud.contract.stubrunner.StubDownloaderBuilder=\ com.example.CustomStubDownloaderBuilder
Now you can pick a folder with the source of your stubs.
| Important |
|---|---|
If you do not provide any implementation, then the default is used (scan classpath).
If you provide the |
Whenever the repositoryRoot starts with a SCM protocol
(currently we support only git://), the stub downloader will try
to clone the repository and use it as a source of contracts
to generate tests or stubs.
Either via environment variables, system properties, properties set inside the plugin or contracts repository configuration you can tweak the downloader’s behaviour. Below you can find the list of properties
Table 95.1. SCM Stub Downloader properties
Type of a property | Name of the property | Description |
* * * | master | Which branch to checkout |
* * * | Git clone username | |
* * * | Git clone password | |
* * * | 10 | Number of attempts to push the commits to |
* * * | 1000 | Number of millis to wait between attempts to push the commits to |
Whenever the repositoryRoot starts with a Pact protocol
(starts with pact://), the stub downloader will try
to fetch the Pact contract definitions from the Pact Broker.
Whatever is set after pact:// will be parsed as the Pact Broker URL.
Either via environment variables, system properties, properties set inside the plugin or contracts repository configuration you can tweak the downloader’s behaviour. Below you can find the list of properties
Table 95.2. SCM Stub Downloader properties
Name of a property | Default | Description |
* * * | Host from URL passed to | What is the URL of Pact Broker |
* * * | Port from URL passed to | What is the port of Pact Broker |
* * * | Protocol from URL passed to | What is the protocol of Pact Broker |
* * * | Version of the stub, or | What tags should be used to fetch the stub |
* * * |
| What kind of authentication should be used to connect to the Pact Broker |
* * * | The username passed to | Username used to connect to the Pact Broker |
* * * | The password passed to | Password used to connect to the Pact Broker |
* * * | false | When |
The Spring Cloud Contract WireMock modules let you use WireMock in a Spring Boot application. Check out the samples for more details.
If you have a Spring Boot application that uses Tomcat as an embedded server (which is
the default with spring-boot-starter-web), you can add
spring-cloud-starter-contract-stub-runner to your classpath and add @AutoConfigureWireMock in
order to be able to use Wiremock in your tests. Wiremock runs as a stub server and you
can register stub behavior using a Java API or via static JSON declarations as part of
your test. The following code shows an example:
@RunWith(SpringRunner.class) @SpringBootTest(webEnvironment = WebEnvironment.RANDOM_PORT) @AutoConfigureWireMock(port = 0) public class WiremockForDocsTests { // A service that calls out over HTTP @Autowired private Service service; @Before public void setup() { this.service.setBase("http://localhost:" + this.environment.getProperty("wiremock.server.port")); } // Using the WireMock APIs in the normal way: @Test public void contextLoads() throws Exception { // Stubbing WireMock stubFor(get(urlEqualTo("/resource")).willReturn(aResponse() .withHeader("Content-Type", "text/plain").withBody("Hello World!"))); // We're asserting if WireMock responded properly assertThat(this.service.go()).isEqualTo("Hello World!"); } }
To start the stub server on a different port use (for example),
@AutoConfigureWireMock(port=9999). For a random port, use a value of 0. The stub
server port can be bound in the test application context with the "wiremock.server.port"
property. Using @AutoConfigureWireMock adds a bean of type WiremockConfiguration to
your test application context, where it will be cached in between methods and classes
having the same context, the same as for Spring integration tests. Also you can inject a bean of type WireMockServer into your test.
If you use @AutoConfigureWireMock, it registers WireMock JSON stubs from the file
system or classpath (by default, from file:src/test/resources/mappings). You can
customize the locations using the stubs attribute in the annotation, which can be an
Ant-style resource pattern or a directory. In the case of a directory, */.json is
appended. The following code shows an example:
@RunWith(SpringRunner.class)
@SpringBootTest
@AutoConfigureWireMock(stubs="classpath:/stubs")
public class WiremockImportApplicationTests {
@Autowired
private Service service;
@Test
public void contextLoads() throws Exception {
assertThat(this.service.go()).isEqualTo("Hello World!");
}
} | Note |
|---|---|
Actually, WireMock always loads mappings from |
If you’re using Spring Cloud Contract’s default stub jars, then your
stubs are stored under /META-INF/group-id/artifact-id/versions/mappings/ folder. If you want to register all stubs from that location, from all embedded JARs, then it’s enough to use the following syntax.
@AutoConfigureWireMock(port = 0, stubs = "classpath*:/META-INF/**/mappings/**/*.json")
WireMock can read response bodies from files on the classpath or the file system. In that
case, you can see in the JSON DSL that the response has a bodyFileName instead of a
(literal) body. The files are resolved relative to a root directory (by default,
src/test/resources/__files). To customize this location you can set the files
attribute in the @AutoConfigureWireMock annotation to the location of the parent
directory (in other words, __files is a subdirectory). You can use Spring resource
notation to refer to file:… or classpath:… locations. Generic URLs are not
supported. A list of values can be given, in which case WireMock resolves the first file
that exists when it needs to find a response body.
| Note |
|---|---|
When you configure the |
For a more conventional WireMock experience, you can use JUnit @Rules to start and stop
the server. To do so, use the WireMockSpring convenience class to obtain an Options
instance, as shown in the following example:
@RunWith(SpringRunner.class) @SpringBootTest(webEnvironment = WebEnvironment.RANDOM_PORT) public class WiremockForDocsClassRuleTests { // Start WireMock on some dynamic port // for some reason `dynamicPort()` is not working properly @ClassRule public static WireMockClassRule wiremock = new WireMockClassRule( WireMockSpring.options().dynamicPort()); // A service that calls out over HTTP to wiremock's port @Autowired private Service service; @Before public void setup() { this.service.setBase("http://localhost:" + wiremock.port()); } // Using the WireMock APIs in the normal way: @Test public void contextLoads() throws Exception { // Stubbing WireMock wiremock.stubFor(get(urlEqualTo("/resource")).willReturn(aResponse() .withHeader("Content-Type", "text/plain").withBody("Hello World!"))); // We're asserting if WireMock responded properly assertThat(this.service.go()).isEqualTo("Hello World!"); } }
The @ClassRule means that the server shuts down after all the methods in this class
have been run.
WireMock lets you stub a "secure" server with an "https" URL protocol. If your application wants to contact that stub server in an integration test, it will find that the SSL certificates are not valid (the usual problem with self-installed certificates). The best option is often to re-configure the client to use "http". If that’s not an option, you can ask Spring to configure an HTTP client that ignores SSL validation errors (do so only for tests, of course).
To make this work with minimum fuss, you need to be using the Spring Boot
RestTemplateBuilder in your app, as shown in the following example:
@Bean public RestTemplate restTemplate(RestTemplateBuilder builder) { return builder.build(); }
You need RestTemplateBuilder because the builder is passed through callbacks to
initialize it, so the SSL validation can be set up in the client at that point. This
happens automatically in your test if you are using the @AutoConfigureWireMock
annotation or the stub runner. If you use the JUnit @Rule approach, you need to add the
@AutoConfigureHttpClient annotation as well, as shown in the following example:
@RunWith(SpringRunner.class) @SpringBootTest("app.baseUrl=https://localhost:6443") @AutoConfigureHttpClient public class WiremockHttpsServerApplicationTests { @ClassRule public static WireMockClassRule wiremock = new WireMockClassRule( WireMockSpring.options().httpsPort(6443)); ... }
If you are using spring-boot-starter-test, you have the Apache HTTP client on the
classpath and it is selected by the RestTemplateBuilder and configured to ignore SSL
errors. If you use the default java.net client, you do not need the annotation (but it
won’t do any harm). There is no support currently for other clients, but it may be added
in future releases.
To disable the custom RestTemplateBuilder, set the wiremock.rest-template-ssl-enabled
property to false.
Spring Cloud Contract provides a convenience class that can load JSON WireMock stubs into
a Spring MockRestServiceServer. The following code shows an example:
@RunWith(SpringRunner.class) @SpringBootTest(webEnvironment = WebEnvironment.NONE) public class WiremockForDocsMockServerApplicationTests { @Autowired private RestTemplate restTemplate; @Autowired private Service service; @Test public void contextLoads() throws Exception { // will read stubs classpath MockRestServiceServer server = WireMockRestServiceServer.with(this.restTemplate) .baseUrl("http://example.org").stubs("classpath:/stubs/resource.json") .build(); // We're asserting if WireMock responded properly assertThat(this.service.go()).isEqualTo("Hello World"); server.verify(); } }
The baseUrl value is prepended to all mock calls, and the stubs() method takes a stub
path resource pattern as an argument. In the preceding example, the stub defined at
/stubs/resource.json is loaded into the mock server. If the RestTemplate is asked to
visit http://example.org/, it gets the responses as being declared at that URL. More
than one stub pattern can be specified, and each one can be a directory (for a recursive
list of all ".json"), a fixed filename (as in the example above), or an Ant-style
pattern. The JSON format is the normal WireMock format, which you can read about in the
WireMock website.
Currently, the Spring Cloud Contract Verifier supports Tomcat, Jetty, and Undertow as Spring Boot embedded servers, and Wiremock itself has "native" support for a particular version of Jetty (currently 9.2). To use the native Jetty, you need to add the native Wiremock dependencies and exclude the Spring Boot container (if there is one).
You can register a bean of org.springframework.cloud.contract.wiremock.WireMockConfigurationCustomizer type
in order to customize the WireMock configuration (e.g. add custom transformers).
Example:
@Bean WireMockConfigurationCustomizer optionsCustomizer() { return new WireMockConfigurationCustomizer() { @Override public void customize(WireMockConfiguration options) { // perform your customization here } }; }
Spring REST Docs can be used to generate
documentation (for example in Asciidoctor format) for an HTTP API with Spring MockMvc
or WebTestClient or Rest Assured. At the same time that you generate documentation for your API, you can also
generate WireMock stubs by using Spring Cloud Contract WireMock. To do so, write your
normal REST Docs test cases and use @AutoConfigureRestDocs to have stubs be
automatically generated in the REST Docs output directory. The following code shows an
example using MockMvc:
@RunWith(SpringRunner.class) @SpringBootTest @AutoConfigureRestDocs(outputDir = "target/snippets") @AutoConfigureMockMvc public class ApplicationTests { @Autowired private MockMvc mockMvc; @Test public void contextLoads() throws Exception { mockMvc.perform(get("/resource")) .andExpect(content().string("Hello World")) .andDo(document("resource")); } }
This test generates a WireMock stub at "target/snippets/stubs/resource.json". It matches
all GET requests to the "/resource" path. The same example with WebTestClient (used
for testing Spring WebFlux applications) would look like this:
@RunWith(SpringRunner.class) @SpringBootTest @AutoConfigureRestDocs(outputDir = "target/snippets") @AutoConfigureWebTestClient public class ApplicationTests { @Autowired private WebTestClient client; @Test public void contextLoads() throws Exception { client.get().uri("/resource").exchange() .expectBody(String.class).isEqualTo("Hello World") .consumeWith(document("resource")); } }
Without any additional configuration, these tests create a stub with a request matcher for the HTTP method and all headers except "host" and "content-length". To match the request more precisely (for example, to match the body of a POST or PUT), we need to explicitly create a request matcher. Doing so has two effects:
- Creating a stub that matches only in the way you specify.
- Asserting that the request in the test case also matches the same conditions.
The main entry point for this feature is WireMockRestDocs.verify(), which can be used
as a substitute for the document() convenience method, as shown in the following
example:
import static org.springframework.cloud.contract.wiremock.restdocs.WireMockRestDocs.verify;
@RunWith(SpringRunner.class)
@SpringBootTest
@AutoConfigureRestDocs(outputDir = "target/snippets")
@AutoConfigureMockMvc
public class ApplicationTests {
@Autowired
private MockMvc mockMvc;
@Test
public void contextLoads() throws Exception {
mockMvc.perform(post("/resource")
.content("{\"id\":\"123456\",\"message\":\"Hello World\"}"))
.andExpect(status().isOk())
.andDo(verify().jsonPath("$.id")
.stub("resource"));
}
}This contract specifies that any valid POST with an "id" field receives the response
defined in this test. You can chain together calls to .jsonPath() to add additional
matchers. If JSON Path is unfamiliar, The JayWay
documentation can help you get up to speed. The WebTestClient version of this test
has a similar verify() static helper that you insert in the same place.
Instead of the jsonPath and contentType convenience methods, you can also use the
WireMock APIs to verify that the request matches the created stub, as shown in the
following example:
@Test public void contextLoads() throws Exception { mockMvc.perform(post("/resource") .content("{\"id\":\"123456\",\"message\":\"Hello World\"}")) .andExpect(status().isOk()) .andDo(verify() .wiremock(WireMock.post( urlPathEquals("/resource")) .withRequestBody(matchingJsonPath("$.id")) .stub("post-resource")); }
The WireMock API is rich. You can match headers, query parameters, and request body by regex as well as by JSON path. These features can be used to create stubs with a wider range of parameters. The above example generates a stub resembling the following example:
post-resource.json.
{ "request" : { "url" : "/resource", "method" : "POST", "bodyPatterns" : [ { "matchesJsonPath" : "$.id" }] }, "response" : { "status" : 200, "body" : "Hello World", "headers" : { "X-Application-Context" : "application:-1", "Content-Type" : "text/plain" } } }
| Note |
|---|---|
You can use either the |
On the consumer side, you can make the resource.json generated earlier in this section
available on the classpath (by
<<publishing-stubs-as-jars], for example). After that, you can create a stub using WireMock in a
number of different ways, including by using
@AutoConfigureWireMock(stubs="classpath:resource.json"), as described earlier in this
document.
You can also generate Spring Cloud Contract DSL files and documentation with Spring REST Docs. If you do so in combination with Spring Cloud WireMock, you get both the contracts and the stubs.
Why would you want to use this feature? Some people in the community asked questions about a situation in which they would like to move to DSL-based contract definition, but they already have a lot of Spring MVC tests. Using this feature lets you generate the contract files that you can later modify and move to folders (defined in your configuration) so that the plugin finds them.
| Tip |
|---|---|
You might wonder why this functionality is in the WireMock module. The functionality is there because it makes sense to generate both the contracts and the stubs. |
Consider the following test:
this.mockMvc .perform(post("/foo").accept(MediaType.APPLICATION_PDF) .accept(MediaType.APPLICATION_JSON) .contentType(MediaType.APPLICATION_JSON) .content("{\"foo\": 23, \"bar\" : \"baz\" }")) .andExpect(status().isOk()).andExpect(content().string("bar")) // first WireMock .andDo(WireMockRestDocs.verify().jsonPath("$[?(@.foo >= 20)]") .jsonPath("$[?(@.bar in ['baz','bazz','bazzz'])]") .contentType(MediaType.valueOf("application/json")) .stub("shouldGrantABeerIfOldEnough")) // then Contract DSL documentation .andDo(document("index", SpringCloudContractRestDocs.dslContract()));
The preceding test creates the stub presented in the previous section, generating both the contract and a documentation file.
The contract is called index.groovy and might look like the following example:
import org.springframework.cloud.contract.spec.Contract Contract.make { request { method 'POST' url '/foo' body(''' {"foo": 23 } ''') headers { header('''Accept''', '''application/json''') header('''Content-Type''', '''application/json''') } } response { status OK() body(''' bar ''') headers { header('''Content-Type''', '''application/json;charset=UTF-8''') header('''Content-Length''', '''3''') } testMatchers { jsonPath('$[?(@.foo >= 20)]', byType()) } } }
The generated document (formatted in Asciidoc in this case) contains a formatted
contract. The location of this file would be index/dsl-contract.adoc.
| Tip |
|---|---|
For up to date migration guides please visit the project’s wiki page. |
This section covers migrating from one version of Spring Cloud Contract Verifier to the next version. It covers the following versions upgrade paths:
This section covers upgrading from version 1.0 to version 1.1.
In 1.1.x we have introduced a change to the structure of generated stubs. If you have
been using the @AutoConfigureWireMock notation to use the stubs from the classpath,
it no longer works. The following example shows how the @AutoConfigureWireMock notation
used to work:
@AutoConfigureWireMock(stubs = "classpath:/customer-stubs/mappings", port = 8084)
You must either change the location of the stubs to:
classpath:…/META-INF/groupId/artifactId/version/mappings or use the new
classpath-based @AutoConfigureStubRunner, as shown in the following example:
@AutoConfigureWireMock(stubs = "classpath:customer-stubs/META-INF/travel.components/customer-contract/1.0.2-SNAPSHOT/mappings/", port = 8084)
If you do not want to use @AutoConfigureStubRunner and you want to remain with the old
structure, set your plugin tasks accordingly. The following example would work for the
structure presented in the previous snippet.
Maven.
<!-- start of pom.xml --> <properties> <!-- we don't want the verifier to do a jar for us --> <spring.cloud.contract.verifier.skip>true</spring.cloud.contract.verifier.skip> </properties> <!-- ... --> <!-- You need to set up the assembly plugin --> <build> <plugins> <plugin> <groupId>org.apache.maven.plugins</groupId> <artifactId>maven-assembly-plugin</artifactId> <executions> <execution> <id>stub</id> <phase>prepare-package</phase> <goals> <goal>single</goal> </goals> <inherited>false</inherited> <configuration> <attach>true</attach> <descriptor>$../../../../src/assembly/stub.xml</descriptor> </configuration> </execution> </executions> </plugin> </plugins> </build> <!-- end of pom.xml --> <!-- start of stub.xml--> <assembly xmlns="http://maven.apache.org/plugins/maven-assembly-plugin/assembly/1.1.3" xmlns:xsi="http://www.w3.org/2001/XMLSchema-instance" xsi:schemaLocation="http://maven.apache.org/plugins/maven-assembly-plugin/assembly/1.1.3 http://maven.apache.org/xsd/assembly-1.1.3.xsd"> <id>stubs</id> <formats> <format>jar</format> </formats> <includeBaseDirectory>false</includeBaseDirectory> <fileSets> <fileSet> <directory>${project.build.directory}/snippets/stubs</directory> <outputDirectory>customer-stubs/mappings</outputDirectory> <includes> <include>**/*</include> </includes> </fileSet> <fileSet> <directory>$../../../../src/test/resources/contracts</directory> <outputDirectory>customer-stubs/contracts</outputDirectory> <includes> <include>**/*.groovy</include> </includes> </fileSet> </fileSets> </assembly> <!-- end of stub.xml-->
Gradle.
task copyStubs(type: Copy, dependsOn: 'generateWireMockClientStubs') { // Preserve directory structure from 1.0.X of spring-cloud-contract from "${project.buildDir}/resources/main/customer-stubs/META-INF/${project.group}/${project.name}/${project.version}" into "${project.buildDir}/resources/main/customer-stubs" }
This section covers upgrading from version 1.1 to version 1.2.
HttpServerStub includes a method that was not in version 1.1. The method is
String registeredMappings() If you have classes that implement HttpServerStub, you
now have to implement the registeredMappings() method. It should return a String
representing all mappings available in a single HttpServerStub.
See issue 355 for more detail.
The flow for setting the generated tests package name will look like this:
- Set
basePackageForTests - If
basePackageForTestswas not set, pick the package frombaseClassForTests - If
baseClassForTestswas not set, pickpackageWithBaseClasses - If nothing got set, pick the default value:
org.springframework.cloud.contract.verifier.tests
See issue 260 for more detail.
In order to add support for fromRequest.path, the following methods had to be added to the
TemplateProcessor interface:
path()path(int index)
See issue 388 for more detail.
Rest Assured, used in the generated test classes, got bumped to 3.0. If
you manually set versions of Spring Cloud Contract and the release train
you might see the following exception:
Failed to execute goal org.apache.maven.plugins:maven-compiler-plugin:3.1:testCompile (default-testCompile) on project some-project: Compilation failure: Compilation failure: [ERROR] /some/path/SomeClass.java:[4,39] package com.jayway.restassured.response does not exist
This exception will occur due to the fact that the tests got generated with an old version of plugin and at test execution time you have an incompatible version of the release train (and vice versa).
Done via issue 267
The following links may be helpful when working with Spring Cloud Contract:
© 2016-2019 The original authors.
| Note |
|---|---|
Copies of this document may be made for your own use and for distribution to others, provided that you do not charge any fee for such copies and further provided that each copy contains this Copyright Notice, whether distributed in print or electronically. |
Spring Cloud Vault Config provides client-side support for externalized configuration in a distributed system. With HashiCorp’s Vault you have a central place to manage external secret properties for applications across all environments. Vault can manage static and dynamic secrets such as username/password for remote applications/resources and provide credentials for external services such as MySQL, PostgreSQL, Apache Cassandra, MongoDB, Consul, AWS and more.
Prerequisites
To get started with Vault and this guide you need a *NIX-like operating systems that provides:
wget,opensslandunzip- at least Java 7 and a properly configured
JAVA_HOMEenvironment variable
Install Vault
$ src/test/bash/install_vault.shCreate SSL certificates for Vault
$ src/test/bash/create_certificates.sh | Note |
|---|---|
|
$ src/test/bash/local_run_vault.shVault is started listening on 0.0.0.0:8200 using the inmem storage and
https.
Vault is sealed and not initialized when starting up.
| Note |
|---|---|
If you want to run tests, leave Vault uninitialized. The tests will
initialize Vault and create a root token |
If you want to use Vault for your application or give it a try then you need to initialize it first.
$ export VAULT_ADDR="https://localhost:8200" $ export VAULT_SKIP_VERIFY=true # Don't do this for production $ vault init
You should see something like:
Key 1: 7149c6a2e16b8833f6eb1e76df03e47f6113a3288b3093faf5033d44f0e70fe701 Key 2: 901c534c7988c18c20435a85213c683bdcf0efcd82e38e2893779f152978c18c02 Key 3: 03ff3948575b1165a20c20ee7c3e6edf04f4cdbe0e82dbff5be49c63f98bc03a03 Key 4: 216ae5cc3ddaf93ceb8e1d15bb9fc3176653f5b738f5f3d1ee00cd7dccbe926e04 Key 5: b2898fc8130929d569c1677ee69dc5f3be57d7c4b494a6062693ce0b1c4d93d805 Initial Root Token: 19aefa97-cccc-bbbb-aaaa-225940e63d76 Vault initialized with 5 keys and a key threshold of 3. Please securely distribute the above keys. When the Vault is re-sealed, restarted, or stopped, you must provide at least 3 of these keys to unseal it again. Vault does not store the master key. Without at least 3 keys, your Vault will remain permanently sealed.
Vault will initialize and return a set of unsealing keys and the root token.
Pick 3 keys and unseal Vault. Store the Vault token in the VAULT_TOKEN
environment variable.
$ vault unseal (Key 1) $ vault unseal (Key 2) $ vault unseal (Key 3) $ export VAULT_TOKEN=(Root token) # Required to run Spring Cloud Vault tests after manual initialization $ vault token-create -id="00000000-0000-0000-0000-000000000000" -policy="root"
Spring Cloud Vault accesses different resources. By default, the secret backend is enabled which accesses secret config settings via JSON endpoints.
The HTTP service has resources in the form:
/secret/{application}/{profile}
/secret/{application}
/secret/{defaultContext}/{profile}
/secret/{defaultContext}where the "application" is injected as the spring.application.name in the
SpringApplication (i.e. what is normally "application" in a regular
Spring Boot app), "profile" is an active profile (or comma-separated
list of properties). Properties retrieved from Vault will be used "as-is"
without further prefixing of the property names.
To use these features in an application, just build it as a Spring
Boot application that depends on spring-cloud-vault-config (e.g. see
the test cases). Example Maven configuration:
Example 100.1. pom.xml
<parent> <groupId>org.springframework.boot</groupId> <artifactId>spring-boot-starter-parent</artifactId> <version>2.0.0.RELEASE</version> <relativePath /> <!-- lookup parent from repository --> </parent> <dependencies> <dependency> <groupId>org.springframework.cloud</groupId> <artifactId>spring-cloud-starter-vault-config</artifactId> <version>1.0.0.BUILD-SNAPSHOT</version> </dependency> <dependency> <groupId>org.springframework.boot</groupId> <artifactId>spring-boot-starter-test</artifactId> <scope>test</scope> </dependency> </dependencies> <build> <plugins> <plugin> <groupId>org.springframework.boot</groupId> <artifactId>spring-boot-maven-plugin</artifactId> </plugin> </plugins> </build> <!-- repositories also needed for snapshots and milestones -->
Then you can create a standard Spring Boot application, like this simple HTTP server:
@SpringBootApplication @RestController public class Application { @RequestMapping("/") public String home() { return "Hello World!"; } public static void main(String[] args) { SpringApplication.run(Application.class, args); } }
When it runs it will pick up the external configuration from the
default local Vault server on port 8200 if it is running. To modify
the startup behavior you can change the location of the Vault server
using bootstrap.properties (like application.properties but for
the bootstrap phase of an application context), e.g.
Example 100.2. bootstrap.yml
spring.cloud.vault: host: localhost port: 8200 scheme: https uri: https://localhost:8200 connection-timeout: 5000 read-timeout: 15000 config: order: -10
hostsets the hostname of the Vault host. The host name will be used for SSL certificate validationportsets the Vault portschemesetting the scheme tohttpwill use plain HTTP. Supported schemes arehttpandhttps.uriconfigure the Vault endpoint with an URI. Takes precedence over host/port/scheme configurationconnection-timeoutsets the connection timeout in millisecondsread-timeoutsets the read timeout in millisecondsconfig.ordersets the order for the property source
Enabling further integrations requires additional dependencies and configuration. Depending on how you have set up Vault you might need additional configuration like SSL and authentication.
If the application imports the spring-boot-starter-actuator project, the
status of the vault server will be available via the /health endpoint.
The vault health indicator can be enabled or disabled through the property management.health.vault.enabled (default to true).
Vault requires an authentication mechanism to authorize client requests.
Spring Cloud Vault supports multiple authentication mechanisms to authenticate applications with Vault.
For a quickstart, use the root token printed by the Vault initialization.
| Warning |
|---|---|
Consider carefully your security requirements. Static token authentication is fine if you want quickly get started with Vault, but a static token is not protected any further. Any disclosure to unintended parties allows Vault use with the associated token roles. |
Different organizations have different requirements for security and authentication. Vault reflects that need by shipping multiple authentication methods. Spring Cloud Vault supports token and AppId authentication.
Tokens are the core method for authentication within Vault. Token authentication requires a static token to be provided using the Bootstrap Application Context.
| Note |
|---|---|
Token authentication is the default authentication method. If a token is disclosed an unintended party gains access to Vault and can access secrets for the intended client. |
Example 101.1. bootstrap.yml
spring.cloud.vault: authentication: TOKEN token: 00000000-0000-0000-0000-000000000000
authenticationsetting this value toTOKENselects the Token authentication methodtokensets the static token to use
See also: Vault Documentation: Tokens
Vault supports AppId
authentication that consists of two hard to guess tokens. The AppId
defaults to spring.application.name that is statically configured.
The second token is the UserId which is a part determined by the application,
usually related to the runtime environment. IP address, Mac address or a
Docker container name are good examples. Spring Cloud Vault Config supports
IP address, Mac address and static UserId’s (e.g. supplied via System properties).
The IP and Mac address are represented as Hex-encoded SHA256 hash.
IP address-based UserId’s use the local host’s IP address.
Example 101.2. bootstrap.yml using SHA256 IP-Address UserId’s
spring.cloud.vault: authentication: APPID app-id: user-id: IP_ADDRESS
authenticationsetting this value toAPPIDselects the AppId authentication methodapp-id-pathsets the path of the AppId mount to useuser-idsets the UserId method. Possible values areIP_ADDRESS,MAC_ADDRESSor a class name implementing a customAppIdUserIdMechanism
The corresponding command to generate the IP address UserId from a command line is:
$ echo -n 192.168.99.1 | sha256sum
| Note |
|---|---|
Including the line break of |
Mac address-based UserId’s obtain their network device from the
localhost-bound device. The configuration also allows specifying
a network-interface hint to pick the right device. The value of
network-interface is optional and can be either an interface
name or interface index (0-based).
Example 101.3. bootstrap.yml using SHA256 Mac-Address UserId’s
spring.cloud.vault: authentication: APPID app-id: user-id: MAC_ADDRESS network-interface: eth0
network-interfacesets network interface to obtain the physical address
The corresponding command to generate the IP address UserId from a command line is:
$ echo -n 0AFEDE1234AC | sha256sum
| Note |
|---|---|
The Mac address is specified uppercase and without colons.
Including the line break of |
The UserId generation is an open mechanism. You can set
spring.cloud.vault.app-id.user-id to any string and the configured
value will be used as static UserId.
A more advanced approach lets you set spring.cloud.vault.app-id.user-id to a
classname. This class must be on your classpath and must implement
the org.springframework.cloud.vault.AppIdUserIdMechanism interface
and the createUserId method. Spring Cloud Vault will obtain the UserId
by calling createUserId each time it authenticates using AppId to
obtain a token.
Example 101.4. bootstrap.yml
spring.cloud.vault: authentication: APPID app-id: user-id: com.examlple.MyUserIdMechanism
Example 101.5. MyUserIdMechanism.java
public class MyUserIdMechanism implements AppIdUserIdMechanism { @Override public String createUserId() { String userId = ... return userId; } }
See also: Vault Documentation: Using the App ID auth backend
AppRole is intended for machine authentication, like the deprecated (since Vault 0.6.1) Section 101.2, “AppId authentication”. AppRole authentication consists of two hard to guess (secret) tokens: RoleId and SecretId.
Spring Vault supports various AppRole scenarios (push/pull mode and wrapped).
RoleId and optionally SecretId must be provided by configuration, Spring Vault will not look up these or create a custom SecretId.
Example 101.6. bootstrap.yml with AppRole authentication properties
spring.cloud.vault: authentication: APPROLE app-role: role-id: bde2076b-cccb-3cf0-d57e-bca7b1e83a52
The following scenarios are supported along the required configuration details:
Table 101.1. Configuration
Method | RoleId | SecretId | RoleName | Token |
Provided RoleId/SecretId | Provided | Provided | ||
Provided RoleId without SecretId | Provided | |||
Provided RoleId, Pull SecretId | Provided | Provided | Provided | Provided |
Pull RoleId, provided SecretId | Provided | Provided | Provided | |
Full Pull Mode | Provided | Provided | ||
Wrapped | Provided | |||
Wrapped RoleId, provided SecretId | Provided | Provided | ||
Provided RoleId, wrapped SecretId | Provided | Provided |
Table 101.2. Pull/Push/Wrapped Matrix
RoleId | SecretId | Supported |
Provided | Provided | ✅ |
Provided | Pull | ✅ |
Provided | Wrapped | ✅ |
Provided | Absent | ✅ |
Pull | Provided | ✅ |
Pull | Pull | ✅ |
Pull | Wrapped | ❌ |
Pull | Absent | ❌ |
Wrapped | Provided | ✅ |
Wrapped | Pull | ❌ |
Wrapped | Wrapped | ✅ |
Wrapped | Absent | ❌ |
| Note |
|---|---|
You can use still all combinations of push/pull/wrapped modes by providing a configured |
| Important |
|---|---|
AppRole authentication is limited to simple pull mode using reactive infrastructure. Full pull mode is not yet supported. Using Spring Cloud Vault with the Spring WebFlux stack enables Vault’s reactive auto-configuration which can be disabled by setting |
Example 101.7. bootstrap.yml with all AppRole authentication properties
spring.cloud.vault: authentication: APPROLE app-role: role-id: bde2076b-cccb-3cf0-d57e-bca7b1e83a52 secret-id: 1696536f-1976-73b1-b241-0b4213908d39 role: my-role app-role-path: approle
role-idsets the RoleId.secret-idsets the SecretId. SecretId can be omitted if AppRole is configured without requiring SecretId (Seebind_secret_id).role: sets the AppRole name for pull mode.app-role-pathsets the path of the approle authentication mount to use.
See also: Vault Documentation: Using the AppRole auth backend
The aws-ec2 auth backend provides a secure introduction mechanism for AWS EC2 instances, allowing automated retrieval of a Vault token. Unlike most Vault authentication backends, this backend does not require first-deploying, or provisioning security-sensitive credentials (tokens, username/password, client certificates, etc.). Instead, it treats AWS as a Trusted Third Party and uses the cryptographically signed dynamic metadata information that uniquely represents each EC2 instance.
Example 101.8. bootstrap.yml using AWS-EC2 Authentication
spring.cloud.vault: authentication: AWS_EC2
AWS-EC2 authentication enables nonce by default to follow the Trust On First Use (TOFU) principle. Any unintended party that gains access to the PKCS#7 identity metadata can authenticate against Vault.
During the first login, Spring Cloud Vault generates a nonce that is stored in the auth backend aside the instance Id. Re-authentication requires the same nonce to be sent. Any other party does not have the nonce and can raise an alert in Vault for further investigation.
The nonce is kept in memory and is lost during application restart.
You can configure a static nonce with spring.cloud.vault.aws-ec2.nonce.
AWS-EC2 authentication roles are optional and default to the AMI.
You can configure the authentication role by setting the
spring.cloud.vault.aws-ec2.role property.
Example 101.9. bootstrap.yml with configured role
spring.cloud.vault: authentication: AWS_EC2 aws-ec2: role: application-server
Example 101.10. bootstrap.yml with all AWS EC2 authentication properties
spring.cloud.vault: authentication: AWS_EC2 aws-ec2: role: application-server aws-ec2-path: aws-ec2 identity-document: http://... nonce: my-static-nonce
authenticationsetting this value toAWS_EC2selects the AWS EC2 authentication methodrolesets the name of the role against which the login is being attempted.aws-ec2-pathsets the path of the AWS EC2 mount to useidentity-documentsets URL of the PKCS#7 AWS EC2 identity documentnonceused for AWS-EC2 authentication. An empty nonce defaults to nonce generation
The aws backend provides a secure authentication mechanism for AWS IAM roles, allowing the automatic authentication with vault based on the current IAM role of the running application. Unlike most Vault authentication backends, this backend does not require first-deploying, or provisioning security-sensitive credentials (tokens, username/password, client certificates, etc.). Instead, it treats AWS as a Trusted Third Party and uses the 4 pieces of information signed by the caller with their IAM credentials to verify that the caller is indeed using that IAM role.
The current IAM role the application is running in is automatically calculated. If you are running your application on AWS ECS then the application will use the IAM role assigned to the ECS task of the running container. If you are running your application naked on top of an EC2 instance then the IAM role used will be the one assigned to the EC2 instance.
When using the AWS-IAM authentication you must create a role in Vault
and assign it to your IAM role. An empty role defaults to
the friendly name the current IAM role.
Example 101.11. bootstrap.yml with required AWS-IAM Authentication properties
spring.cloud.vault: authentication: AWS_IAM
Example 101.12. bootstrap.yml with all AWS-IAM Authentication properties
spring.cloud.vault: authentication: AWS_IAM aws-iam: role: my-dev-role aws-path: aws server-id: some.server.name
rolesets the name of the role against which the login is being attempted. This should be bound to your IAM role. If one is not supplied then the friendly name of the current IAM user will be used as the vault role.aws-pathsets the path of the AWS mount to useserver-idsets the value to use for theX-Vault-AWS-IAM-Server-IDheader preventing certain types of replay attacks.
AWS-IAM requires the AWS Java SDK dependency (com.amazonaws:aws-java-sdk-core)
as the authentication implementation uses AWS SDK types for credentials and request signing.
The azure auth backend provides a secure introduction mechanism for Azure VM instances, allowing automated retrieval of a Vault token. Unlike most Vault authentication backends, this backend does not require first-deploying, or provisioning security-sensitive credentials (tokens, username/password, client certificates, etc.). Instead, it treats Azure as a Trusted Third Party and uses the managed service identity and instance metadata information that can be bound to a VM instance.
Example 101.13. bootstrap.yml with required Azure Authentication properties
spring.cloud.vault: authentication: AZURE_MSI azure-msi: role: my-dev-role
Example 101.14. bootstrap.yml with all Azure Authentication properties
spring.cloud.vault: authentication: AZURE_MSI azure-msi: role: my-dev-role azure-path: aws
rolesets the name of the role against which the login is being attempted.azure-pathsets the path of the Azure mount to use
Azure MSI authentication fetches environmental details about the virtual machine (subscription Id, resource group, VM name) from the instance metadata service.
The cert auth backend allows authentication using SSL/TLS client
certificates that are either signed by a CA or self-signed.
To enable cert authentication you need to:
- Use SSL, see Chapter 107, Vault Client SSL configuration
- Configure a Java
Keystorethat contains the client certificate and the private key - Set the
spring.cloud.vault.authenticationtoCERT
Example 101.15. bootstrap.yml
spring.cloud.vault: authentication: CERT ssl: key-store: classpath:keystore.jks key-store-password: changeit cert-auth-path: cert
Cubbyhole authentication uses Vault primitives to provide a secured authentication
workflow. Cubbyhole authentication uses tokens as primary login method.
An ephemeral token is used to obtain a second, login VaultToken from Vault’s
Cubbyhole secret backend. The login token is usually longer-lived and used to
interact with Vault. The login token will be retrieved from a wrapped
response stored at /cubbyhole/response.
Creating a wrapped token
| Note |
|---|---|
Response Wrapping for token creation requires Vault 0.6.0 or higher. |
Example 101.16. Creating and storing tokens
$ vault token-create -wrap-ttl="10m" Key Value --- ----- wrapping_token: 397ccb93-ff6c-b17b-9389-380b01ca2645 wrapping_token_ttl: 0h10m0s wrapping_token_creation_time: 2016-09-18 20:29:48.652957077 +0200 CEST wrapped_accessor: 46b6aebb-187f-932a-26d7-4f3d86a68319
Example 101.17. bootstrap.yml
spring.cloud.vault: authentication: CUBBYHOLE token: 397ccb93-ff6c-b17b-9389-380b01ca2645
See also:
The gcp auth backend allows Vault login by using existing GCP (Google Cloud Platform) IAM and GCE credentials.
GCP GCE (Google Compute Engine) authentication creates a signature in the form of a JSON Web Token (JWT) for a service account. A JWT for a Compute Engine instance is obtained from the GCE metadata service using Instance identification. This API creates a JSON Web Token that can be used to confirm the instance identity.
Unlike most Vault authentication backends, this backend does not require first-deploying, or provisioning security-sensitive credentials (tokens, username/password, client certificates, etc.). Instead, it treats GCP as a Trusted Third Party and uses the cryptographically signed dynamic metadata information that uniquely represents each GCP service account.
Example 101.18. bootstrap.yml with required GCP-GCE Authentication properties
spring.cloud.vault: authentication: GCP_GCE gcp-gce: role: my-dev-role
Example 101.19. bootstrap.yml with all GCP-GCE Authentication properties
spring.cloud.vault: authentication: GCP_GCE gcp-gce: gcp-path: gcp role: my-dev-role service-account: [email protected]
rolesets the name of the role against which the login is being attempted.gcp-pathsets the path of the GCP mount to useservice-accountallows overriding the service account Id to a specific value. Defaults to thedefaultservice account.
See also:
The gcp auth backend allows Vault login by using existing GCP (Google Cloud Platform) IAM and GCE credentials.
GCP IAM authentication creates a signature in the form of a JSON Web Token (JWT)
for a service account. A JWT for a service account is obtained by
calling GCP IAM’s projects.serviceAccounts.signJwt API. The caller authenticates against GCP IAM
and proves thereby its identity. This Vault backend treats GCP as a Trusted Third Party.
IAM credentials can be obtained from either the runtime environment
, specifically the GOOGLE_APPLICATION_CREDENTIALS
environment variable, the Google Compute metadata service,
or supplied externally as e.g. JSON or base64 encoded.
JSON is the preferred form as it carries the project id and
service account identifier required for calling projects.serviceAccounts.signJwt.
Example 101.20. bootstrap.yml with required GCP-IAM Authentication properties
spring.cloud.vault: authentication: GCP_IAM gcp-iam: role: my-dev-role
Example 101.21. bootstrap.yml with all GCP-IAM Authentication properties
spring.cloud.vault: authentication: GCP_IAM gcp-iam: credentials: location: classpath:credentials.json encoded-key: e+KApn0= gcp-path: gcp jwt-validity: 15m project-id: my-project-id role: my-dev-role service-account: [email protected]
rolesets the name of the role against which the login is being attempted.credentials.locationpath to the credentials resource that contains Google credentials in JSON format.credentials.encoded-keythe base64 encoded contents of an OAuth2 account private key in the JSON format.gcp-pathsets the path of the GCP mount to usejwt-validityconfigures the JWT token validity. Defaults to 15 minutes.project-idallows overriding the project Id to a specific value. Defaults to the project Id from the obtained credential.service-accountallows overriding the service account Id to a specific value. Defaults to the service account from the obtained credential.
GCP IAM authentication requires the Google Cloud Java SDK dependency
(com.google.apis:google-api-services-iam and com.google.auth:google-auth-library-oauth2-http)
as the authentication implementation uses Google APIs for credentials and JWT signing.
| Note |
|---|---|
Google credentials require an OAuth 2 token maintaining the token lifecycle. All API
is synchronous therefore, |
See also:
Kubernetes authentication mechanism (since Vault 0.8.3) allows to authenticate with Vault using a Kubernetes Service Account Token. The authentication is role based and the role is bound to a service account name and a namespace.
A file containing a JWT token for a pod’s service account is automatically mounted at /var/run/secrets/kubernetes.io/serviceaccount/token.
Example 101.22. bootstrap.yml with all Kubernetes authentication properties
spring.cloud.vault: authentication: KUBERNETES kubernetes: role: my-dev-role kubernetes-path: kubernetes service-account-token-file: /var/run/secrets/kubernetes.io/serviceaccount/token
rolesets the Role.kubernetes-pathsets the path of the Kubernetes mount to use.service-account-token-filesets the location of the file containing the Kubernetes Service Account Token. Defaults to/var/run/secrets/kubernetes.io/serviceaccount/token.
See also:
Spring Cloud Vault supports at the basic level the generic secret
backend. The generic secret backend allows storage of arbitrary
values as key-value store. A single context can store one or many
key-value tuples. Contexts can be organized hierarchically.
Spring Cloud Vault allows using the Application name
and a default context name (application) in combination with active
profiles.
/secret/{application}/{profile}
/secret/{application}
/secret/{default-context}/{profile}
/secret/{default-context}The application name is determined by the properties:
spring.cloud.vault.generic.application-namespring.cloud.vault.application-namespring.application.name
Secrets can be obtained from other contexts within the generic backend by adding their
paths to the application name, separated by commas. For example, given the application
name usefulapp,mysql1,projectx/aws, each of these folders will be used:
/secret/usefulapp/secret/mysql1/secret/projectx/aws
Spring Cloud Vault adds all active profiles to the list of possible context paths. No active profiles will skip accessing contexts with a profile name.
Properties are exposed like they are stored (i.e. without additional prefixes).
spring.cloud.vault: generic: enabled: true backend: secret profile-separator: '/' default-context: application application-name: my-app
enabledsetting this value tofalsedisables the secret backend config usagebackendsets the path of the secret mount to usedefault-contextsets the context name used by all applicationsapplication-nameoverrides the application name for use in the generic backendprofile-separatorseparates the profile name from the context in property sources with profiles
| Note |
|---|---|
The key-value secret backend can be operated in versioned (v2) and non-versioned (v1) modes. Depending on the mode of operation, a different API is required to access secrets. Make sure to enable |
See also: Vault Documentation: Using the KV Secrets Engine - Version 1 (generic secret backend)
Spring Cloud Vault supports the versioned Key-Value secret
backend. The key-value backend allows storage of arbitrary
values as key-value store. A single context can store one or many
key-value tuples. Contexts can be organized hierarchically.
Spring Cloud Vault allows using the Application name
and a default context name (application) in combination with active
profiles.
/secret/{application}/{profile}
/secret/{application}
/secret/{default-context}/{profile}
/secret/{default-context}The application name is determined by the properties:
spring.cloud.vault.kv.application-namespring.cloud.vault.application-namespring.application.name
Secrets can be obtained from other contexts within the key-value backend by adding their
paths to the application name, separated by commas. For example, given the application
name usefulapp,mysql1,projectx/aws, each of these folders will be used:
/secret/usefulapp/secret/mysql1/secret/projectx/aws
Spring Cloud Vault adds all active profiles to the list of possible context paths. No active profiles will skip accessing contexts with a profile name.
Properties are exposed like they are stored (i.e. without additional prefixes).
| Note |
|---|---|
Spring Cloud Vault adds the |
spring.cloud.vault: kv: enabled: true backend: secret profile-separator: '/' default-context: application application-name: my-app
enabledsetting this value tofalsedisables the secret backend config usagebackendsets the path of the secret mount to usedefault-contextsets the context name used by all applicationsapplication-nameoverrides the application name for use in the generic backendprofile-separatorseparates the profile name from the context in property sources with profiles
| Note |
|---|---|
The key-value secret backend can be operated in versioned (v2) and non-versioned (v1) modes. Depending on the mode of operation, a different API is required to access secrets. Make sure to enable |
See also: Vault Documentation: Using the KV Secrets Engine - Version 2 (versioned key-value backend)
Spring Cloud Vault can obtain credentials for HashiCorp Consul.
The Consul integration requires the spring-cloud-vault-config-consul
dependency.
Example 102.1. pom.xml
<dependencies> <dependency> <groupId>org.springframework.cloud</groupId> <artifactId>spring-cloud-vault-config-consul</artifactId> <version>1.0.0.BUILD-SNAPSHOT</version> </dependency> </dependencies>
The integration can be enabled by setting
spring.cloud.vault.consul.enabled=true (default false) and
providing the role name with spring.cloud.vault.consul.role=….
The obtained token is stored in spring.cloud.consul.token
so using Spring Cloud Consul can pick up the generated
credentials without further configuration. You can configure
the property name by setting spring.cloud.vault.consul.token-property.
spring.cloud.vault: consul: enabled: true role: readonly backend: consul token-property: spring.cloud.consul.token
enabledsetting this value totrueenables the Consul backend config usagerolesets the role name of the Consul role definitionbackendsets the path of the Consul mount to usetoken-propertysets the property name in which the Consul ACL token is stored
Spring Cloud Vault can obtain credentials for RabbitMQ.
The RabbitMQ integration requires the spring-cloud-vault-config-rabbitmq
dependency.
Example 102.2. pom.xml
<dependencies> <dependency> <groupId>org.springframework.cloud</groupId> <artifactId>spring-cloud-vault-config-rabbitmq</artifactId> <version>1.0.0.BUILD-SNAPSHOT</version> </dependency> </dependencies>
The integration can be enabled by setting
spring.cloud.vault.rabbitmq.enabled=true (default false)
and providing the role name with spring.cloud.vault.rabbitmq.role=….
Username and password are stored in spring.rabbitmq.username
and spring.rabbitmq.password so using Spring Boot will pick up the generated
credentials without further configuration. You can configure the property names
by setting spring.cloud.vault.rabbitmq.username-property and
spring.cloud.vault.rabbitmq.password-property.
spring.cloud.vault: rabbitmq: enabled: true role: readonly backend: rabbitmq username-property: spring.rabbitmq.username password-property: spring.rabbitmq.password
enabledsetting this value totrueenables the RabbitMQ backend config usagerolesets the role name of the RabbitMQ role definitionbackendsets the path of the RabbitMQ mount to useusername-propertysets the property name in which the RabbitMQ username is storedpassword-propertysets the property name in which the RabbitMQ password is stored
See also: Vault Documentation: Setting up RabbitMQ with Vault
Spring Cloud Vault can obtain credentials for AWS.
The AWS integration requires the spring-cloud-vault-config-aws
dependency.
Example 102.3. pom.xml
<dependencies> <dependency> <groupId>org.springframework.cloud</groupId> <artifactId>spring-cloud-vault-config-aws</artifactId> <version>1.0.0.BUILD-SNAPSHOT</version> </dependency> </dependencies>
The integration can be enabled by setting
spring.cloud.vault.aws=true (default false)
and providing the role name with spring.cloud.vault.aws.role=….
The access key and secret key are stored in cloud.aws.credentials.accessKey
and cloud.aws.credentials.secretKey so using Spring Cloud AWS will pick up the generated
credentials without further configuration. You can configure the property names
by setting spring.cloud.vault.aws.access-key-property and
spring.cloud.vault.aws.secret-key-property.
spring.cloud.vault: aws: enabled: true role: readonly backend: aws access-key-property: cloud.aws.credentials.accessKey secret-key-property: cloud.aws.credentials.secretKey
enabledsetting this value totrueenables the AWS backend config usagerolesets the role name of the AWS role definitionbackendsets the path of the AWS mount to useaccess-key-propertysets the property name in which the AWS access key is storedsecret-key-propertysets the property name in which the AWS secret key is stored
Vault supports several database secret backends to generate database credentials dynamically based on configured roles. This means services that need to access a database no longer need to configure credentials: they can request them from Vault, and use Vault’s leasing mechanism to more easily roll keys.
Spring Cloud Vault integrates with these backends:
Using a database secret backend requires to enable the
backend in the configuration and the spring-cloud-vault-config-databases
dependency.
Vault ships since 0.7.1 with a dedicated database secret backend that allows
database integration via plugins. You can use that specific backend by using the
generic database backend. Make sure to specify the appropriate
backend path, e.g. spring.cloud.vault.mysql.role.backend=database.
Example 103.1. pom.xml
<dependencies> <dependency> <groupId>org.springframework.cloud</groupId> <artifactId>spring-cloud-vault-config-databases</artifactId> <version>1.0.0.BUILD-SNAPSHOT</version> </dependency> </dependencies>
| Note |
|---|---|
Enabling multiple JDBC-compliant databases will generate credentials and store them by default in the same property keys hence property names for JDBC secrets need to be configured separately. |
Spring Cloud Vault can obtain credentials for any database listed at
https://www.vaultproject.io/api/secret/databases/index.html.
The integration can be enabled by setting
spring.cloud.vault.database.enabled=true (default false) and
providing the role name with spring.cloud.vault.database.role=….
While the database backend is a generic one, spring.cloud.vault.database
specifically targets JDBC databases. Username and password are
stored in spring.datasource.username and spring.datasource.password
so using Spring Boot will pick up the generated credentials
for your DataSource without further configuration.
You can configure the property names by setting
spring.cloud.vault.database.username-property and
spring.cloud.vault.database.password-property.
spring.cloud.vault: database: enabled: true role: readonly backend: database username-property: spring.datasource.username password-property: spring.datasource.username
enabledsetting this value totrueenables the Database backend config usagerolesets the role name of the Database role definitionbackendsets the path of the Database mount to useusername-propertysets the property name in which the Database username is storedpassword-propertysets the property name in which the Database password is stored
| Note |
|---|---|
The |
Spring Cloud Vault can obtain credentials for Apache Cassandra.
The integration can be enabled by setting
spring.cloud.vault.cassandra.enabled=true (default false) and
providing the role name with spring.cloud.vault.cassandra.role=….
Username and password are stored in spring.data.cassandra.username
and spring.data.cassandra.password so using Spring Boot will pick
up the generated credentials without further configuration.
You can configure the property names by setting
spring.cloud.vault.cassandra.username-property and
spring.cloud.vault.cassandra.password-property.
spring.cloud.vault: cassandra: enabled: true role: readonly backend: cassandra username-property: spring.data.cassandra.username password-property: spring.data.cassandra.username
enabledsetting this value totrueenables the Cassandra backend config usagerolesets the role name of the Cassandra role definitionbackendsets the path of the Cassandra mount to useusername-propertysets the property name in which the Cassandra username is storedpassword-propertysets the property name in which the Cassandra password is stored
See also: Vault Documentation: Setting up Apache Cassandra with Vault
| Note |
|---|---|
The |
Spring Cloud Vault can obtain credentials for MongoDB.
The integration can be enabled by setting
spring.cloud.vault.mongodb.enabled=true (default false) and
providing the role name with spring.cloud.vault.mongodb.role=….
Username and password are stored in spring.data.mongodb.username
and spring.data.mongodb.password so using Spring Boot will
pick up the generated credentials without further configuration.
You can configure the property names by setting
spring.cloud.vault.mongodb.username-property and
spring.cloud.vault.mongodb.password-property.
spring.cloud.vault: mongodb: enabled: true role: readonly backend: mongodb username-property: spring.data.mongodb.username password-property: spring.data.mongodb.password
enabledsetting this value totrueenables the MongodB backend config usagerolesets the role name of the MongoDB role definitionbackendsets the path of the MongoDB mount to useusername-propertysets the property name in which the MongoDB username is storedpassword-propertysets the property name in which the MongoDB password is stored
See also: Vault Documentation: Setting up MongoDB with Vault
| Note |
|---|---|
The |
Spring Cloud Vault can obtain credentials for MySQL.
The integration can be enabled by setting
spring.cloud.vault.mysql.enabled=true (default false) and
providing the role name with spring.cloud.vault.mysql.role=….
Username and password are stored in spring.datasource.username
and spring.datasource.password so using Spring Boot will
pick up the generated credentials without further configuration.
You can configure the property names by setting
spring.cloud.vault.mysql.username-property and
spring.cloud.vault.mysql.password-property.
spring.cloud.vault: mysql: enabled: true role: readonly backend: mysql username-property: spring.datasource.username password-property: spring.datasource.username
enabledsetting this value totrueenables the MySQL backend config usagerolesets the role name of the MySQL role definitionbackendsets the path of the MySQL mount to useusername-propertysets the property name in which the MySQL username is storedpassword-propertysets the property name in which the MySQL password is stored
| Note |
|---|---|
The |
Spring Cloud Vault can obtain credentials for PostgreSQL.
The integration can be enabled by setting
spring.cloud.vault.postgresql.enabled=true (default false) and
providing the role name with spring.cloud.vault.postgresql.role=….
Username and password are stored in spring.datasource.username
and spring.datasource.password so using Spring Boot will
pick up the generated credentials without further configuration.
You can configure the property names by setting
spring.cloud.vault.postgresql.username-property and
spring.cloud.vault.postgresql.password-property.
spring.cloud.vault: postgresql: enabled: true role: readonly backend: postgresql username-property: spring.datasource.username password-property: spring.datasource.username
enabledsetting this value totrueenables the PostgreSQL backend config usagerolesets the role name of the PostgreSQL role definitionbackendsets the path of the PostgreSQL mount to useusername-propertysets the property name in which the PostgreSQL username is storedpassword-propertysets the property name in which the PostgreSQL password is stored
See also: Vault Documentation: Setting up PostgreSQL with Vault
Spring Cloud Vault uses property-based configuration to create PropertySources
for generic and discovered secret backends.
Discovered backends provide VaultSecretBackendDescriptor beans to describe the configuration
state to use secret backend as PropertySource. A SecretBackendMetadataFactory is required
to create a SecretBackendMetadata object which contains path, name and property transformation
configuration.
SecretBackendMetadata is used to back a particular PropertySource.
You can register an arbitrary number of beans implementing VaultConfigurer for customization.
Default generic and discovered backend registration is disabled if Spring Cloud Vault discovers
at least one VaultConfigurer bean. You can however enable default registration with
SecretBackendConfigurer.registerDefaultGenericSecretBackends() and SecretBackendConfigurer.registerDefaultDiscoveredSecretBackends().
public class CustomizationBean implements VaultConfigurer { @Override public void addSecretBackends(SecretBackendConfigurer configurer) { configurer.add("secret/my-application"); configurer.registerDefaultGenericSecretBackends(false); configurer.registerDefaultDiscoveredSecretBackends(true); } }
| Note |
|---|---|
All customization is required to happen in the bootstrap context. Add your configuration
classes to |
You can use a DiscoveryClient (such as from Spring Cloud Consul) to locate
a Vault server by setting spring.cloud.vault.discovery.enabled=true (default false).
The net result of that is that your apps need a bootstrap.yml (or an environment variable)
with the appropriate discovery configuration.
The benefit is that the Vault can change its co-ordinates, as long as the discovery service
is a fixed point. The default service id is vault but you can change that on the client with
spring.cloud.vault.discovery.serviceId.
The discovery client implementations all support some kind of metadata map
(e.g. for Eureka we have eureka.instance.metadataMap). Some additional properties of the service
may need to be configured in its service registration metadata so that clients can connect
correctly. Service registries that do not provide details about transport layer security
need to provide a scheme metadata entry to be set either to https or http.
If no scheme is configured and the service is not exposed as secure service, then
configuration defaults to spring.cloud.vault.scheme which is https when it’s not set.
spring.cloud.vault.discovery: enabled: true service-id: my-vault-service
In some cases, it may be desirable to fail startup of a service if
it cannot connect to the Vault Server. If this is the desired
behavior, set the bootstrap configuration property
spring.cloud.vault.fail-fast=true and the client will halt with
an Exception.
spring.cloud.vault: fail-fast: true
SSL can be configured declaratively by setting various properties.
You can set either javax.net.ssl.trustStore to configure
JVM-wide SSL settings or spring.cloud.vault.ssl.trust-store
to set SSL settings only for Spring Cloud Vault Config.
spring.cloud.vault: ssl: trust-store: classpath:keystore.jks trust-store-password: changeit
trust-storesets the resource for the trust-store. SSL-secured Vault communication will validate the Vault SSL certificate with the specified trust-store.trust-store-passwordsets the trust-store password
Please note that configuring spring.cloud.vault.ssl.* can be only
applied when either Apache Http Components or the OkHttp client
is on your class-path.
With every secret, Vault creates a lease: metadata containing information such as a time duration, renewability, and more.
Vault promises that the data will be valid for the given duration, or Time To Live (TTL). Once the lease is expired, Vault can revoke the data, and the consumer of the secret can no longer be certain that it is valid.
Spring Cloud Vault maintains a lease lifecycle beyond the creation of login tokens and secrets. That said, login tokens and secrets associated with a lease are scheduled for renewal just before the lease expires until terminal expiry. Application shutdown revokes obtained login tokens and renewable leases.
Secret service and database backends (such as MongoDB or MySQL) usually generate a renewable lease so generated credentials will be disabled on application shutdown.
| Note |
|---|---|
Static tokens are not renewed or revoked. |
Lease renewal and revocation is enabled by default and can
be disabled by setting spring.cloud.vault.config.lifecycle.enabled
to false. This is not recommended as leases can expire and
Spring Cloud Vault cannot longer access Vault or services
using generated credentials and valid credentials remain active
after application shutdown.
spring.cloud.vault: config.lifecycle.enabled: true
1.0.0.BUILD-SNAPSHOT
This project provides an API Gateway built on top of the Spring Ecosystem, including: Spring 5, Spring Boot 2 and Project Reactor. Spring Cloud Gateway aims to provide a simple, yet effective way to route to APIs and provide cross cutting concerns to them such as: security, monitoring/metrics, and resiliency.
To include Spring Cloud Gateway in your project use the starter with group org.springframework.cloud
and artifact id spring-cloud-starter-gateway. See the Spring Cloud Project page
for details on setting up your build system with the current Spring Cloud Release Train.
If you include the starter, but, for some reason, you do not want the gateway to be enabled, set spring.cloud.gateway.enabled=false.
| Important |
|---|---|
Spring Cloud Gateway is built upon Spring Boot 2.0, Spring WebFlux, and Project Reactor. As a consequence many of the familiar synchronous libraries (Spring Data and Spring Security, for example) and patterns you may not apply when using Spring Cloud Gateway. If you are unfamiliar with these projects we suggest you begin by reading their documentation to familiarize yourself with some of the new concepts before working with Spring Cloud Gateway. |
| Important |
|---|---|
Spring Cloud Gateway requires the Netty runtime provided by Spring Boot and Spring Webflux. It does not work in a traditional Servlet Container or built as a WAR. |
- Route: Route the basic building block of the gateway. It is defined by an ID, a destination URI, a collection of predicates and a collection of filters. A route is matched if aggregate predicate is true.
- Predicate: This is a Java 8 Function Predicate. The input type is a Spring Framework
ServerWebExchange. This allows developers to match on anything from the HTTP request, such as headers or parameters. - Filter: These are instances Spring Framework
GatewayFilterconstructed in with a specific factory. Here, requests and responses can be modified before or after sending the downstream request.
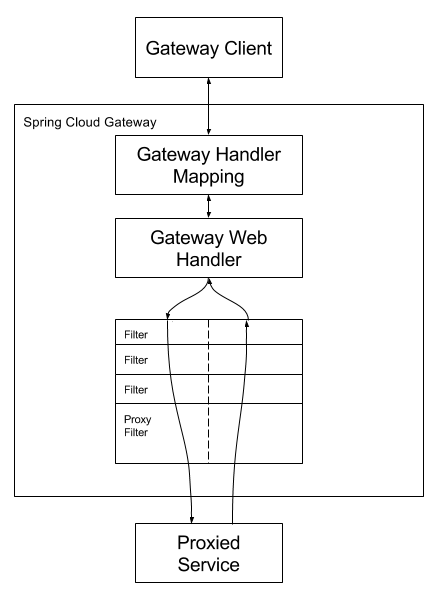
Clients make requests to Spring Cloud Gateway. If the Gateway Handler Mapping determines that a request matches a Route, it is sent to the Gateway Web Handler. This handler runs sends the request through a filter chain that is specific to the request. The reason the filters are divided by the dotted line, is that filters may execute logic before the proxy request is sent or after. All "pre" filter logic is executed, then the proxy request is made. After the proxy request is made, the "post" filter logic is executed.
| Note |
|---|---|
URIs defined in routes without a port will get a default port set to 80 and 443 for HTTP and HTTPS URIs respectively. |
Spring Cloud Gateway matches routes as part of the Spring WebFlux HandlerMapping infrastructure. Spring Cloud Gateway includes many built-in Route Predicate Factories. All of these predicates match on different attributes of the HTTP request. Multiple Route Predicate Factories can be combined and are combined via logical and.
The After Route Predicate Factory takes one parameter, a datetime. This predicate matches requests that happen after the current datetime.
application.yml.
spring: cloud: gateway: routes: - id: after_route uri: http://example.org predicates: - After=2017-01-20T17:42:47.789-07:00[America/Denver]
This route matches any request after Jan 20, 2017 17:42 Mountain Time (Denver).
The Before Route Predicate Factory takes one parameter, a datetime. This predicate matches requests that happen before the current datetime.
application.yml.
spring: cloud: gateway: routes: - id: before_route uri: http://example.org predicates: - Before=2017-01-20T17:42:47.789-07:00[America/Denver]
This route matches any request before Jan 20, 2017 17:42 Mountain Time (Denver).
The Between Route Predicate Factory takes two parameters, datetime1 and datetime2. This predicate matches requests that happen after datetime1 and before datetime2. The datetime2 parameter must be after datetime1.
application.yml.
spring: cloud: gateway: routes: - id: between_route uri: http://example.org predicates: - Between=2017-01-20T17:42:47.789-07:00[America/Denver], 2017-01-21T17:42:47.789-07:00[America/Denver]
This route matches any request after Jan 20, 2017 17:42 Mountain Time (Denver) and before Jan 21, 2017 17:42 Mountain Time (Denver). This could be useful for maintenance windows.
The Cookie Route Predicate Factory takes two parameters, the cookie name and a regular expression. This predicate matches cookies that have the given name and the value matches the regular expression.
application.yml.
spring: cloud: gateway: routes: - id: cookie_route uri: http://example.org predicates: - Cookie=chocolate, ch.p
This route matches the request has a cookie named chocolate who’s value matches the ch.p regular expression.
The Header Route Predicate Factory takes two parameters, the header name and a regular expression. This predicate matches with a header that has the given name and the value matches the regular expression.
application.yml.
spring: cloud: gateway: routes: - id: header_route uri: http://example.org predicates: - Header=X-Request-Id, \d+
This route matches if the request has a header named X-Request-Id whos value matches the \d+ regular expression (has a value of one or more digits).
The Host Route Predicate Factory takes one parameter: a list of host name patterns. The pattern is an Ant style pattern with . as the separator. This predicates matches the Host header that matches the pattern.
application.yml.
spring: cloud: gateway: routes: - id: host_route uri: http://example.org predicates: - Host=**.somehost.org,**.anotherhost.org
URI template variables are supported as well, such as {sub}.myhost.org.
This route would match if the request has a Host header has the value www.somehost.org or beta.somehost.org or www.anotherhost.org.
This predicate extracts the URI template variables (like sub defined in the example above) as a map of names and values and places it in the ServerWebExchange.getAttributes() with a key defined in ServerWebExchangeUtils.URI_TEMPLATE_VARIABLES_ATTRIBUTE. Those values are then available for use by GatewayFilter Factories
The Method Route Predicate Factory takes one parameter: the HTTP method to match.
application.yml.
spring: cloud: gateway: routes: - id: method_route uri: http://example.org predicates: - Method=GET
This route would match if the request method was a GET.
The Path Route Predicate Factory takes two parameter: a list of Spring PathMatcher patterns and an optional flag to matchOptionalTrailingSeparator.
application.yml.
spring: cloud: gateway: routes: - id: host_route uri: http://example.org predicates: - Path=/foo/{segment},/bar/{segment}
This route would match if the request path was, for example: /foo/1 or /foo/bar or /bar/baz.
This predicate extracts the URI template variables (like segment defined in the example above) as a map of names and values and places it in the ServerWebExchange.getAttributes() with a key defined in ServerWebExchangeUtils.URI_TEMPLATE_VARIABLES_ATTRIBUTE. Those values are then available for use by GatewayFilter Factories
A utility method is available to make access to these variables easier.
Map<String, String> uriVariables = ServerWebExchangeUtils.getPathPredicateVariables(exchange);
String segment = uriVariables.get("segment");The Query Route Predicate Factory takes two parameters: a required param and an optional regexp.
application.yml.
spring: cloud: gateway: routes: - id: query_route uri: http://example.org predicates: - Query=baz
This route would match if the request contained a baz query parameter.
application.yml.
spring: cloud: gateway: routes: - id: query_route uri: http://example.org predicates: - Query=foo, ba.
This route would match if the request contained a foo query parameter whose value matched the ba. regexp, so bar and baz would match.
The RemoteAddr Route Predicate Factory takes a list (min size 1) of CIDR-notation (IPv4 or IPv6) strings, e.g. 192.168.0.1/16 (where 192.168.0.1 is an IP address and 16 is a subnet mask).
application.yml.
spring: cloud: gateway: routes: - id: remoteaddr_route uri: http://example.org predicates: - RemoteAddr=192.168.1.1/24
This route would match if the remote address of the request was, for example, 192.168.1.10.
By default the RemoteAddr Route Predicate Factory uses the remote address from the incoming request. This may not match the actual client IP address if Spring Cloud Gateway sits behind a proxy layer.
You can customize the way that the remote address is resolved by setting a custom RemoteAddressResolver.
Spring Cloud Gateway comes with one non-default remote address resolver which is based off of the X-Forwarded-For header, XForwardedRemoteAddressResolver.
XForwardedRemoteAddressResolver has two static constructor methods which take different approaches to security:
XForwardedRemoteAddressResolver::trustAll returns a RemoteAddressResolver which always takes the first IP address found in the X-Forwarded-For header.
This approach is vulnerable to spoofing, as a malicious client could set an initial value for the X-Forwarded-For which would be accepted by the resolver.
XForwardedRemoteAddressResolver::maxTrustedIndex takes an index which correlates to the number of trusted infrastructure running in front of Spring Cloud Gateway.
If Spring Cloud Gateway is, for example only accessible via HAProxy, then a value of 1 should be used.
If two hops of trusted infrastructure are required before Spring Cloud Gateway is accessible, then a value of 2 should be used.
Given the following header value:
X-Forwarded-For: 0.0.0.1, 0.0.0.2, 0.0.0.3
The maxTrustedIndex values below will yield the following remote addresses.
maxTrustedIndex | result |
|---|---|
[ | (invalid, |
1 | 0.0.0.3 |
2 | 0.0.0.2 |
3 | 0.0.0.1 |
[4, | 0.0.0.1 |
GatewayConfig.java
RemoteAddressResolver resolver = XForwardedRemoteAddressResolver
.maxTrustedIndex(1);
...
.route("direct-route",
r -> r.remoteAddr("10.1.1.1", "10.10.1.1/24")
.uri("https://downstream1")
.route("proxied-route",
r -> r.remoteAddr(resolver, "10.10.1.1", "10.10.1.1/24")
.uri("https://downstream2")
)Route filters allow the modification of the incoming HTTP request or outgoing HTTP response in some manner. Route filters are scoped to a particular route. Spring Cloud Gateway includes many built-in GatewayFilter Factories.
NOTE For more detailed examples on how to use any of the following filters, take a look at the unit tests.
The AddRequestHeader GatewayFilter Factory takes a name and value parameter.
application.yml.
spring: cloud: gateway: routes: - id: add_request_header_route uri: http://example.org filters: - AddRequestHeader=X-Request-Foo, Bar
This will add X-Request-Foo:Bar header to the downstream request’s headers for all matching requests.
The AddRequestParameter GatewayFilter Factory takes a name and value parameter.
application.yml.
spring: cloud: gateway: routes: - id: add_request_parameter_route uri: http://example.org filters: - AddRequestParameter=foo, bar
This will add foo=bar to the downstream request’s query string for all matching requests.
The AddResponseHeader GatewayFilter Factory takes a name and value parameter.
application.yml.
spring: cloud: gateway: routes: - id: add_request_header_route uri: http://example.org filters: - AddResponseHeader=X-Response-Foo, Bar
This will add X-Response-Foo:Bar header to the downstream response’s headers for all matching requests.
Hystrix is a library from Netflix that implements the circuit breaker pattern. The Hystrix GatewayFilter allows you to introduce circuit breakers to your gateway routes, protecting your services from cascading failures and allowing you to provide fallback responses in the event of downstream failures.
To enable Hystrix GatewayFilters in your project, add a dependency on spring-cloud-starter-netflix-hystrix from Spring Cloud Netflix.
The Hystrix GatewayFilter Factory requires a single name parameter, which is the name of the HystrixCommand.
application.yml.
spring: cloud: gateway: routes: - id: hystrix_route uri: http://example.org filters: - Hystrix=myCommandName
This wraps the remaining filters in a HystrixCommand with command name myCommandName.
The Hystrix filter can also accept an optional fallbackUri parameter. Currently, only forward: schemed URIs are supported. If the fallback is called, the request will be forwarded to the controller matched by the URI.
application.yml.
spring: cloud: gateway: routes: - id: hystrix_route uri: lb://backing-service:8088 predicates: - Path=/consumingserviceendpoint filters: - name: Hystrix args: name: fallbackcmd fallbackUri: forward:/incaseoffailureusethis - RewritePath=/consumingserviceendpoint, /backingserviceendpoint
This will forward to the /incaseoffailureusethis URI when the Hystrix fallback is called. Note that this example also demonstrates (optional) Spring Cloud Netflix Ribbon load-balancing via the lb prefix on the destination URI.
The primary scenario is to use the fallbackUri to an internal controller or handler within the gateway app.
However, it is also possible to reroute the request to a controller or handler in an external application, like so:
application.yml.
spring: cloud: gateway: routes: - id: ingredients uri: lb://ingredients predicates: - Path=//ingredients/** filters: - name: Hystrix args: name: fetchIngredients fallbackUri: forward:/fallback - id: ingredients-fallback uri: http://localhost:9994 predicates: - Path=/fallback
In this example, there is no fallback endpoint or handler in the gateway application, however, there is one in another
app, registered under http://localhost:9994.
In case of the request being forwarded to fallback, the Hystrix Gateway filter also provides the Throwable that has
caused it. It’s added to the ServerWebExchange as the
ServerWebExchangeUtils.HYSTRIX_EXECUTION_EXCEPTION_ATTR attribute that can be used when
handling the fallback within the gateway app.
For the external controller/ handler scenario, headers can be added with exception details. You can find more information on it in the FallbackHeaders GatewayFilter Factory section.
Hystrix settings (such as timeouts) can be configured with global defaults or on a route by route basis using application properties as explained on the Hystrix wiki.
To set a 5 second timeout for the example route above, the following configuration would be used:
application.yml.
hystrix.command.fallbackcmd.execution.isolation.thread.timeoutInMilliseconds: 5000
The FallbackHeaders factory allows you to add Hystrix execution exception details in headers of a request forwarded to
a fallbackUri in an external application, like in the following scenario:
application.yml.
spring: cloud: gateway: routes: - id: ingredients uri: lb://ingredients predicates: - Path=//ingredients/** filters: - name: Hystrix args: name: fetchIngredients fallbackUri: forward:/fallback - id: ingredients-fallback uri: http://localhost:9994 predicates: - Path=/fallback filters: - name: FallbackHeaders args: executionExceptionTypeHeaderName: Test-Header
In this example, after an execution exception occurs while running the HystrixCommand, the request will be forwarde to
the fallback endpoint or handler in an app running on localhost:9994. The headers with the exception type, message
and -if available- root cause exception type and message will be added to that request by the FallbackHeaders filter.
The names of the headers can be overwritten in the config by setting the values of the arguments listed below, along with their default values:
executionExceptionTypeHeaderName("Execution-Exception-Type")executionExceptionMessageHeaderName("Execution-Exception-Message")rootCauseExceptionTypeHeaderName("Root-Cause-Exception-Type")rootCauseExceptionMessageHeaderName("Root-Cause-Exception-Message")
You can find more information on how Hystrix works with Gateway in the Hystrix GatewayFilter Factory section.
The PrefixPath GatewayFilter Factory takes a single prefix parameter.
application.yml.
spring: cloud: gateway: routes: - id: prefixpath_route uri: http://example.org filters: - PrefixPath=/mypath
This will prefix /mypath to the path of all matching requests. So a request to /hello, would be sent to /mypath/hello.
The PreserveHostHeader GatewayFilter Factory has not parameters. This filter, sets a request attribute that the routing filter will inspect to determine if the original host header should be sent, rather than the host header determined by the http client.
application.yml.
spring: cloud: gateway: routes: - id: preserve_host_route uri: http://example.org filters: - PreserveHostHeader
The RequestRateLimiter GatewayFilter Factory is uses a RateLimiter implementation to determine if the current request is allowed to proceed. If it is not, a status of HTTP 429 - Too Many Requests (by default) is returned.
This filter takes an optional keyResolver parameter and parameters specific to the rate limiter (see below).
keyResolver is a bean that implements the KeyResolver interface. In configuration, reference the bean by name using SpEL. #{@myKeyResolver} is a SpEL expression referencing a bean with the name myKeyResolver.
KeyResolver.java.
public interface KeyResolver { Mono<String> resolve(ServerWebExchange exchange); }
The KeyResolver interface allows pluggable strategies to derive the key for limiting requests. In future milestones, there will be some KeyResolver implementations.
The default implementation of KeyResolver is the PrincipalNameKeyResolver which retrieves the Principal from the ServerWebExchange and calls Principal.getName().
By default, if the KeyResolver does not find a key, requests will be denied. This behavior can be adjust with the spring.cloud.gateway.filter.request-rate-limiter.deny-empty-key (true or false) and spring.cloud.gateway.filter.request-rate-limiter.empty-key-status-code properties.
| Note |
|---|---|
The RequestRateLimiter is not configurable via the "shortcut" notation. The example below is invalid |
application.properties.
# INVALID SHORTCUT CONFIGURATION
spring.cloud.gateway.routes[0].filters[0]=RequestRateLimiter=2, 2, #{@userkeyresolver}
The redis implementation is based off of work done at Stripe. It requires the use of the spring-boot-starter-data-redis-reactive Spring Boot starter.
The algorithm used is the Token Bucket Algorithm.
The redis-rate-limiter.replenishRate is how many requests per second do you want a user to be allowed to do, without any dropped requests. This is the rate that the token bucket is filled.
The redis-rate-limiter.burstCapacity is the maximum number of requests a user is allowed to do in a single second. This is the number of tokens the token bucket can hold. Setting this value to zero will block all requests.
A steady rate is accomplished by setting the same value in replenishRate and burstCapacity. Temporary bursts can be allowed by setting burstCapacity higher than replenishRate. In this case, the rate limiter needs to be allowed some time between bursts (according to replenishRate), as 2 consecutive bursts will result in dropped requests (HTTP 429 - Too Many Requests).
application.yml.
spring: cloud: gateway: routes: - id: requestratelimiter_route uri: http://example.org filters: - name: RequestRateLimiter args: redis-rate-limiter.replenishRate: 10 redis-rate-limiter.burstCapacity: 20
Config.java.
@Bean KeyResolver userKeyResolver() { return exchange -> Mono.just(exchange.getRequest().getQueryParams().getFirst("user")); }
This defines a request rate limit of 10 per user. A burst of 20 is allowed, but the next second only 10 requests will be available. The KeyResolver is a simple one that gets the user request parameter (note: this is not recommended for production).
A rate limiter can also be defined as a bean implementing the RateLimiter interface. In configuration, reference the bean by name using SpEL. #{@myRateLimiter} is a SpEL expression referencing a bean with the name myRateLimiter.
application.yml.
spring: cloud: gateway: routes: - id: requestratelimiter_route uri: http://example.org filters: - name: RequestRateLimiter args: rate-limiter: "#{@myRateLimiter}" key-resolver: "#{@userKeyResolver}"
The RedirectTo GatewayFilter Factory takes a status and a url parameter. The status should be a 300 series redirect http code, such as 301. The url should be a valid url. This will be the value of the Location header.
application.yml.
spring: cloud: gateway: routes: - id: prefixpath_route uri: http://example.org filters: - RedirectTo=302, http://acme.org
This will send a status 302 with a Location:http://acme.org header to perform a redirect.
The RemoveHopByHopHeadersFilter GatewayFilter Factory removes headers from forwarded requests. The default list of headers that is removed comes from the IETF.
The default removed headers are:
- Connection
- Keep-Alive
- Proxy-Authenticate
- Proxy-Authorization
- TE
- Trailer
- Transfer-Encoding
- Upgrade
To change this, set the spring.cloud.gateway.filter.remove-non-proxy-headers.headers property to the list of header names to remove.
The RemoveRequestHeader GatewayFilter Factory takes a name parameter. It is the name of the header to be removed.
application.yml.
spring: cloud: gateway: routes: - id: removerequestheader_route uri: http://example.org filters: - RemoveRequestHeader=X-Request-Foo
This will remove the X-Request-Foo header before it is sent downstream.
The RemoveResponseHeader GatewayFilter Factory takes a name parameter. It is the name of the header to be removed.
application.yml.
spring: cloud: gateway: routes: - id: removeresponseheader_route uri: http://example.org filters: - RemoveResponseHeader=X-Response-Foo
This will remove the X-Response-Foo header from the response before it is returned to the gateway client.
To remove any kind of sensitive header you should configure this filter for any routes that you may
want to do so. In addition you can configure this filter once using spring.cloud.gateway.default-filters
and have it applied to all routes.
The RewritePath GatewayFilter Factory takes a path regexp parameter and a replacement parameter. This uses Java regular expressions for a flexible way to rewrite the request path.
application.yml.
spring: cloud: gateway: routes: - id: rewritepath_route uri: http://example.org predicates: - Path=/foo/** filters: - RewritePath=/foo/(?<segment>.*), /$\{segment}
For a request path of /foo/bar, this will set the path to /bar before making the downstream request. Notice the $\ which is replaced with $ because of the YAML spec.
The RewriteResponseHeader GatewayFilter Factory takes name, regexp, and replacement parameters. It uses Java regular expressions for a flexible way to rewrite the response header value.
application.yml.
spring: cloud: gateway: routes: - id: rewriteresponseheader_route uri: http://example.org filters: - RewriteResponseHeader=X-Response-Foo, , password=[^&]+, password=***
For a header value of /42?user=ford&password=omg!what&flag=true, it will be set to /42?user=ford&password=***&flag=true after making the downstream request. Please use $\ to mean $ because of the YAML spec.
The SaveSession GatewayFilter Factory forces a WebSession::save operation before forwarding the call downstream. This is of particular use when
using something like Spring Session with a lazy data store and need to ensure the session state has been saved before making the forwarded call.
application.yml.
spring: cloud: gateway: routes: - id: save_session uri: http://example.org predicates: - Path=/foo/** filters: - SaveSession
If you are integrating Spring Security with Spring Session, and want to ensure security details have been forwarded to the remote process, this is critical.
The SecureHeaders GatewayFilter Factory adds a number of headers to the response at the reccomendation from this blog post.
The following headers are added (allong with default values):
X-Xss-Protection:1; mode=blockStrict-Transport-Security:max-age=631138519X-Frame-Options:DENYX-Content-Type-Options:nosniffReferrer-Policy:no-referrerContent-Security-Policy:default-src 'self' https:; font-src 'self' https: data:; img-src 'self' https: data:; object-src 'none'; script-src https:; style-src 'self' https: 'unsafe-inline'X-Download-Options:noopenX-Permitted-Cross-Domain-Policies:none
To change the default values set the appropriate property in the spring.cloud.gateway.filter.secure-headers namespace:
Property to change:
xss-protection-headerstrict-transport-securityframe-optionscontent-type-optionsreferrer-policycontent-security-policydownload-optionspermitted-cross-domain-policies
The SetPath GatewayFilter Factory takes a path template parameter. It offers a simple way to manipulate the request path by allowing templated segments of the path. This uses the uri templates from Spring Framework. Multiple matching segments are allowed.
application.yml.
spring: cloud: gateway: routes: - id: setpath_route uri: http://example.org predicates: - Path=/foo/{segment} filters: - SetPath=/{segment}
For a request path of /foo/bar, this will set the path to /bar before making the downstream request.
The SetResponseHeader GatewayFilter Factory takes name and value parameters.
application.yml.
spring: cloud: gateway: routes: - id: setresponseheader_route uri: http://example.org filters: - SetResponseHeader=X-Response-Foo, Bar
This GatewayFilter replaces all headers with the given name, rather than adding. So if the downstream server responded with a X-Response-Foo:1234, this would be replaced with X-Response-Foo:Bar, which is what the gateway client would receive.
The SetStatus GatewayFilter Factory takes a single status parameter. It must be a valid Spring HttpStatus. It may be the integer value 404 or the string representation of the enumeration NOT_FOUND.
application.yml.
spring: cloud: gateway: routes: - id: setstatusstring_route uri: http://example.org filters: - SetStatus=BAD_REQUEST - id: setstatusint_route uri: http://example.org filters: - SetStatus=401
In either case, the HTTP status of the response will be set to 401.
The StripPrefix GatewayFilter Factory takes one paramter, parts. The parts parameter indicated the number of parts in the path to strip from the request before sending it downstream.
application.yml.
spring: cloud: gateway: routes: - id: nameRoot uri: http://nameservice predicates: - Path=/name/** filters: - StripPrefix=2
When a request is made through the gateway to /name/bar/foo the request made to nameservice will look like http://nameservice/foo.
The Retry GatewayFilter Factory takes retries, statuses, methods, and series as parameters.
retries: the number of retries that should be attemptedstatuses: the HTTP status codes that should be retried, represented usingorg.springframework.http.HttpStatusmethods: the HTTP methods that should be retried, represented usingorg.springframework.http.HttpMethodseries: the series of status codes to be retried, represented usingorg.springframework.http.HttpStatus.Series
application.yml.
spring: cloud: gateway: routes: - id: retry_test uri: http://localhost:8080/flakey predicates: - Host=*.retry.com filters: - name: Retry args: retries: 3 statuses: BAD_GATEWAY
| Note |
|---|---|
The retry filter does not currently support retrying with a body (e.g. for POST or PUT requests with a body). |
| Note |
|---|---|
When using the retry filter with a |
The RequestSize GatewayFilter Factory can restrict a request from reaching the downstream service , when the request size is greater than the permissible limit. The filter takes RequestSize as parameter which is the permissible size limit of the request defined in bytes.
application.yml.
spring: cloud: gateway: routes: - id: request_size_route uri: http://localhost:8080/upload predicates: - Path=/upload filters: - name: RequestSize args: maxSize: 5000000
The RequestSize GatewayFilter Factory set the response status as 413 Payload Too Large with a additional header errorMessage when the Request is rejected due to size. Following is an example of such an errorMessage .
errorMessage : Request size is larger than permissible limit. Request size is 6.0 MB where permissible limit is 5.0 MB
| Note |
|---|---|
The default Request size will be set to 5 MB if not provided as filter argument in route definition. |
This filter is considered BETA and the API may change in the future
This filter can be used to modify the request body before it is sent downstream by the Gateway.
| Note |
|---|---|
This filter can only be configured using the Java DSL |
@Bean public RouteLocator routes(RouteLocatorBuilder builder) { return builder.routes() .route("rewrite_request_obj", r -> r.host("*.rewriterequestobj.org") .filters(f -> f.prefixPath("/httpbin") .modifyRequestBody(String.class, Hello.class, MediaType.APPLICATION_JSON_VALUE, (exchange, s) -> return Mono.just(new Hello(s.toUpperCase())))).uri(uri)) .build(); } static class Hello { String message; public Hello() { } public Hello(String message) { this.message = message; } public String getMessage() { return message; } public void setMessage(String message) { this.message = message; } }
This filter is considered BETA and the API may change in the future
This filter can be used to modify the response body before it is sent back to the Client.
| Note |
|---|---|
This filter can only be configured using the Java DSL |
@Bean public RouteLocator routes(RouteLocatorBuilder builder) { return builder.routes() .route("rewrite_response_upper", r -> r.host("*.rewriteresponseupper.org") .filters(f -> f.prefixPath("/httpbin") .modifyResponseBody(String.class, String.class, (exchange, s) -> Mono.just(s.toUpperCase()))).uri(uri) .build(); }
If you would like to add a filter and apply it to all routes you can use spring.cloud.gateway.default-filters.
This property takes a list of filters
application.yml.
spring: cloud: gateway: default-filters: - AddResponseHeader=X-Response-Default-Foo, Default-Bar - PrefixPath=/httpbin
The GlobalFilter interface has the same signature as GatewayFilter. These are special filters that are conditionally applied to all routes. (This interface and usage are subject to change in future milestones).
When a request comes in (and matches a Route) the Filtering Web Handler will add all instances of GlobalFilter and all route specific instances of GatewayFilter to a filter chain. This combined filter chain is sorted by the org.springframework.core.Ordered interface, which can be set by implementing the getOrder() method or by using the @Order annotation.
As Spring Cloud Gateway distinguishes between "pre" and "post" phases for filter logic execution (see: How It Works), the filter with the highest precedence will be the first in the "pre"-phase and the last in the "post"-phase.
ExampleConfiguration.java.
@Bean @Order(-1) public GlobalFilter a() { return (exchange, chain) -> { log.info("first pre filter"); return chain.filter(exchange).then(Mono.fromRunnable(() -> { log.info("third post filter"); })); }; } @Bean @Order(0) public GlobalFilter b() { return (exchange, chain) -> { log.info("second pre filter"); return chain.filter(exchange).then(Mono.fromRunnable(() -> { log.info("second post filter"); })); }; } @Bean @Order(1) public GlobalFilter c() { return (exchange, chain) -> { log.info("third pre filter"); return chain.filter(exchange).then(Mono.fromRunnable(() -> { log.info("first post filter"); })); }; }
The ForwardRoutingFilter looks for a URI in the exchange attribute ServerWebExchangeUtils.GATEWAY_REQUEST_URL_ATTR. If the url has a forward scheme (ie forward:///localendpoint), it will use the Spring DispatcherHandler to handler the request. The path part of the request URL will be overridden with the path in the forward URL. The unmodified original url is appended to the list in the ServerWebExchangeUtils.GATEWAY_ORIGINAL_REQUEST_URL_ATTR attribute.
The LoadBalancerClientFilter looks for a URI in the exchange attribute ServerWebExchangeUtils.GATEWAY_REQUEST_URL_ATTR. If the url has a lb scheme (ie lb://myservice), it will use the Spring Cloud LoadBalancerClient to resolve the name (myservice in the previous example) to an actual host and port and replace the URI in the same attribute. The unmodified original url is appended to the list in the ServerWebExchangeUtils.GATEWAY_ORIGINAL_REQUEST_URL_ATTR attribute. The filter will also look in the ServerWebExchangeUtils.GATEWAY_SCHEME_PREFIX_ATTR attribute to see if it equals lb and then the same rules apply.
application.yml.
spring: cloud: gateway: routes: - id: myRoute uri: lb://service predicates: - Path=/service/**
| Note |
|---|---|
By default when a service instance cannot be found in the |
| Note |
|---|---|
The |
The Netty Routing Filter runs if the url located in the ServerWebExchangeUtils.GATEWAY_REQUEST_URL_ATTR exchange attribute has a http or https scheme. It uses the Netty HttpClient to make the downstream proxy request. The response is put in the ServerWebExchangeUtils.CLIENT_RESPONSE_ATTR exchange attribute for use in a later filter. (There is an experimental WebClientHttpRoutingFilter that performs the same function, but does not require netty)
The NettyWriteResponseFilter runs if there is a Netty HttpClientResponse in the ServerWebExchangeUtils.CLIENT_RESPONSE_ATTR exchange attribute. It is run after all other filters have completed and writes the proxy response back to the gateway client response. (There is an experimental WebClientWriteResponseFilter that performs the same function, but does not require netty)
The RouteToRequestUrlFilter runs if there is a Route object in the ServerWebExchangeUtils.GATEWAY_ROUTE_ATTR exchange attribute. It creates a new URI, based off of the request URI, but updated with the URI attribute of the Route object. The new URI is placed in the ServerWebExchangeUtils.GATEWAY_REQUEST_URL_ATTR exchange attribute`.
If the URI has a scheme prefix, such as lb:ws://serviceid, the lb scheme is stripped from the URI and placed in the ServerWebExchangeUtils.GATEWAY_SCHEME_PREFIX_ATTR for use later in the filter chain.
The Websocket Routing Filter runs if the url located in the ServerWebExchangeUtils.GATEWAY_REQUEST_URL_ATTR exchange attribute has a ws or wss scheme. It uses the Spring Web Socket infrastructure to forward the Websocket request downstream.
Websockets may be load-balanced by prefixing the URI with lb, such as lb:ws://serviceid.
| Note |
|---|---|
If you are using SockJS as a fallback over normal http, you should configure a normal HTTP route as well as the Websocket Route. |
application.yml.
spring: cloud: gateway: routes: # SockJS route - id: websocket_sockjs_route uri: http://localhost:3001 predicates: - Path=/websocket/info/** # Normwal Websocket route - id: websocket_route uri: ws://localhost:3001 predicates: - Path=/websocket/**
To enable Gateway Metrics add spring-boot-starter-actuator as a project dependency. Then, by default, the Gateway Metrics Filter runs as long as the property spring.cloud.gateway.metrics.enabled is not set to false. This filter adds a timer metric named "gateway.requests" with the following tags:
routeId: The route idrouteUri: The URI that the API will be routed tooutcome: Outcome as classified by HttpStatus.Seriesstatus: Http Status of the request returned to the client
These metrics are then available to be scraped from /actuator/metrics/gateway.requests and can be easily integated with Prometheus to create a Grafana dashboard.
| Note |
|---|---|
To enable the pometheus endpoint add micrometer-registry-prometheus as a project dependency. |
After the Gateway has routed a ServerWebExchange it will mark that exchange as "routed" by adding gatewayAlreadyRouted
to the exchange attributes. Once a request has been marked as routed, other routing filters will not route the request again,
essentially skipping the filter. There are convenience methods that you can use to mark an exchange as routed
or check if an exchange has already been routed.
ServerWebExchangeUtils.isAlreadyRoutedtakes aServerWebExchangeobject and checks if it has been "routed"ServerWebExchangeUtils.setAlreadyRoutedtakes aServerWebExchangeobject and marks it as "routed"
The Gateway can listen for requests on https by following the usual Spring server configuration. Example:
application.yml.
server: ssl: enabled: true key-alias: scg key-store-password: scg1234 key-store: classpath:scg-keystore.p12 key-store-type: PKCS12
Gateway routes can be routed to both http and https backends. If routing to a https backend then the Gateway can be configured to trust all downstream certificates with the following configuration:
application.yml.
spring: cloud: gateway: httpclient: ssl: useInsecureTrustManager: true
Using an insecure trust manager is not suitable for production. For a production deployment the Gateway can be configured with a set of known certificates that it can trust with the follwing configuration:
application.yml.
spring: cloud: gateway: httpclient: ssl: trustedX509Certificates: - cert1.pem - cert2.pem
If the Spring Cloud Gateway is not provisioned with trusted certificates the default trust store is used (which can be overriden with system property javax.net.ssl.trustStore).
The Gateway maintains a client pool that it uses to route to backends. When communicating over https the client initiates a TLS handshake. A number of timeouts are assoicated with this handshake. These timeouts can be configured (defaults shown):
application.yml.
spring: cloud: gateway: httpclient: ssl: handshake-timeout-millis: 10000 close-notify-flush-timeout-millis: 3000 close-notify-read-timeout-millis: 0
Configuration for Spring Cloud Gateway is driven by a collection of `RouteDefinitionLocator`s.
RouteDefinitionLocator.java.
public interface RouteDefinitionLocator { Flux<RouteDefinition> getRouteDefinitions(); }
By default, a PropertiesRouteDefinitionLocator loads properties using Spring Boot’s @ConfigurationProperties mechanism.
The configuration examples above all use a shortcut notation that uses positional arguments rather than named ones. The two examples below are equivalent:
application.yml.
spring: cloud: gateway: routes: - id: setstatus_route uri: http://example.org filters: - name: SetStatus args: status: 401 - id: setstatusshortcut_route uri: http://example.org filters: - SetStatus=401
For some usages of the gateway, properties will be adequate, but some production use cases will benefit from loading configuration from an external source, such as a database. Future milestone versions will have RouteDefinitionLocator implementations based off of Spring Data Repositories such as: Redis, MongoDB and Cassandra.
To allow for simple configuration in Java, there is a fluent API defined in the RouteLocatorBuilder bean.
GatewaySampleApplication.java.
// static imports from GatewayFilters and RoutePredicates @Bean public RouteLocator customRouteLocator(RouteLocatorBuilder builder, ThrottleGatewayFilterFactory throttle) { return builder.routes() .route(r -> r.host("**.abc.org").and().path("/image/png") .filters(f -> f.addResponseHeader("X-TestHeader", "foobar")) .uri("http://httpbin.org:80") ) .route(r -> r.path("/image/webp") .filters(f -> f.addResponseHeader("X-AnotherHeader", "baz")) .uri("http://httpbin.org:80") ) .route(r -> r.order(-1) .host("**.throttle.org").and().path("/get") .filters(f -> f.filter(throttle.apply(1, 1, 10, TimeUnit.SECONDS))) .uri("http://httpbin.org:80") ) .build(); }
This style also allows for more custom predicate assertions. The predicates defined by RouteDefinitionLocator beans are combined using logical and. By using the fluent Java API, you can use the and(), or() and negate() operators on the Predicate class.
The Gateway can be configured to create routes based on services registered with a DiscoveryClient compatible service registry.
To enable this, set spring.cloud.gateway.discovery.locator.enabled=true and make sure a DiscoveryClient implementation is on the classpath and enabled (such as Netflix Eureka, Consul or Zookeeper).
By default the Gateway defines a single predicate and filter for routes created via a DiscoveryClient.
The default predicate is a path predicate defined with the pattern /serviceId/**, where serviceId is
the id of the service from the DiscoveryClient.
The default filter is rewrite path filter with the regex /serviceId/(?<remaining>.*) and the replacement
/${remaining}. This just strips the service id from the path before the request is sent
downstream.
If you would like to customize the predicates and/or filters used by the DiscoveryClient routes you can do so
by setting spring.cloud.gateway.discovery.locator.predicates[x] and spring.cloud.gateway.discovery.locator.filters[y].
When doing so you need to make sure to include the default predicate and filter above, if you want to retain
that functionality. Below is an example of what this looks like.
application.properties.
spring.cloud.gateway.discovery.locator.predicates[0].name: Path
spring.cloud.gateway.discovery.locator.predicates[0].args[pattern]: "'/'+serviceId+'/**'"
spring.cloud.gateway.discovery.locator.predicates[1].name: Host
spring.cloud.gateway.discovery.locator.predicates[1].args[pattern]: "'**.foo.com'"
spring.cloud.gateway.discovery.locator.filters[0].name: Hystrix
spring.cloud.gateway.discovery.locator.filters[0].args[name]: serviceId
spring.cloud.gateway.discovery.locator.filters[1].name: RewritePath
spring.cloud.gateway.discovery.locator.filters[1].args[regexp]: "'/' + serviceId + '/(?<remaining>.*)'"
spring.cloud.gateway.discovery.locator.filters[1].args[replacement]: "'/${remaining}'"
To enable Reactor Netty access logs, set -Dreactor.netty.http.server.accessLogEnabled=true. (It must be a Java System Property, not a Spring Boot property).
The logging system can be configured to have a separate access log file. Below is an example logback configuration:
logback.xml.
<appender name="accessLog" class="ch.qos.logback.core.FileAppender"> <file>access_log.log</file> <encoder> <pattern>%msg%n</pattern> </encoder> </appender> <appender name="async" class="ch.qos.logback.classic.AsyncAppender"> <appender-ref ref="accessLog" /> </appender> <logger name="reactor.netty.http.server.AccessLog" level="INFO" additivity="false"> <appender-ref ref="async"/> </logger>
The gateway can be configured to control CORS behavior. The "global" CORS configuration is a map of URL patterns to Spring Framework CorsConfiguration.
application.yml.
spring: cloud: gateway: globalcors: corsConfigurations: '[/**]': allowedOrigins: "http://docs.spring.io" allowedMethods: - GET
In the example above, CORS requests will be allowed from requests that originate from docs.spring.io for all GET requested paths.
The /gateway actuator endpoint allows to monitor and interact with a Spring Cloud Gateway application. To be remotely accessible, the endpoint has to be enabled and exposed via HTTP or JMX in the application properties.
application.properties.
management.endpoint.gateway.enabled=true # default value management.endpoints.web.exposure.include=gateway
To retrieve the global filters applied to all routes, make a GET request to /actuator/gateway/globalfilters. The resulting response is similar to the following:
{
"org.springframework.cloud.gateway.filter.LoadBalancerClientFilter@77856cc5": 10100,
"org.springframework.cloud.gateway.filter.RouteToRequestUrlFilter@4f6fd101": 10000,
"org.springframework.cloud.gateway.filter.NettyWriteResponseFilter@32d22650": -1,
"org.springframework.cloud.gateway.filter.ForwardRoutingFilter@106459d9": 2147483647,
"org.springframework.cloud.gateway.filter.NettyRoutingFilter@1fbd5e0": 2147483647,
"org.springframework.cloud.gateway.filter.ForwardPathFilter@33a71d23": 0,
"org.springframework.cloud.gateway.filter.AdaptCachedBodyGlobalFilter@135064ea": 2147483637,
"org.springframework.cloud.gateway.filter.WebsocketRoutingFilter@23c05889": 2147483646
}The response contains details of the global filters in place. For each global filter is provided the string representation of the filter object (e.g., org.springframework.cloud.gateway.filter.LoadBalancerClientFilter@77856cc5) and the corresponding order in the filter chain.
To retrieve the GatewayFilter factories applied to routes, make a GET request to /actuator/gateway/routefilters. The resulting response is similar to the following:
{
"[AddRequestHeaderGatewayFilterFactory@570ed9c configClass = AbstractNameValueGatewayFilterFactory.NameValueConfig]": null,
"[SecureHeadersGatewayFilterFactory@fceab5d configClass = Object]": null,
"[SaveSessionGatewayFilterFactory@4449b273 configClass = Object]": null
}The response contains details of the GatewayFilter factories applied to any particular route. For each factory is provided the string representation of the corresponding object (e.g., [SecureHeadersGatewayFilterFactory@fceab5d configClass = Object]). Note that the null value is due to an incomplete implementation of the endpoint controller, for that it tries to set the order of the object in the filter chain, which does not apply to a GatewayFilter factory object.
To clear the routes cache, make a POST request to /actuator/gateway/refresh. The request returns a 200 without response body.
To retrieve the routes defined in the gateway, make a GET request to /actuator/gateway/routes. The resulting response is similar to the following:
[{
"route_id": "first_route",
"route_object": {
"predicate": "org.springframework.cloud.gateway.handler.predicate.PathRoutePredicateFactory$$Lambda$432/1736826640@1e9d7e7d",
"filters": [
"OrderedGatewayFilter{delegate=org.springframework.cloud.gateway.filter.factory.PreserveHostHeaderGatewayFilterFactory$$Lambda$436/674480275@6631ef72, order=0}"
]
},
"order": 0
},
{
"route_id": "second_route",
"route_object": {
"predicate": "org.springframework.cloud.gateway.handler.predicate.PathRoutePredicateFactory$$Lambda$432/1736826640@cd8d298",
"filters": []
},
"order": 0
}]The response contains details of all the routes defined in the gateway. The following table describes the structure of each element (i.e., a route) of the response.
| Path | Type | Description |
|---|---|---|
| String | The route id. |
| Object | The route predicate. |
| Array | The GatewayFilter factories applied to the route. |
| Number | The route order. |
To retrieve information about a single route, make a GET request to /actuator/gateway/routes/{id} (e.g., /actuator/gateway/routes/first_route). The resulting response is similar to the following:
{
"id": "first_route",
"predicates": [{
"name": "Path",
"args": {"_genkey_0":"/first"}
}],
"filters": [],
"uri": "http://www.uri-destination.org",
"order": 0
}]The following table describes the structure of the response.
| Path | Type | Description |
|---|---|---|
| String | The route id. |
| Array | The collection of route predicates. Each item defines the name and the arguments of a given predicate. |
| Array | The collection of filters applied to the route. |
| String | The destination URI of the route. |
| Number | The route order. |
To create a route, make a POST request to /gateway/routes/{id_route_to_create} with a JSON body that specifies the fields of the route (see the previous subsection).
To delete a route, make a DELETE request to /gateway/routes/{id_route_to_delete}.
The table below summarises the Spring Cloud Gateway actuator endpoints. Note that each endpoint has /actuator/gateway as the base-path.
| ID | HTTP Method | Description |
|---|---|---|
| GET | Displays the list of global filters applied to the routes. |
| GET | Displays the list of GatewayFilter factories applied to a particular route. |
| POST | Clears the routes cache. |
| GET | Displays the list of routes defined in the gateway. |
| GET | Displays information about a particular route. |
| POST | Add a new route to the gateway. |
| DELETE | Remove an existing route from the gateway. |
TODO: overview of writing custom integrations
TODO: document writing Custom Route Predicate Factories
In order to write a GatewayFilter you will need to implement GatewayFilterFactory. There is an abstract class called AbstractGatewayFilterFactory which you can extend.
PreGatewayFilterFactory.java.
public class PreGatewayFilterFactory extends AbstractGatewayFilterFactory<PreGatewayFilterFactory.Config> { public PreGatewayFilterFactory() { super(Config.class); } @Override public GatewayFilter apply(Config config) { // grab configuration from Config object return (exchange, chain) -> { //If you want to build a "pre" filter you need to manipulate the //request before calling chain.filter ServerHttpRequest.Builder builder = exchange.getRequest().mutate(); //use builder to manipulate the request return chain.filter(exchange.mutate().request(request).build()); }; } public static class Config { //Put the configuration properties for your filter here } }
PostGatewayFilterFactory.java.
public class PostGatewayFilterFactory extends AbstractGatewayFilterFactory<PostGatewayFilterFactory.Config> { public PostGatewayFilterFactory() { super(Config.class); } @Override public GatewayFilter apply(Config config) { // grab configuration from Config object return (exchange, chain) -> { return chain.filter(exchange).then(Mono.fromRunnable(() -> { ServerHttpResponse response = exchange.getResponse(); //Manipulate the response in some way })); }; } public static class Config { //Put the configuration properties for your filter here } }
In order to write a custom global filter, you will need to implement GlobalFilter interface. This will apply the filter to all requests.
Example of how to set up a Global Pre and Post filter, respectively
@Bean public GlobalFilter customGlobalFilter() { return (exchange, chain) -> exchange.getPrincipal() .map(Principal::getName) .defaultIfEmpty("Default User") .map(userName -> { //adds header to proxied request exchange.getRequest().mutate().header("CUSTOM-REQUEST-HEADER", userName).build(); return exchange; }) .flatMap(chain::filter); } @Bean public GlobalFilter customGlobalPostFilter() { return (exchange, chain) -> chain.filter(exchange) .then(Mono.just(exchange)) .map(serverWebExchange -> { //adds header to response serverWebExchange.getResponse().getHeaders().set("CUSTOM-RESPONSE-HEADER", HttpStatus.OK.equals(serverWebExchange.getResponse().getStatusCode()) ? "It worked": "It did not work"); return serverWebExchange; }) .then(); }
Spring Cloud Gateway provides a utility object called ProxyExchange which you can use inside a regular Spring web handler as a method parameter. It supports basic downstream HTTP exchanges via methods that mirror the HTTP verbs. With MVC it also supports forwarding to a local handler via the forward() method. To use the ProxyExchange just include the right module in your classpath (either spring-cloud-gateway-mvc or spring-cloud-gateway-webflux).
MVC example (proxying a request to "/test" downstream to a remote server):
@RestController @SpringBootApplication public class GatewaySampleApplication { @Value("${remote.home}") private URI home; @GetMapping("/test") public ResponseEntity<?> proxy(ProxyExchange<byte[]> proxy) throws Exception { return proxy.uri(home.toString() + "/image/png").get(); } }
The same thing with Webflux:
@RestController @SpringBootApplication public class GatewaySampleApplication { @Value("${remote.home}") private URI home; @GetMapping("/test") public Mono<ResponseEntity<?>> proxy(ProxyExchange<byte[]> proxy) throws Exception { return proxy.uri(home.toString() + "/image/png").get(); } }
There are convenience methods on the ProxyExchange to enable the handler method to discover and enhance the URI path of the incoming request. For example you might want to extract the trailing elements of a path to pass them downstream:
@GetMapping("/proxy/path/**") public ResponseEntity<?> proxyPath(ProxyExchange<byte[]> proxy) throws Exception { String path = proxy.path("/proxy/path/"); return proxy.uri(home.toString() + "/foos/" + path).get(); }
All the features of Spring MVC or Webflux are available to Gateway handler methods. So you can inject request headers and query parameters, for instance, and you can constrain the incoming requests with declarations in the mapping annotation. See the documentation for @RequestMapping in Spring MVC for more details of those features.
Headers can be added to the downstream response using the header() methods on ProxyExchange.
You can also manipulate response headers (and anything else you like in the response) by adding a mapper to the get() etc. method. The mapper is a Function that takes the incoming ResponseEntity and converts it to an outgoing one.
First class support is provided for "sensitive" headers ("cookie" and "authorization" by default) which are not passed downstream, and for "proxy" headers (x-forwarded-*).
Mark Fisher, Dave Syer, Oleg Zhurakousky
Spring Cloud Function is a project with the following high-level goals:
- Promote the implementation of business logic via functions.
- Decouple the development lifecycle of business logic from any specific runtime target so that the same code can run as a web endpoint, a stream processor, or a task.
- Support a uniform programming model across serverless providers, as well as the ability to run standalone (locally or in a PaaS).
- Enable Spring Boot features (auto-configuration, dependency injection, metrics) on serverless providers.
It abstracts away all of the transport details and infrastructure, allowing the developer to keep all the familiar tools and processes, and focus firmly on business logic.
Here’s a complete, executable, testable Spring Boot application (implementing a simple string manipulation):
@SpringBootApplication public class Application { @Bean public Function<Flux<String>, Flux<String>> uppercase() { return flux -> flux.map(value -> value.toUpperCase()); } public static void main(String[] args) { SpringApplication.run(Application.class, args); } }
It’s just a Spring Boot application, so it can be built, run and
tested, locally and in a CI build, the same way as any other Spring
Boot application. The Function is from java.util and Flux is a
Reactive Streams Publisher from
Project Reactor. The function can be
accessed over HTTP or messaging.
Spring Cloud Function has 4 main features:
- Wrappers for
@Beansof typeFunction,ConsumerandSupplier, exposing them to the outside world as either HTTP endpoints and/or message stream listeners/publishers with RabbitMQ, Kafka etc. - Compiling strings which are Java function bodies into bytecode, and
then turning them into
@Beansthat can be wrapped as above. - Deploying a JAR file containing such an application context with an isolated classloader, so that you can pack them together in a single JVM.
- Adapters for AWS Lambda, Azure, Apache OpenWhisk and possibly other "serverless" service providers.
| Note |
|---|---|
Spring Cloud is released under the non-restrictive Apache 2.0 license. If you would like to contribute to this section of the documentation or if you find an error, please find the source code and issue trackers in the project at github. |
Build from the command line (and "install" the samples):
$ ./mvnw clean install
(If you like to YOLO add -DskipTests.)
Run one of the samples, e.g.
$ java -jar spring-cloud-function-samples/function-sample/target/*.jar
This runs the app and exposes its functions over HTTP, so you can convert a string to uppercase, like this:
$ curl -H "Content-Type: text/plain" localhost:8080/uppercase -d Hello HELLO
You can convert multiple strings (a Flux<String>) by separating them
with new lines
$ curl -H "Content-Type: text/plain" localhost:8080/uppercase -d 'Hello > World' HELLOWORLD
(You can use QJ in a terminal to insert a new line in a literal
string like that.)
The sample @SpringBootApplication above has a function that can be
decorated at runtime by Spring Cloud Function to be an HTTP endpoint,
or a Stream processor, for instance with RabbitMQ, Apache Kafka or
JMS.
The @Beans can be Function, Consumer or Supplier (all from
java.util), and their parametric types can be String or POJO.
Functions can also be of Flux<String> or Flux<Pojo> and Spring
Cloud Function takes care of converting the data to and from the
desired types, as long as it comes in as plain text or (in the case of
the POJO) JSON. There is also support for Message<Pojo> where the
message headers are copied from the incoming event, depending on the
adapter. The web adapter also supports conversion from form-encoded
data to a Map, and if you are using the function with Spring Cloud
Stream then all the conversion and coercion features for message
payloads will be applicable as well.
Functions can be grouped together in a single application, or deployed one-per-jar. It’s up to the developer to choose. An app with multiple functions can be deployed multiple times in different "personalities", exposing different functions over different physical transports.
One of the main features of Spring Cloud Function is to adapt and support a range of type signatures for user-defined functions,
while providing a consistent execution model.
That’s why all user defined functions are transformed into a canonical representation by FunctionCatalog, using primitives
defined by the Project Reactor (i.e., Flux<T> and Mono<T>).
Users can supply a bean of type Function<String,String>, for instance, and the FunctionCatalog will wrap it into a
Function<Flux<String>,Flux<String>>.
Using Reactor based primitives not only helps with the canonical representation of user defined functions, but it also facilitates a more robust and flexible(reactive) execution model.
While users don’t normally have to care about the FunctionCatalog at all, it is useful to know what
kind of functions are supported in user code.
Generally speaking users can expect that if they write a function for
a plain old Java type (or primitive wrapper), then the function
catalog will wrap it to a Flux of the same type. If the user writes
a function using Message (from spring-messaging) it will receive and
transmit headers from any adapter that supports key-value metadata
(e.g. HTTP headers). Here are the details.
| User Function | Catalog Registration | |
|---|---|---|
|
| |
|
| |
|
| |
|
| |
|
| |
|
| |
|
| |
|
|
Consumer is a little bit special because it has a void return type,
which implies blocking, at least potentially. Most likely you will not
need to write Consumer<Flux<?>>, but if you do need to do that,
remember to subscribe to the input flux. If you declare a Consumer
of a non publisher type (which is normal), it will be converted to a
function that returns a publisher, so that it can be subscribed to in
a controlled way.
We also provide support for Kotlin lambdas (since v2.0). Consider the following:
@Bean open fun kotlinSupplier(): () -> String { return { "Hello from Kotlin" } } @Bean open fun kotlinFunction(): (String) -> String { return { it.toUpperCase() } } @Bean open fun kotlinConsumer(): (String) -> Unit { return { println(it) } }
The above represents Kotlin lambdas configured as Spring beans. The signature of each maps to a Java equivalent of
Supplier, Function and Consumer, and thus supported/recognized signatures by the framework.
While mechanics of Kotlin-to-Java mapping are outside of the scope of this documentation, it is important to understand that the
same rules for signature transformation outlined in "Java 8 function support" section are applied here as well.
To enable Kotlin support all you need is to add spring-cloud-function-kotlin module to your classpath which contains the appropriate
autoconfiguration and supporting classes.
The spring-cloud-function-web module has autoconfiguration that
activates when it is included in a Spring Boot web application (with
MVC support). There is also a spring-cloud-starter-function-web to
collect all the optional dependencies in case you just want a simple
getting started experience.
With the web configurations activated your app will have an MVC
endpoint (on "/" by default, but configurable with
spring.cloud.function.web.path) that can be used to access the
functions in the application context. The supported content types are
plain text and JSON.
| Method | Path | Request | Response | Status |
|---|---|---|---|---|
GET | /{supplier} | - | Items from the named supplier | 200 OK |
POST | /{consumer} | JSON object or text | Mirrors input and pushes request body into consumer | 202 Accepted |
POST | /{consumer} | JSON array or text with new lines | Mirrors input and pushes body into consumer one by one | 202 Accepted |
POST | /{function} | JSON object or text | The result of applying the named function | 200 OK |
POST | /{function} | JSON array or text with new lines | The result of applying the named function | 200 OK |
GET | /{function}/{item} | - | Convert the item into an object and return the result of applying the function | 200 OK |
As the table above shows the behaviour of the endpoint depends on the method and also the type of incoming request data. When the incoming data is single valued, and the target function is declared as obviously single valued (i.e. not returning a collection or Flux), then the response will also contain a single value.
For multi-valued responses the client can ask for a server-sent event stream by sending `Accept: text/event-stream".
If there is only a single function (consumer etc.) in the catalog, the name in the path is optional. Composite functions can be addressed using pipes or commas to separate function names (pipes are legal in URL paths, but a bit awkward to type on the command line).
For cases where there is more then a single function in catalog and you want to map a specific function to the root
path (e.g., "/"), or you want to compose several functions and then map to the root path you can do so by providing
spring.cloud.function.definition property which essentially used by spring-=cloud-function-web module to provide
default mapping for cases where there is some type of a conflict (e.g., more then one function available etc).
For example,
--spring.cloud.function.definition=foo|bar
The above property will compose 'foo' and 'bar' function and map the composed function to the "/" path.
Functions and consumers that are declared with input and output in Message<?> will see the request headers on the input messages, and the output message headers will be converted to HTTP headers.
When POSTing text the response format might be different with Spring Boot 2.0 and older versions, depending on the content negotiation (provide content type and accpt headers for the best results).
To send or receive messages from a broker (such as RabbitMQ or Kafka) you can leverage spring-cloud-stream project and it’s integration with Spring Cloud Function.
Please refer to Spring Cloud Function section of the Spring Cloud Stream reference manual for more details and examples.
Spring Cloud Function provides a "deployer" library that allows you to launch a jar file (or exploded archive, or set of jar files) with an isolated class loader and expose the functions defined in it. This is quite a powerful tool that would allow you to, for instance, adapt a function to a range of different input-output adapters without changing the target jar file. Serverless platforms often have this kind of feature built in, so you could see it as a building block for a function invoker in such a platform (indeed the Riff Java function invoker uses this library).
The standard entry point of the API is the Spring configuration annotation @EnableFunctionDeployer. If that is used in a Spring Boot application the deployer kicks in and looks for some configuration to tell it where to find the function jar. At a minimum the user has to provide a function.location which is a URL or resource location for the archive containing the functions. It can optionally use a maven: prefix to locate the artifact via a dependency lookup (see FunctionProperties for complete details). A Spring Boot application is bootstrapped from the jar file, using the MANIFEST.MF to locate a start class, so that a standard Spring Boot fat jar works well, for example. If the target jar can be launched successfully then the result is a function registered in the main application’s FunctionCatalog. The registered function can be applied by code in the main application, even though it was created in an isolated class loader (by deault).
Spring Cloud Function supports a "functional" style of bean declarations for small apps where you need fast startup. The functional style of bean declaration was a feature of Spring Framework 5.0 with significant enhancements in 5.1.
Here’s a vanilla Spring Cloud Function application from with the
familiar @Configuration and @Bean declaration style:
@SpringBootApplication public class DemoApplication { @Bean public Function<String, String> uppercase() { return value -> value.toUpperCase(); } public static void main(String[] args) { SpringApplication.run(DemoApplication.class, args); } }
You can run the above in a serverless platform, like AWS Lambda or Azure Functions, or you can run it in its own HTTP server just by including spring-cloud-function-starter-web on the classpath. Running the main method would expose an endpoint that you can use to ping that uppercase function:
$ curl localhost:8080 -d foo FOO
The web adapter in spring-cloud-function-starter-web uses Spring MVC, so you needed a Servlet container. You can also use Webflux where the default server is netty (even though you can still use Servlet containers if you want to) - just include the spring-cloud-starter-function-webflux dependency instead. The functionality is the same, and the user application code can be used in both.
Now for the functional beans: the user application code can be recast into "functional" form, like this:
@SpringBootConfiguration public class DemoApplication implements ApplicationContextInitializer<GenericApplicationContext> { public static void main(String[] args) { FunctionalSpringApplication.run(DemoApplication.class, args); } public Function<String, String> uppercase() { return value -> value.toUpperCase(); } @Override public void initialize(GenericApplicationContext context) { context.registerBean("demo", FunctionRegistration.class, () -> new FunctionRegistration<>(uppercase()) .type(FunctionType.from(String.class).to(String.class))); } }
The main differences are:
- The main class is an
ApplicationContextInitializer. - The
@Beanmethods have been converted to calls tocontext.registerBean() - The
@SpringBootApplicationhas been replaced with@SpringBootConfigurationto signify that we are not enabling Spring Boot autoconfiguration, and yet still marking the class as an "entry point". - The
SpringApplicationfrom Spring Boot has been replaced with aFunctionalSpringApplicationfrom Spring Cloud Function (it’s a subclass).
The business logic beans that you register in a Spring Cloud Function app are of type FunctionRegistration. This is a wrapper that contains both the function and information about the input and output types. In the @Bean form of the application that information can be derived reflectively, but in a functional bean registration some of it is lost unless we use a FunctionRegistration.
An alternative to using an ApplicationContextInitializer and FunctionRegistration is to make the application itself implement Function (or Consumer or Supplier). Example (equivalent to the above):
@SpringBootConfiguration public class DemoApplication implements Function<String, String> { public static void main(String[] args) { FunctionalSpringApplication.run(DemoApplication.class, args); } @Override public String uppercase(String value) { return value.toUpperCase(); } }
It would also work if you add a separate, standalone class of type Function and register it with the SpringApplication using an alternative form of the run() method. The main thing is that the generic type information is available at runtime through the class declaration.
The app runs in its own HTTP server if you add spring-cloud-starter-function-webflux (it won’t work with the MVC starter at the moment because the functional form of the embedded Servlet container hasn’t been implemented). The app also runs just fine in AWS Lambda or Azure Functions, and the improvements in startup time are dramatic.
| Note |
|---|---|
The "lite" web server has some limitations for the range of |
Spring Cloud Function also has some utilities for integration testing that will be very familiar to Spring Boot users. For example, here is an integration test for the HTTP server wrapping the app above:
@RunWith(SpringRunner.class) @FunctionalSpringBootTest @AutoConfigureWebTestClient public class FunctionalTests { @Autowired private WebTestClient client; @Test public void words() throws Exception { client.post().uri("/").body(Mono.just("foo"), String.class).exchange() .expectStatus().isOk().expectBody(String.class).isEqualTo("FOO"); } }
This test is almost identical to the one you would write for the @Bean version of the same app - the only difference is the @FunctionalSpringBootTest annotation, instead of the regular @SpringBootTest. All the other pieces, like the @Autowired WebTestClient, are standard Spring Boot features.
Or you could write a test for a non-HTTP app using just the FunctionCatalog. For example:
@RunWith(SpringRunner.class) @FunctionalSpringBootTest public class FunctionalTests { @Autowired private FunctionCatalog catalog; @Test public void words() throws Exception { Function<Flux<String>, Flux<String>> function = catalog.lookup(Function.class, "function"); assertThat(function.apply(Flux.just("foo")).blockFirst()).isEqualTo("FOO"); } }
(The FunctionCatalog always returns functions from Flux to Flux, even if the user declares them with a simpler signature.)
Most Spring Cloud Function apps have a relatively small scope compared to the whole of Spring Boot, so we are able to adapt it to these functional bean definitions easily. If you step outside that limited scope, you can extend your Spring Cloud Function app by switching back to @Bean style configuration, or by using a hybrid approach. If you want to take advantage of Spring Boot autoconfiguration for integrations with external datastores, for example, you will need to use @EnableAutoConfiguration. Your functions can still be defined using the functional declarations if you want (i.e. the "hybrid" style), but in that case you will need to explicitly switch off the "full functional mode" using spring.functional.enabled=false so that Spring Boot can take back control.
There is a sample app that uses the function compiler to create a
function from a configuration property. The vanilla "function-sample"
also has that feature. And there are some scripts that you can run to
see the compilation happening at run time. To run these examples,
change into the scripts directory:
cd scripts
Also, start a RabbitMQ server locally (e.g. execute rabbitmq-server).
Start the Function Registry Service:
./function-registry.sh
Register a Function:
./registerFunction.sh -n uppercase -f "f->f.map(s->s.toString().toUpperCase())"
Run a REST Microservice using that Function:
./web.sh -f uppercase -p 9000 curl -H "Content-Type: text/plain" -H "Accept: text/plain" localhost:9000/uppercase -d foo
Register a Supplier:
./registerSupplier.sh -n words -f "()->Flux.just(\"foo\",\"bar\")"
Run a REST Microservice using that Supplier:
./web.sh -s words -p 9001 curl -H "Accept: application/json" localhost:9001/words
Register a Consumer:
./registerConsumer.sh -n print -t String -f "System.out::println"
Run a REST Microservice using that Consumer:
./web.sh -c print -p 9002 curl -X POST -H "Content-Type: text/plain" -d foo localhost:9002/print
Run Stream Processing Microservices:
First register a streaming words supplier:
./registerSupplier.sh -n wordstream -f "()->Flux.interval(Duration.ofMillis(1000)).map(i->\"message-\"+i)"
Then start the source (supplier), processor (function), and sink (consumer) apps (in reverse order):
./stream.sh -p 9103 -i uppercaseWords -c print ./stream.sh -p 9102 -i words -f uppercase -o uppercaseWords ./stream.sh -p 9101 -s wordstream -o words
The output will appear in the console of the sink app (one message per second, converted to uppercase):
MESSAGE-0 MESSAGE-1 MESSAGE-2 MESSAGE-3 MESSAGE-4 MESSAGE-5 MESSAGE-6 MESSAGE-7 MESSAGE-8 MESSAGE-9 ...
As well as being able to run as a standalone process, a Spring Cloud Function application can be adapted to run one of the existing serverless platforms. In the project there are adapters for AWS Lambda, Azure, and Apache OpenWhisk. The Oracle Fn platform has its own Spring Cloud Function adapter. And Riff supports Java functions and its Java Function Invoker acts natively is an adapter for Spring Cloud Function jars.
The AWS adapter takes a Spring Cloud Function app and converts it to a form that can run in AWS Lambda.
The adapter has a couple of generic request handlers that you can use. The most generic is SpringBootStreamHandler, which uses a Jackson ObjectMapper provided by Spring Boot to serialize and deserialize the objects in the function. There is also a SpringBootRequestHandler which you can extend, and provide the input and output types as type parameters (enabling AWS to inspect the class and do the JSON conversions itself).
If your app has more than one @Bean of type Function etc. then you can choose the one to use by configuring function.name (e.g. as FUNCTION_NAME environment variable in AWS). The functions are extracted from the Spring Cloud FunctionCatalog (searching first for Function then Consumer and finally Supplier).
You don’t need the Spring Cloud Function Web or Stream adapter at runtime in Lambda, so you might need to exclude those before you create the JAR you send to AWS. A Lambda application has to be shaded, but a Spring Boot standalone application does not, so you can run the same app using 2 separate jars (as per the sample). The sample app creates 2 jar files, one with an aws classifier for deploying in Lambda, and one executable (thin) jar that includes spring-cloud-function-web at runtime. Spring Cloud Function will try and locate a "main class" for you from the JAR file manifest, using the Start-Class attribute (which will be added for you by the Spring Boot tooling if you use the starter parent). If there is no Start-Class in your manifest you can use an environment variable MAIN_CLASS when you deploy the function to AWS.
Build the sample under spring-cloud-function-samples/function-sample-aws and upload the -aws jar file to Lambda. The handler can be example.Handler or org.springframework.cloud.function.adapter.aws.SpringBootStreamHandler (FQN of the class, not a method reference, although Lambda does accept method references).
./mvnw -U clean package
Using the AWS command line tools it looks like this:
aws lambda create-function --function-name Uppercase --role arn:aws:iam::[USERID]:role/service-role/[ROLE] --zip-file fileb://function-sample-aws/target/function-sample-aws-2.0.0.BUILD-SNAPSHOT-aws.jar --handler org.springframework.cloud.function.adapter.aws.SpringBootStreamHandler --description "Spring Cloud Function Adapter Example" --runtime java8 --region us-east-1 --timeout 30 --memory-size 1024 --publish
The input type for the function in the AWS sample is a Foo with a single property called "value". So you would need this to test it:
{
"value": "test"
} | Note |
|---|---|
The AWS sample app is written in the "functional" style (as an |
AWS has some platform-specific data types, including batching of messages, which is much more efficient than processing each one individually. To make use of these types you can write a function that depends on those types. Or you can rely on Spring to extract the data from the AWS types and convert it to a Spring Message. To do this you tell AWS that the function is of a specific generic handler type (depending on the AWS service) and provide a bean of type Function<Message<S>,Message<T>>, where S and T are your business data types. If there is more than one bean of type Function you may also need to configure the Spring Boot property function.name to be the name of the target bean (e.g. use FUNCTION_NAME as an environment variable).
The supported AWS services and generic handler types are listed below:
| Service | AWS Types | Generic Handler | |
|---|---|---|---|
API Gateway |
|
| |
Kinesis | KinesisEvent | org.springframework.cloud.function.adapter.aws.SpringBootKinesisEventHandler |
For example, to deploy behind an API Gateway, use --handler org.springframework.cloud.function.adapter.aws.SpringBootApiGatewayRequestHandler in your AWS command line (in via the UI) and define a @Bean of type Function<Message<Foo>,Message<Bar>> where Foo and Bar are POJO types (the data will be marshalled and unmarshalled by AWS using Jackson).
The Azure adapter bootstraps a Spring Cloud Function context and channels function calls from the Azure framework into the user functions, using Spring Boot configuration where necessary. Azure Functions has quite a unique, but invasive programming model, involving annotations in user code that are specific to the platform. The easiest way to use it with Spring Cloud is to extend a base class and write a method in it with the @FunctionName annotation which delegates to a base class method.
This project provides an adapter layer for a Spring Cloud Function application onto Azure.
You can write an app with a single @Bean of type Function and it will be deployable in Azure if you get the JAR file laid out right.
There is an AzureSpringBootRequestHandler which you must extend, and provide the input and output types as annotated method parameters (enabling Azure to inspect the class and create JSON bindings). The base class has two useful methods (handleRequest and handleOutput) to which you can delegate the actual function call, so mostly the function will only ever have one line.
Example:
public class FooHandler extends AzureSpringBootRequestHandler<Foo, Bar> { @FunctionName("uppercase") public Bar execute( @HttpTrigger(name = "req", methods = { HttpMethod.GET, HttpMethod.POST }, authLevel = AuthorizationLevel.ANONYMOUS) Foo foo, ExecutionContext context) { return handleRequest(foo, context); } }
This Azure handler will delegate to a Function<Foo,Bar> bean (or a Function<Publisher<Foo>,Publisher<Bar>>). Some Azure triggers (e.g. @CosmosDBTrigger) result in a input type of List and in that case you can bind to List in the Azure handler, or String (the raw JSON). The List input delegates to a Function with input type Map<String,Object>, or Publisher or List of the same type. The output of the Function can be a List (one-for-one) or a single value (aggregation), and the output binding in the Azure declaration should match.
If your app has more than one @Bean of type Function etc. then you can choose the one to use by configuring function.name. Or if you make the @FunctionName in the Azure handler method match the function name it should work that way (also for function apps with multiple functions). The functions are extracted from the Spring Cloud FunctionCatalog so the default function names are the same as the bean names.
You don’t need the Spring Cloud Function Web at runtime in Azure, so you can exclude this before you create the JAR you deploy to Azure, but it won’t be used if you include it so it doesn’t hurt to leave it in. A function application on Azure is an archive generated by the Maven plugin. The function lives in the JAR file generated by this project. The sample creates it as an executable jar, using the thin layout, so that Azure can find the handler classes. If you prefer you can just use a regular flat JAR file. The dependencies should not be included.
You can run the sample locally, just like the other Spring Cloud Function samples:
and curl -H "Content-Type: text/plain" localhost:8080/function -d '{"value": "hello foobar"}'.
You will need the az CLI app (see https://docs.microsoft.com/en-us/azure/azure-functions/functions-create-first-java-maven for more detail). To deploy the function on Azure runtime:
$ az login $ mvn azure-functions:deploy
On another terminal try this: curl https://<azure-function-url-from-the-log>/api/uppercase -d '{"value": "hello foobar!"}'. Please ensure that you use the right URL for the function above. Alternatively you can test the function in the Azure Dashboard UI (click on the function name, go to the right hand side and click "Test" and to the bottom right, "Run").
The input type for the function in the Azure sample is a Foo with a single property called "value". So you need this to test it with something like below:
{
"value": "foobar"
} | Note |
|---|---|
The Azure sample app is written in the "non-functional" style (using |
The OpenWhisk adapter is in the form of an executable jar that can be used in a a docker image to be deployed to Openwhisk. The platform works in request-response mode, listening on port 8080 on a specific endpoint, so the adapter is a simple Spring MVC application.
Implement a POF (be sure to use the functions package):
package functions;
import java.util.function.Function;
public class Uppercase implements Function<String, String> {
public String apply(String input) {
return input.toUpperCase();
}
}Install it into your local Maven repository:
./mvnw clean install
Create a function.properties file that provides its Maven coordinates. For example:
dependencies.function: com.example:pof:0.0.1-SNAPSHOT
Copy the openwhisk runner JAR to the working directory (same directory as the properties file):
cp spring-cloud-function-adapters/spring-cloud-function-adapter-openwhisk/target/spring-cloud-function-adapter-openwhisk-2.0.0.BUILD-SNAPSHOT.jar runner.jar
Generate a m2 repo from the --thin.dryrun of the runner JAR with the above properties file:
java -jar -Dthin.root=m2 runner.jar --thin.name=function --thin.dryrun
Use the following Dockerfile:
FROM openjdk:8-jdk-alpine VOLUME /tmp COPY m2 /m2 ADD runner.jar . ADD function.properties . ENV JAVA_OPTS="" ENTRYPOINT [ "java", "-Djava.security.egd=file:/dev/./urandom", "-jar", "runner.jar", "--thin.root=/m2", "--thin.name=function", "--function.name=uppercase"] EXPOSE 8080
Note you could use a Spring Cloud Function app, instead of just a jar with a POF in it, in which case you would have to change the way the app runs in the container so that it picks up the main class as a source file. For example, you could change the
ENTRYPOINTabove and add--spring.main.sources=com.example.SampleApplication.
Build the Docker image:
docker build -t [username/appname] .
Push the Docker image:
docker push [username/appname]
Use the OpenWhisk CLI (e.g. after vagrant ssh) to create the action:
wsk action create example --docker [username/appname]
Invoke the action:
wsk action invoke example --result --param payload foo
{
"result": "FOO"
}This reference guide covers how to use Spring Cloud Kubernetes.
Spring Cloud Kubernetes provide Spring Cloud common interface implementations that consume Kubernetes native services. The main objective of the projects provided in this repository is to facilitate the integration of Spring Cloud and Spring Boot applications running inside Kubernetes.
Starters are convenient dependency descriptors you can include in your application. Include a starter to get the dependencies and Spring Boot auto-configuration for a feature set.
| Starter | Features |
|---|---|
<dependency> <groupId>org.springframework.cloud</groupId> <artifactId>spring-cloud-starter-kubernetes</artifactId> </dependency> | Discovery Client implementation that resolves service names to Kubernetes Services. |
<dependency> <groupId>org.springframework.cloud</groupId> <artifactId>spring-cloud-starter-kubernetes-config</artifactId> </dependency> | Load application properties from Kubernetes ConfigMaps and Secrets. Reload application properties when a ConfigMap or Secret changes. |
<dependency> <groupId>org.springframework.cloud</groupId> <artifactId>spring-cloud-starter-kubernetes-ribbon</artifactId> </dependency> | Ribbon client-side load balancer with server list obtained from Kubernetes Endpoints. |
<dependency> <groupId>org.springframework.cloud</groupId> <artifactId>spring-cloud-starter-kubernetes-all</artifactId> </dependency> | All Spring Cloud Kubernetes features. |
This project provides an implementation of Discovery Client
for Kubernetes.
This client lets you query Kubernetes endpoints (see services) by name.
A service is typically exposed by the Kubernetes API server as a collection of endpoints that represent http and https addresses and that a client can
access from a Spring Boot application running as a pod. This discovery feature is also used by the Spring Cloud Kubernetes Ribbon project
to fetch the list of the endpoints defined for an application to be load balanced.
This is something that you get for free by adding the following dependency inside your project:
<dependency> <groupId>org.springframework.cloud</groupId> <artifactId>spring-cloud-starter-kubernetes</artifactId> </dependency>
To enable loading of the DiscoveryClient, add @EnableDiscoveryClient to the according configuration or application class, as the following example shows:
@SpringBootApplication @EnableDiscoveryClient public class Application { public static void main(String[] args) { SpringApplication.run(Application.class, args); } }
Then you can inject the client in your code simply by autowiring it, as the following example shows:
@Autowired private DiscoveryClient discoveryClient;
If, for any reason, you need to disable the DiscoveryClient, you can set the following property in application.properties:
spring.cloud.kubernetes.discovery.enabled=false
Some Spring Cloud components use the DiscoveryClient in order to obtain information about the local service instance. For
this to work, you need to align the Kubernetes service name with the spring.application.name property.
Kubernetes itself is capable of (server side) service discovery (see: https://kubernetes.io/docs/concepts/services-networking/service/#discovering-services). Using native kubernetes service discovery ensures compatibility with additional tooling, such as Istio (https://istio.io), a service mesh that is capable of load balancing, ribbon, circuit breaker, failover, and much more.
The caller service then need only refer to names resolvable in a particular Kubernetes cluster. A simple implementation might use a spring RestTemplate that refers to a fully qualified domain name (FQDN), such as https://{service-name}.{namespace}.svc.{cluster}.local:{service-port}.
Additionally, you can use Hystrix for:
- Circuit breaker implementation on the caller side, by annotating the spring boot application class with
@EnableCircuitBreaker - Fallback functionality, by annotating the respective method with
@HystrixCommand(fallbackMethod=
The most common approach to configuring your Spring Boot application is to create an application.properties or applicaiton.yaml or
an application-profile.properties or application-profile.yaml file that contains key-value pairs that provide customization values to your
application or Spring Boot starters. You can override these properties by specifying system properties or environment
variables.
Kubernetes provides a resource named ConfigMap to externalize the
parameters to pass to your application in the form of key-value pairs or embedded application.properties or application.yaml files.
The Spring Cloud Kubernetes Config project makes Kubernetes ConfigMap instances available
during application bootstrapping and triggers hot reloading of beans or Spring context when changes are detected on
observed ConfigMap instances.
The default behavior is to create a ConfigMapPropertySource based on a Kubernetes ConfigMap that has a metadata.name value of either the name of
your Spring application (as defined by its spring.application.name property) or a custom name defined within the
bootstrap.properties file under the following key: spring.cloud.kubernetes.config.name.
However, more advanced configuration is possible where you can use multiple ConfigMap instances.
The spring.cloud.kubernetes.config.sources list makes this possible.
For example, you could define the following ConfigMap instances:
spring: application: name: cloud-k8s-app cloud: kubernetes: config: name: default-name namespace: default-namespace sources: # Spring Cloud Kubernetes looks up a ConfigMap named c1 in namespace default-namespace - name: c1 # Spring Cloud Kubernetes looks up a ConfigMap named default-name in whatever namespace n2 - namespace: n2 # Spring Cloud Kubernetes looks up a ConfigMap named c3 in namespace n3 - namespace: n3 name: c3
In the preceding example, if spring.cloud.kubernetes.config.namespace had not been set,
the ConfigMap named c1 would be looked up in the namespace that the application runs.
Any matching ConfigMap that is found is processed as follows:
- Apply individual configuration properties.
- Apply as
yamlthe content of any property namedapplication.yaml. - Apply as a properties file the content of any property named
application.properties.
The single exception to the aforementioned flow is when the ConfigMap contains a single key that indicates
the file is a YAML or properties file. In that case, the name of the key does NOT have to be application.yaml or
application.properties (it can be anything) and the value of the property is treated correctly.
This features facilitates the use case where the ConfigMap was created by using something like the following:
kubectl create configmap game-config --from-file=/path/to/app-config.yaml
Assume that we have a Spring Boot application named demo that uses the following properties to read its thread pool
configuration.
pool.size.corepool.size.maximum
This can be externalized to config map in yaml format as follows:
kind: ConfigMap apiVersion: v1 metadata: name: demo data: pool.size.core: 1 pool.size.max: 16
Individual properties work fine for most cases. However, sometimes, embedded yaml is more convenient. In this case, we
use a single property named application.yaml to embed our yaml, as follows:
kind: ConfigMap apiVersion: v1 metadata: name: demo data: application.yaml: |- pool: size: core: 1 max:16
The following example also works:
kind: ConfigMap apiVersion: v1 metadata: name: demo data: custom-name.yaml: |- pool: size: core: 1 max:16
You can also configure Spring Boot applications differently depending on active profiles that are merged together
when the ConfigMap is read. You can provide different property values for different profiles by using an
application.properties or application.yaml property, specifying profile-specific values, each in their own document
(indicated by the --- sequence), as follows:
kind: ConfigMap apiVersion: v1 metadata: name: demo data: application.yml: |- greeting: message: Say Hello to the World farewell: message: Say Goodbye --- spring: profiles: development greeting: message: Say Hello to the Developers farewell: message: Say Goodbye to the Developers --- spring: profiles: production greeting: message: Say Hello to the Ops
In the preceding case, the configuration loaded into your Spring Application with the development profile is as follows:
greeting: message: Say Hello to the Developers farewell: message: Say Goodbye to the Developers
However, if the production profile is active, the configuration becomes:
greeting: message: Say Hello to the Ops farewell: message: Say Goodbye
If both profiles are active, the property that appears last within the ConfigMap overwrites any preceding values.
To tell Spring Boot which profile should be enabled at bootstrap, you can pass a system property to the Java
command. To do so, you can launch your Spring Boot application with an environment variable that you can define with the OpenShift
DeploymentConfig or Kubernetes ReplicationConfig resource file, as follows:
apiVersion: v1 kind: DeploymentConfig spec: replicas: 1 ... spec: containers: - env: - name: JAVA_APP_DIR value: /deployments - name: JAVA_OPTIONS value: -Dspring.profiles.active=developer
| Note |
|---|---|
You should check the security configuration section. To access config maps from inside a pod you need to have the correct Kubernetes service accounts, roles and role bindings. |
Another option for using ConfigMap instances is to mount them into the Pod by running the Spring Cloud Kubernetes application
and having Spring Cloud Kubernetes read them from the file system.
This behavior is controlled by the spring.cloud.kubernetes.config.paths property. You can use it in
addition to or instead of the mechanism described earlier.
You can specify multiple (exact) file paths in spring.cloud.kubernetes.config.paths by using the , delimiter.
| Note |
|---|---|
You have to provide the full exact path to each property file, because directories are not being recursively parsed. |
Table 136.1. Properties:
| Name | Type | Default | Description |
|---|---|---|---|
|
|
| Enable or disable consuming |
|
|
| Enable Secrets |
|
|
| Sets the name of |
|
| Client namespace | Sets the Kubernetes namespace where to lookup |
|
|
| Sets the paths where |
Kubernetes has the notion of Secrets for storing
sensitive data such as passwords, OAuth tokens, and so on. This project provides integration with Secrets to make secrets
accessible by Spring Boot applications. You can explicitly enable or disable This feature by setting the spring.cloud.kubernetes.secrets.enabled property.
When enabled, the SecretsPropertySource looks up Kubernetes for Secrets from the following sources:
- Reading recursively from secrets mounts
- Named after the application (as defined by
spring.application.name) - Matching some labels
Note that, by default, consuming Secrets through the API (points 2 and 3 above) is not enabled for security reasons. Further, we recommend that containers share secrets through mounted volumes. If you enable consuming Secrets through the API, we recommend that you limit access to Secrets by using an [authorization policy, such as RBAC](https://kubernetes.io/docs/concepts/configuration/secret/#best-practices).
If the secrets are found, their data is made available to the application.
Assume that we have a spring boot application named demo that uses properties to read its database
configuration. We can create a Kubernetes secret by using the following command:
oc create secret generic db-secret --from-literal=username=user --from-literal=password=p455w0rd
The preceding command would create the following secret (which you can see by using oc get secrets db-secret -o yaml):
apiVersion: v1 data: password: cDQ1NXcwcmQ= username: dXNlcg== kind: Secret metadata: creationTimestamp: 2017-07-04T09:15:57Z name: db-secret namespace: default resourceVersion: "357496" selfLink: /api/v1/namespaces/default/secrets/db-secret uid: 63c89263-6099-11e7-b3da-76d6186905a8 type: Opaque
Note that the data contains Base64-encoded versions of the literal provided by the create command.
Your application can then use this secret — for example, by exporting the secret’s value as environment variables:
apiVersion: v1 kind: Deployment metadata: name: ${project.artifactId} spec: template: spec: containers: - env: - name: DB_USERNAME valueFrom: secretKeyRef: name: db-secret key: username - name: DB_PASSWORD valueFrom: secretKeyRef: name: db-secret key: password
You can select the Secrets to consume in a number of ways:
By listing the directories where secrets are mapped:
-Dspring.cloud.kubernetes.secrets.paths=/etc/secrets/db-secret,etc/secrets/postgresql
If you have all the secrets mapped to a common root, you can set them like:
-Dspring.cloud.kubernetes.secrets.paths=/etc/secrets
By setting a named secret:
-Dspring.cloud.kubernetes.secrets.name=db-secret
By defining a list of labels:
-Dspring.cloud.kubernetes.secrets.labels.broker=activemq -Dspring.cloud.kubernetes.secrets.labels.db=postgresql
Table 136.2. Properties:
| Name | Type | Default | Description |
|---|---|---|---|
|
|
| Enables or disables consuming secrets through APIs (examples 2 and 3) |
|
|
| Enable Secrets |
|
|
| Sets the name of the secret to look up |
|
| Client namespace | Sets the Kubernetes namespace where to look up |
|
|
| Sets the labels used to lookup secrets |
|
|
| Sets the paths where secrets are mounted (example 1) |
Notes:
* The spring.cloud.kubernetes.secrets.labels property behaves as defined by
Map-based binding.
* The spring.cloud.kubernetes.secrets.paths property behaves as defined by
Collection-based binding.
* Access to secrets through the API may be restricted for security reasons. The preferred way is to mount secrets to the Pod.
You can find an example of an application that uses secrets (though it has not been updated to use the new spring-cloud-kubernetes project) at
spring-boot-camel-config
Some applications may need to detect changes on external property sources and update their internal status to reflect the new configuration.
The reload feature of Spring Cloud Kubernetes is able to trigger an application reload when a related ConfigMap or
Secret changes.
By default, this feature is disabled. You can enable it by using the spring.cloud.kubernetes.reload.enabled=true configuration property (for example, in the application.properties file).
The following levels of reload are supported (by setting the spring.cloud.kubernetes.reload.strategy property):
* refresh (default): Only configuration beans annotated with @ConfigurationProperties or @RefreshScope are reloaded.
This reload level leverages the refresh feature of Spring Cloud Context.
* restart_context: the whole Spring ApplicationContext is gracefully restarted. Beans are recreated with the new configuration.
* shutdown: the Spring ApplicationContext is shut down to activate a restart of the container.
When you use this level, make sure that the lifecycle of all non-daemon threads is bound to the ApplicationContext
and that a replication controller or replica set is configured to restart the pod.
Assuming that the reload feature is enabled with default settings (refresh mode), the following bean is refreshed when the config map changes:
@Configuration
@ConfigurationProperties(prefix = "bean")
public class MyConfig {
private String message = "a message that can be changed live";
// getter and setters
}To see that changes effectively happen, you can create another bean that prints the message periodically, as follows
@Component public class MyBean { @Autowired private MyConfig config; @Scheduled(fixedDelay = 5000) public void hello() { System.out.println("The message is: " + config.getMessage()); } }
You can change the message printed by the application by using a ConfigMap, as follows:
apiVersion: v1 kind: ConfigMap metadata: name: reload-example data: application.properties: |- bean.message=Hello World!
Any change to the property named bean.message in the ConfigMap associated with the pod is reflected in the
output. More generally speaking, changes associated to properties prefixed with the value defined by the prefix
field of the @ConfigurationProperties annotation are detected and reflected in the application.
Associating a ConfigMap with a pod is explained earlier in this chapter.
The full example is available in spring-cloud-kubernetes-reload-example.
The reload feature supports two operating modes:
* Event (default): Watches for changes in config maps or secrets by using the Kubernetes API (web socket).
Any event produces a re-check on the configuration and, in case of changes, a reload.
The view role on the service account is required in order to listen for config map changes. A higher level role (such as edit) is required for secrets
(by default, secrets are not monitored).
* Polling: Oeriodically re-creates the configuration from config maps and secrets to see if it has changed.
You can configure the polling period by using the spring.cloud.kubernetes.reload.period property and defaults to 15 seconds.
It requires the same role as the monitored property source.
This means, for example, that using polling on file-mounted secret sources does not require particular privileges.
Table 136.3. Properties:
| Name | Type | Default | Description |
|---|---|---|---|
|
|
| The period for verifying changes when using the |
|
|
| Enables monitoring of property sources and configuration reload |
|
|
| Allow monitoring changes in config maps |
|
|
| Allow monitoring changes in secrets |
`spring.cloud.kubernetes.reload.strategy ` |
|
| The strategy to use when firing a reload ( |
|
|
| Specifies how to listen for changes in property sources ( |
Notes:
* You should not use properties under spring.cloud.kubernetes.reload in config maps or secrets. Changing such properties at runtime may lead to unexpected results.
* Deleting a property or the whole config map does not restore the original state of the beans when you use the refresh level.
Spring Cloud client applications that call a microservice should be interested on relying on a client load-balancing
feature in order to automatically discover at which endpoint(s) it can reach a given service. This mechanism has been
implemented within the spring-cloud-kubernetes-ribbon project, where a
Kubernetes client populates a Ribbon ServerList that contains information
about such endpoints.
The implementation is part of the following starter that you can use by adding its dependency to your pom file:
<dependency> <groupId>org.springframework.cloud</groupId> <artifactId>spring-cloud-starter-kubernetes-ribbon</artifactId> <version>${latest.version}</version> </dependency>
When the list of the endpoints is populated, the Kubernetes client searches the registered endpoints that live in the current namespace or project by matching the service name defined in the Ribbon Client annotation, as follows:
@RibbonClient(name = "name-service")You can configure Ribbon’s behavior by providing properties in your application.properties (through your application’s
dedicated ConfigMap) by using the following format: <name of your service>.ribbon.<Ribbon configuration key>, where:
<name of your service>corresponds to the service name you access over Ribbon, as configured by using the@RibbonClientannotation (such asname-servicein the preceding example).<Ribbon configuration key>is one of the Ribbon configuration keys defined by Ribbon’sCommonClientConfigKeyclass.
Additionally, the spring-cloud-kubernetes-ribbon project defines two additional configuration keys to further
control how Ribbon interacts with Kubernetes. In particular, if an endpoint defines multiple ports, the default
behavior is to use the first one found. To select more specifically which port to use in a multi-port service, you can use
the PortName key. If you want to specify in which Kubernetes namespace the target service should be looked up, you can use
the KubernetesNamespace key, remembering in both instances to prefix these keys with your service name and
ribbon prefix, as specified earlier.
The following examples use this module for ribbon discovery:
| Note |
|---|---|
You can disable the Ribbon discovery client by setting the |
All of the features described earlier in this guide work equally well, regardless of whether your application is running inside
Kubernetes. This is really helpful for development and troubleshooting.
From a development point of view, this lets you start your Spring Boot application and debug one
of the modules that is part of this project. You need not deploy it in Kubernetes,
as the code of the project relies on the
Fabric8 Kubernetes Java client, which is a fluent DSL that can
communicate by using http protocol to the REST API of the Kubernetes Server.
When the application runs as a pod inside Kubernetes, a Spring profile named kubernetes automatically gets activated.
This lets you customize the configuration, to define beans that are applied when the Spring Boot application is deployed
within the Kubernetes platform (for example, different development and production configuration).
When you include the spring-cloud-kubernetes-istio module in the application classpath, a new profile is added to the application,
provided the application is running inside a Kubernetes Cluster with Istio installed. You can then use
spring @Profile("istio") annotations in your Beans and @Configuration classes.
The Istio awareness module uses me.snowdrop:istio-client to interact with Istio APIs, letting us discover traffic rules, circuit breakers, and so on,
making it easy for our Spring Boot applications to consume this data to dynamically configure themselves according to the environment.
Spring Boot uses HealthIndicator to expose info about the health of an application.
That makes it really useful for exposing health-related information to the user and makes it a good fit for use as readiness probes.
The Kubernetes health indicator (which is part of the core module) exposes the following info:
- Pod name, IP address, namespace, service account, node name, and its IP address
- A flag that indicates whether the Spring Boot application is internal or external to Kubernetes
Most of the components provided in this project need to know the namespace. For Kubernetes (1.3+), the namespace is made available to the pod as part of the service account secret and is automatically detected by the client. For earlier versions, it needs to be specified as an environment variable to the pod. A quick way to do this is as follows:
env:
- name: "KUBERNETES_NAMESPACE"
valueFrom:
fieldRef:
fieldPath: "metadata.namespace"For distributions of Kubernetes that support more fine-grained role-based access within the cluster, you need to make sure a pod that runs with spring-cloud-kubernetes has access to the Kubernetes API.
For any service accounts you assign to a deployment or pod, you need to make sure they have the correct roles. For example, you can add cluster-reader permissions to your default service account, depending on the project you’re in.
Spring Cloud Kubernetes tries to make it transparent for your applications to consume Kubernetes Native Services by following the Spring Cloud interfaces.
In your applications, you need to add the spring-cloud-kubernetes-discovery dependency to your classpath and remove any other dependency that contains a DiscoveryClient implementation (that is, a Eureka discovery client).
The same applies for PropertySourceLocator, where you need to add to the classpath the spring-cloud-kubernetes-config and remove any other dependency that contains a PropertySourceLocator implementation (that is, a configuration server client).
The following projects highlight the usage of these dependencies and demonstrate how you can use these libraries from any Spring Boot application:
- Spring Cloud Kubernetes Examples: the ones located inside this repository.
Spring Cloud Kubernetes Full Example: Minions and Boss
- Spring Cloud Kubernetes Full Example: SpringOne Platform Tickets Service
- Spring Cloud Gateway with Spring Cloud Kubernetes Discovery and Config
- Spring Boot Admin with Spring Cloud Kubernetes Discovery and Config
This section lists other resources, such as presentations (slides) and videos about Spring Cloud Kubernetes.
Please feel free to submit other resources through pull requests to this repository.
To build the source you will need to install JDK 1.7.
Spring Cloud uses Maven for most build-related activities, and you should be able to get off the ground quite quickly by cloning the project you are interested in and typing
$ ./mvnw install
| Note |
|---|---|
You can also install Maven (>=3.3.3) yourself and run the |
| Note |
|---|---|
Be aware that you might need to increase the amount of memory
available to Maven by setting a |
For hints on how to build the project look in .travis.yml if there
is one. There should be a "script" and maybe "install" command. Also
look at the "services" section to see if any services need to be
running locally (e.g. mongo or rabbit). Ignore the git-related bits
that you might find in "before_install" since they’re related to setting git
credentials and you already have those.
The projects that require middleware generally include a
docker-compose.yml, so consider using
Docker Compose to run the middeware servers
in Docker containers. See the README in the
scripts demo
repository for specific instructions about the common cases of mongo,
rabbit and redis.
| Note |
|---|---|
If all else fails, build with the command from |
The spring-cloud-build module has a "docs" profile, and if you switch
that on it will try to build asciidoc sources from
src/main/asciidoc. As part of that process it will look for a
README.adoc and process it by loading all the includes, but not
parsing or rendering it, just copying it to ${main.basedir}
(defaults to $../../../.., i.e. the root of the project). If there are
any changes in the README it will then show up after a Maven build as
a modified file in the correct place. Just commit it and push the change.
If you don’t have an IDE preference we would recommend that you use Spring Tools Suite or Eclipse when working with the code. We use the m2eclipse eclipse plugin for maven support. Other IDEs and tools should also work without issue as long as they use Maven 3.3.3 or better.
We recommend the m2eclipse eclipse plugin when working with eclipse. If you don’t already have m2eclipse installed it is available from the "eclipse marketplace".
| Note |
|---|---|
Older versions of m2e do not support Maven 3.3, so once the
projects are imported into Eclipse you will also need to tell
m2eclipse to use the right profile for the projects. If you
see many different errors related to the POMs in the projects, check
that you have an up to date installation. If you can’t upgrade m2e,
add the "spring" profile to your |
Spring Cloud is released under the non-restrictive Apache 2.0 license, and follows a very standard Github development process, using Github tracker for issues and merging pull requests into master. If you want to contribute even something trivial please do not hesitate, but follow the guidelines below.
Before we accept a non-trivial patch or pull request we will need you to sign the Contributor License Agreement. Signing the contributor’s agreement does not grant anyone commit rights to the main repository, but it does mean that we can accept your contributions, and you will get an author credit if we do. Active contributors might be asked to join the core team, and given the ability to merge pull requests.
This project adheres to the Contributor Covenant code of conduct. By participating, you are expected to uphold this code. Please report unacceptable behavior to [email protected].
None of these is essential for a pull request, but they will all help. They can also be added after the original pull request but before a merge.
- Use the Spring Framework code format conventions. If you use Eclipse
you can import formatter settings using the
eclipse-code-formatter.xmlfile from the Spring Cloud Build project. If using IntelliJ, you can use the Eclipse Code Formatter Plugin to import the same file. - Make sure all new
.javafiles to have a simple Javadoc class comment with at least an@authortag identifying you, and preferably at least a paragraph on what the class is for. - Add the ASF license header comment to all new
.javafiles (copy from existing files in the project) - Add yourself as an
@authorto the .java files that you modify substantially (more than cosmetic changes). - Add some Javadocs and, if you change the namespace, some XSD doc elements.
- A few unit tests would help a lot as well — someone has to do it.
- If no-one else is using your branch, please rebase it against the current master (or other target branch in the main project).
- When writing a commit message please follow these conventions,
if you are fixing an existing issue please add
Fixes gh-XXXXat the end of the commit message (where XXXX is the issue number).
Spring Cloud Build comes with a set of checkstyle rules. You can find them in the spring-cloud-build-tools module. The most notable files under the module are:
spring-cloud-build-tools/.
└── src ├── checkstyle │ └── checkstyle-suppressions.xml
| Default Checkstyle rules |
| File header setup |
| Default suppression rules |
Checkstyle rules are disabled by default. To add checkstyle to your project just define the following properties and plugins.
pom.xml.
<properties> <maven-checkstyle-plugin.failsOnError>true</maven-checkstyle-plugin.failsOnError><groupId>io.spring.javaformat</groupId> <artifactId>spring-javaformat-maven-plugin</artifactId> </plugin> <plugin>
<groupId>org.apache.maven.plugins</groupId> <artifactId>maven-checkstyle-plugin</artifactId> </plugin> </plugins> <reporting> <plugins> <plugin>
<groupId>org.apache.maven.plugins</groupId> <artifactId>maven-checkstyle-plugin</artifactId> </plugin> </plugins> </reporting> </build>
| Fails the build upon Checkstyle errors |
| Fails the build upon Checkstyle violations |
| Checkstyle analyzes also the test sources |
| Add the Spring Java Format plugin that will reformat your code to pass most of the Checkstyle formatting rules |
| Add checkstyle plugin to your build and reporting phases |
If you need to suppress some rules (e.g. line length needs to be longer), then it’s enough for you to define a file under ${project.root}/src/checkstyle/checkstyle-suppressions.xml with your suppressions. Example:
projectRoot/src/checkstyle/checkstyle-suppresions.xml.
<?xml version="1.0"?> <!DOCTYPE suppressions PUBLIC "-//Puppy Crawl//DTD Suppressions 1.1//EN" "http://www.puppycrawl.com/dtds/suppressions_1_1.dtd"> <suppressions> <suppress files=".*ConfigServerApplication\.java" checks="HideUtilityClassConstructor"/> <suppress files=".*ConfigClientWatch\.java" checks="LineLengthCheck"/> </suppressions>
It’s advisable to copy the ${spring-cloud-build.rootFolder}/.editorconfig and ${spring-cloud-build.rootFolder}/.springformat to your project. That way, some default formatting rules will be applied. You can do so by running this script:
$ curl https://raw.githubusercontent.com/spring-cloud/spring-cloud-build/master/.editorconfig -o .editorconfig $ touch .springformat
In order to setup Intellij you should import our coding conventions, inspection profiles and set up the checkstyle plugin.
spring-cloud-build-tools/.
└── src ├── checkstyle │ └── checkstyle-suppressions.xml
| Default Checkstyle rules |
| File header setup |
| Default suppression rules |
| Project defaults for Intellij that apply most of Checkstyle rules |
| Project style conventions for Intellij that apply most of Checkstyle rules |

Go to File → Settings → Editor → Code style. There click on the icon next to the Scheme section. There, click on the Import Scheme value and pick the Intellij IDEA code style XML option. Import the spring-cloud-build-tools/src/main/resources/intellij/Intellij_Spring_Boot_Java_Conventions.xml file.

Go to File → Settings → Editor → Inspections. There click on the icon next to the Profile section. There, click on the Import Profile and import the spring-cloud-build-tools/src/main/resources/intellij/Intellij_Project_Defaults.xml file.
Checkstyle. To have Intellij work with Checkstyle, you have to install the Checkstyle plugin. It’s advisable to also install the Assertions2Assertj to automatically convert the JUnit assertions

Go to File → Settings → Other settings → Checkstyle. There click on the + icon in the Configuration file section. There, you’ll have to define where the checkstyle rules should be picked from. In the image above, we’ve picked the rules from the cloned Spring Cloud Build repository. However, you can point to the Spring Cloud Build’s GitHub repository (e.g. for the checkstyle.xml : https://raw.githubusercontent.com/spring-cloud/spring-cloud-build/master/spring-cloud-build-tools/src/main/resources/checkstyle.xml). We need to provide the following variables:
checkstyle.header.file- please point it to the Spring Cloud Build’s,spring-cloud-build-tools/src/main/resources/checkstyle/checkstyle-header.txtfile either in your cloned repo or via thehttps://raw.githubusercontent.com/spring-cloud/spring-cloud-build/master/spring-cloud-build-tools/src/main/resources/checkstyle-header.txtURL.checkstyle.suppressions.file- default suppressions. Please point it to the Spring Cloud Build’s,spring-cloud-build-tools/src/checkstyle/checkstyle-suppressions.xmlfile either in your cloned repo or via thehttps://raw.githubusercontent.com/spring-cloud/spring-cloud-build/master/spring-cloud-build-tools/src/checkstyle/checkstyle-suppressions.xmlURL.checkstyle.additional.suppressions.file- this variable corresponds to suppressions in your local project. E.g. you’re working onspring-cloud-contract. Then point to theproject-root/src/checkstyle/checkstyle-suppressions.xmlfolder. Example forspring-cloud-contractwould be:/home/username/spring-cloud-contract/src/checkstyle/checkstyle-suppressions.xml.
| Important |
|---|---|
Remember to set the |
João André Martins; Jisha Abubaker; Ray Tsang; Mike Eltsufin; Artem Bilan; Andreas Berger; Balint Pato; Chengyuan Zhao; Dmitry Solomakha; Elena Felder; Daniel Zou
The Spring Cloud GCP project makes the Spring Framework a first-class citizen of Google Cloud Platform (GCP).
Spring Cloud GCP lets you leverage the power and simplicity of the Spring Framework to:
- Analyze your images for text, objects, and other content with Google Cloud Vision
- Use Spring Security via Google Cloud IAP
- Map objects, relationships, and collections with Spring Data Cloud Spanner and Spring Data Cloud Datastore
- Publish and subscribe to Google Cloud Pub/Sub topics
- Configure Spring JDBC with a few properties to use Google Cloud SQL
- Write and read from Spring Resources backed up by Google Cloud Storage
- Exchange messages with Spring Integration using Google Cloud Pub/Sub on the background
- Trace the execution of your app with Spring Cloud Sleuth and Google Stackdriver Trace
- Configure your app with Spring Cloud Config, backed up by the Google Runtime Configuration API
- Consume and produce Google Cloud Storage data via Spring Integration GCS Channel Adapters
The Spring Cloud GCP Bill of Materials (BOM) contains the versions of all the dependencies it uses.
If you’re a Maven user, adding the following to your pom.xml file will allow you to not specify any Spring Cloud GCP dependency versions. Instead, the version of the BOM you’re using determines the versions of the used dependencies.
<dependencyManagement> <dependencies> <dependency> <groupId>org.springframework.cloud</groupId> <artifactId>spring-cloud-gcp-dependencies</artifactId> <version>{project-version}</version> <type>pom</type> <scope>import</scope> </dependency> </dependencies> </dependencyManagement>
In the following sections, it will be assumed you are using the Spring Cloud GCP BOM and the dependency snippets will not contain versions.
Gradle users can achieve the same kind of BOM experience using Spring’s dependency-management-plugin Gradle plugin. For simplicity, the Gradle dependency snippets in the remainder of this document will also omit their versions.
There are many available resources to get you up to speed with our libraries as quickly as possible.
There are three entries in Spring Initializr for Spring Cloud GCP.
The GCP Support entry contains auto-configuration support for every Spring Cloud GCP integration. Most of the autoconfiguration code is only enabled if other dependencies are added to the classpath.
| Spring Cloud GCP Starter | Required dependencies |
|---|---|
Config | org.springframework.cloud:spring-cloud-gcp-starter-config |
Cloud Spanner | org.springframework.cloud:spring-cloud-gcp-starter-data-spanner |
Cloud Datastore | org.springframework.cloud:spring-cloud-gcp-starter-data-datastore |
Logging | org.springframework.cloud:spring-cloud-gcp-starter-logging |
SQL - MySql | org.springframework.cloud:spring-cloud-gcp-starter-sql-mysql |
SQL - PostgreSQL | org.springframework.cloud:spring-cloud-gcp-starter-sql-postgres |
Trace | org.springframework.cloud:spring-cloud-gcp-starter-trace |
Vision | org.springframework.cloud:spring-cloud-gcp-starter-vision |
Security - IAP | org.springframework.cloud:spring-cloud-gcp-starter-security-iap |
The GCP Messaging entry adds the GCP Support entry and all the required dependencies so that the Google Cloud Pub/Sub integrations work out of the box.
There are code samples available that demonstrate the usage of all our integrations.
For example, the Vision API sample shows how to use spring-cloud-gcp-starter-vision to automatically configure Vision API clients.
In a code challenge, you perform a task step by step, using one integration. There are a number of challenges available in the Google Developers Codelabs page.
A Spring Getting Started guide on messaging with Spring Integration Channel Adapters for Google Cloud Pub/Sub is available from Spring Guides.
Each Spring Cloud GCP module uses GcpProjectIdProvider and CredentialsProvider to get the GCP project ID and access credentials.
Spring Cloud GCP provides a Spring Boot starter to auto-configure the core components.
Maven coordinates, using Spring Cloud GCP BOM:
<dependency> <groupId>org.springframework.cloud</groupId> <artifactId>spring-cloud-gcp-starter</artifactId> </dependency>
Gradle coordinates:
dependencies {
compile group: 'org.springframework.cloud', name: 'spring-cloud-gcp-starter'
}GcpProjectIdProvider is a functional interface that returns a GCP project ID string.
public interface GcpProjectIdProvider { String getProjectId(); }
The Spring Cloud GCP starter auto-configures a GcpProjectIdProvider.
If a spring.cloud.gcp.project-id property is specified, the provided GcpProjectIdProvider returns that property value.
spring.cloud.gcp.project-id=my-gcp-project-id
Otherwise, the project ID is discovered based on an ordered list of rules:
- The project ID specified by the
GOOGLE_CLOUD_PROJECTenvironment variable - The Google App Engine project ID
- The project ID specified in the JSON credentials file pointed by the
GOOGLE_APPLICATION_CREDENTIALSenvironment variable - The Google Cloud SDK project ID
- The Google Compute Engine project ID, from the Google Compute Engine Metadata Server
CredentialsProvider is a functional interface that returns the credentials to authenticate and authorize calls to Google Cloud Client Libraries.
public interface CredentialsProvider { Credentials getCredentials() throws IOException; }
The Spring Cloud GCP starter auto-configures a CredentialsProvider.
It uses the spring.cloud.gcp.credentials.location property to locate the OAuth2 private key of a Google service account.
Keep in mind this property is a Spring Resource, so the credentials file can be obtained from a number of different locations such as the file system, classpath, URL, etc.
The next example specifies the credentials location property in the file system.
spring.cloud.gcp.credentials.location=file:/usr/local/key.json
Alternatively, you can set the credentials by directly specifying the spring.cloud.gcp.credentials.encoded-key property.
The value should be the base64-encoded account private key in JSON format.
If that credentials aren’t specified through properties, the starter tries to discover credentials from a number of places:
- Credentials file pointed to by the
GOOGLE_APPLICATION_CREDENTIALSenvironment variable - Credentials provided by the Google Cloud SDK
gcloud auth application-default logincommand - Google App Engine built-in credentials
- Google Cloud Shell built-in credentials
- Google Compute Engine built-in credentials
If your app is running on Google App Engine or Google Compute Engine, in most cases, you should omit the spring.cloud.gcp.credentials.location property and, instead, let the Spring Cloud GCP Starter get the correct credentials for those environments.
On App Engine Standard, the App Identity service account credentials are used, on App Engine Flexible, the Flexible service account credential are used and on Google Compute Engine, the Compute Engine Default Service Account is used.
By default, the credentials provided by the Spring Cloud GCP Starter contain scopes for every service supported by Spring Cloud GCP.
Service | Scope |
Spanner | https://www.googleapis.com/auth/spanner.admin, https://www.googleapis.com/auth/spanner.data |
Datastore | |
Pub/Sub | |
Storage (Read Only) | |
Storage (Write/Write) | |
Runtime Config | |
Trace (Append) | |
Cloud Platform | |
Vision |
The Spring Cloud GCP starter allows you to configure a custom scope list for the provided credentials.
To do that, specify a comma-delimited list of Google OAuth2 scopes in the spring.cloud.gcp.credentials.scopes property.
spring.cloud.gcp.credentials.scopes is a comma-delimited list of Google OAuth2 scopes for Google Cloud Platform services that the credentials returned by the provided CredentialsProvider support.
spring.cloud.gcp.credentials.scopes=https://www.googleapis.com/auth/pubsub,https://www.googleapis.com/auth/sqlservice.admin
You can also use DEFAULT_SCOPES placeholder as a scope to represent the starters default scopes, and append the additional scopes you need to add.
spring.cloud.gcp.credentials.scopes=DEFAULT_SCOPES,https://www.googleapis.com/auth/cloud-vision
GcpEnvironmentProvider is a functional interface, auto-configured by the Spring Cloud GCP starter, that returns a GcpEnvironment enum.
The provider can help determine programmatically in which GCP environment (App Engine Flexible, App Engine Standard, Kubernetes Engine or Compute Engine) the application is deployed.
public interface GcpEnvironmentProvider { GcpEnvironment getCurrentEnvironment(); }
This starter is available from Spring Initializr through the GCP Support entry.
Spring Cloud GCP provides an abstraction layer to publish to and subscribe from Google Cloud Pub/Sub topics and to create, list or delete Google Cloud Pub/Sub topics and subscriptions.
A Spring Boot starter is provided to auto-configure the various required Pub/Sub components.
Maven coordinates, using Spring Cloud GCP BOM:
<dependency> <groupId>org.springframework.cloud</groupId> <artifactId>spring-cloud-gcp-starter-pubsub</artifactId> </dependency>
Gradle coordinates:
dependencies {
compile group: 'org.springframework.cloud', name: 'spring-cloud-gcp-starter-pubsub'
}This starter is also available from Spring Initializr through the GCP Messaging entry.
PubSubOperations is an abstraction that allows Spring users to use Google Cloud Pub/Sub without depending on any Google Cloud Pub/Sub API semantics.
It provides the common set of operations needed to interact with Google Cloud Pub/Sub.
PubSubTemplate is the default implementation of PubSubOperations and it uses the Google Cloud Java Client for Pub/Sub to interact with Google Cloud Pub/Sub.
PubSubTemplate depends on a PublisherFactory and a SubscriberFactory.
The PublisherFactory provides a Google Cloud Java Client for Pub/Sub Publisher.
The SubscriberFactory provides the Subscriber for asynchronous message pulling, as well as a SubscriberStub for synchronous pulling.
The Spring Boot starter for GCP Pub/Sub auto-configures a PublisherFactory and SubscriberFactory with default settings and uses the GcpProjectIdProvider and CredentialsProvider auto-configured by the Spring Boot GCP starter.
The PublisherFactory implementation provided by Spring Cloud GCP Pub/Sub, DefaultPublisherFactory, caches Publisher instances by topic name, in order to optimize resource utilization.
The PubSubOperations interface is actually a combination of PubSubPublisherOperations and PubSubSubscriberOperations with the corresponding PubSubPublisherTemplate and PubSubSubscriberTemplate implementations, which can be used individually or via the composite PubSubTemplate.
The rest of the documentation refers to PubSubTemplate, but the same applies to PubSubPublisherTemplate and PubSubSubscriberTemplate, depending on whether we’re talking about publishing or subscribing.
PubSubTemplate provides asynchronous methods to publish messages to a Google Cloud Pub/Sub topic.
The publish() method takes in a topic name to post the message to, a payload of a generic type and, optionally, a map with the message headers.
Here is an example of how to publish a message to a Google Cloud Pub/Sub topic:
public void publishMessage() { this.pubSubTemplate.publish("topic", "your message payload", ImmutableMap.of("key1", "val1")); }
By default, the SimplePubSubMessageConverter is used to convert payloads of type byte[], ByteString, ByteBuffer, and String to Pub/Sub messages.
For serialization and deserialization of POJOs using Jackson JSON, configure a JacksonPubSubMessageConverter bean, and the Spring Boot starter for GCP Pub/Sub will automatically wire it into the PubSubTemplate.
// Note: The ObjectMapper is used to convert Java POJOs to and from JSON. // You will have to configure your own instance if you are unable to depend // on the ObjectMapper provided by Spring Boot starters. @Bean public JacksonPubSubMessageConverter jacksonPubSubMessageConverter(ObjectMapper objectMapper) { return new JacksonPubSubMessageConverter(objectMapper); }
Alternatively, you can set it directly by calling the setMessageConverter() method on the PubSubTemplate.
Other implementations of the PubSubMessageConverter can also be configured in the same manner.
Please refer to our Pub/Sub JSON Payload Sample App as a reference for using this functionality.
Google Cloud Pub/Sub allows many subscriptions to be associated to the same topic.
PubSubTemplate allows you to listen to subscriptions via the subscribe() method.
It relies on a SubscriberFactory object, whose only task is to generate Google Cloud Pub/Sub
Subscriber objects.
When listening to a subscription, messages will be pulled from Google Cloud Pub/Sub
asynchronously, at a certain interval.
The Spring Boot starter for Google Cloud Pub/Sub auto-configures a SubscriberFactory.
If Pub/Sub message payload conversion is desired, you can use the subscribeAndConvert() method, which will use the converter configured in the template.
Google Cloud Pub/Sub supports synchronous pulling of messages from a subscription. This is different from subscribing to a subscription, in the sense that subscribing is an asynchronous task which polls the subscription on a set interval.
The pullNext() method allows for a single message to be pulled and automatically acknowledged from a subscription.
The pull() method pulls a number of messages from a subscription, allowing for the retry settings to be configured.
Any messages received by pull() are not automatically acknowledged.
Instead, since they are of the kind AcknowledgeablePubsubMessage, you can acknowledge them by calling the ack() method, or negatively acknowledge them by calling the nack() method.
The pullAndAck() method does the same as the pull() method and, additionally, acknowledges all received messages.
The pullAndConvert() method does the same as the pull() method and, additionally, converts the Pub/Sub binary payload to an object of the desired type, using the converter configured in the template.
To acknowledge multiple messages received from pull() or pullAndConvert() at once, you can use the PubSubTemplate.ack() method.
You can also use the PubSubTemplate.nack() for negatively acknowledging messages.
Using these methods for acknowledging messages in batches is more efficient than acknowledging messages individually, but they require the collection of messages to be from the same project.
All ack(), nack(), and modifyAckDeadline() methods on messages as well as PubSubSubscriberTemplate are implemented asynchronously, returning a ListenableFuture<Void> to be able to process the asynchronous execution.
PubSubTemplate uses a special subscriber generated by its SubscriberFactory to synchronously pull messages.
PubSubAdmin is the abstraction provided by Spring Cloud GCP to manage Google Cloud Pub/Sub resources.
It allows for the creation, deletion and listing of topics and subscriptions.
PubSubAdmin depends on GcpProjectIdProvider and either a CredentialsProvider or a TopicAdminClient and a SubscriptionAdminClient.
If given a CredentialsProvider, it creates a TopicAdminClient and a SubscriptionAdminClient with the Google Cloud Java Library for Pub/Sub default settings.
The Spring Boot starter for GCP Pub/Sub auto-configures a PubSubAdmin object using the GcpProjectIdProvider and the CredentialsProvider auto-configured by the Spring Boot GCP Core starter.
PubSubAdmin implements a method to create topics:
public Topic createTopic(String topicName)Here is an example of how to create a Google Cloud Pub/Sub topic:
public void newTopic() { pubSubAdmin.createTopic("topicName"); }
PubSubAdmin implements a method to delete topics:
public void deleteTopic(String topicName)
Here is an example of how to delete a Google Cloud Pub/Sub topic:
public void deleteTopic() { pubSubAdmin.deleteTopic("topicName"); }
PubSubAdmin implements a method to list topics:
public List<Topic> listTopicsHere is an example of how to list every Google Cloud Pub/Sub topic name in a project:
public List<String> listTopics() { return pubSubAdmin .listTopics() .stream() .map(Topic::getNameAsTopicName) .map(TopicName::getTopic) .collect(Collectors.toList()); }
PubSubAdmin implements a method to create subscriptions to existing topics:
public Subscription createSubscription(String subscriptionName, String topicName, Integer ackDeadline, String pushEndpoint)Here is an example of how to create a Google Cloud Pub/Sub subscription:
public void newSubscription() { pubSubAdmin.createSubscription("subscriptionName", "topicName", 10, “http://my.endpoint/push”); }
Alternative methods with default settings are provided for ease of use.
The default value for ackDeadline is 10 seconds.
If pushEndpoint isn’t specified, the subscription uses message pulling, instead.
public Subscription createSubscription(String subscriptionName, String topicName)public Subscription createSubscription(String subscriptionName, String topicName, Integer ackDeadline)public Subscription createSubscription(String subscriptionName, String topicName, String pushEndpoint)PubSubAdmin implements a method to delete subscriptions:
public void deleteSubscription(String subscriptionName)
Here is an example of how to delete a Google Cloud Pub/Sub subscription:
public void deleteSubscription() { pubSubAdmin.deleteSubscription("subscriptionName"); }
PubSubAdmin implements a method to list subscriptions:
public List<Subscription> listSubscriptions()Here is an example of how to list every subscription name in a project:
public List<String> listSubscriptions() { return pubSubAdmin .listSubscriptions() .stream() .map(Subscription::getNameAsSubscriptionName) .map(SubscriptionName::getSubscription) .collect(Collectors.toList()); }
The Spring Boot starter for Google Cloud Pub/Sub provides the following configuration options:
Name | Description | Required | Default value |
| Enables or disables Pub/Sub auto-configuration | No |
|
| Number of threads used by | No | 4 |
| Number of threads used by | No | 4 |
| GCP project ID where the Google Cloud Pub/Sub API is hosted, if different from the one in the Spring Cloud GCP Core Module | No | |
| OAuth2 credentials for authenticating with the Google Cloud Pub/Sub API, if different from the ones in the Spring Cloud GCP Core Module | No | |
| Base64-encoded contents of OAuth2 account private key for authenticating with the Google Cloud Pub/Sub API, if different from the ones in the Spring Cloud GCP Core Module | No | |
| OAuth2 scope for Spring Cloud GCP Pub/Sub credentials | No | |
| The number of pull workers | No | The available number of processors |
| The maximum period a message ack deadline will be extended, in seconds | No | 0 |
| The endpoint for synchronous pulling messages | No | pubsub.googleapis.com:443 |
| TotalTimeout has ultimate control over how long the logic should keep trying the remote call until it gives up completely. The higher the total timeout, the more retries can be attempted. | No | 0 |
| InitialRetryDelay controls the delay before the first retry. Subsequent retries will use this value adjusted according to the RetryDelayMultiplier. | No | 0 |
| RetryDelayMultiplier controls the change in retry delay. The retry delay of the previous call is multiplied by the RetryDelayMultiplier to calculate the retry delay for the next call. | No | 1 |
| MaxRetryDelay puts a limit on the value of the retry delay, so that the RetryDelayMultiplier can’t increase the retry delay higher than this amount. | No | 0 |
| MaxAttempts defines the maximum number of attempts to perform. If this value is greater than 0, and the number of attempts reaches this limit, the logic will give up retrying even if the total retry time is still lower than TotalTimeout. | No | 0 |
| Jitter determines if the delay time should be randomized. | No | true |
| InitialRpcTimeout controls the timeout for the initial RPC. Subsequent calls will use this value adjusted according to the RpcTimeoutMultiplier. | No | 0 |
| RpcTimeoutMultiplier controls the change in RPC timeout. The timeout of the previous call is multiplied by the RpcTimeoutMultiplier to calculate the timeout for the next call. | No | 1 |
| MaxRpcTimeout puts a limit on the value of the RPC timeout, so that the RpcTimeoutMultiplier can’t increase the RPC timeout higher than this amount. | No | 0 |
| Maximum number of outstanding elements to keep in memory before enforcing flow control. | No | unlimited |
| Maximum number of outstanding bytes to keep in memory before enforcing flow control. | No | unlimited |
| The behavior when the specified limits are exceeded. | No | Block |
| The element count threshold to use for batching. | No | unset (threshold does not apply) |
| The request byte threshold to use for batching. | No | unset (threshold does not apply) |
| The delay threshold to use for batching. After this amount of time has elapsed (counting from the first element added), the elements will be wrapped up in a batch and sent. | No | unset (threshold does not apply) |
| Enables batching. | No | false |
A sample application is available.
Spring Resources are an abstraction for a number of low-level resources, such as file system files, classpath files, servlet context-relative files, etc. Spring Cloud GCP adds a new resource type: a Google Cloud Storage (GCS) object.
A Spring Boot starter is provided to auto-configure the various Storage components.
Maven coordinates, using Spring Cloud GCP BOM:
<dependency> <groupId>org.springframework.cloud</groupId> <artifactId>spring-cloud-gcp-starter-storage</artifactId> </dependency>
Gradle coordinates:
dependencies {
compile group: 'org.springframework.cloud', name: 'spring-cloud-gcp-starter-storage'
}This starter is also available from Spring Initializr through the GCP Storage entry.
The Spring Resource Abstraction for Google Cloud Storage allows GCS objects to be accessed by their GCS URL using the @Value annotation:
@Value("gs://[YOUR_GCS_BUCKET]/[GCS_FILE_NAME]") private Resource gcsResource;
…or the Spring application context
SpringApplication.run(...).getResource("gs://[YOUR_GCS_BUCKET]/[GCS_FILE_NAME]");This creates a Resource object that can be used to read the object, among other possible operations.
It is also possible to write to a Resource, although a WriteableResource is required.
@Value("gs://[YOUR_GCS_BUCKET]/[GCS_FILE_NAME]") private Resource gcsResource; ... try (OutputStream os = ((WritableResource) gcsResource).getOutputStream()) { os.write("foo".getBytes()); }
To work with the Resource as a Google Cloud Storage resource, cast it to GoogleStorageResource.
If the resource path refers to an object on Google Cloud Storage (as opposed to a bucket), then the getBlob method can be called to obtain a Blob.
This type represents a GCS file, which has associated metadata, such as content-type, that can be set.
The createSignedUrl method can also be used to obtain signed URLs for GCS objects.
However, creating signed URLs requires that the resource was created using service account credentials.
The Spring Boot Starter for Google Cloud Storage auto-configures the Storage bean required by the spring-cloud-gcp-storage module, based on the CredentialsProvider provided by the Spring Boot GCP starter.
The Spring Boot Starter for Google Cloud Storage provides the following configuration options:
Name | Description | Required | Default value |
| Enables the GCP storage APIs. | No |
|
| Creates files and buckets on Google Cloud Storage when writes are made to non-existent files | No |
|
| OAuth2 credentials for authenticating with the Google Cloud Storage API, if different from the ones in the Spring Cloud GCP Core Module | No | |
| Base64-encoded contents of OAuth2 account private key for authenticating with the Google Cloud Storage API, if different from the ones in the Spring Cloud GCP Core Module | No | |
| OAuth2 scope for Spring Cloud GCP Storage credentials | No |
A sample application and a codelab are available.
Spring Cloud GCP adds integrations with Spring JDBC so you can run your MySQL or PostgreSQL databases in Google Cloud SQL using Spring JDBC, or other libraries that depend on it like Spring Data JPA.
The Cloud SQL support is provided by Spring Cloud GCP in the form of two Spring Boot starters, one for MySQL and another one for PostgreSQL. The role of the starters is to read configuration from properties and assume default settings so that user experience connecting to MySQL and PostgreSQL is as simple as possible.
Maven coordinates, using Spring Cloud GCP BOM:
<dependency> <groupId>org.springframework.cloud</groupId> <artifactId>spring-cloud-gcp-starter-sql-mysql</artifactId> </dependency> <dependency> <groupId>org.springframework.cloud</groupId> <artifactId>spring-cloud-gcp-starter-sql-postgresql</artifactId> </dependency>
Gradle coordinates:
dependencies {
compile group: 'org.springframework.cloud', name: 'spring-cloud-gcp-starter-sql-mysql'
compile group: 'org.springframework.cloud', name: 'spring-cloud-gcp-starter-sql-postgresql'
}In order to use the Spring Boot Starters for Google Cloud SQL, the Google Cloud SQL API must be enabled in your GCP project.
To do that, go to the API library page of the Google Cloud Console, search for "Cloud SQL API", click the first result and enable the API.
| Note |
|---|---|
There are several similar "Cloud SQL" results. You must access the "Google Cloud SQL API" one and enable the API from there. |
The Spring Boot Starters for Google Cloud SQL provide an auto-configured DataSource object.
Coupled with Spring JDBC, it provides a
JdbcTemplate object bean that allows for operations such as querying and modifying a database.
public List<Map<String, Object>> listUsers() { return jdbcTemplate.queryForList("SELECT * FROM user;"); }
You can rely on
Spring Boot data source auto-configuration to configure a DataSource bean.
In other words, properties like the SQL username, spring.datasource.username, and password, spring.datasource.password can be used.
There is also some configuration specific to Google Cloud SQL:
Property name | Description | Default value | Unused if specified property(ies) |
| Enables or disables Cloud SQL auto configuration |
| |
| Name of the database to connect to. |
| |
| A string containing a Google Cloud SQL instance’s project ID, region and name, each separated by a colon.
For example, |
| |
| File system path to the Google OAuth2 credentials private key file. Used to authenticate and authorize new connections to a Google Cloud SQL instance. | Default credentials provided by the Spring GCP Boot starter | |
| Base64-encoded contents of OAuth2 account private key in JSON format. Used to authenticate and authorize new connections to a Google Cloud SQL instance. | Default credentials provided by the Spring GCP Boot starter |
Based on the previous properties, the Spring Boot starter for Google Cloud SQL creates a CloudSqlJdbcInfoProvider object which is used to obtain an instance’s JDBC URL and driver class name.
If you provide your own CloudSqlJdbcInfoProvider bean, it is used instead and the properties related to building the JDBC URL or driver class are ignored.
The DataSourceProperties object provided by Spring Boot Autoconfigure is mutated in order to use the JDBC URL and driver class names provided by CloudSqlJdbcInfoProvider, unless those values were provided in the properties.
It is in the DataSourceProperties mutation step that the credentials factory is registered in a system property to be SqlCredentialFactory.
DataSource creation is delegated to
Spring Boot.
You can select the type of connection pool (e.g., Tomcat, HikariCP, etc.) by adding their dependency to the classpath.
Using the created DataSource in conjunction with Spring JDBC provides you with a fully configured and operational JdbcTemplate object that you can use to interact with your SQL database.
You can connect to your database with as little as a database and instance names.
If you’re not able to connect to a database and see an endless loop of Connecting to Cloud SQL instance […] on IP […], it’s likely that exceptions are being thrown and logged at a level lower than your logger’s level.
This may be the case with HikariCP, if your logger is set to INFO or higher level.
To see what’s going on in the background, you should add a logback.xml file to your application resources folder, that looks like this:
<?xml version="1.0" encoding="UTF-8"?> <configuration> <include resource="org/springframework/boot/logging/logback/base.xml"/> <logger name="com.zaxxer.hikari.pool" level="DEBUG"/> </configuration>
If you see a lot of errors like this in a loop and can’t connect to your database, this is usually a symptom that something isn’t right with the permissions of your credentials or the Google Cloud SQL API is not enabled. Verify that the Google Cloud SQL API is enabled in the Cloud Console and that your service account has the necessary IAM roles.
To find out what’s causing the issue, you can enable DEBUG logging level as mentioned above.
We found this exception to be common if your Maven project’s parent is spring-boot version 1.5.x, or in any other circumstance that would cause the version of the org.postgresql:postgresql dependency to be an older one (e.g., 9.4.1212.jre7).
To fix this, re-declare the dependency in its correct version. For example, in Maven:
<dependency> <groupId>org.postgresql</groupId> <artifactId>postgresql</artifactId> <version>42.1.1</version> </dependency>
Available sample applications and codelabs:
Spring Cloud GCP provides Spring Integration adapters that allow your applications to use Enterprise Integration Patterns backed up by Google Cloud Platform services.
The channel adapters for Google Cloud Pub/Sub connect your Spring MessageChannels to Google Cloud Pub/Sub topics and subscriptions.
This enables messaging between different processes, applications or micro-services backed up by Google Cloud Pub/Sub.
The Spring Integration Channel Adapters for Google Cloud Pub/Sub are included in the spring-cloud-gcp-pubsub module.
Maven coordinates, using Spring Cloud GCP BOM:
<dependency> <groupId>org.springframework.cloud</groupId> <artifactId>spring-cloud-gcp-pubsub</artifactId> </dependency> <dependency> <groupId>org.springframework.integration</groupId> <artifactId>spring-integration-core</artifactId> </dependency>
Gradle coordinates:
dependencies {
compile group: 'org.springframework.cloud', name: 'spring-cloud-gcp-pubsub'
compile group: 'org.springframework.integration', name: 'spring-integration-core'
}PubSubInboundChannelAdapter is the inbound channel adapter for GCP Pub/Sub that listens to a GCP Pub/Sub subscription for new messages.
It converts new messages to an internal Spring Message and then sends it to the bound output channel.
Google Pub/Sub treats message payloads as byte arrays.
So, by default, the inbound channel adapter will construct the Spring Message with byte[] as the payload.
However, you can change the desired payload type by setting the payloadType property of the PubSubInboundChannelAdapter.
The PubSubInboundChannelAdapter delegates the conversion to the desired payload type to the PubSubMessageConverter configured in the PubSubTemplate.
To use the inbound channel adapter, a PubSubInboundChannelAdapter must be provided and configured on the user application side.
@Bean public MessageChannel pubsubInputChannel() { return new PublishSubscribeChannel(); } @Bean public PubSubInboundChannelAdapter messageChannelAdapter( @Qualifier("pubsubInputChannel") MessageChannel inputChannel, SubscriberFactory subscriberFactory) { PubSubInboundChannelAdapter adapter = new PubSubInboundChannelAdapter(subscriberFactory, "subscriptionName"); adapter.setOutputChannel(inputChannel); adapter.setAckMode(AckMode.MANUAL); return adapter; }
In the example, we first specify the MessageChannel where the adapter is going to write incoming messages to.
The MessageChannel implementation isn’t important here.
Depending on your use case, you might want to use a MessageChannel other than PublishSubscribeChannel.
Then, we declare a PubSubInboundChannelAdapter bean.
It requires the channel we just created and a SubscriberFactory, which creates Subscriber objects from the Google Cloud Java Client for Pub/Sub.
The Spring Boot starter for GCP Pub/Sub provides a configured SubscriberFactory.
The PubSubInboundChannelAdapter supports three acknowledgement modes, with AckMode.AUTO being the default value;
Automatic acking (AckMode.AUTO)
A message is acked with GCP Pub/Sub if the adapter sent it to the channel and no exceptions were thrown.
If a RuntimeException is thrown while the message is processed, then the message is nacked.
Automatic acking OK (AckMode.AUTO_ACK)
A message is acked with GCP Pub/Sub if the adapter sent it to the channel and no exceptions were thrown.
If a RuntimeException is thrown while the message is processed, then the message is neither acked / nor nacked.
This is useful when using the subscription’s ack deadline timeout as a retry delivery backoff mechanism.
Manually acking (AckMode.MANUAL)
The adapter attaches a BasicAcknowledgeablePubsubMessage object to the Message headers.
Users can extract the BasicAcknowledgeablePubsubMessage using the GcpPubSubHeaders.ORIGINAL_MESSAGE key and use it to (n)ack a message.
@Bean @ServiceActivator(inputChannel = "pubsubInputChannel") public MessageHandler messageReceiver() { return message -> { LOGGER.info("Message arrived! Payload: " + new String((byte[]) message.getPayload())); BasicAcknowledgeablePubsubMessage originalMessage = message.getHeaders().get(GcpPubSubHeaders.ORIGINAL_MESSAGE, BasicAcknowledgeablePubsubMessage.class); originalMessage.ack(); }; }
PubSubMessageHandler is the outbound channel adapter for GCP Pub/Sub that listens for new messages on a Spring MessageChannel.
It uses PubSubTemplate to post them to a GCP Pub/Sub topic.
To construct a Pub/Sub representation of the message, the outbound channel adapter needs to convert the Spring Message payload to a byte array representation expected by Pub/Sub.
It delegates this conversion to the PubSubTemplate.
To customize the conversion, you can specify a PubSubMessageConverter in the PubSubTemplate that should convert the Object payload and headers of the Spring Message to a PubsubMessage.
To use the outbound channel adapter, a PubSubMessageHandler bean must be provided and configured on the user application side.
@Bean @ServiceActivator(inputChannel = "pubsubOutputChannel") public MessageHandler messageSender(PubSubTemplate pubsubTemplate) { return new PubSubMessageHandler(pubsubTemplate, "topicName"); }
The provided PubSubTemplate contains all the necessary configuration to publish messages to a GCP Pub/Sub topic.
PubSubMessageHandler publishes messages asynchronously by default.
A publish timeout can be configured for synchronous publishing.
If none is provided, the adapter waits indefinitely for a response.
It is possible to set user-defined callbacks for the publish() call in PubSubMessageHandler through the setPublishFutureCallback() method.
These are useful to process the message ID, in case of success, or the error if any was thrown.
To override the default destination you can use the GcpPubSubHeaders.DESTINATION header.
@Autowired private MessageChannel pubsubOutputChannel; public void handleMessage(Message<?> msg) throws MessagingException { final Message<?> message = MessageBuilder .withPayload(msg.getPayload()) .setHeader(GcpPubSubHeaders.TOPIC, "customTopic").build(); pubsubOutputChannel.send(message); }
It is also possible to set an SpEL expression for the topic with the setTopicExpression() or setTopicExpressionString() methods.
These channel adapters contain header mappers that allow you to map, or filter out, headers from Spring to Google Cloud Pub/Sub messages, and vice-versa.
By default, the inbound channel adapter maps every header on the Google Cloud Pub/Sub messages to the Spring messages produced by the adapter.
The outbound channel adapter maps every header from Spring messages into Google Cloud Pub/Sub ones, except the ones added by Spring, like headers with key "id", "timestamp" and "gcp_pubsub_acknowledgement".
In the process, the outbound mapper also converts the value of the headers into string.
Each adapter declares a setHeaderMapper() method to let you further customize which headers you want to map from Spring to Google Cloud Pub/Sub, and vice-versa.
For example, to filter out headers "foo", "bar" and all headers starting with the prefix "prefix_", you can use setHeaderMapper() along with the PubSubHeaderMapper implementation provided by this module.
PubSubMessageHandler adapter = ... ... PubSubHeaderMapper headerMapper = new PubSubHeaderMapper(); headerMapper.setOutboundHeaderPatterns("!foo", "!bar", "!prefix_*", "*"); adapter.setHeaderMapper(headerMapper);
| Note |
|---|---|
The order in which the patterns are declared in |
In the previous example, the "*" pattern means every header is mapped.
However, because it comes last in the list, the previous patterns take precedence.
Available examples:
The channel adapters for Google Cloud Storage allow you to read and write files to Google Cloud Storage through MessageChannels.
Spring Cloud GCP provides two inbound adapters, GcsInboundFileSynchronizingMessageSource and GcsStreamingMessageSource, and one outbound adapter, GcsMessageHandler.
The Spring Integration Channel Adapters for Google Cloud Storage are included in the spring-cloud-gcp-storage module.
To use the Storage portion of Spring Integration for Spring Cloud GCP, you must also provide the spring-integration-file dependency, since it isn’t pulled transitively.
Maven coordinates, using Spring Cloud GCP BOM:
<dependency> <groupId>org.springframework.cloud</groupId> <artifactId>spring-cloud-gcp-storage</artifactId> </dependency> <dependency> <groupId>org.springframework.integration</groupId> <artifactId>spring-integration-file</artifactId> </dependency>
Gradle coordinates:
dependencies {
compile group: 'org.springframework.cloud', name: 'spring-cloud-gcp-starter-storage'
compile group: 'org.springframework.integration', name: 'spring-integration-file'
}The Google Cloud Storage inbound channel adapter polls a Google Cloud Storage bucket for new files and sends each of them in a Message payload to the MessageChannel specified in the @InboundChannelAdapter annotation.
The files are temporarily stored in a folder in the local file system.
Here is an example of how to configure a Google Cloud Storage inbound channel adapter.
@Bean @InboundChannelAdapter(channel = "new-file-channel", poller = @Poller(fixedDelay = "5000")) public MessageSource<File> synchronizerAdapter(Storage gcs) { GcsInboundFileSynchronizer synchronizer = new GcsInboundFileSynchronizer(gcs); synchronizer.setRemoteDirectory("your-gcs-bucket"); GcsInboundFileSynchronizingMessageSource synchAdapter = new GcsInboundFileSynchronizingMessageSource(synchronizer); synchAdapter.setLocalDirectory(new File("local-directory")); return synchAdapter; }
The inbound streaming channel adapter is similar to the normal inbound channel adapter, except it does not require files to be stored in the file system.
Here is an example of how to configure a Google Cloud Storage inbound streaming channel adapter.
@Bean @InboundChannelAdapter(channel = "streaming-channel", poller = @Poller(fixedDelay = "5000")) public MessageSource<InputStream> streamingAdapter(Storage gcs) { GcsStreamingMessageSource adapter = new GcsStreamingMessageSource(new GcsRemoteFileTemplate(new GcsSessionFactory(gcs))); adapter.setRemoteDirectory("your-gcs-bucket"); return adapter; }
The outbound channel adapter allows files to be written to Google Cloud Storage.
When it receives a Message containing a payload of type File, it writes that file to the Google Cloud Storage bucket specified in the adapter.
Here is an example of how to configure a Google Cloud Storage outbound channel adapter.
@Bean @ServiceActivator(inputChannel = "writeFiles") public MessageHandler outboundChannelAdapter(Storage gcs) { GcsMessageHandler outboundChannelAdapter = new GcsMessageHandler(new GcsSessionFactory(gcs)); outboundChannelAdapter.setRemoteDirectoryExpression(new ValueExpression<>("your-gcs-bucket")); return outboundChannelAdapter; }
A sample application is available.
Spring Cloud GCP provides a Spring Cloud Stream binder to Google Cloud Pub/Sub.
The provided binder relies on the Spring Integration Channel Adapters for Google Cloud Pub/Sub.
Maven coordinates, using Spring Cloud GCP BOM:
<dependency> <groupId>org.springframework.cloud</groupId> <artifactId>spring-cloud-gcp-pubsub-stream-binder</artifactId> </dependency>
Gradle coordinates:
dependencies {
compile group: 'org.springframework.cloud', name: 'spring-cloud-gcp-pubsub-stream-binder'
}This binder binds producers to Google Cloud Pub/Sub topics and consumers to subscriptions.
| Note |
|---|---|
Partitioning is currently not supported by this binder. |
You can configure the Spring Cloud Stream Binder for Google Cloud Pub/Sub to automatically generate the underlying resources, like the Google Cloud Pub/Sub topics and subscriptions for producers and consumers.
For that, you can use the spring.cloud.stream.gcp.pubsub.bindings.<channelName>.<consumer|producer>.auto-create-resources property, which is turned ON by default.
Starting with version 1.1, these and other binder properties can be configured globally for all the bindings, e.g. spring.cloud.stream.gcp.pubsub.default.consumer.auto-create-resources.
If you are using Pub/Sub auto-configuration from the Spring Cloud GCP Pub/Sub Starter, you should refer to the configuration section for other Pub/Sub parameters.
| Note |
|---|---|
To use this binder with a running emulator, configure its host and port via |
If automatic resource creation is turned ON and the topic corresponding to the destination name does not exist, it will be created.
For example, for the following configuration, a topic called myEvents would be created.
application.properties.
spring.cloud.stream.bindings.events.destination=myEvents spring.cloud.stream.gcp.pubsub.bindings.events.producer.auto-create-resources=true
If automatic resource creation is turned ON and the subscription and/or the topic do not exist for a consumer, a subscription and potentially a topic will be created. The topic name will be the same as the destination name, and the subscription name will be the destination name followed by the consumer group name.
Regardless of the auto-create-resources setting, if the consumer group is not specified, an anonymous one will be created with the name anonymous.<destinationName>.<randomUUID>.
Then when the binder shuts down, all Pub/Sub subscriptions created for anonymous consumer groups will be automatically cleaned up.
For example, for the following configuration, a topic named myEvents and a subscription called myEvents.counsumerGroup1 would be created.
If the consumer group is not specified, a subscription called anonymous.myEvents.a6d83782-c5a3-4861-ac38-e6e2af15a7be would be created and later cleaned up.
| Important |
|---|---|
If you are manually creating Pub/Sub subscriptions for consumers, make sure that they follow the naming convention of |
application.properties.
spring.cloud.stream.bindings.events.destination=myEvents spring.cloud.stream.gcp.pubsub.bindings.events.consumer.auto-create-resources=true # specify consumer group, and avoid anonymous consumer group generation spring.cloud.stream.bindings.events.group=consumerGroup1
A sample application is available.
Spring Cloud Sleuth is an instrumentation framework for Spring Boot applications. It captures trace information and can forward traces to services like Zipkin for storage and analysis.
Google Cloud Platform provides its own managed distributed tracing service called Stackdriver Trace. Instead of running and maintaining your own Zipkin instance and storage, you can use Stackdriver Trace to store traces, view trace details, generate latency distributions graphs, and generate performance regression reports.
This Spring Cloud GCP starter can forward Spring Cloud Sleuth traces to Stackdriver Trace without an intermediary Zipkin server.
Maven coordinates, using Spring Cloud GCP BOM:
<dependency> <groupId>org.springframework.cloud</groupId> <artifactId>spring-cloud-gcp-starter-trace</artifactId> </dependency>
Gradle coordinates:
dependencies {
compile group: 'org.springframework.cloud', name: 'spring-cloud-gcp-starter-trace'
}You must enable Stackdriver Trace API from the Google Cloud Console in order to capture traces. Navigate to the Stackdriver Trace API for your project and make sure it’s enabled.
| Note |
|---|---|
If you are already using a Zipkin server capturing trace information from multiple platform/frameworks, you can also use a Stackdriver Zipkin proxy to forward those traces to Stackdriver Trace without modifying existing applications. |
Spring Cloud Sleuth uses the Brave tracer to generate traces.
This integration enables Brave to use the StackdriverTracePropagation propagation.
A propagation is responsible for extracting trace context from an entity (e.g., an HTTP servlet request) and injecting trace context into an entity.
A canonical example of the propagation usage is a web server that receives an HTTP request, which triggers other HTTP requests from the server before returning an HTTP response to the original caller.
In the case of StackdriverTracePropagation, first it looks for trace context in the x-cloud-trace-context key (e.g., an HTTP request header).
The value of the x-cloud-trace-context key can be formatted in three different ways:
x-cloud-trace-context: TRACE_IDx-cloud-trace-context: TRACE_ID/SPAN_IDx-cloud-trace-context: TRACE_ID/SPAN_ID;o=TRACE_TRUE
TRACE_ID is a 32-character hexadecimal value that encodes a 128-bit number.
SPAN_ID is an unsigned long.
Since Stackdriver Trace doesn’t support span joins, a new span ID is always generated, regardless of the one specified in x-cloud-trace-context.
TRACE_TRUE can either be 0 if the entity should be untraced, or 1 if it should be traced.
This field forces the decision of whether or not to trace the request; if omitted then the decision is deferred to the sampler.
If a x-cloud-trace-context key isn’t found, StackdriverTracePropagation falls back to tracing with the X-B3 headers.
Spring Boot Starter for Stackdriver Trace uses Spring Cloud Sleuth and auto-configures a StackdriverSender that sends the Sleuth’s trace information to Stackdriver Trace.
All configurations are optional:
Name | Description | Required | Default value |
| Auto-configure Spring Cloud Sleuth to send traces to Stackdriver Trace. | No |
|
| Overrides the project ID from the Spring Cloud GCP Module | No | |
| Overrides the credentials location from the Spring Cloud GCP Module | No | |
| Overrides the credentials encoded key from the Spring Cloud GCP Module | No | |
| Overrides the credentials scopes from the Spring Cloud GCP Module | No | |
| Number of threads used by the Trace executor | No | 4 |
| HTTP/2 authority the channel claims to be connecting to. | No | |
| Name of the compression to use in Trace calls | No | |
| Call deadline in milliseconds | No | |
| Maximum size for inbound messages | No | |
| Maximum size for outbound messages | No | |
| Waits for the channel to be ready in case of a transient failure | No |
|
You can use core Spring Cloud Sleuth properties to control Sleuth’s sampling rate, etc. Read Sleuth documentation for more information on Sleuth configurations.
For example, when you are testing to see the traces are going through, you can set the sampling rate to 100%.
spring.sleuth.sampler.probability=1 # Send 100% of the request traces to Stackdriver. spring.sleuth.web.skipPattern=(^cleanup.*|.+favicon.*) # Ignore some URL paths.
Spring Cloud GCP Trace does override some Sleuth configurations:
- Always uses 128-bit Trace IDs. This is required by Stackdriver Trace.
- Does not use Span joins. Span joins will share the span ID between the client and server Spans. Stackdriver requires that every Span ID within a Trace to be unique, so Span joins are not supported.
- Uses
StackdriverHttpClientParserandStackdriverHttpServerParserby default to populate Stackdriver related fields.
Integration with Stackdriver Logging is available through the Stackdriver Logging Support.
If the Trace integration is used together with the Logging one, the request logs will be associated to the corresponding traces.
The trace logs can be viewed by going to the Google Cloud Console Trace List, selecting a trace and pressing the Logs → View link in the Details section.
A sample application and a codelab are available.
Maven coordinates, using Spring Cloud GCP BOM:
<dependency> <groupId>org.springframework.cloud</groupId> <artifactId>spring-cloud-gcp-starter-logging</artifactId> </dependency>
Gradle coordinates:
dependencies {
compile group: 'org.springframework.cloud', name: 'spring-cloud-gcp-starter-logging'
}Stackdriver Logging is the managed logging service provided by Google Cloud Platform.
This module provides support for associating a web request trace ID with the corresponding log entries.
It does so by retrieving the X-B3-TraceId value from the Mapped Diagnostic Context (MDC), which is set by Spring Cloud Sleuth.
If Spring Cloud Sleuth isn’t used, the configured TraceIdExtractor extracts the desired header value and sets it as the log entry’s trace ID.
This allows grouping of log messages by request, for example, in the Google Cloud Console Logs viewer.
| Note |
|---|---|
Due to the way logging is set up, the GCP project ID and credentials defined in |
For use in Web MVC-based applications, TraceIdLoggingWebMvcInterceptor is provided that extracts the request trace ID from an HTTP request using a TraceIdExtractor and stores it in a thread-local, which can then be used in a logging appender to add the trace ID metadata to log messages.
| Warning |
|---|---|
If Spring Cloud GCP Trace is enabled, the logging module disables itself and delegates log correlation to Spring Cloud Sleuth. |
LoggingWebMvcConfigurer configuration class is also provided to help register the TraceIdLoggingWebMvcInterceptor in Spring MVC applications.
Applications hosted on the Google Cloud Platform include trace IDs under the x-cloud-trace-context header, which will be included in log entries.
However, if Sleuth is used the trace ID will be picked up from the MDC.
Currently, only Logback is supported and there are 2 possibilities to log to Stackdriver via this library with Logback: via direct API calls and through JSON-formatted console logs.
A Stackdriver appender is available using org/springframework/cloud/gcp/autoconfigure/logging/logback-appender.xml.
This appender builds a Stackdriver Logging log entry from a JUL or Logback log entry, adds a trace ID to it and sends it to Stackdriver Logging.
STACKDRIVER_LOG_NAME and STACKDRIVER_LOG_FLUSH_LEVEL environment variables can be used to customize the STACKDRIVER appender.
Your configuration may then look like this:
<configuration> <include resource="org/springframework/cloud/gcp/autoconfigure/logging/logback-appender.xml" /> <root level="INFO"> <appender-ref ref="STACKDRIVER" /> </root> </configuration>
If you want to have more control over the log output, you can further configure the appender. The following properties are available:
| Property | Default Value | Description |
|---|---|---|
|
| The Stackdriver Log name.
This can also be set via the |
|
| If a log entry with this level is encountered, trigger a flush of locally buffered log to Stackdriver Logging.
This can also be set via the |
For Logback, a org/springframework/cloud/gcp/autoconfigure/logging/logback-json-appender.xml file is made available for import to make it easier to configure the JSON Logback appender.
Your configuration may then look something like this:
<configuration> <include resource="org/springframework/cloud/gcp/autoconfigure/logging/logback-json-appender.xml" /> <root level="INFO"> <appender-ref ref="CONSOLE_JSON" /> </root> </configuration>
If your application is running on Google Kubernetes Engine, Google Compute Engine or Google App Engine Flexible, your console logging is automatically saved to Google Stackdriver Logging.
Therefore, you can just include org/springframework/cloud/gcp/autoconfigure/logging/logback-json-appender.xml in your logging configuration, which logs JSON entries to the console.
The trace id will be set correctly.
If you want to have more control over the log output, you can further configure the appender. The following properties are available:
| Property | Default Value | Description |
|---|---|---|
| If not set, default value is determined in the following order:
| This is used to generate fully qualified Stackdriver Trace ID format: This format is required to correlate trace between Stackdriver Trace and Stackdriver Logging. If |
|
| Should the |
|
| Should the |
|
| Should the severity be included |
|
| Should the thread name be included |
|
| Should all MDC properties be included.
The MDC properties |
|
| Should the name of the logger be included |
|
| Should the formatted log message be included. |
|
| Should the stacktrace be appended to the formatted log message.
This setting is only evaluated if |
|
| Should the logging context be included |
|
| Should the log message with blank placeholders be included |
|
| Should the stacktrace be included as a own field |
This is an example of such an Logback configuration:
<configuration > <property name="projectId" value="${projectId:-${GOOGLE_CLOUD_PROJECT}}"/> <appender name="CONSOLE_JSON" class="ch.qos.logback.core.ConsoleAppender"> <encoder class="ch.qos.logback.core.encoder.LayoutWrappingEncoder"> <layout class="org.springframework.cloud.gcp.logging.StackdriverJsonLayout"> <projectId>${projectId}</projectId> <!--<includeTraceId>true</includeTraceId>--> <!--<includeSpanId>true</includeSpanId>--> <!--<includeLevel>true</includeLevel>--> <!--<includeThreadName>true</includeThreadName>--> <!--<includeMDC>true</includeMDC>--> <!--<includeLoggerName>true</includeLoggerName>--> <!--<includeFormattedMessage>true</includeFormattedMessage>--> <!--<includeExceptionInMessage>true</includeExceptionInMessage>--> <!--<includeContextName>true</includeContextName>--> <!--<includeMessage>false</includeMessage>--> <!--<includeException>false</includeException>--> </layout> </encoder> </appender> </configuration>
A Sample Spring Boot Application is provided to show how to use the Cloud logging starter.
Spring Cloud GCP makes it possible to use the Google Runtime Configuration API as a Spring Cloud Config server to remotely store your application configuration data.
The Spring Cloud GCP Config support is provided via its own Spring Boot starter. It enables the use of the Google Runtime Configuration API as a source for Spring Boot configuration properties.
| Note |
|---|---|
The Google Cloud Runtime Configuration service is in beta status. |
Maven coordinates, using Spring Cloud GCP BOM:
<dependency> <groupId>org.springframework.cloud</groupId> <artifactId>spring-cloud-gcp-starter-config</artifactId> </dependency>
Gradle coordinates:
dependencies {
compile group: 'org.springframework.cloud', name: 'spring-cloud-gcp-starter-config'
}The following parameters are configurable in Spring Cloud GCP Config:
Name | Description | Required | Default value |
| Enables the Config client | No |
|
| Name of your application | No | Value of the |
| Active profile | No | Value of the |
| Timeout in milliseconds for connecting to the Google Runtime Configuration API | No |
|
| GCP project ID where the Google Runtime Configuration API is hosted | No | |
| OAuth2 credentials for authenticating with the Google Runtime Configuration API | No | |
| Base64-encoded OAuth2 credentials for authenticating with the Google Runtime Configuration API | No | |
| OAuth2 scope for Spring Cloud GCP Config credentials | No |
| Note |
|---|---|
These properties should be specified in a |
| Note |
|---|---|
Core properties, as described in Spring Cloud GCP Core Module, do not apply to Spring Cloud GCP Config. |
Create a configuration in the Google Runtime Configuration API that is called
${spring.application.name}_${spring.profiles.active}. In other words, ifspring.application.nameismyappandspring.profiles.activeisprod, the configuration should be calledmyapp_prod.In order to do that, you should have the Google Cloud SDK installed, own a Google Cloud Project and run the following command:
gcloud init # if this is your first Google Cloud SDK run. gcloud beta runtime-config configs create myapp_prod gcloud beta runtime-config configs variables set myapp.queue-size 25 --config-name myapp_prod
Configure your
bootstrap.propertiesfile with your application’s configuration data:spring.application.name=myapp spring.profiles.active=prod
Add the
@ConfigurationPropertiesannotation to a Spring-managed bean:@Component @ConfigurationProperties("myapp") public class SampleConfig { private int queueSize; public int getQueueSize() { return this.queueSize; } public void setQueueSize(int queueSize) { this.queueSize = queueSize; } }
When your Spring application starts, the queueSize field value will be set to 25 for the above SampleConfig bean.
Spring Cloud provides support to have configuration parameters be reloadable with the POST request to /actuator/refresh endpoint.
- Add the Spring Boot Actuator dependency:
Maven coordinates:
<dependency>
<groupId>org.springframework.boot</groupId>
<artifactId>spring-boot-starter-actuator</artifactId>
</dependency>Gradle coordinates:
dependencies {
compile group: 'org.springframework.boot', name: 'spring-boot-starter-actuator'
}- Add
@RefreshScopeto your Spring configuration class to have parameters be reloadable at runtime. - Add
management.endpoints.web.exposure.include=refreshto yourapplication.propertiesto allow unrestricted access to/actuator/refresh. Update a property with
gcloud:$ gcloud beta runtime-config configs variables set \ myapp.queue_size 200 \ --config-name myapp_prod
Send a POST request to the refresh endpoint:
$ curl -XPOST http://myapp.host.com/actuator/refresh
A sample application and a codelab are available.
Spring Data is an abstraction for storing and retrieving POJOs in numerous storage technologies. Spring Cloud GCP adds Spring Data support for Google Cloud Spanner.
Maven coordinates for this module only, using Spring Cloud GCP BOM:
<dependency> <groupId>org.springframework.cloud</groupId> <artifactId>spring-cloud-gcp-data-spanner</artifactId> </dependency>
Gradle coordinates:
dependencies {
compile group: 'org.springframework.cloud', name: 'spring-cloud-gcp-data-spanner'
}We provide a Spring Boot Starter for Spring Data Spanner, with which you can leverage our recommended auto-configuration setup. To use the starter, see the coordinates see below.
Maven:
<dependency> <groupId>org.springframework.cloud</groupId> <artifactId>spring-cloud-gcp-starter-data-spanner</artifactId> </dependency>
Gradle:
dependencies {
compile group: 'org.springframework.cloud', name: 'spring-cloud-gcp-starter-data-spanner'
}This setup takes care of bringing in the latest compatible version of Cloud Java Cloud Spanner libraries as well.
To setup Spring Data Cloud Spanner, you have to configure the following:
- Setup the connection details to Google Cloud Spanner.
- Enable Spring Data Repositories (optional).
You can the use Spring Boot Starter for Spring Data Spanner to autoconfigure Google Cloud Spanner in your Spring application. It contains all the necessary setup that makes it easy to authenticate with your Google Cloud project. The following configuration options are available:
Name | Description | Required | Default value |
| Cloud Spanner instance to use | Yes | |
| Cloud Spanner database to use | Yes | |
| GCP project ID where the Google Cloud Spanner API is hosted, if different from the one in the Spring Cloud GCP Core Module | No | |
| OAuth2 credentials for authenticating with the Google Cloud Spanner API, if different from the ones in the Spring Cloud GCP Core Module | No | |
| Base64-encoded OAuth2 credentials for authenticating with the Google Cloud Spanner API, if different from the ones in the Spring Cloud GCP Core Module | No | |
| OAuth2 scope for Spring Cloud GCP Cloud Spanner credentials | No | |
| If | No |
|
| Number of gRPC channels used to connect to Cloud Spanner | No | 4 - Determined by Cloud Spanner client library |
| Number of chunks prefetched by Cloud Spanner for read and query | No | 4 - Determined by Cloud Spanner client library |
| Minimum number of sessions maintained in the session pool | No | 0 - Determined by Cloud Spanner client library |
| Maximum number of sessions session pool can have | No | 400 - Determined by Cloud Spanner client library |
| Maximum number of idle sessions session pool will maintain | No | 0 - Determined by Cloud Spanner client library |
| Fraction of sessions to be kept prepared for write transactions | No | 0.2 - Determined by Cloud Spanner client library |
| How long to keep idle sessions alive | No | 30 - Determined by Cloud Spanner client library |
Spring Data Repositories can be configured via the @EnableSpannerRepositories annotation on your main @Configuration class.
With our Spring Boot Starter for Spring Data Cloud Spanner, @EnableSpannerRepositories is automatically added.
It is not required to add it to any other class, unless there is a need to override finer grain configuration parameters provided by @EnableSpannerRepositories.
Our Spring Boot autoconfiguration creates the following beans available in the Spring application context:
- an instance of
SpannerTemplate - an instance of
SpannerDatabaseAdminTemplatefor generating table schemas from object hierarchies and creating and deleting tables and databases - an instance of all user-defined repositories extending
SpannerRepository,CrudRepository,PagingAndSortingRepository, when repositories are enabled - an instance of
DatabaseClientfrom the Google Cloud Java Client for Spanner, for convenience and lower level API access
Spring Data Cloud Spanner allows you to map domain POJOs to Cloud Spanner tables via annotations:
@Table(name = "traders") public class Trader { @PrimaryKey @Column(name = "trader_id") String traderId; String firstName; String lastName; @NotMapped Double temporaryNumber; }
Spring Data Cloud Spanner will ignore any property annotated with @NotMapped.
These properties will not be written to or read from Spanner.
Simple constructors are supported on POJOs. The constructor arguments can be a subset of the persistent properties. Every constructor argument needs to have the same name and type as a persistent property on the entity and the constructor should set the property from the given argument. Arguments that are not directly set to properties are not supported.
@Table(name = "traders") public class Trader { @PrimaryKey @Column(name = "trader_id") String traderId; String firstName; String lastName; @NotMapped Double temporaryNumber; public Trader(String traderId, String firstName) { this.traderId = traderId; this.firstName = firstName; } }
The @Table annotation can provide the name of the Cloud Spanner table that stores instances of the annotated class, one per row.
This annotation is optional, and if not given, the name of the table is inferred from the class name with the first character uncapitalized.
In some cases, you might want the @Table table name to be determined dynamically.
To do that, you can use Spring Expression Language.
For example:
@Table(name = "trades_#{tableNameSuffix}") public class Trade { // ... }
The table name will be resolved only if the tableNameSuffix value/bean in the Spring application context is defined.
For example, if tableNameSuffix has the value "123", the table name will resolve to trades_123.
For a simple table, you may only have a primary key consisting of a single column.
Even in that case, the @PrimaryKey annotation is required.
@PrimaryKey identifies the one or more ID properties corresponding to the primary key.
Spanner has first class support for composite primary keys of multiple columns.
You have to annotate all of your POJO’s fields that the primary key consists of with @PrimaryKey as below:
@Table(name = "trades") public class Trade { @PrimaryKey(keyOrder = 2) @Column(name = "trade_id") private String tradeId; @PrimaryKey(keyOrder = 1) @Column(name = "trader_id") private String traderId; private String action; private Double price; private Double shares; private String symbol; }
The keyOrder parameter of @PrimaryKey identifies the properties corresponding to the primary key columns in order, starting with 1 and increasing consecutively.
Order is important and must reflect the order defined in the Cloud Spanner schema.
In our example the DDL to create the table and its primary key is as follows:
CREATE TABLE trades ( trader_id STRING(MAX), trade_id STRING(MAX), action STRING(15), symbol STRING(10), price FLOAT64, shares FLOAT64 ) PRIMARY KEY (trader_id, trade_id)
Spanner does not have automatic ID generation. For most use-cases, sequential IDs should be used with caution to avoid creating data hotspots in the system. Read Spanner Primary Keys documentation for a better understanding of primary keys and recommended practices.
All accessible properties on POJOs are automatically recognized as a Cloud Spanner column.
Column naming is generated by the PropertyNameFieldNamingStrategy by default defined on the SpannerMappingContext bean.
The @Column annotation optionally provides a different column name than that of the property and some other settings:
nameis the optional name of the columnspannerTypeMaxLengthspecifies forSTRINGandBYTEScolumns the maximum length. This setting is only used when generating DDL schema statements based on domain types.nullablespecifies if the column is created asNOT NULL. This setting is only used when generating DDL schema statements based on domain types.spannerTypeis the Cloud Spanner column type you can optionally specify. If this is not specified then a compatible column type is inferred from the Java property type.spannerCommitTimestampis a boolean specifying if this property corresponds to an auto-populated commit timestamp column. Any value set in this property will be ignored when writing to Cloud Spanner.
If an object of type B is embedded as a property of A, then the columns of B will be saved in the same Cloud Spanner table as those of A.
If B has primary key columns, those columns will be included in the primary key of A. B can also have embedded properties.
Embedding allows reuse of columns between multiple entities, and can be useful for implementing parent-child situations, because Cloud Spanner requires child tables to include the key columns of their parents.
For example:
class X { @PrimaryKey String grandParentId; long age; } class A { @PrimaryKey @Embedded X grandParent; @PrimaryKey(keyOrder = 2) String parentId; String value; } @Table(name = "items") class B { @PrimaryKey @Embedded A parent; @PrimaryKey(keyOrder = 2) String id; @Column(name = "child_value") String value; }
Entities of B can be stored in a table defined as:
CREATE TABLE items ( grandParentId STRING(MAX), parentId STRING(MAX), id STRING(MAX), value STRING(MAX), child_value STRING(MAX), age INT64 ) PRIMARY KEY (grandParentId, parentId, id)
Note that embedded properties' column names must all be unique.
Spring Data Cloud Spanner supports parent-child relationships using the Cloud Spanner parent-child interleaved table mechanism. Cloud Spanner interleaved tables enforce the one-to-many relationship and provide efficient queries and operations on entities of a single domain parent entity. These relationships can be up to 7 levels deep. Cloud Spanner also provides automatic cascading delete or enforces the deletion of child entities before parents.
While one-to-one and many-to-many relationships can be implemented in Cloud Spanner and Spring Data Cloud Spanner using constructs of interleaved parent-child tables, only the parent-child relationship is natively supported. Cloud Spanner does not support the foreign key constraint, though the parent-child key constraint enforces a similar requirement when used with interleaved tables.
For example, the following Java entities:
@Table(name = "Singers") class Singer { @PrimaryKey long SingerId; String FirstName; String LastName; byte[] SingerInfo; @Interleaved List<Album> albums; } @Table(name = "Albums") class Album { @PrimaryKey long SingerId; @PrimaryKey(keyOrder = 2) long AlbumId; String AlbumTitle; }
These classes can correspond to an existing pair of interleaved tables.
The @Interleaved annotation may be applied to Collection properties and the inner type is resolved as the child entity type.
The schema needed to create them can also be generated using the SpannerSchemaUtils and executed using the SpannerDatabaseAdminTemplate:
@Autowired SpannerSchemaUtils schemaUtils; @Autowired SpannerDatabaseAdminTemplate databaseAdmin; ... // Get the create statmenets for all tables in the table structure rooted at Singer List<String> createStrings = this.schemaUtils.getCreateTableDdlStringsForInterleavedHierarchy(Singer.class); // Create the tables and also create the database if necessary this.databaseAdmin.executeDdlStrings(createStrings, true);
The createStrings list contains table schema statements using column names and types compatible with the provided Java type and any resolved child relationship types contained within based on the configured custom converters.
CREATE TABLE Singers ( SingerId INT64 NOT NULL, FirstName STRING(1024), LastName STRING(1024), SingerInfo BYTES(MAX), ) PRIMARY KEY (SingerId); CREATE TABLE Albums ( SingerId INT64 NOT NULL, AlbumId INT64 NOT NULL, AlbumTitle STRING(MAX), ) PRIMARY KEY (SingerId, AlbumId), INTERLEAVE IN PARENT Singers ON DELETE CASCADE;
The ON DELETE CASCADE clause indicates that Cloud Spanner will delete all Albums of a singer if the Singer is deleted.
The alternative is ON DELETE NO ACTION, where a Singer cannot be deleted until all of its Albums have already been deleted.
When using SpannerSchemaUtils to generate the schema strings, the spring.cloud.gcp.spanner.createInterleavedTableDdlOnDeleteCascade boolean setting determines if these schema are generated as ON DELETE CASCADE for true and ON DELETE NO ACTION for false.
Cloud Spanner restricts these relationships to 7 child layers. A table may have multiple child tables.
On updating or inserting an object to Cloud Spanner, all of its referenced children objects are also updated or inserted in the same request, respectively. On read, all of the interleaved child rows are also all read.
Spring Data Cloud Spanner natively supports the following types for regular fields but also utilizes custom converters (detailed in following sections) and dozens of pre-defined Spring Data custom converters to handle other common Java types.
Natively supported types:
com.google.cloud.ByteArraycom.google.cloud.Datecom.google.cloud.Timestampjava.lang.Boolean,booleanjava.lang.Double,doublejava.lang.Long,longjava.lang.Integer,intjava.lang.Stringdouble[]long[]boolean[]java.util.Datejava.util.Instantjava.sql.Date
Spanner supports ARRAY types for columns.
ARRAY columns are mapped to List fields in POJOS.
Example:
List<Double> curve;
The types inside the lists can be any singular property type.
Cloud Spanner queries can construct STRUCT values that appear as columns in the result.
Cloud Spanner requires STRUCT values appear in ARRAYs at the root level: SELECT ARRAY(SELECT STRUCT(1 as val1, 2 as val2)) as pair FROM Users.
Spring Data Cloud Spanner will attempt to read the column STRUCT values into a property that is an Iterable of an entity type compatible with the schema of the column STRUCT value.
For the previous array-select example, the following property can be mapped with the constructed ARRAY<STRUCT> column: List<TwoInts> pair; where the TwoInts type is defined:
class TwoInts { int val1; int val2; }
Custom converters can be used to extend the type support for user defined types.
- Converters need to implement the
org.springframework.core.convert.converter.Converterinterface in both directions. The user defined type needs to be mapped to one of the basic types supported by Spanner:
com.google.cloud.ByteArraycom.google.cloud.Datecom.google.cloud.Timestampjava.lang.Boolean,booleanjava.lang.Double,doublejava.lang.Long,longjava.lang.Stringdouble[]long[]boolean[]enumtypes
- An instance of both Converters needs to be passed to a
ConverterAwareMappingSpannerEntityProcessor, which then has to be made available as a@BeanforSpannerEntityProcessor.
For example:
We would like to have a field of type Person on our Trade POJO:
@Table(name = "trades") public class Trade { //... Person person; //... }
Where Person is a simple class:
public class Person { public String firstName; public String lastName; }
We have to define the two converters:
public class PersonWriteConverter implements Converter<Person, String> { @Override public String convert(Person person) { return person.firstName + " " + person.lastName; } } public class PersonReadConverter implements Converter<String, Person> { @Override public Person convert(String s) { Person person = new Person(); person.firstName = s.split(" ")[0]; person.lastName = s.split(" ")[1]; return person; } }
That will be configured in our @Configuration file:
@Configuration public class ConverterConfiguration { @Bean public SpannerEntityProcessor spannerEntityProcessor(SpannerMappingContext spannerMappingContext) { return new ConverterAwareMappingSpannerEntityProcessor(spannerMappingContext, Arrays.asList(new PersonWriteConverter()), Arrays.asList(new PersonReadConverter())); } }
SpannerOperations and its implementation, SpannerTemplate, provides the Template pattern familiar to Spring developers.
It provides:
- Resource management
- One-stop-shop to Spanner operations with the Spring Data POJO mapping and conversion features
- Exception conversion
Using the autoconfigure provided by our Spring Boot Starter for Spanner, your Spring application context will contain a fully configured SpannerTemplate object that you can easily autowire in your application:
@SpringBootApplication public class SpannerTemplateExample { @Autowired SpannerTemplate spannerTemplate; public void doSomething() { this.spannerTemplate.delete(Trade.class, KeySet.all()); //... Trade t = new Trade(); //... this.spannerTemplate.insert(t); //... List<Trade> tradesByAction = spannerTemplate.findAll(Trade.class); //... } }
The Template API provides convenience methods for:
Reads, and by providing SpannerReadOptions and SpannerQueryOptions
- Stale read
- Read with secondary indices
- Read with limits and offsets
- Read with sorting
- Queries
- DML operations (delete, insert, update, upsert)
Partial reads
- You can define a set of columns to be read into your entity
Partial writes
- Persist only a few properties from your entity
- Read-only transactions
- Locking read-write transactions
Cloud Spanner has SQL support for running read-only queries.
All the query related methods start with query on SpannerTemplate.
Using SpannerTemplate you can execute SQL queries that map to POJOs:
List<Trade> trades = this.spannerTemplate.query(Trade.class, Statement.of("SELECT * FROM trades"));
Spanner exposes a Read API for reading single row or multiple rows in a table or in a secondary index.
Using SpannerTemplate you can execute reads, for example:
List<Trade> trades = this.spannerTemplate.readAll(Trade.class);
Main benefit of reads over queries is reading multiple rows of a certain pattern of keys is much easier using the features of the KeySet class.
All reads and queries are strong reads by default.
A strong read is a read at a current timestamp and is guaranteed to see all data that has been committed up until the start of this read.
A stale read on the other hand is read at a timestamp in the past.
Cloud Spanner allows you to determine how current the data should be when you read data.
With SpannerTemplate you can specify the Timestamp by setting it on SpannerQueryOptions or SpannerReadOptions to the appropriate read or query methods:
Reads:
// a read with options: SpannerReadOptions spannerReadOptions = new SpannerReadOptions().setTimestamp(Timestamp.now()); List<Trade> trades = this.spannerTemplate.readAll(Trade.class, spannerReadOptions);
Queries:
// a query with options: SpannerQueryOptions spannerQueryOptions = new SpannerQueryOptions().setTimestamp(Timestamp.now()); List<Trade> trades = this.spannerTemplate.query(Trade.class, Statement.of("SELECT * FROM trades"), spannerQueryOptions);
Using a secondary index is available for Reads via the Template API and it is also implicitly available via SQL for Queries.
The following shows how to read rows from a table using a secondary index simply by setting index on SpannerReadOptions:
SpannerReadOptions spannerReadOptions = new SpannerReadOptions().setIndex("TradesByTrader"); List<Trade> trades = this.spannerTemplate.readAll(Trade.class, spannerReadOptions);
Limits and offsets are only supported by Queries. The following will get only the first two rows of the query:
SpannerQueryOptions spannerQueryOptions = new SpannerQueryOptions().setLimit(2).setOffset(3); List<Trade> trades = this.spannerTemplate.query(Trade.class, Statement.of("SELECT * FROM trades"), spannerQueryOptions);
Note that the above is equivalent of executing SELECT * FROM trades LIMIT 2 OFFSET 3.
Reads by keys do not support sorting. However, queries on the Template API support sorting through standard SQL and also via Spring Data Sort API:
List<Trade> trades = this.spannerTemplate.queryAll(Trade.class, Sort.by("action"));
If the provided sorted field name is that of a property of the domain type, then the column name corresponding to that property will be used in the query. Otherwise, the given field name is assumed to be the name of the column in the Cloud Spanner table. Sorting on columns of Cloud Spanner types STRING and BYTES can be done while ignoring case:
Sort.by(Order.desc("action").ignoreCase())Partial read is only possible when using Queries. In case the rows returned by the query have fewer columns than the entity that it will be mapped to, Spring Data will map the returned columns only. This setting also applies to nested structs and their corresponding nested POJO properties.
List<Trade> trades = this.spannerTemplate.query(Trade.class, Statement.of("SELECT action, symbol FROM trades"), new SpannerQueryOptions().setAllowMissingResultSetColumns(true));
If the setting is set to false, then an exception will be thrown if there are missing columns in the query result.
The write methods of SpannerOperations accept a POJO and writes all of its properties to Spanner.
The corresponding Spanner table and entity metadata is obtained from the given object’s actual type.
If a POJO was retrieved from Spanner and its primary key properties values were changed and then written or updated, the operation will occur as if against a row with the new primary key values. The row with the original primary key values will not be affected.
The insert method of SpannerOperations accepts a POJO and writes all of its properties to Spanner, which means the operation will fail if a row with the POJO’s primary key already exists in the table.
Trade t = new Trade(); this.spannerTemplate.insert(t);
The update method of SpannerOperations accepts a POJO and writes all of its properties to Spanner, which means the operation will fail if the POJO’s primary key does not already exist in the table.
// t was retrieved from a previous operation this.spannerTemplate.update(t);
The upsert method of SpannerOperations accepts a POJO and writes all of its properties to Spanner using update-or-insert.
// t was retrieved from a previous operation or it's new this.spannerTemplate.upsert(t);
The update methods of SpannerOperations operate by default on all properties within the given object, but also accept String[] and Optional<Set<String>> of column names.
If the Optional of set of column names is empty, then all columns are written to Spanner.
However, if the Optional is occupied by an empty set, then no columns will be written.
// t was retrieved from a previous operation or it's new this.spannerTemplate.update(t, "symbol", "action");
DML statements can be executed using SpannerOperations.executeDmlStatement.
Inserts, updates, and deletions can affect any number of rows and entities.
SpannerOperations provides methods to run java.util.Function objects within a single transaction while making available the read and write methods from SpannerOperations.
Read and write transactions are provided by SpannerOperations via the performReadWriteTransaction method:
@Autowired SpannerOperations mySpannerOperations; public String doWorkInsideTransaction() { return mySpannerOperations.performReadWriteTransaction( transActionSpannerOperations -> { // Work with transActionSpannerOperations here. // It is also a SpannerOperations object. return "transaction completed"; } ); }
The performReadWriteTransaction method accepts a Function that is provided an instance of a SpannerOperations object.
The final returned value and type of the function is determined by the user.
You can use this object just as you would a regular SpannerOperations with a few exceptions:
- Its read functionality cannot perform stale reads, because all reads and writes happen at the single point in time of the transaction.
- It cannot perform sub-transactions via
performReadWriteTransactionorperformReadOnlyTransaction.
As these read-write transactions are locking, it is recommended that you use the performReadOnlyTransaction if your function does not perform any writes.
The performReadOnlyTransaction method is used to perform read-only transactions using a SpannerOperations:
@Autowired SpannerOperations mySpannerOperations; public String doWorkInsideTransaction() { return mySpannerOperations.performReadOnlyTransaction( transActionSpannerOperations -> { // Work with transActionSpannerOperations here. // It is also a SpannerOperations object. return "transaction completed"; } ); }
The performReadOnlyTransaction method accepts a Function that is provided an instance of a
SpannerOperations object.
This method also accepts a ReadOptions object, but the only attribute used is the timestamp used to determine the snapshot in time to perform the reads in the transaction.
If the timestamp is not set in the read options the transaction is run against the current state of the database.
The final returned value and type of the function is determined by the user.
You can use this object just as you would a regular SpannerOperations with
a few exceptions:
- Its read functionality cannot perform stale reads, because all reads happen at the single point in time of the transaction.
- It cannot perform sub-transactions via
performReadWriteTransactionorperformReadOnlyTransaction - It cannot perform any write operations.
Because read-only transactions are non-locking and can be performed on points in time in the past, these are recommended for functions that do not perform write operations.
This feature requires a bean of SpannerTransactionManager, which is provided when using spring-cloud-gcp-starter-data-spanner.
SpannerTemplate and SpannerRepository support running methods with the @Transactional [annotation](https://docs.spring.io/spring/docs/current/spring-framework-reference/data-access.html#transaction-declarative) as transactions.
If a method annotated with @Transactional calls another method also annotated, then both methods will work within the same transaction.
performReadOnlyTransaction and performReadWriteTransaction cannot be used in @Transactional annotated methods because Cloud Spanner does not support transactions within transactions.
SpannerTemplate supports [DML](https://cloud.google.com/spanner/docs/dml-tasks) Statements.
DML statements can be executed in transactions via performReadWriteTransaction or using the @Transactional annotation.
When DML statements are executed outside of transactions, they are executed in [partitioned-mode](https://cloud.google.com/spanner/docs/dml-tasks#partitioned-dml).
Spring Data Repositories are a powerful abstraction that can save you a lot of boilerplate code.
For example:
public interface TraderRepository extends SpannerRepository<Trader, String> { }
Spring Data generates a working implementation of the specified interface, which can be conveniently autowired into an application.
The Trader type parameter to SpannerRepository refers to the underlying domain type.
The second type parameter, String in this case, refers to the type of the key of the domain type.
For POJOs with a composite primary key, this ID type parameter can be any descendant of Object[] compatible with all primary key properties, any descendant of Iterable, or com.google.cloud.spanner.Key.
If the domain POJO type only has a single primary key column, then the primary key property type can be used or the Key type.
For example in case of Trades, that belong to a Trader, TradeRepository would look like this:
public interface TradeRepository extends SpannerRepository<Trade, String[]> { }
public class MyApplication { @Autowired SpannerTemplate spannerTemplate; @Autowired StudentRepository studentRepository; public void demo() { this.tradeRepository.deleteAll(); String traderId = "demo_trader"; Trade t = new Trade(); t.symbol = stock; t.action = action; t.traderId = traderId; t.price = 100.0; t.shares = 12345.6; this.spannerTemplate.insert(t); Iterable<Trade> allTrades = this.tradeRepository.findAll(); int count = this.tradeRepository.countByAction("BUY"); } }
CrudRepository methods work as expected, with one thing Spanner specific: the save and saveAll methods work as update-or-insert.
You can also use PagingAndSortingRepository with Spanner Spring Data.
The sorting and pageable findAll methods available from this interface operate on the current state of the Spanner database.
As a result, beware that the state of the database (and the results) might change when moving page to page.
The SpannerRepository extends the PagingAndSortingRepository, but adds the read-only and the read-write transaction functionality provided by Spanner.
These transactions work very similarly to those of SpannerOperations, but is specific to the repository’s domain type and provides repository functions instead of template functions.
For example, this is a read-write transaction:
@Autowired SpannerRepository myRepo; public String doWorkInsideTransaction() { return myRepo.performReadOnlyTransaction( transactionSpannerRepo -> { // Work with the single-transaction transactionSpannerRepo here. // This is a SpannerRepository object. return "transaction completed"; } ); }
When creating custom repositories for your own domain types and query methods, you can extend SpannerRepository to access Cloud Spanner-specific features as well as all features from PagingAndSortingRepository and CrudRepository.
SpannerRepository supports Query Methods.
Described in the following sections, these are methods residing in your custom repository interfaces of which implementations are generated based on their names and annotations.
Query Methods can read, write, and delete entities in Cloud Spanner.
Parameters to these methods can be any Cloud Spanner data type supported directly or via custom configured converters.
Parameters can also be of type Struct or POJOs.
If a POJO is given as a parameter, it will be converted to a Struct with the same type-conversion logic as used to create write mutations.
Comparisons using Struct parameters are limited to what is available with Cloud Spanner.
public interface TradeRepository extends SpannerRepository<Trade, String[]> { List<Trade> findByAction(String action); int countByAction(String action); // Named methods are powerful, but can get unwieldy List<Trade> findTop3DistinctByActionAndSymbolIgnoreCaseOrTraderIdOrderBySymbolDesc( String action, String symbol, String traderId); }
In the example above, the query methods in TradeRepository are generated based on the name of the methods, using the Spring Data Query creation naming convention.
List<Trade> findByAction(String action) would translate to a SELECT * FROM trades WHERE action = ?.
The function List<Trade> findTop3DistinctByActionAndSymbolIgnoreCaseOrTraderIdOrderBySymbolDesc(String action, String symbol, String traderId); will be translated as the equivalent of this SQL query:
SELECT DISTINCT * FROM trades WHERE ACTION = ? AND LOWER(SYMBOL) = LOWER(?) AND TRADER_ID = ? ORDER BY SYMBOL DESC LIMIT 3
The following filter options are supported:
- Equality
- Greater than or equals
- Greater than
- Less than or equals
- Less than
- Is null
- Is not null
- Is true
- Is false
- Like a string
- Not like a string
- Contains a string
- Not contains a string
Note that the phrase SymbolIgnoreCase is translated to LOWER(SYMBOL) = LOWER(?) indicating a non-case-sensitive matching.
The IgnoreCase phrase may only be appended to fields that correspond to columns of type STRING or BYTES.
The Spring Data "AllIgnoreCase" phrase appended at the end of the method name is not supported.
The Like or NotLike naming conventions:
List<Trade> findBySymbolLike(String symbolFragment);
The param symbolFragment can contain wildcard characters for string matching such as _ and %.
The Contains and NotContains naming conventions:
List<Trade> findBySymbolContains(String symbolFragment);
The param symbolFragment is a regular expression that is checked for occurrences.
Delete queries are also supported.
For example, query methods such as deleteByAction or removeByAction delete entities found by findByAction.
The delete operation happens in a single transaction.
Delete queries can have the following return types:
* An integer type that is the number of entities deleted
* A collection of entities that were deleted
* void
The example above for List<Trade> fetchByActionNamedQuery(String action) does not match the Spring Data Query creation naming convention, so we have to map a parametrized Spanner SQL query to it.
The SQL query for the method can be mapped to repository methods in one of two ways:
namedQueriesproperties file- using the
@Queryannotation
The names of the tags of the SQL correspond to the @Param annotated names of the method parameters.
Custom SQL query methods can accept a single Sort or Pageable parameter that is applied on top of any sorting or paging in the SQL:
@Query("SELECT * FROM trades ORDER BY action DESC") List<Trade> sortedTrades(Pageable pageable); @Query("SELECT * FROM trades ORDER BY action DESC LIMIT 1") Trade sortedTopTrade(Pageable pageable);
This can be used:
List<Trade> customSortedTrades = tradeRepository.sortedTrades(PageRequest .of(2, 2, org.springframework.data.domain.Sort.by(Order.asc("id"))));
The results would be sorted by "id" in ascending order.
Your query method can also return non-entity types:
@Query("SELECT COUNT(1) FROM trades WHERE action = @action") int countByActionQuery(String action); @Query("SELECT EXISTS(SELECT COUNT(1) FROM trades WHERE action = @action)") boolean existsByActionQuery(String action); @Query("SELECT action FROM trades WHERE action = @action LIMIT 1") String getFirstString(@Param("action") String action); @Query("SELECT action FROM trades WHERE action = @action") List<String> getFirstStringList(@Param("action") String action);
DML statements can also be executed by query methods, but the only possible return value is a long representing the number of affected rows.
The dmlStatement boolean setting must be set on @Query to indicate that the query method is executed as a DML statement.
@Query(value = "DELETE FROM trades WHERE action = @action", dmlStatement = true) long deleteByActionQuery(String action);
By default, the namedQueriesLocation attribute on @EnableSpannerRepositories points to the META-INF/spanner-named-queries.properties file.
You can specify the query for a method in the properties file by providing the SQL as the value for the "interface.method" property:
Trade.fetchByActionNamedQuery=SELECT * FROM trades WHERE trades.action = @tag0public interface TradeRepository extends SpannerRepository<Trade, String[]> { // This method uses the query from the properties file instead of one generated based on name. List<Trade> fetchByActionNamedQuery(@Param("tag0") String action); }
Using the @Query annotation:
public interface TradeRepository extends SpannerRepository<Trade, String[]> { @Query("SELECT * FROM trades WHERE trades.action = @tag0") List<Trade> fetchByActionNamedQuery(@Param("tag0") String action); }
Table names can be used directly.
For example, "trades" in the above example.
Alternatively, table names can be resolved from the @Table annotation on domain classes as well.
In this case, the query should refer to table names with fully qualified class names between :
characters: :fully.qualified.ClassName:.
A full example would look like:
@Query("SELECT * FROM :com.example.Trade: WHERE trades.action = @tag0")
List<Trade> fetchByActionNamedQuery(String action);This allows table names evaluated with SpEL to be used in custom queries.
SpEL can also be used to provide SQL parameters:
@Query("SELECT * FROM :com.example.Trade: WHERE trades.action = @tag0
AND price > #{#priceRadius * -1} AND price < #{#priceRadius * 2}")
List<Trade> fetchByActionNamedQuery(String action, Double priceRadius);Spring Data Spanner supports projections. You can define projection interfaces based on domain types and add query methods that return them in your repository:
public interface TradeProjection { String getAction(); @Value("#{target.symbol + ' ' + target.action}") String getSymbolAndAction(); } public interface TradeRepository extends SpannerRepository<Trade, Key> { List<Trade> findByTraderId(String traderId); List<TradeProjection> findByAction(String action); @Query("SELECT action, symbol FROM trades WHERE action = @action") List<TradeProjection> findByQuery(String action); }
Projections can be provided by name-convention-based query methods as well as by custom SQL queries. If using custom SQL queries, you can further restrict the columns retrieved from Spanner to just those required by the projection to improve performance.
Properties of projection types defined using SpEL use the fixed name target for the underlying domain object.
As a result accessing underlying properties take the form target.<property-name>.
When running with Spring Boot, repositories can be exposed as REST services by simply adding this dependency to your pom file:
<dependency> <groupId>org.springframework.boot</groupId> <artifactId>spring-boot-starter-data-rest</artifactId> </dependency>
If you prefer to configure parameters (such as path), you can use @RepositoryRestResource annotation:
@RepositoryRestResource(collectionResourceRel = "trades", path = "trades") public interface TradeRepository extends SpannerRepository<Trade, String[]> { }
For example, you can retrieve all Trade objects in the repository by using curl http://<server>:<port>/trades, or any specific trade via curl http://<server>:<port>/trades/<trader_id>,<trade_id>.
The separator between your primary key components, id and trader_id in this case, is a comma by default, but can be configured to any string not found in your key values by extending the SpannerKeyIdConverter class:
@Component class MySpecialIdConverter extends SpannerKeyIdConverter { @Override protected String getUrlIdSeparator() { return ":"; } }
You can also write trades using curl -XPOST -H"Content-Type: application/json" -[email protected] http://<server>:<port>/trades/ where the file test.json holds the JSON representation of a Trade object.
Databases and tables inside Spanner instances can be created automatically from SpannerPersistentEntity objects:
@Autowired private SpannerSchemaUtils spannerSchemaUtils; @Autowired private SpannerDatabaseAdminTemplate spannerDatabaseAdminTemplate; public void createTable(SpannerPersistentEntity entity) { if(!spannerDatabaseAdminTemplate.tableExists(entity.tableName()){ // The boolean parameter indicates that the database will be created if it does not exist. spannerDatabaseAdminTemplate.executeDdlStrings(Arrays.asList( spannerSchemaUtils.getCreateTableDDLString(entity.getType())), true); } }
Schemas can be generated for entire object hierarchies with interleaved relationships and composite keys.
A sample application is available.
Spring Data is an abstraction for storing and retrieving POJOs in numerous storage technologies. Spring Cloud GCP adds Spring Data support for Google Cloud Datastore.
Maven coordinates for this module only, using Spring Cloud GCP BOM:
<dependency> <groupId>org.springframework.cloud</groupId> <artifactId>spring-cloud-gcp-data-datastore</artifactId> </dependency>
Gradle coordinates:
dependencies {
compile group: 'org.springframework.cloud', name: 'spring-cloud-gcp-data-datastore'
}We provide a Spring Boot Starter for Spring Data Datastore, with which you can use our recommended auto-configuration setup. To use the starter, see the coordinates below.
Maven:
<dependency> <groupId>org.springframework.cloud</groupId> <artifactId>spring-cloud-gcp-starter-data-datastore</artifactId> </dependency>
Gradle:
dependencies {
compile group: 'org.springframework.cloud', name: 'spring-cloud-gcp-starter-data-datastore'
}This setup takes care of bringing in the latest compatible version of Cloud Java Cloud Datastore libraries as well.
To setup Spring Data Cloud Datastore, you have to configure the following:
- Setup the connection details to Google Cloud Datastore.
You can the use Spring Boot Starter for Spring Data Datastore to autoconfigure Google Cloud Datastore in your Spring application. It contains all the necessary setup that makes it easy to authenticate with your Google Cloud project. The following configuration options are available:
Name | Description | Required | Default value |
| Enables the Cloud Datastore client | No |
|
| GCP project ID where the Google Cloud Datastore API is hosted, if different from the one in the Spring Cloud GCP Core Module | No | |
| OAuth2 credentials for authenticating with the Google Cloud Datastore API, if different from the ones in the Spring Cloud GCP Core Module | No | |
| Base64-encoded OAuth2 credentials for authenticating with the Google Cloud Datastore API, if different from the ones in the Spring Cloud GCP Core Module | No | |
| OAuth2 scope for Spring Cloud GCP Cloud Datastore credentials | No | |
| The Cloud Datastore namespace to use | No | the Default namespace of Cloud Datastore in your GCP project |
Spring Data Repositories can be configured via the @EnableDatastoreRepositories annotation on your main @Configuration class.
With our Spring Boot Starter for Spring Data Cloud Datastore, @EnableDatastoreRepositories is automatically added.
It is not required to add it to any other class, unless there is a need to override finer grain configuration parameters provided by @EnableDatastoreRepositories.
Our Spring Boot autoconfiguration creates the following beans available in the Spring application context:
- an instance of
DatastoreTemplate - an instance of all user defined repositories extending
CrudRepository,PagingAndSortingRepository, andDatastoreRepository(an extension ofPagingAndSortingRepositorywith additional Cloud Datastore features) when repositories are enabled - an instance of
Datastorefrom the Google Cloud Java Client for Datastore, for convenience and lower level API access
Spring Data Cloud Datastore allows you to map domain POJOs to Cloud Datastore kinds and entities via annotations:
@Entity(name = "traders") public class Trader { @Id @Field(name = "trader_id") String traderId; String firstName; String lastName; @Transient Double temporaryNumber; }
Spring Data Cloud Datastore will ignore any property annotated with @Transient.
These properties will not be written to or read from Cloud Datastore.
Simple constructors are supported on POJOs. The constructor arguments can be a subset of the persistent properties. Every constructor argument needs to have the same name and type as a persistent property on the entity and the constructor should set the property from the given argument. Arguments that are not directly set to properties are not supported.
@Entity(name = "traders") public class Trader { @Id @Field(name = "trader_id") String traderId; String firstName; String lastName; @Transient Double temporaryNumber; public Trader(String traderId, String firstName) { this.traderId = traderId; this.firstName = firstName; } }
The @Entity annotation can provide the name of the Cloud Datastore kind that stores instances of the annotated class, one per row.
@Id identifies the property corresponding to the ID value.
You must annotate one of your POJO’s fields as the ID value, because every entity in Cloud Datastore requires a single ID value:
@Entity(name = "trades") public class Trade { @Id @Field(name = "trade_id") String tradeId; @Field(name = "trader_id") String traderId; String action; Double price; Double shares; String symbol; }
Datastore can automatically allocate integer ID values.
If a POJO instance with a Long ID property is written to Cloud Datastore with null as the ID value, then Spring Data Cloud Datastore will obtain a newly allocated ID value from Cloud Datastore and set that in the POJO for saving.
Because primitive long ID properties cannot be null and default to 0, keys will not be allocated.
All accessible properties on POJOs are automatically recognized as a Cloud Datastore field.
Field naming is generated by the PropertyNameFieldNamingStrategy by default defined on the DatastoreMappingContext bean.
The @Field annotation optionally provides a different field name than that of the property.
Spring Data Cloud Datastore supports the following types for regular fields and elements of collections:
| Type | Stored as |
|---|---|
| com.google.cloud.datastore.TimestampValue |
| com.google.cloud.datastore.BlobValue |
| com.google.cloud.datastore.LatLngValue |
| com.google.cloud.datastore.BooleanValue |
| com.google.cloud.datastore.DoubleValue |
| com.google.cloud.datastore.LongValue |
| com.google.cloud.datastore.LongValue |
| com.google.cloud.datastore.StringValue |
| com.google.cloud.datastore.EntityValue |
| com.google.cloud.datastore.KeyValue |
| com.google.cloud.datastore.BlobValue |
Java | com.google.cloud.datastore.StringValue |
In addition, all types that can be converted to the ones listed in the table by
org.springframework.core.convert.support.DefaultConversionService are supported.
Custom converters can be used extending the type support for user defined types.
- Converters need to implement the
org.springframework.core.convert.converter.Converterinterface in both directions. - The user defined type needs to be mapped to one of the basic types supported by Cloud Datastore.
- An instance of both Converters (read and write) needs to be passed to the
DatastoreCustomConversionsconstructor, which then has to be made available as a@BeanforDatastoreCustomConversions.
For example:
We would like to have a field of type Album on our Singer POJO and want it to be stored as a string property:
@Entity public class Singer { @Id String singerId; String name; Album album; }
Where Album is a simple class:
public class Album { String albumName; LocalDate date; }
We have to define the two converters:
//Converter to write custom Album type static final Converter<Album, String> ALBUM_STRING_CONVERTER = new Converter<Album, String>() { @Override public String convert(Album album) { return album.getAlbumName() + " " + album.getDate().format(DateTimeFormatter.ISO_DATE); } }; //Converters to read custom Album type static final Converter<String, Album> STRING_ALBUM_CONVERTER = new Converter<String, Album>() { @Override public Album convert(String s) { String[] parts = s.split(" "); return new Album(parts[0], LocalDate.parse(parts[parts.length - 1], DateTimeFormatter.ISO_DATE)); } };
That will be configured in our @Configuration file:
@Configuration public class ConverterConfiguration { @Bean public DatastoreCustomConversions datastoreCustomConversions() { return new DatastoreCustomConversions( Arrays.asList( ALBUM_STRING_CONVERTER, STRING_ALBUM_CONVERTER)); } }
Arrays and collections (types that implement java.util.Collection) of supported types are supported.
They are stored as com.google.cloud.datastore.ListValue.
Elements are converted to Cloud Datastore supported types individually. byte[] is an exception, it is converted to
com.google.cloud.datastore.Blob.
Users can provide converters from List<?> to the custom collection type.
Only read converter is necessary, the Collection API is used on the write side to convert a collection to the internal list type.
Collection converters need to implement the org.springframework.core.convert.converter.Converter interface.
Example:
Let’s improve the Singer class from the previous example.
Instead of a field of type Album, we would like to have a field of type ImmutableSet<Album>:
@Entity public class Singer { @Id String singerId; String name; ImmutableSet<Album> albums; }
We have to define a read converter only:
static final Converter<List<?>, ImmutableSet<?>> LIST_IMMUTABLE_SET_CONVERTER = new Converter<List<?>, ImmutableSet<?>>() { @Override public ImmutableSet<?> convert(List<?> source) { return ImmutableSet.copyOf(source); } };
And add it to the list of custom converters:
@Configuration public class ConverterConfiguration { @Bean public DatastoreCustomConversions datastoreCustomConversions() { return new DatastoreCustomConversions( Arrays.asList( LIST_IMMUTABLE_SET_CONVERTER, ALBUM_STRING_CONVERTER, STRING_ALBUM_CONVERTER)); } }
There are three ways to represent relationships between entities that are described in this section:
- Embedded entities stored directly in the field of the containing entity
@Descendantannotated properties for one-to-many relationships@Referenceannotated properties for general relationships without hierarchy
Fields whose types are also annotated with @Entity are converted to EntityValue and stored inside the parent entity.
Here is an example of Cloud Datastore entity containing an embedded entity in JSON:
{ "name" : "Alexander", "age" : 47, "child" : {"name" : "Philip" } }
This corresponds to a simple pair of Java entities:
import org.springframework.cloud.gcp.data.datastore.core.mapping.Entity; import org.springframework.data.annotation.Id; @Entity("parents") public class Parent { @Id String name; Child child; } @Entity public class Child { String name; }
Child entities are not stored in their own kind.
They are stored in their entirety in the child field of the parents kind.
Multiple levels of embedded entities are supported.
| Note |
|---|---|
Embedded entities don’t need to have |
Example:
Entities can hold embedded entities that are their own type. We can store trees in Cloud Datastore using this feature:
import org.springframework.cloud.gcp.data.datastore.core.mapping.Embedded; import org.springframework.cloud.gcp.data.datastore.core.mapping.Entity; import org.springframework.data.annotation.Id; @Entity public class EmbeddableTreeNode { @Id long value; EmbeddableTreeNode left; EmbeddableTreeNode right; Map<String, Long> longValues; Map<String, List<Timestamp>> listTimestamps; public EmbeddableTreeNode(long value, EmbeddableTreeNode left, EmbeddableTreeNode right) { this.value = value; this.left = left; this.right = right; } }
Maps will be stored as embedded entities where the key values become the field names in the embedded entity. The value types in these maps can be any regularly supported property type, and the key values will be converted to String using the configured converters.
Also, a collection of entities can be embedded; it will be converted to ListValue on write.
Example:
Instead of a binary tree from the previous example, we would like to store a general tree
(each node can have an arbitrary number of children) in Cloud Datastore.
To do that, we need to create a field of type List<EmbeddableTreeNode>:
import org.springframework.cloud.gcp.data.datastore.core.mapping.Embedded; import org.springframework.data.annotation.Id; public class EmbeddableTreeNode { @Id long value; List<EmbeddableTreeNode> children; Map<String, EmbeddableTreeNode> siblingNodes; Map<String, Set<EmbeddableTreeNode>> subNodeGroups; public EmbeddableTreeNode(List<EmbeddableTreeNode> children) { this.children = children; } }
Because Maps are stored as entities, they can further hold embedded entities:
- Singular embedded objects in the value can be stored in the values of embedded Maps.
- Collections of embedded objects in the value can also be stored as the values of embedded Maps.
- Maps in the value are further stored as embedded entities with the same rules applied recursively for their values.
Parent-child relationships are supported via the @Descendants annotation.
Unlike embedded children, descendants are fully-formed entities residing in their own kinds. The parent entity does not have an extra field to hold the descendant entities. Instead, the relationship is captured in the descendants' keys, which refer to their parent entities:
import org.springframework.cloud.gcp.data.datastore.core.mapping.Descendants; import org.springframework.cloud.gcp.data.datastore.core.mapping.Entity; import org.springframework.data.annotation.Id; @Entity("orders") public class ShoppingOrder { @Id long id; @Descendants List<Item> items; } @Entity("purchased_item") public class Item { @Id Key purchasedItemKey; String name; Timestamp timeAddedToOrder; }
For example, an instance of a GQL key-literal representation for Item would also contain the parent ShoppingOrder ID value:
Key(orders, '12345', purchased_item, 'eggs')
The GQL key-literal representation for the parent ShoppingOrder would be:
Key(orders, '12345')
The Cloud Datastore entities exist separately in their own kinds.
The ShoppingOrder:
{
"id" : 12345
}The two items inside that order:
{
"purchasedItemKey" : Key(orders, '12345', purchased_item, 'eggs'),
"name" : "eggs",
"timeAddedToOrder" : "2014-09-27 12:30:00.45-8:00"
}
{
"purchasedItemKey" : Key(orders, '12345', purchased_item, 'sausage'),
"name" : "sausage",
"timeAddedToOrder" : "2014-09-28 11:30:00.45-9:00"
}The parent-child relationship structure of objects is stored in Cloud Datastore using Datastore’s ancestor relationships. Because the relationships are defined by the Ancestor mechanism, there is no extra column needed in either the parent or child entity to store this relationship. The relationship link is part of the descendant entity’s key value. These relationships can be many levels deep.
Properties holding child entities must be collection-like, but they can be any of the supported inter-convertible collection-like types that are supported for regular properties such as List, arrays, Set, etc…
Child items must have Key as their ID type because Cloud Datastore stores the ancestor relationship link inside the keys of the children.
Reading or saving an entity automatically causes all subsequent levels of children under that entity to be read or saved, respectively.
If a new child is created and added to a property annotated @Descendants and the key property is left null, then a new key will be allocated for that child.
The ordering of the retrieved children may not be the same as the ordering in the original property that was saved.
Child entities cannot be moved from the property of one parent to that of another unless the child’s key property is set to null or a value that contains the new parent as an ancestor.
Since Cloud Datastore entity keys can have multiple parents, it is possible that a child entity appears in the property of multiple parent entities.
Because entity keys are immutable in Cloud Datastore, to change the key of a child you must delete the existing one and re-save it with the new key.
General relationships can be stored using the @Reference annotation.
import org.springframework.cloud.gcp.data.datastore.core.mapping.Reference; import org.springframework.data.annotation.Id; @Entity public class ShoppingOrder { @Id long id; @Reference List<Item> items; @Reference Item specialSingleItem; } @Entity public class Item { @Id Key purchasedItemKey; String name; Timestamp timeAddedToOrder; }
@Reference relationships are between fully-formed entities residing in their own kinds.
The relationship between ShoppingOrder and Item entities are stored as a Key field inside ShoppingOrder, which are resolved to the underlying Java entity type by Spring Data Cloud Datastore:
{
"id" : 12345,
"specialSingleItem" : Key(item, "milk"),
"items" : [ Key(item, "eggs"), Key(item, "sausage") ]
}Reference properties can either be singular or collection-like. These properties correspond to actual columns in the entity and Cloud Datastore Kind that hold the key values of the referenced entities. The referenced entities are full-fledged entities of other Kinds.
Similar to the @Descendants relationships, reading or writing an entity will recursively read or write all of the referenced entities at all levels.
If referenced entities have null ID values, then they will be saved as new entities and will have ID values allocated by Cloud Datastore.
There are no requirements for relationships between the key of an entity and the keys that entity holds as references.
The order of collection-like reference properties is not preserved when reading back from Cloud Datastore.
DatastoreOperations and its implementation, DatastoreTemplate, provides the Template pattern familiar to Spring developers.
Using the auto-configuration provided by Spring Boot Starter for Datastore, your Spring application context will contain a fully configured DatastoreTemplate object that you can autowire in your application:
@SpringBootApplication public class DatastoreTemplateExample { @Autowired DatastoreTemplate datastoreTemplate; public void doSomething() { this.datastoreTemplate.deleteAll(Trader.class); //... Trader t = new Trader(); //... this.datastoreTemplate.save(t); //... List<Trader> traders = datastoreTemplate.findAll(Trader.class); //... } }
The Template API provides convenience methods for:
- Write operations (saving and deleting)
- Read-write transactions
In addition to retrieving entities by their IDs, you can also submit queries.
<T> Iterable<T> query(Query<? extends BaseEntity> query, Class<T> entityClass);
<A, T> Iterable<T> query(Query<A> query, Function<A, T> entityFunc);
Iterable<Key> queryKeys(Query<Key> query);These methods, respectively, allow querying for: * entities mapped by a given entity class using all the same mapping and converting features * arbitrary types produced by a given mapping function * only the Cloud Datastore keys of the entities found by the query
Datstore reading a single entity or multiple entities in a kind.
Using DatastoreTemplate you can execute reads, for example:
Trader trader = this.datastoreTemplate.findById("trader1", Trader.class); List<Trader> traders = this.datastoreTemplate.findAllById(ImmutableList.of("trader1", "trader2"), Trader.class); List<Trader> allTraders = this.datastoreTemplate.findAll(Trader.class);
Cloud Datastore executes key-based reads with strong consistency, but queries with eventual consistency.
In the example above the first two reads utilize keys, while the third is executed using a query based on the corresponding Kind of Trader.
By default, all fields are indexed.
To disable indexing on a particular field, @Unindexed annotation can be used.
Example:
import org.springframework.cloud.gcp.data.datastore.core.mapping.Unindexed; public class ExampleItem { long indexedField; @Unindexed long unindexedField; }
When using queries directly or via Query Methods, Cloud Datastore requires composite custom indexes if the select statement is not SELECT * or if there is more than one filtering condition in the WHERE clause.
DatastoreRepository and custom-defined entity repositories implement the Spring Data PagingAndSortingRepository, which supports offsets and limits using page numbers and page sizes.
Paging and sorting options are also supported in DatastoreTemplate by supplying a DatastoreQueryOptions to findAll.
The write methods of DatastoreOperations accept a POJO and writes all of its properties to Datastore.
The required Datastore kind and entity metadata is obtained from the given object’s actual type.
If a POJO was retrieved from Datastore and its ID value was changed and then written or updated, the operation will occur as if against a row with the new ID value. The entity with the original ID value will not be affected.
Trader t = new Trader(); this.datastoreTemplate.save(t);
The save method behaves as update-or-insert.
Read and write transactions are provided by DatastoreOperations via the performTransaction method:
@Autowired DatastoreOperations myDatastoreOperations; public String doWorkInsideTransaction() { return myDatastoreOperations.performTransaction( transactionDatastoreOperations -> { // Work with transactionDatastoreOperations here. // It is also a DatastoreOperations object. return "transaction completed"; } ); }
The performTransaction method accepts a Function that is provided an instance of a DatastoreOperations object.
The final returned value and type of the function is determined by the user.
You can use this object just as you would a regular DatastoreOperations with an exception:
- It cannot perform sub-transactions.
Because of Cloud Datastore’s consistency guarantees, there are limitations to the operations and relationships among entities used inside transactions.
This feature requires a bean of DatastoreTransactionManager, which is provided when using spring-cloud-gcp-starter-data-datastore.
DatastoreTemplate and DatastoreRepository support running methods with the @Transactional annotation as transactions.
If a method annotated with @Transactional calls another method also annotated, then both methods will work within the same transaction.
performTransaction cannot be used in @Transactional annotated methods because Cloud Datastore does not support transactions within transactions.
You can work with Maps of type Map<String, ?> instead of with entity objects by directly reading and writing them to and from Cloud Datastore.
| Note |
|---|---|
This is a different situation than using entity objects that contain Map properties. |
The map keys are used as field names for a Datastore entity and map values are converted to Datastore supported types. Only simple types are supported (i.e. collections are not supported). Converters for custom value types can be added (see Section 158.2.10, “Custom types” section).
Example:
Map<String, Long> map = new HashMap<>(); map.put("field1", 1L); map.put("field2", 2L); map.put("field3", 3L); keyForMap = datastoreTemplate.createKey("kindName", "id"); //write a map datastoreTemplate.writeMap(keyForMap, map); //read a map Map<String, Long> loadedMap = datastoreTemplate.findByIdAsMap(keyForMap, Long.class);
Spring Data Repositories are an abstraction that can reduce boilerplate code.
For example:
public interface TraderRepository extends DatastoreRepository<Trader, String> { }
Spring Data generates a working implementation of the specified interface, which can be autowired into an application.
The Trader type parameter to DatastoreRepository refers to the underlying domain type.
The second type parameter, String in this case, refers to the type of the key of the domain type.
public class MyApplication { @Autowired TraderRepository traderRepository; public void demo() { this.traderRepository.deleteAll(); String traderId = "demo_trader"; Trader t = new Trader(); t.traderId = traderId; this.tradeRepository.save(t); Iterable<Trader> allTraders = this.traderRepository.findAll(); int count = this.traderRepository.count(); } }
Repositories allow you to define custom Query Methods (detailed in the following sections) for retrieving, counting, and deleting based on filtering and paging parameters. Filtering parameters can be of types supported by your configured custom converters.
public interface TradeRepository extends DatastoreRepository<Trade, String[]> { List<Trader> findByAction(String action); int countByAction(String action); boolean existsByAction(String action); List<Trade> findTop3ByActionAndSymbolAndPriceGreaterThanAndPriceLessThanOrEqualOrderBySymbolDesc( String action, String symbol, double priceFloor, double priceCeiling); Page<TestEntity> findByAction(String action, Pageable pageable); Slice<TestEntity> findBySymbol(String symbol, Pageable pageable); List<TestEntity> findBySymbol(String symbol, Sort sort); }
In the example above the query methods in TradeRepository are generated based on the name of the methods using thehttps://docs.spring.io/spring-data/data-commons/docs/current/reference/html#repositories.query-methods.query-creation[Spring Data Query creation naming convention].
Cloud Datastore only supports filter components joined by AND, and the following operations:
equalsgreater than or equalsgreater thanless than or equalsless thanis null
After writing a custom repository interface specifying just the signatures of these methods, implementations are generated for you and can be used with an auto-wired instance of the repository.
Because of Cloud Datastore’s requirement that explicitly selected fields must all appear in a composite index together, find name-based query methods are run as SELECT *.
Delete queries are also supported.
For example, query methods such as deleteByAction or removeByAction delete entities found by findByAction.
Delete queries are executed as separate read and delete operations instead of as a single transaction because Cloud Datastore cannot query in transactions unless ancestors for queries are specified.
As a result, removeBy and deleteBy name-convention query methods cannot be used inside transactions via either performInTransaction or @Transactional annotation.
Delete queries can have the following return types:
- An integer type that is the number of entities deleted
- A collection of entities that were deleted
- 'void'
Methods can have org.springframework.data.domain.Pageable parameter to control pagination and sorting, or org.springframework.data.domain.Sort parameter to control sorting only.
See Spring Data documentation for details.
For returning multiple items in a repository method, we support Java collections as well as org.springframework.data.domain.Page and org.springframework.data.domain.Slice.
If a method’s return type is org.springframework.data.domain.Page, the returned object will include current page, total number of results and total number of pages.
| Note |
|---|---|
Methods that return |
Custom GQL queries can be mapped to repository methods in one of two ways:
namedQueriesproperties file- using the
@Queryannotation
Using the @Query annotation:
The names of the tags of the GQL correspond to the @Param annotated names of the method parameters.
public interface TraderRepository extends DatastoreRepository<Trader, String> { @Query("SELECT * FROM traders WHERE name = @trader_name") List<Trader> tradersByName(@Param("trader_name") String traderName); @Query("SELECT * FROM test_entities_ci WHERE id = @id_val") TestEntity getOneTestEntity(@Param("id_val") long id); }
The following parameter types are supported:
com.google.cloud.Timestampcom.google.cloud.datastore.Blobcom.google.cloud.datastore.Keycom.google.cloud.datastore.Cursorjava.lang.Booleanjava.lang.Doublejava.lang.Longjava.lang.Stringenumvalues. These are queried asStringvalues.
With the exception of Cursor, array forms of each of the types are also supported.
If you would like to obtain the count of items of a query or if there are any items returned by the query, set the count = true or exists = true properties of the @Query annotation, respectively.
The return type of the query method in these cases should be an integer type or a boolean type.
Cloud Datastore provides provides the SELECT key FROM … special column for all kinds that retrieves the Key`s of each row.
Selecting this special `key column is especially useful and efficient for count and exists queries.
You can also query for non-entity types:
@Query(value = "SELECT __key__ from test_entities_ci") List<Key> getKeys(); @Query(value = "SELECT __key__ from test_entities_ci limit 1") Key getKey(); @Query("SELECT id FROM test_entities_ci WHERE id <= @id_val") List<String> getIds(@Param("id_val") long id); @Query("SELECT id FROM test_entities_ci WHERE id <= @id_val limit 1") String getOneId(@Param("id_val") long id);
SpEL can be used to provide GQL parameters:
@Query("SELECT * FROM |com.example.Trade| WHERE trades.action = @act AND price > :#{#priceRadius * -1} AND price < :#{#priceRadius * 2}") List<Trade> fetchByActionNamedQuery(@Param("act") String action, @Param("priceRadius") Double r);
Kind names can be directly written in the GQL annotations.
Kind names can also be resolved from the @Entity annotation on domain classes.
In this case, the query should refer to table names with fully qualified class names surrounded by | characters: |fully.qualified.ClassName|.
This is useful when SpEL expressions appear in the kind name provided to the @Entity annotation.
For example:
@Query("SELECT * FROM |com.example.Trade| WHERE trades.action = @act") List<Trade> fetchByActionNamedQuery(@Param("act") String action);
You can also specify queries with Cloud Datastore parameter tags and SpEL expressions in properties files.
By default, the namedQueriesLocation attribute on @EnableDatastoreRepositories points to the META-INF/datastore-named-queries.properties file.
You can specify the query for a method in the properties file by providing the GQL as the value for the "interface.method" property:
Trader.fetchByName=SELECT * FROM traders WHERE name = @tag0public interface TraderRepository extends DatastoreRepository<Trader, String> { // This method uses the query from the properties file instead of one generated based on name. List<Trader> fetchByName(@Param("tag0") String traderName); }
These transactions work very similarly to those of DatastoreOperations, but is specific to the repository’s domain type and provides repository functions instead of template functions.
For example, this is a read-write transaction:
@Autowired DatastoreRepository myRepo; public String doWorkInsideTransaction() { return myRepo.performTransaction( transactionDatastoreRepo -> { // Work with the single-transaction transactionDatastoreRepo here. // This is a DatastoreRepository object. return "transaction completed"; } ); }
Spring Data Cloud Datastore supports projections. You can define projection interfaces based on domain types and add query methods that return them in your repository:
public interface TradeProjection { String getAction(); @Value("#{target.symbol + ' ' + target.action}") String getSymbolAndAction(); } public interface TradeRepository extends DatastoreRepository<Trade, Key> { List<Trade> findByTraderId(String traderId); List<TradeProjection> findByAction(String action); @Query("SELECT action, symbol FROM trades WHERE action = @action") List<TradeProjection> findByQuery(String action); }
Projections can be provided by name-convention-based query methods as well as by custom GQL queries.
If using custom GQL queries, you can further restrict the fields retrieved from Cloud Datastore to just those required by the projection.
However, custom select statements (those not using SELECT *) require composite indexes containing the selected fields.
Properties of projection types defined using SpEL use the fixed name target for the underlying domain object.
As a result, accessing underlying properties take the form target.<property-name>.
When running with Spring Boot, repositories can be exposed as REST services by simply adding this dependency to your pom file:
<dependency> <groupId>org.springframework.boot</groupId> <artifactId>spring-boot-starter-data-rest</artifactId> </dependency>
If you prefer to configure parameters (such as path), you can use @RepositoryRestResource annotation:
@RepositoryRestResource(collectionResourceRel = "trades", path = "trades") public interface TradeRepository extends DatastoreRepository<Trade, String[]> { }
For example, you can retrieve all Trade objects in the repository by using curl http://<server>:<port>/trades, or any specific trade via curl http://<server>:<port>/trades/<trader_id>.
You can also write trades using curl -XPOST -H"Content-Type: application/json" -[email protected] http://<server>:<port>/trades/ where the file test.json holds the JSON representation of a Trade object.
To delete trades, you can use curl -XDELETE http://<server>:<port>/trades/<trader_id>
A Simple Spring Boot Application and more advanced Sample Spring Boot Application are provided to show how to use the Spring Data Cloud Datastore starter and template.
Cloud Memorystore for Redis provides a fully managed in-memory data store service. Cloud Memorystore is compatible with the Redis protocol, allowing easy integration with Spring Caching.
All you have to do is create a Cloud Memorystore instance and use its IP address in application.properties file as spring.redis.host property value.
Everything else is exactly the same as setting up redis-backed Spring caching.
| Note |
|---|---|
Memorystore instances and your application instances have to be located in the same region. |
In short, the following dependencies are needed:
<dependency> <groupId>org.springframework.boot</groupId> <artifactId>spring-boot-starter-cache</artifactId> </dependency> <dependency> <groupId>org.springframework.boot</groupId> <artifactId>spring-boot-starter-data-redis</artifactId> </dependency>
And then you can use org.springframework.cache.annotation.Cacheable annotation for methods you’d like to be cached.
@Cacheable("cache1") public String hello(@PathVariable String name) { .... }
If you are interested in a detailed how-to guide, please check Spring Boot Caching using Cloud Memorystore codelab.
Cloud Memorystore documentation can be found here.
Cloud Identity-Aware Proxy (IAP) provides a security layer over applications deployed to Google Cloud.
The IAP starter uses Spring Security OAuth 2.0 Resource Server functionality to automatically extract user identity from the proxy-injected x-goog-iap-jwt-assertion HTTP header.
The following claims are validated automatically:
- Issue time
- Expiration time
- Issuer
- Audience
The audience ("aud") validation is automatically configured when the application is running on App Engine Standard or App Engine Flexible.
For other runtime environments, a custom audience must be provided through spring.cloud.gcp.security.iap.audience property.
The custom property, if specified, overrides the automatic App Engine audience detection.
| Important |
|---|---|
There is no automatic audience string configuration for Compute Engine or Kubernetes Engine.
To use the IAP starter on GCE/GKE, find the Audience string per instructions in the Verify the JWT payload guide, and specify it in the |
| Note |
|---|---|
If you create a custom |
Starter Maven coordinates, using Spring Cloud GCP BOM:
<dependency> <groupId>org.springframework.cloud</groupId> <artifactId>spring-cloud-gcp-starter-security-iap</artifactId> </dependency>
Starter Gradle coordinates:
dependencies {
compile group: 'org.springframework.cloud', name: 'spring-cloud-gcp-starter-security-iap'
}The following properties are available.
| Caution |
|---|---|
Modifying registry, algorithm, and header properties might be useful for testing, but the defaults should not be changed in production. |
| Name | Description | Required | Default |
|---|---|---|---|
| Link to JWK public key registry. | true | |
| Encryption algorithm used to sign the JWK token. | true |
|
| Header from which to extract the JWK key. | true |
|
| JWK issuer to verify. | true | |
| Custom JWK audience to verify. | false on App Engine; true on GCE/GKE |
A sample application is available.
The Google Cloud Vision API allows users to leverage machine learning algorithms for processing images including: image classification, face detection, text extraction, and others.
Spring Cloud GCP provides:
- A convenience starter which automatically configures authentication settings and client objects needed to begin using the Google Cloud Vision API.
A Cloud Vision Template which simplifies interactions with the Cloud Vision API.
- Allows you to easily send images to the API as Spring Resources.
- Offers convenience methods for common operations, such as extracting the text from an image.
Maven coordinates, using Spring Cloud GCP BOM:
<dependency> <groupId>org.springframework.cloud</groupId> <artifactId>spring-cloud-gcp-starter-vision</artifactId> </dependency>
Gradle coordinates:
dependencies {
compile group: 'org.springframework.cloud', name: 'spring-cloud-gcp-starter-vision'
}The CloudVisionTemplate offers a simple way to use the Cloud Vision APIs with Spring Resources.
After you add the spring-cloud-gcp-starter-vision dependency to your project, you may @Autowire an instance of CloudVisionTemplate to use in your code.
The CloudVisionTemplate offers the following method for interfacing with Cloud Vision:
public AnnotateImageResponse analyzeImage(Resource imageResource, Feature.Type… featureTypes)
Parameters:
Resource imageResourcerefers to the Spring Resource of the image object you wish to analyze. The Google Cloud Vision documentation provides a list of the image types that they support.Feature.Type… featureTypesrefers to a var-arg array of Cloud Vision Features to extract from the image. A feature refers to a kind of image analysis one wishes to perform on an image, such as label detection, OCR recognition, facial detection, etc. One may specify multiple features to analyze within one request. A full list of Cloud Vision Features is provided in the Cloud Vision Feature docs.
Returns:
AnnotateImageResponsecontains the results of all the feature analyses that were specified in the request. For each feature type that you provide in the request,AnnotateImageResponseprovides a getter method to get the result of that feature analysis. For example, if you analyzed an image using theLABEL_DETECTIONfeature, you would retrieve the results from the response usingannotateImageResponse.getLabelAnnotationsList().AnnotateImageResponseis provided by the Google Cloud Vision libraries; please consult the RPC reference or Javadoc for more details. Additionally, you may consult the Cloud Vision docs to familiarize yourself with the concepts and features of the API.
Image labeling refers to producing labels that describe the contents of an image. Below is a code sample of how this is done using the Cloud Vision Spring Template.
@Autowired private ResourceLoader resourceLoader; @Autowired private CloudVisionTemplate cloudVisionTemplate; public void processImage() { Resource imageResource = this.resourceLoader.getResource("my_image.jpg"); AnnotateImageResponse response = this.cloudVisionTemplate.analyzeImage( imageResource, Type.LABEL_DETECTION); System.out.println("Image Classification results: " + response.getLabelAnnotationsList()); }
A Sample Spring Boot Application is provided to show how to use the Cloud Vision starter and template.
Spring Cloud GCP provides support for Cloud Foundry’s GCP Service Broker. Our Pub/Sub, Cloud Spanner, Storage, Stackdriver Trace and Cloud SQL MySQL and PostgreSQL starters are Cloud Foundry aware and retrieve properties like project ID, credentials, etc., that are used in auto configuration from the Cloud Foundry environment.
In cases like Pub/Sub’s topic and subscription, or Storage’s bucket name, where those parameters are not used in auto configuration, you can fetch them using the VCAP mapping provided by Spring Boot.
For example, to retrieve the provisioned Pub/Sub topic, you can use the vcap.services.mypubsub.credentials.topic_name property from the application environment.
| Note |
|---|---|
If the same service is bound to the same application more than once, the auto configuration will not be able to choose among bindings and will not be activated for that service. This includes both MySQL and PostgreSQL bindings to the same app. |
| Warning |
|---|---|
In order for the Cloud SQL integration to work in Cloud Foundry, auto-reconfiguration must be disabled.
You can do so using the |
The latest version of the Spring Framework provides first-class support for Kotlin. For Kotlin users of Spring, the Spring Cloud GCP libraries work out-of-the-box and are fully interoperable with Kotlin applications.
For more information on building a Spring application in Kotlin, please consult the Spring Kotlin documentation.
Ensure that your Kotlin application is properly set up. Based on your build system, you will need to include the correct Kotlin build plugin in your project:
Depending on your application’s needs, you may need to augment your build configuration with compiler plugins:
- Kotlin Spring Plugin: Makes your Spring configuration classes/members non-final for convenience.
- Kotlin JPA Plugin: Enables using JPA in Kotlin applications.
Once your Kotlin project is properly configured, the Spring Cloud GCP libraries will work within your application without any additional setup.
A Kotlin sample application is provided to demonstrate a working Maven setup and various Spring Cloud GCP integrations from within Kotlin.
Name | Default | Description |
aws.paramstore.default-context | application | |
aws.paramstore.enabled | true | Is AWS Parameter Store support enabled. |
aws.paramstore.fail-fast | true | Throw exceptions during config lookup if true, otherwise, log warnings. |
aws.paramstore.name | Alternative to spring.application.name to use in looking up values in AWS Parameter Store. | |
aws.paramstore.prefix | /config | Prefix indicating first level for every property. Value must start with a forward slash followed by a valid path segment or be empty. Defaults to "/config". |
aws.paramstore.profile-separator | _ | |
cloud.aws.credentials.access-key | The access key to be used with a static provider. | |
cloud.aws.credentials.instance-profile | true | Configures an instance profile credentials provider with no further configuration. |
cloud.aws.credentials.profile-name | The AWS profile name. | |
cloud.aws.credentials.profile-path | The AWS profile path. | |
cloud.aws.credentials.secret-key | The secret key to be used with a static provider. | |
cloud.aws.credentials.use-default-aws-credentials-chain | false | Use the DefaultAWSCredentials Chain instead of configuring a custom credentials chain. |
cloud.aws.loader.core-pool-size | 1 | The core pool size of the Task Executor used for parallel S3 interaction. @see org.springframework.scheduling.concurrent.ThreadPoolTaskExecutor#setCorePoolSize(int) |
cloud.aws.loader.max-pool-size | The maximum pool size of the Task Executor used for parallel S3 interaction. @see org.springframework.scheduling.concurrent.ThreadPoolTaskExecutor#setMaxPoolSize(int) | |
cloud.aws.loader.queue-capacity | The maximum queue capacity for backed up S3 requests. @see org.springframework.scheduling.concurrent.ThreadPoolTaskExecutor#setQueueCapacity(int) | |
cloud.aws.region.auto | true | Enables automatic region detection based on the EC2 meta data service. |
cloud.aws.region.static | ||
cloud.aws.stack.auto | true | Enables the automatic stack name detection for the application. |
cloud.aws.stack.name | myStackName | The name of the manually configured stack name that will be used to retrieve the resources. |
encrypt.fail-on-error | true | Flag to say that a process should fail if there is an encryption or decryption error. |
encrypt.key | A symmetric key. As a stronger alternative, consider using a keystore. | |
encrypt.key-store.alias | Alias for a key in the store. | |
encrypt.key-store.location | Location of the key store file, e.g. classpath:/keystore.jks. | |
encrypt.key-store.password | Password that locks the keystore. | |
encrypt.key-store.secret | Secret protecting the key (defaults to the same as the password). | |
encrypt.key-store.type | jks | The KeyStore type. Defaults to jks. |
encrypt.rsa.algorithm | The RSA algorithm to use (DEFAULT or OEAP). Once it is set, do not change it (or existing ciphers will not be decryptable). | |
encrypt.rsa.salt | deadbeef | Salt for the random secret used to encrypt cipher text. Once it is set, do not change it (or existing ciphers will not be decryptable). |
encrypt.rsa.strong | false | Flag to indicate that "strong" AES encryption should be used internally. If true, then the GCM algorithm is applied to the AES encrypted bytes. Default is false (in which case "standard" CBC is used instead). Once it is set, do not change it (or existing ciphers will not be decryptable). |
encrypt.salt | deadbeef | A salt for the symmetric key, in the form of a hex-encoded byte array. As a stronger alternative, consider using a keystore. |
endpoints.zookeeper.enabled | true | Enable the /zookeeper endpoint to inspect the state of zookeeper. |
eureka.client.healthcheck.enabled | true | Enables the Eureka health check handler. |
health.config.enabled | false | Flag to indicate that the config server health indicator should be installed. |
health.config.time-to-live | 0 | Time to live for cached result, in milliseconds. Default 300000 (5 min). |
hystrix.metrics.enabled | true | Enable Hystrix metrics polling. Defaults to true. |
hystrix.metrics.polling-interval-ms | 2000 | Interval between subsequent polling of metrics. Defaults to 2000 ms. |
hystrix.shareSecurityContext | false | Enables auto-configuration of the Hystrix concurrency strategy plugin hook who will transfer the |
management.endpoint.bindings.cache.time-to-live | 0ms | Maximum time that a response can be cached. |
management.endpoint.bindings.enabled | true | Whether to enable the bindings endpoint. |
management.endpoint.bus-env.enabled | true | Whether to enable the bus-env endpoint. |
management.endpoint.bus-refresh.enabled | true | Whether to enable the bus-refresh endpoint. |
management.endpoint.channels.cache.time-to-live | 0ms | Maximum time that a response can be cached. |
management.endpoint.channels.enabled | true | Whether to enable the channels endpoint. |
management.endpoint.consul.cache.time-to-live | 0ms | Maximum time that a response can be cached. |
management.endpoint.consul.enabled | true | Whether to enable the consul endpoint. |
management.endpoint.env.post.enabled | true | Enables writable environment endpoint. |
management.endpoint.features.cache.time-to-live | 0ms | Maximum time that a response can be cached. |
management.endpoint.features.enabled | true | Whether to enable the features endpoint. |
management.endpoint.gateway.enabled | true | Whether to enable the gateway endpoint. |
management.endpoint.hystrix.config | Hystrix settings. These are traditionally set using servlet parameters. Refer to the documentation of Hystrix for more details. | |
management.endpoint.hystrix.stream.enabled | true | Whether to enable the hystrix.stream endpoint. |
management.endpoint.pause.enabled | true | Enable the /pause endpoint (to send Lifecycle.stop()). |
management.endpoint.refresh.enabled | true | Enable the /refresh endpoint to refresh configuration and re-initialize refresh scoped beans. |
management.endpoint.restart.enabled | true | Enable the /restart endpoint to restart the application context. |
management.endpoint.resume.enabled | true | Enable the /resume endpoint (to send Lifecycle.start()). |
management.endpoint.service-registry.cache.time-to-live | 0ms | Maximum time that a response can be cached. |
management.endpoint.service-registry.enabled | true | Whether to enable the service-registry endpoint. |
management.health.binders.enabled | true | Allows to enable/disable binder’s' health indicators. If you want to disable health indicator completely, then set it to |
management.health.refresh.enabled | true | Enable the health endpoint for the refresh scope. |
management.health.zookeeper.enabled | true | Enable the health endpoint for zookeeper. |
management.metrics.binders.hystrix.enabled | true | Enables creation of OK Http Client factory beans. |
management.metrics.export.cloudwatch.batch-size | ||
management.metrics.export.cloudwatch.connect-timeout | ||
management.metrics.export.cloudwatch.enabled | true | Enables cloud watch metrics. |
management.metrics.export.cloudwatch.namespace | Cloud watch namespace. | |
management.metrics.export.cloudwatch.num-threads | ||
management.metrics.export.cloudwatch.read-timeout | ||
management.metrics.export.cloudwatch.step | ||
maven.checksum-policy | ||
maven.connect-timeout | ||
maven.local-repository | ||
maven.offline | ||
maven.proxy | ||
maven.remote-repositories | ||
maven.request-timeout | ||
maven.resolve-pom | ||
maven.update-policy | ||
proxy.auth.load-balanced | false | |
proxy.auth.routes | Authentication strategy per route. | |
ribbon.eager-load.clients | ||
ribbon.eager-load.enabled | false | |
ribbon.http.client.enabled | false | Deprecated property to enable Ribbon RestClient. |
ribbon.okhttp.enabled | false | Enables the use of the OK HTTP Client with Ribbon. |
ribbon.restclient.enabled | false | Enables the use of the deprecated Ribbon RestClient. |
ribbon.secure-ports | ||
spring.cloud.bus.ack.destination-service | Service that wants to listen to acks. By default null (meaning all services). | |
spring.cloud.bus.ack.enabled | true | Flag to switch off acks (default on). |
spring.cloud.bus.destination | springCloudBus | Name of Spring Cloud Stream destination for messages. |
spring.cloud.bus.enabled | true | Flag to indicate that the bus is enabled. |
spring.cloud.bus.env.enabled | true | Flag to switch off environment change events (default on). |
spring.cloud.bus.id | application | The identifier for this application instance. |
spring.cloud.bus.refresh.enabled | true | Flag to switch off refresh events (default on). |
spring.cloud.bus.trace.enabled | false | Flag to switch on tracing of acks (default off). |
spring.cloud.cloudfoundry.discovery.default-server-port | 80 | Port to use when no port is defined by ribbon. |
spring.cloud.cloudfoundry.discovery.enabled | true | Flag to indicate that discovery is enabled. |
spring.cloud.cloudfoundry.discovery.heartbeat-frequency | 5000 | Frequency in milliseconds of poll for heart beat. The client will poll on this frequency and broadcast a list of service ids. |
spring.cloud.cloudfoundry.discovery.order | 0 | Order of the discovery client used by |
spring.cloud.cloudfoundry.org | Organization name to initially target. | |
spring.cloud.cloudfoundry.password | Password for user to authenticate and obtain token. | |
spring.cloud.cloudfoundry.skip-ssl-validation | false | |
spring.cloud.cloudfoundry.space | Space name to initially target. | |
spring.cloud.cloudfoundry.url | URL of Cloud Foundry API (Cloud Controller). | |
spring.cloud.cloudfoundry.username | Username to authenticate (usually an email address). | |
spring.cloud.compatibility-verifier.compatible-boot-versions | 2.1.x | Default accepted versions for the Spring Boot dependency. You can set {@code x} for the patch version if you don’t want to specify a concrete value. Example: {@code 3.4.x} |
spring.cloud.compatibility-verifier.enabled | false | Enables creation of Spring Cloud compatibility verification. |
spring.cloud.config.allow-override | true | Flag to indicate that {@link #isOverrideSystemProperties() systemPropertiesOverride} can be used. Set to false to prevent users from changing the default accidentally. Default true. |
spring.cloud.config.discovery.enabled | false | Flag to indicate that config server discovery is enabled (config server URL will be looked up via discovery). |
spring.cloud.config.discovery.service-id | configserver | Service id to locate config server. |
spring.cloud.config.enabled | true | Flag to say that remote configuration is enabled. Default true; |
spring.cloud.config.fail-fast | false | Flag to indicate that failure to connect to the server is fatal (default false). |
spring.cloud.config.headers | Additional headers used to create the client request. | |
spring.cloud.config.label | The label name to use to pull remote configuration properties. The default is set on the server (generally "master" for a git based server). | |
spring.cloud.config.name | Name of application used to fetch remote properties. | |
spring.cloud.config.override-none | false | Flag to indicate that when {@link #setAllowOverride(boolean) allowOverride} is true, external properties should take lowest priority and should not override any existing property sources (including local config files). Default false. |
spring.cloud.config.override-system-properties | true | Flag to indicate that the external properties should override system properties. Default true. |
spring.cloud.config.password | The password to use (HTTP Basic) when contacting the remote server. | |
spring.cloud.config.profile | default | The default profile to use when fetching remote configuration (comma-separated). Default is "default". |
spring.cloud.config.request-read-timeout | 0 | timeout on waiting to read data from the Config Server. |
spring.cloud.config.retry.initial-interval | 1000 | Initial retry interval in milliseconds. |
spring.cloud.config.retry.max-attempts | 6 | Maximum number of attempts. |
spring.cloud.config.retry.max-interval | 2000 | Maximum interval for backoff. |
spring.cloud.config.retry.multiplier | 1.1 | Multiplier for next interval. |
spring.cloud.config.send-state | true | Flag to indicate whether to send state. Default true. |
spring.cloud.config.server.accept-empty | true | Flag to indicate that If HTTP 404 needs to be sent if Application is not Found. |
spring.cloud.config.server.bootstrap | false | Flag indicating that the config server should initialize its own Environment with properties from the remote repository. Off by default because it delays startup but can be useful when embedding the server in another application. |
spring.cloud.config.server.credhub.ca-cert-files | ||
spring.cloud.config.server.credhub.connection-timeout | ||
spring.cloud.config.server.credhub.oauth2.registration-id | ||
spring.cloud.config.server.credhub.order | ||
spring.cloud.config.server.credhub.read-timeout | ||
spring.cloud.config.server.credhub.url | ||
spring.cloud.config.server.default-application-name | application | Default application name when incoming requests do not have a specific one. |
spring.cloud.config.server.default-label | Default repository label when incoming requests do not have a specific label. | |
spring.cloud.config.server.default-profile | default | Default application profile when incoming requests do not have a specific one. |
spring.cloud.config.server.encrypt.enabled | true | Enable decryption of environment properties before sending to client. |
spring.cloud.config.server.git.basedir | Base directory for local working copy of repository. | |
spring.cloud.config.server.git.clone-on-start | false | Flag to indicate that the repository should be cloned on startup (not on demand). Generally leads to slower startup but faster first query. |
spring.cloud.config.server.git.default-label | The default label to be used with the remote repository. | |
spring.cloud.config.server.git.delete-untracked-branches | false | Flag to indicate that the branch should be deleted locally if it’s origin tracked branch was removed. |
spring.cloud.config.server.git.force-pull | false | Flag to indicate that the repository should force pull. If true discard any local changes and take from remote repository. |
spring.cloud.config.server.git.host-key | Valid SSH host key. Must be set if hostKeyAlgorithm is also set. | |
spring.cloud.config.server.git.host-key-algorithm | One of ssh-dss, ssh-rsa, ecdsa-sha2-nistp256, ecdsa-sha2-nistp384, or ecdsa-sha2-nistp521. Must be set if hostKey is also set. | |
spring.cloud.config.server.git.ignore-local-ssh-settings | false | If true, use property-based instead of file-based SSH config. |
spring.cloud.config.server.git.known-hosts-file | Location of custom .known_hosts file. | |
spring.cloud.config.server.git.order | The order of the environment repository. | |
spring.cloud.config.server.git.passphrase | Passphrase for unlocking your ssh private key. | |
spring.cloud.config.server.git.password | Password for authentication with remote repository. | |
spring.cloud.config.server.git.preferred-authentications | Override server authentication method order. This should allow for evading login prompts if server has keyboard-interactive authentication before the publickey method. | |
spring.cloud.config.server.git.private-key | Valid SSH private key. Must be set if ignoreLocalSshSettings is true and Git URI is SSH format. | |
spring.cloud.config.server.git.proxy | HTTP proxy configuration. | |
spring.cloud.config.server.git.refresh-rate | 0 | Time (in seconds) between refresh of the git repository. |
spring.cloud.config.server.git.repos | Map of repository identifier to location and other properties. | |
spring.cloud.config.server.git.search-paths | Search paths to use within local working copy. By default searches only the root. | |
spring.cloud.config.server.git.skip-ssl-validation | false | Flag to indicate that SSL certificate validation should be bypassed when communicating with a repository served over an HTTPS connection. |
spring.cloud.config.server.git.strict-host-key-checking | true | If false, ignore errors with host key. |
spring.cloud.config.server.git.timeout | 5 | Timeout (in seconds) for obtaining HTTP or SSH connection (if applicable), defaults to 5 seconds. |
spring.cloud.config.server.git.uri | URI of remote repository. | |
spring.cloud.config.server.git.username | Username for authentication with remote repository. | |
spring.cloud.config.server.health.repositories | ||
spring.cloud.config.server.jdbc.order | 0 | |
spring.cloud.config.server.jdbc.sql | SELECT KEY, VALUE from PROPERTIES where APPLICATION=? and PROFILE=? and LABEL=? | SQL used to query database for keys and values. |
spring.cloud.config.server.native.add-label-locations | true | Flag to determine whether label locations should be added. |
spring.cloud.config.server.native.default-label | master | |
spring.cloud.config.server.native.fail-on-error | false | Flag to determine how to handle exceptions during decryption (default false). |
spring.cloud.config.server.native.order | ||
spring.cloud.config.server.native.search-locations | [] | Locations to search for configuration files. Defaults to the same as a Spring Boot app so [classpath:/,classpath:/config/,file:./,file:./config/]. |
spring.cloud.config.server.native.version | Version string to be reported for native repository. | |
spring.cloud.config.server.overrides | Extra map for a property source to be sent to all clients unconditionally. | |
spring.cloud.config.server.prefix | Prefix for configuration resource paths (default is empty). Useful when embedding in another application when you don’t want to change the context path or servlet path. | |
spring.cloud.config.server.strip-document-from-yaml | true | Flag to indicate that YAML documents that are text or collections (not a map) should be returned in "native" form. |
spring.cloud.config.server.svn.basedir | Base directory for local working copy of repository. | |
spring.cloud.config.server.svn.default-label | The default label to be used with the remote repository. | |
spring.cloud.config.server.svn.order | The order of the environment repository. | |
spring.cloud.config.server.svn.passphrase | Passphrase for unlocking your ssh private key. | |
spring.cloud.config.server.svn.password | Password for authentication with remote repository. | |
spring.cloud.config.server.svn.search-paths | Search paths to use within local working copy. By default searches only the root. | |
spring.cloud.config.server.svn.strict-host-key-checking | true | Reject incoming SSH host keys from remote servers not in the known host list. |
spring.cloud.config.server.svn.uri | URI of remote repository. | |
spring.cloud.config.server.svn.username | Username for authentication with remote repository. | |
spring.cloud.config.server.vault.backend | secret | Vault backend. Defaults to secret. |
spring.cloud.config.server.vault.default-key | application | The key in vault shared by all applications. Defaults to application. Set to empty to disable. |
spring.cloud.config.server.vault.host | 127.0.0.1 | Vault host. Defaults to 127.0.0.1. |
spring.cloud.config.server.vault.kv-version | 1 | Value to indicate which version of Vault kv backend is used. Defaults to 1. |
spring.cloud.config.server.vault.namespace | The value of the Vault X-Vault-Namespace header. Defaults to null. This a Vault Enterprise feature only. | |
spring.cloud.config.server.vault.order | ||
spring.cloud.config.server.vault.port | 8200 | Vault port. Defaults to 8200. |
spring.cloud.config.server.vault.profile-separator | , | Vault profile separator. Defaults to comma. |
spring.cloud.config.server.vault.proxy | HTTP proxy configuration. | |
spring.cloud.config.server.vault.scheme | http | Vault scheme. Defaults to http. |
spring.cloud.config.server.vault.skip-ssl-validation | false | Flag to indicate that SSL certificate validation should be bypassed when communicating with a repository served over an HTTPS connection. |
spring.cloud.config.server.vault.timeout | 5 | Timeout (in seconds) for obtaining HTTP connection, defaults to 5 seconds. |
spring.cloud.config.token | Security Token passed thru to underlying environment repository. | |
spring.cloud.config.uri | The URI of the remote server (default http://localhost:8888). | |
spring.cloud.config.username | The username to use (HTTP Basic) when contacting the remote server. | |
spring.cloud.consul.config.acl-token | ||
spring.cloud.consul.config.data-key | data | If format is Format.PROPERTIES or Format.YAML then the following field is used as key to look up consul for configuration. |
spring.cloud.consul.config.default-context | application | |
spring.cloud.consul.config.enabled | true | |
spring.cloud.consul.config.fail-fast | true | Throw exceptions during config lookup if true, otherwise, log warnings. |
spring.cloud.consul.config.format | ||
spring.cloud.consul.config.name | Alternative to spring.application.name to use in looking up values in consul KV. | |
spring.cloud.consul.config.prefix | config | |
spring.cloud.consul.config.profile-separator | , | |
spring.cloud.consul.config.watch.delay | 1000 | The value of the fixed delay for the watch in millis. Defaults to 1000. |
spring.cloud.consul.config.watch.enabled | true | If the watch is enabled. Defaults to true. |
spring.cloud.consul.config.watch.wait-time | 55 | The number of seconds to wait (or block) for watch query, defaults to 55. Needs to be less than default ConsulClient (defaults to 60). To increase ConsulClient timeout create a ConsulClient bean with a custom ConsulRawClient with a custom HttpClient. |
spring.cloud.consul.discovery.acl-token | ||
spring.cloud.consul.discovery.catalog-services-watch-delay | 1000 | The delay between calls to watch consul catalog in millis, default is 1000. |
spring.cloud.consul.discovery.catalog-services-watch-timeout | 2 | The number of seconds to block while watching consul catalog, default is 2. |
spring.cloud.consul.discovery.datacenters | Map of serviceId’s → datacenter to query for in server list. This allows looking up services in another datacenters. | |
spring.cloud.consul.discovery.default-query-tag | Tag to query for in service list if one is not listed in serverListQueryTags. | |
spring.cloud.consul.discovery.default-zone-metadata-name | zone | Service instance zone comes from metadata. This allows changing the metadata tag name. |
spring.cloud.consul.discovery.deregister | true | Disable automatic de-registration of service in consul. |
spring.cloud.consul.discovery.enabled | true | Is service discovery enabled? |
spring.cloud.consul.discovery.fail-fast | true | Throw exceptions during service registration if true, otherwise, log warnings (defaults to true). |
spring.cloud.consul.discovery.health-check-critical-timeout | Timeout to deregister services critical for longer than timeout (e.g. 30m). Requires consul version 7.x or higher. | |
spring.cloud.consul.discovery.health-check-headers | Headers to be applied to the Health Check calls. | |
spring.cloud.consul.discovery.health-check-interval | 10s | How often to perform the health check (e.g. 10s), defaults to 10s. |
spring.cloud.consul.discovery.health-check-path | /actuator/health | Alternate server path to invoke for health checking. |
spring.cloud.consul.discovery.health-check-timeout | Timeout for health check (e.g. 10s). | |
spring.cloud.consul.discovery.health-check-tls-skip-verify | Skips certificate verification during service checks if true, otherwise runs certificate verification. | |
spring.cloud.consul.discovery.health-check-url | Custom health check url to override default. | |
spring.cloud.consul.discovery.heartbeat.enabled | false | |
spring.cloud.consul.discovery.heartbeat.interval-ratio | ||
spring.cloud.consul.discovery.heartbeat.ttl-unit | s | |
spring.cloud.consul.discovery.heartbeat.ttl-value | 30 | |
spring.cloud.consul.discovery.hostname | Hostname to use when accessing server. | |
spring.cloud.consul.discovery.instance-group | Service instance group. | |
spring.cloud.consul.discovery.instance-id | Unique service instance id. | |
spring.cloud.consul.discovery.instance-zone | Service instance zone. | |
spring.cloud.consul.discovery.ip-address | IP address to use when accessing service (must also set preferIpAddress to use). | |
spring.cloud.consul.discovery.lifecycle.enabled | true | |
spring.cloud.consul.discovery.management-port | Port to register the management service under (defaults to management port). | |
spring.cloud.consul.discovery.management-suffix | management | Suffix to use when registering management service. |
spring.cloud.consul.discovery.management-tags | Tags to use when registering management service. | |
spring.cloud.consul.discovery.order | 0 | Order of the discovery client used by |
spring.cloud.consul.discovery.port | Port to register the service under (defaults to listening port). | |
spring.cloud.consul.discovery.prefer-agent-address | false | Source of how we will determine the address to use. |
spring.cloud.consul.discovery.prefer-ip-address | false | Use ip address rather than hostname during registration. |
spring.cloud.consul.discovery.query-passing | false | Add the 'passing` parameter to /v1/health/service/serviceName. This pushes health check passing to the server. |
spring.cloud.consul.discovery.register | true | Register as a service in consul. |
spring.cloud.consul.discovery.register-health-check | true | Register health check in consul. Useful during development of a service. |
spring.cloud.consul.discovery.scheme | http | Whether to register an http or https service. |
spring.cloud.consul.discovery.server-list-query-tags | Map of serviceId’s → tag to query for in server list. This allows filtering services by a single tag. | |
spring.cloud.consul.discovery.service-name | Service name. | |
spring.cloud.consul.discovery.tags | Tags to use when registering service. | |
spring.cloud.consul.enabled | true | Is spring cloud consul enabled. |
spring.cloud.consul.host | localhost | Consul agent hostname. Defaults to 'localhost'. |
spring.cloud.consul.port | 8500 | Consul agent port. Defaults to '8500'. |
spring.cloud.consul.retry.initial-interval | 1000 | Initial retry interval in milliseconds. |
spring.cloud.consul.retry.max-attempts | 6 | Maximum number of attempts. |
spring.cloud.consul.retry.max-interval | 2000 | Maximum interval for backoff. |
spring.cloud.consul.retry.multiplier | 1.1 | Multiplier for next interval. |
spring.cloud.consul.scheme | Consul agent scheme (HTTP/HTTPS). If there is no scheme in address - client will use HTTP. | |
spring.cloud.consul.tls.certificate-password | Password to open the certificate. | |
spring.cloud.consul.tls.certificate-path | File path to the certificate. | |
spring.cloud.consul.tls.key-store-instance-type | Type of key framework to use. | |
spring.cloud.consul.tls.key-store-password | Password to an external keystore. | |
spring.cloud.consul.tls.key-store-path | Path to an external keystore. | |
spring.cloud.discovery.client.cloudfoundry.order | ||
spring.cloud.discovery.client.composite-indicator.enabled | true | Enables discovery client composite health indicator. |
spring.cloud.discovery.client.health-indicator.enabled | true | |
spring.cloud.discovery.client.health-indicator.include-description | false | |
spring.cloud.discovery.client.simple.instances | ||
spring.cloud.discovery.client.simple.local.instance-id | The unique identifier or name for the service instance. | |
spring.cloud.discovery.client.simple.local.metadata | Metadata for the service instance. Can be used by discovery clients to modify their behaviour per instance, e.g. when load balancing. | |
spring.cloud.discovery.client.simple.local.service-id | The identifier or name for the service. Multiple instances might share the same service ID. | |
spring.cloud.discovery.client.simple.local.uri | The URI of the service instance. Will be parsed to extract the scheme, host, and port. | |
spring.cloud.discovery.client.simple.order | ||
spring.cloud.discovery.enabled | true | Enables discovery client health indicators. |
spring.cloud.features.enabled | true | Enables the features endpoint. |
spring.cloud.function.compile | Configuration for function bodies, which will be compiled. The key in the map is the function name and the value is a map containing a key "lambda" which is the body to compile, and optionally a "type" (defaults to "function"). Can also contain "inputType" and "outputType" in case it is ambiguous. | |
spring.cloud.function.definition | Name (e.g., 'foo') or composition instruction (e.g., 'foo|bar') used to resolve default function especially for cases where there is more then once function available in catalog. | |
spring.cloud.function.imports | Configuration for a set of files containing function bodies, which will be imported and compiled. The key in the map is the function name and the value is another map, containing a "location" of the file to compile and (optionally) a "type" (defaults to "function"). | |
spring.cloud.function.scan.packages | functions | Triggers scanning within the specified base packages for any class that is assignable to java.util.function.Function. For each detected Function class, a bean instance will be added to the context. |
spring.cloud.function.task.consumer | ||
spring.cloud.function.task.function | ||
spring.cloud.function.task.supplier | ||
spring.cloud.function.web.path | Path to web resources for functions (should start with / if not empty). | |
spring.cloud.function.web.supplier.auto-startup | true | |
spring.cloud.function.web.supplier.debug | true | |
spring.cloud.function.web.supplier.enabled | false | |
spring.cloud.function.web.supplier.headers | ||
spring.cloud.function.web.supplier.name | ||
spring.cloud.function.web.supplier.template-url | ||
spring.cloud.gateway.default-filters | List of filter definitions that are applied to every route. | |
spring.cloud.gateway.discovery.locator.enabled | false | Flag that enables DiscoveryClient gateway integration. |
spring.cloud.gateway.discovery.locator.filters | ||
spring.cloud.gateway.discovery.locator.include-expression | true | SpEL expression that will evaluate whether to include a service in gateway integration or not, defaults to: true. |
spring.cloud.gateway.discovery.locator.lower-case-service-id | false | Option to lower case serviceId in predicates and filters, defaults to false. Useful with eureka when it automatically uppercases serviceId. so MYSERIVCE, would match /myservice/** |
spring.cloud.gateway.discovery.locator.predicates | ||
spring.cloud.gateway.discovery.locator.route-id-prefix | The prefix for the routeId, defaults to discoveryClient.getClass().getSimpleName() + "_". Service Id will be appended to create the routeId. | |
spring.cloud.gateway.discovery.locator.url-expression | 'lb://'+serviceId | SpEL expression that create the uri for each route, defaults to: 'lb://'+serviceId. |
spring.cloud.gateway.enabled | true | Enables gateway functionality. |
spring.cloud.gateway.filter.remove-hop-by-hop.headers | ||
spring.cloud.gateway.filter.remove-hop-by-hop.order | ||
spring.cloud.gateway.filter.request-rate-limiter.deny-empty-key | true | Switch to deny requests if the Key Resolver returns an empty key, defaults to true. |
spring.cloud.gateway.filter.request-rate-limiter.empty-key-status-code | HttpStatus to return when denyEmptyKey is true, defaults to FORBIDDEN. | |
spring.cloud.gateway.filter.secure-headers.content-security-policy | default-src 'self' https:; font-src 'self' https: data:; img-src 'self' https: data:; object-src 'none'; script-src https:; style-src 'self' https: 'unsafe-inline' | |
spring.cloud.gateway.filter.secure-headers.content-type-options | nosniff | |
spring.cloud.gateway.filter.secure-headers.download-options | noopen | |
spring.cloud.gateway.filter.secure-headers.frame-options | DENY | |
spring.cloud.gateway.filter.secure-headers.permitted-cross-domain-policies | none | |
spring.cloud.gateway.filter.secure-headers.referrer-policy | no-referrer | |
spring.cloud.gateway.filter.secure-headers.strict-transport-security | max-age=631138519 | |
spring.cloud.gateway.filter.secure-headers.xss-protection-header | 1 ; mode=block | |
spring.cloud.gateway.forwarded.enabled | true | Enables the ForwardedHeadersFilter. |
spring.cloud.gateway.globalcors.cors-configurations | ||
spring.cloud.gateway.httpclient.connect-timeout | The connect timeout in millis, the default is 45s. | |
spring.cloud.gateway.httpclient.pool.acquire-timeout | Only for type FIXED, the maximum time in millis to wait for aquiring. | |
spring.cloud.gateway.httpclient.pool.max-connections | Only for type FIXED, the maximum number of connections before starting pending acquisition on existing ones. | |
spring.cloud.gateway.httpclient.pool.name | proxy | The channel pool map name, defaults to proxy. |
spring.cloud.gateway.httpclient.pool.type | Type of pool for HttpClient to use, defaults to ELASTIC. | |
spring.cloud.gateway.httpclient.proxy.host | Hostname for proxy configuration of Netty HttpClient. | |
spring.cloud.gateway.httpclient.proxy.non-proxy-hosts-pattern | Regular expression (Java) for a configured list of hosts. that should be reached directly, bypassing the proxy | |
spring.cloud.gateway.httpclient.proxy.password | Password for proxy configuration of Netty HttpClient. | |
spring.cloud.gateway.httpclient.proxy.port | Port for proxy configuration of Netty HttpClient. | |
spring.cloud.gateway.httpclient.proxy.username | Username for proxy configuration of Netty HttpClient. | |
spring.cloud.gateway.httpclient.response-timeout | The response timeout. | |
spring.cloud.gateway.httpclient.ssl.close-notify-flush-timeout | 3000ms | SSL close_notify flush timeout. Default to 3000 ms. |
spring.cloud.gateway.httpclient.ssl.close-notify-flush-timeout-millis | ||
spring.cloud.gateway.httpclient.ssl.close-notify-read-timeout | SSL close_notify read timeout. Default to 0 ms. | |
spring.cloud.gateway.httpclient.ssl.close-notify-read-timeout-millis | ||
spring.cloud.gateway.httpclient.ssl.default-configuration-type | The default ssl configuration type. Defaults to TCP. | |
spring.cloud.gateway.httpclient.ssl.handshake-timeout | 10000ms | SSL handshake timeout. Default to 10000 ms |
spring.cloud.gateway.httpclient.ssl.handshake-timeout-millis | ||
spring.cloud.gateway.httpclient.ssl.trusted-x509-certificates | Trusted certificates for verifying the remote endpoint’s certificate. | |
spring.cloud.gateway.httpclient.ssl.use-insecure-trust-manager | false | Installs the netty InsecureTrustManagerFactory. This is insecure and not suitable for production. |
spring.cloud.gateway.loadbalancer.use404 | false | |
spring.cloud.gateway.metrics.enabled | false | Enables the collection of metrics data. |
spring.cloud.gateway.proxy.headers | Fixed header values that will be added to all downstream requests. | |
spring.cloud.gateway.proxy.sensitive | A set of sensitive header names that will not be sent downstream by default. | |
spring.cloud.gateway.redis-rate-limiter.burst-capacity-header | X-RateLimit-Burst-Capacity | The name of the header that returns the burst capacity configuration. |
spring.cloud.gateway.redis-rate-limiter.config | ||
spring.cloud.gateway.redis-rate-limiter.include-headers | true | Whether or not to include headers containing rate limiter information, defaults to true. |
spring.cloud.gateway.redis-rate-limiter.remaining-header | X-RateLimit-Remaining | The name of the header that returns number of remaining requests during the current second. |
spring.cloud.gateway.redis-rate-limiter.replenish-rate-header | X-RateLimit-Replenish-Rate | The name of the header that returns the replenish rate configuration. |
spring.cloud.gateway.routes | List of Routes. | |
spring.cloud.gateway.streaming-media-types | ||
spring.cloud.gateway.x-forwarded.enabled | true | If the XForwardedHeadersFilter is enabled. |
spring.cloud.gateway.x-forwarded.for-append | true | If appending X-Forwarded-For as a list is enabled. |
spring.cloud.gateway.x-forwarded.for-enabled | true | If X-Forwarded-For is enabled. |
spring.cloud.gateway.x-forwarded.host-append | true | If appending X-Forwarded-Host as a list is enabled. |
spring.cloud.gateway.x-forwarded.host-enabled | true | If X-Forwarded-Host is enabled. |
spring.cloud.gateway.x-forwarded.order | 0 | The order of the XForwardedHeadersFilter. |
spring.cloud.gateway.x-forwarded.port-append | true | If appending X-Forwarded-Port as a list is enabled. |
spring.cloud.gateway.x-forwarded.port-enabled | true | If X-Forwarded-Port is enabled. |
spring.cloud.gateway.x-forwarded.prefix-append | true | If appending X-Forwarded-Prefix as a list is enabled. |
spring.cloud.gateway.x-forwarded.prefix-enabled | true | If X-Forwarded-Prefix is enabled. |
spring.cloud.gateway.x-forwarded.proto-append | true | If appending X-Forwarded-Proto as a list is enabled. |
spring.cloud.gateway.x-forwarded.proto-enabled | true | If X-Forwarded-Proto is enabled. |
spring.cloud.gcp.config.credentials.encoded-key | ||
spring.cloud.gcp.config.credentials.location | ||
spring.cloud.gcp.config.credentials.scopes | ||
spring.cloud.gcp.config.enabled | false | Enables Spring Cloud GCP Config. |
spring.cloud.gcp.config.name | Name of the application. | |
spring.cloud.gcp.config.profile | Comma-delimited string of profiles under which the app is running. Gets its default value from the {@code spring.profiles.active} property, falling back on the {@code spring.profiles.default} property. | |
spring.cloud.gcp.config.project-id | Overrides the GCP project ID specified in the Core module. | |
spring.cloud.gcp.config.timeout-millis | 60000 | Timeout for Google Runtime Configuration API calls. |
spring.cloud.gcp.credentials.encoded-key | ||
spring.cloud.gcp.credentials.location | ||
spring.cloud.gcp.credentials.scopes | ||
spring.cloud.gcp.datastore.credentials.encoded-key | ||
spring.cloud.gcp.datastore.credentials.location | ||
spring.cloud.gcp.datastore.credentials.scopes | ||
spring.cloud.gcp.datastore.namespace | ||
spring.cloud.gcp.datastore.project-id | ||
spring.cloud.gcp.logging.enabled | true | Auto-configure Google Cloud Stackdriver logging for Spring MVC. |
spring.cloud.gcp.project-id | GCP project ID where services are running. | |
spring.cloud.gcp.pubsub.credentials.encoded-key | ||
spring.cloud.gcp.pubsub.credentials.location | ||
spring.cloud.gcp.pubsub.credentials.scopes | ||
spring.cloud.gcp.pubsub.emulator-host | The host and port of the local running emulator. If provided, this will setup the client to connect against a running pub/sub emulator. | |
spring.cloud.gcp.pubsub.enabled | true | Auto-configure Google Cloud Pub/Sub components. |
spring.cloud.gcp.pubsub.project-id | Overrides the GCP project ID specified in the Core module. | |
spring.cloud.gcp.pubsub.publisher.batching.delay-threshold-seconds | The delay threshold to use for batching. After this amount of time has elapsed (counting from the first element added), the elements will be wrapped up in a batch and sent. | |
spring.cloud.gcp.pubsub.publisher.batching.element-count-threshold | The element count threshold to use for batching. | |
spring.cloud.gcp.pubsub.publisher.batching.enabled | Enables batching if true. | |
spring.cloud.gcp.pubsub.publisher.batching.flow-control.limit-exceeded-behavior | The behavior when the specified limits are exceeded. | |
spring.cloud.gcp.pubsub.publisher.batching.flow-control.max-outstanding-element-count | Maximum number of outstanding elements to keep in memory before enforcing flow control. | |
spring.cloud.gcp.pubsub.publisher.batching.flow-control.max-outstanding-request-bytes | Maximum number of outstanding bytes to keep in memory before enforcing flow control. | |
spring.cloud.gcp.pubsub.publisher.batching.request-byte-threshold | The request byte threshold to use for batching. | |
spring.cloud.gcp.pubsub.publisher.executor-threads | 4 | Number of threads used by every publisher. |
spring.cloud.gcp.pubsub.publisher.retry.initial-retry-delay-seconds | InitialRetryDelay controls the delay before the first retry. Subsequent retries will use this value adjusted according to the RetryDelayMultiplier. | |
spring.cloud.gcp.pubsub.publisher.retry.initial-rpc-timeout-seconds | InitialRpcTimeout controls the timeout for the initial RPC. Subsequent calls will use this value adjusted according to the RpcTimeoutMultiplier. | |
spring.cloud.gcp.pubsub.publisher.retry.jittered | Jitter determines if the delay time should be randomized. | |
spring.cloud.gcp.pubsub.publisher.retry.max-attempts | MaxAttempts defines the maximum number of attempts to perform. If this value is greater than 0, and the number of attempts reaches this limit, the logic will give up retrying even if the total retry time is still lower than TotalTimeout. | |
spring.cloud.gcp.pubsub.publisher.retry.max-retry-delay-seconds | MaxRetryDelay puts a limit on the value of the retry delay, so that the RetryDelayMultiplier can’t increase the retry delay higher than this amount. | |
spring.cloud.gcp.pubsub.publisher.retry.max-rpc-timeout-seconds | MaxRpcTimeout puts a limit on the value of the RPC timeout, so that the RpcTimeoutMultiplier can’t increase the RPC timeout higher than this amount. | |
spring.cloud.gcp.pubsub.publisher.retry.retry-delay-multiplier | RetryDelayMultiplier controls the change in retry delay. The retry delay of the previous call is multiplied by the RetryDelayMultiplier to calculate the retry delay for the next call. | |
spring.cloud.gcp.pubsub.publisher.retry.rpc-timeout-multiplier | RpcTimeoutMultiplier controls the change in RPC timeout. The timeout of the previous call is multiplied by the RpcTimeoutMultiplier to calculate the timeout for the next call. | |
spring.cloud.gcp.pubsub.publisher.retry.total-timeout-seconds | TotalTimeout has ultimate control over how long the logic should keep trying the remote call until it gives up completely. The higher the total timeout, the more retries can be attempted. | |
spring.cloud.gcp.pubsub.subscriber.executor-threads | 4 | Number of threads used by every subscriber. |
spring.cloud.gcp.pubsub.subscriber.flow-control.limit-exceeded-behavior | The behavior when the specified limits are exceeded. | |
spring.cloud.gcp.pubsub.subscriber.flow-control.max-outstanding-element-count | Maximum number of outstanding elements to keep in memory before enforcing flow control. | |
spring.cloud.gcp.pubsub.subscriber.flow-control.max-outstanding-request-bytes | Maximum number of outstanding bytes to keep in memory before enforcing flow control. | |
spring.cloud.gcp.pubsub.subscriber.max-ack-extension-period | 0 | The optional max ack extension period in seconds for the subscriber factory. |
spring.cloud.gcp.pubsub.subscriber.max-acknowledgement-threads | 4 | Number of threads used for batch acknowledgement. |
spring.cloud.gcp.pubsub.subscriber.parallel-pull-count | The optional parallel pull count setting for the subscriber factory. | |
spring.cloud.gcp.pubsub.subscriber.pull-endpoint | The optional pull endpoint setting for the subscriber factory. | |
spring.cloud.gcp.pubsub.subscriber.retry.initial-retry-delay-seconds | InitialRetryDelay controls the delay before the first retry. Subsequent retries will use this value adjusted according to the RetryDelayMultiplier. | |
spring.cloud.gcp.pubsub.subscriber.retry.initial-rpc-timeout-seconds | InitialRpcTimeout controls the timeout for the initial RPC. Subsequent calls will use this value adjusted according to the RpcTimeoutMultiplier. | |
spring.cloud.gcp.pubsub.subscriber.retry.jittered | Jitter determines if the delay time should be randomized. | |
spring.cloud.gcp.pubsub.subscriber.retry.max-attempts | MaxAttempts defines the maximum number of attempts to perform. If this value is greater than 0, and the number of attempts reaches this limit, the logic will give up retrying even if the total retry time is still lower than TotalTimeout. | |
spring.cloud.gcp.pubsub.subscriber.retry.max-retry-delay-seconds | MaxRetryDelay puts a limit on the value of the retry delay, so that the RetryDelayMultiplier can’t increase the retry delay higher than this amount. | |
spring.cloud.gcp.pubsub.subscriber.retry.max-rpc-timeout-seconds | MaxRpcTimeout puts a limit on the value of the RPC timeout, so that the RpcTimeoutMultiplier can’t increase the RPC timeout higher than this amount. | |
spring.cloud.gcp.pubsub.subscriber.retry.retry-delay-multiplier | RetryDelayMultiplier controls the change in retry delay. The retry delay of the previous call is multiplied by the RetryDelayMultiplier to calculate the retry delay for the next call. | |
spring.cloud.gcp.pubsub.subscriber.retry.rpc-timeout-multiplier | RpcTimeoutMultiplier controls the change in RPC timeout. The timeout of the previous call is multiplied by the RpcTimeoutMultiplier to calculate the timeout for the next call. | |
spring.cloud.gcp.pubsub.subscriber.retry.total-timeout-seconds | TotalTimeout has ultimate control over how long the logic should keep trying the remote call until it gives up completely. The higher the total timeout, the more retries can be attempted. | |
spring.cloud.gcp.security.iap.algorithm | ES256 | Encryption algorithm used to sign the JWK token. |
spring.cloud.gcp.security.iap.audience | Non-dynamic audience string to validate. | |
spring.cloud.gcp.security.iap.enabled | true | Auto-configure Google Cloud IAP identity extraction components. |
spring.cloud.gcp.security.iap.header | x-goog-iap-jwt-assertion | Header from which to extract the JWK key. |
spring.cloud.gcp.security.iap.issuer | JWK issuer to verify. | |
spring.cloud.gcp.security.iap.registry | Link to JWK public key registry. | |
spring.cloud.gcp.spanner.create-interleaved-table-ddl-on-delete-cascade | true | |
spring.cloud.gcp.spanner.credentials.encoded-key | ||
spring.cloud.gcp.spanner.credentials.location | ||
spring.cloud.gcp.spanner.credentials.scopes | ||
spring.cloud.gcp.spanner.database | ||
spring.cloud.gcp.spanner.instance-id | ||
spring.cloud.gcp.spanner.keep-alive-interval-minutes | -1 | |
spring.cloud.gcp.spanner.max-idle-sessions | -1 | |
spring.cloud.gcp.spanner.max-sessions | -1 | |
spring.cloud.gcp.spanner.min-sessions | -1 | |
spring.cloud.gcp.spanner.num-rpc-channels | -1 | |
spring.cloud.gcp.spanner.prefetch-chunks | -1 | |
spring.cloud.gcp.spanner.project-id | ||
spring.cloud.gcp.spanner.write-sessions-fraction | -1 | |
spring.cloud.gcp.sql.credentials | Overrides the GCP OAuth2 credentials specified in the Core module. | |
spring.cloud.gcp.sql.database-name | Name of the database in the Cloud SQL instance. | |
spring.cloud.gcp.sql.enabled | true | Auto-configure Google Cloud SQL support components. |
spring.cloud.gcp.sql.instance-connection-name | Cloud SQL instance connection name. [GCP_PROJECT_ID]:[INSTANCE_REGION]:[INSTANCE_NAME]. | |
spring.cloud.gcp.storage.auto-create-files | ||
spring.cloud.gcp.storage.credentials.encoded-key | ||
spring.cloud.gcp.storage.credentials.location | ||
spring.cloud.gcp.storage.credentials.scopes | ||
spring.cloud.gcp.storage.enabled | true | Auto-configure Google Cloud Storage components. |
spring.cloud.gcp.trace.authority | HTTP/2 authority the channel claims to be connecting to. | |
spring.cloud.gcp.trace.compression | Compression to use for the call. | |
spring.cloud.gcp.trace.credentials.encoded-key | ||
spring.cloud.gcp.trace.credentials.location | ||
spring.cloud.gcp.trace.credentials.scopes | ||
spring.cloud.gcp.trace.deadline-ms | Call deadline. | |
spring.cloud.gcp.trace.enabled | true | Auto-configure Google Cloud Stackdriver tracing components. |
spring.cloud.gcp.trace.max-inbound-size | Maximum size for an inbound message. | |
spring.cloud.gcp.trace.max-outbound-size | Maximum size for an outbound message. | |
spring.cloud.gcp.trace.num-executor-threads | 4 | Number of threads to be used by the Trace executor. |
spring.cloud.gcp.trace.project-id | Overrides the GCP project ID specified in the Core module. | |
spring.cloud.gcp.trace.wait-for-ready | Waits for the channel to be ready in case of a transient failure. Defaults to failing fast in that case. | |
spring.cloud.gcp.vision.credentials.encoded-key | ||
spring.cloud.gcp.vision.credentials.location | ||
spring.cloud.gcp.vision.credentials.scopes | ||
spring.cloud.gcp.vision.enabled | true | Auto-configure Google Cloud Vision components. |
spring.cloud.httpclientfactories.apache.enabled | true | Enables creation of Apache Http Client factory beans. |
spring.cloud.httpclientfactories.ok.enabled | true | Enables creation of OK Http Client factory beans. |
spring.cloud.hypermedia.refresh.fixed-delay | 5000 | |
spring.cloud.hypermedia.refresh.initial-delay | 10000 | |
spring.cloud.inetutils.default-hostname | localhost | The default hostname. Used in case of errors. |
spring.cloud.inetutils.default-ip-address | 127.0.0.1 | The default IP address. Used in case of errors. |
spring.cloud.inetutils.ignored-interfaces | List of Java regular expressions for network interfaces that will be ignored. | |
spring.cloud.inetutils.preferred-networks | List of Java regular expressions for network addresses that will be preferred. | |
spring.cloud.inetutils.timeout-seconds | 1 | Timeout, in seconds, for calculating hostname. |
spring.cloud.inetutils.use-only-site-local-interfaces | false | Whether to use only interfaces with site local addresses. See {@link InetAddress#isSiteLocalAddress()} for more details. |
spring.cloud.kubernetes.client.api-version | ||
spring.cloud.kubernetes.client.apiVersion | v1 | Kubernetes API Version |
spring.cloud.kubernetes.client.ca-cert-data | ||
spring.cloud.kubernetes.client.ca-cert-file | ||
spring.cloud.kubernetes.client.caCertData | Kubernetes API CACertData | |
spring.cloud.kubernetes.client.caCertFile | Kubernetes API CACertFile | |
spring.cloud.kubernetes.client.client-cert-data | ||
spring.cloud.kubernetes.client.client-cert-file | ||
spring.cloud.kubernetes.client.client-key-algo | ||
spring.cloud.kubernetes.client.client-key-data | ||
spring.cloud.kubernetes.client.client-key-file | ||
spring.cloud.kubernetes.client.client-key-passphrase | ||
spring.cloud.kubernetes.client.clientCertData | Kubernetes API ClientCertData | |
spring.cloud.kubernetes.client.clientCertFile | Kubernetes API ClientCertFile | |
spring.cloud.kubernetes.client.clientKeyAlgo | RSA | Kubernetes API ClientKeyAlgo |
spring.cloud.kubernetes.client.clientKeyData | Kubernetes API ClientKeyData | |
spring.cloud.kubernetes.client.clientKeyFile | Kubernetes API ClientKeyFile | |
spring.cloud.kubernetes.client.clientKeyPassphrase | changeit | Kubernetes API ClientKeyPassphrase |
spring.cloud.kubernetes.client.connection-timeout | ||
spring.cloud.kubernetes.client.connectionTimeout | 10s | Connection timeout |
spring.cloud.kubernetes.client.http-proxy | ||
spring.cloud.kubernetes.client.https-proxy | ||
spring.cloud.kubernetes.client.logging-interval | ||
spring.cloud.kubernetes.client.loggingInterval | 20s | Logging interval |
spring.cloud.kubernetes.client.master-url | ||
spring.cloud.kubernetes.client.masterUrl | Kubernetes API Master Node URL | |
spring.cloud.kubernetes.client.namespace | true | Kubernetes Namespace |
spring.cloud.kubernetes.client.no-proxy | ||
spring.cloud.kubernetes.client.password | Kubernetes API Password | |
spring.cloud.kubernetes.client.proxy-password | ||
spring.cloud.kubernetes.client.proxy-username | ||
spring.cloud.kubernetes.client.request-timeout | ||
spring.cloud.kubernetes.client.requestTimeout | 10s | Request timeout |
spring.cloud.kubernetes.client.rolling-timeout | ||
spring.cloud.kubernetes.client.rollingTimeout | 900s | Rolling timeout |
spring.cloud.kubernetes.client.trust-certs | ||
spring.cloud.kubernetes.client.trustCerts | false | Kubernetes API Trust Certificates |
spring.cloud.kubernetes.client.username | Kubernetes API Username | |
spring.cloud.kubernetes.client.watch-reconnect-interval | ||
spring.cloud.kubernetes.client.watch-reconnect-limit | ||
spring.cloud.kubernetes.client.watchReconnectInterval | 1s | Reconnect Interval |
spring.cloud.kubernetes.client.watchReconnectLimit | -1 | Reconnect Interval limit retries |
spring.cloud.kubernetes.config.enable-api | true | |
spring.cloud.kubernetes.config.enabled | true | Enable the ConfigMap property source locator. |
spring.cloud.kubernetes.config.name | ||
spring.cloud.kubernetes.config.namespace | ||
spring.cloud.kubernetes.config.paths | ||
spring.cloud.kubernetes.config.sources | ||
spring.cloud.kubernetes.reload.enabled | false | Enables the Kubernetes configuration reload on change. |
spring.cloud.kubernetes.reload.mode | Sets the detection mode for Kubernetes configuration reload. | |
spring.cloud.kubernetes.reload.monitoring-config-maps | true | Enables monitoring on config maps to detect changes. |
spring.cloud.kubernetes.reload.monitoring-secrets | false | Enables monitoring on secrets to detect changes. |
spring.cloud.kubernetes.reload.period | 15000ms | Sets the polling period to use when the detection mode is POLLING. |
spring.cloud.kubernetes.reload.strategy | Sets the reload strategy for Kubernetes configuration reload on change. | |
spring.cloud.kubernetes.secrets.enable-api | false | |
spring.cloud.kubernetes.secrets.enabled | true | Enable the Secrets property source locator. |
spring.cloud.kubernetes.secrets.labels | ||
spring.cloud.kubernetes.secrets.name | ||
spring.cloud.kubernetes.secrets.namespace | ||
spring.cloud.kubernetes.secrets.paths | ||
spring.cloud.loadbalancer.retry.enabled | true | |
spring.cloud.refresh.enabled | true | Enables autoconfiguration for the refresh scope and associated features. |
spring.cloud.refresh.extra-refreshable | true | Additional class names for beans to post process into refresh scope. |
spring.cloud.service-registry.auto-registration.enabled | true | Whether service auto-registration is enabled. Defaults to true. |
spring.cloud.service-registry.auto-registration.fail-fast | false | Whether startup fails if there is no AutoServiceRegistration. Defaults to false. |
spring.cloud.service-registry.auto-registration.register-management | true | Whether to register the management as a service. Defaults to true. |
spring.cloud.stream.binders | Additional per-binder properties (see {@link BinderProperties}) if more then one binder of the same type is used (i.e., connect to multiple instances of RabbitMq). Here you can specify multiple binder configurations, each with different environment settings. For example; spring.cloud.stream.binders.rabbit1.environment. . . , spring.cloud.stream.binders.rabbit2.environment. . . | |
spring.cloud.stream.binding-retry-interval | 30 | Retry interval (in seconds) used to schedule binding attempts. Default: 30 sec. |
spring.cloud.stream.bindings | Additional binding properties (see {@link BinderProperties}) per binding name (e.g., 'input`). For example; This sets the content-type for the 'input' binding of a Sink application: 'spring.cloud.stream.bindings.input.contentType=text/plain' | |
spring.cloud.stream.consul.binder.event-timeout | 5 | |
spring.cloud.stream.default-binder | The name of the binder to use by all bindings in the event multiple binders available (e.g., 'rabbit'). | |
spring.cloud.stream.dynamic-destinations | [] | A list of destinations that can be bound dynamically. If set, only listed destinations can be bound. |
spring.cloud.stream.function.definition | Definition of functions to bind. If several functions need to be composed into one, use pipes (e.g., 'fooFunc\|barFunc') | |
spring.cloud.stream.instance-count | 1 | The number of deployed instances of an application. Default: 1. NOTE: Could also be managed per individual binding "spring.cloud.stream.bindings.foo.consumer.instance-count" where 'foo' is the name of the binding. |
spring.cloud.stream.instance-index | 0 | The instance id of the application: a number from 0 to instanceCount-1. Used for partitioning and with Kafka. NOTE: Could also be managed per individual binding "spring.cloud.stream.bindings.foo.consumer.instance-index" where 'foo' is the name of the binding. |
spring.cloud.stream.integration.message-handler-not-propagated-headers | Message header names that will NOT be copied from the inbound message. | |
spring.cloud.stream.kafka.binder.auto-add-partitions | false | |
spring.cloud.stream.kafka.binder.auto-create-topics | true | |
spring.cloud.stream.kafka.binder.brokers | [localhost] | |
spring.cloud.stream.kafka.binder.configuration | Arbitrary kafka properties that apply to both producers and consumers. | |
spring.cloud.stream.kafka.binder.consumer-properties | Arbitrary kafka consumer properties. | |
spring.cloud.stream.kafka.binder.fetch-size | 0 | |
spring.cloud.stream.kafka.binder.header-mapper-bean-name | The bean name of a custom header mapper to use instead of a {@link org.springframework.kafka.support.DefaultKafkaHeaderMapper}. | |
spring.cloud.stream.kafka.binder.headers | [] | |
spring.cloud.stream.kafka.binder.health-timeout | 60 | Time to wait to get partition information in seconds; default 60. |
spring.cloud.stream.kafka.binder.jaas | ||
spring.cloud.stream.kafka.binder.max-wait | 100 | |
spring.cloud.stream.kafka.binder.min-partition-count | 1 | |
spring.cloud.stream.kafka.binder.offset-update-count | 0 | |
spring.cloud.stream.kafka.binder.offset-update-shutdown-timeout | 2000 | |
spring.cloud.stream.kafka.binder.offset-update-time-window | 10000 | |
spring.cloud.stream.kafka.binder.producer-properties | Arbitrary kafka producer properties. | |
spring.cloud.stream.kafka.binder.queue-size | 8192 | |
spring.cloud.stream.kafka.binder.replication-factor | 1 | |
spring.cloud.stream.kafka.binder.required-acks | 1 | |
spring.cloud.stream.kafka.binder.socket-buffer-size | 2097152 | |
spring.cloud.stream.kafka.binder.transaction.producer.admin | ||
spring.cloud.stream.kafka.binder.transaction.producer.batch-timeout | ||
spring.cloud.stream.kafka.binder.transaction.producer.buffer-size | ||
spring.cloud.stream.kafka.binder.transaction.producer.compression-type | ||
spring.cloud.stream.kafka.binder.transaction.producer.configuration | ||
spring.cloud.stream.kafka.binder.transaction.producer.error-channel-enabled | ||
spring.cloud.stream.kafka.binder.transaction.producer.header-mode | ||
spring.cloud.stream.kafka.binder.transaction.producer.header-patterns | ||
spring.cloud.stream.kafka.binder.transaction.producer.message-key-expression | ||
spring.cloud.stream.kafka.binder.transaction.producer.partition-count | ||
spring.cloud.stream.kafka.binder.transaction.producer.partition-key-expression | ||
spring.cloud.stream.kafka.binder.transaction.producer.partition-key-extractor-name | ||
spring.cloud.stream.kafka.binder.transaction.producer.partition-selector-expression | ||
spring.cloud.stream.kafka.binder.transaction.producer.partition-selector-name | ||
spring.cloud.stream.kafka.binder.transaction.producer.required-groups | ||
spring.cloud.stream.kafka.binder.transaction.producer.sync | ||
spring.cloud.stream.kafka.binder.transaction.producer.topic | ||
spring.cloud.stream.kafka.binder.transaction.producer.use-native-encoding | ||
spring.cloud.stream.kafka.binder.transaction.transaction-id-prefix | ||
spring.cloud.stream.kafka.binder.zk-connection-timeout | 10000 | ZK Connection timeout in milliseconds. |
spring.cloud.stream.kafka.binder.zk-nodes | [localhost] | |
spring.cloud.stream.kafka.binder.zk-session-timeout | 10000 | ZK session timeout in milliseconds. |
spring.cloud.stream.kafka.bindings | ||
spring.cloud.stream.kafka.streams.binder.application-id | ||
spring.cloud.stream.kafka.streams.binder.auto-add-partitions | ||
spring.cloud.stream.kafka.streams.binder.auto-create-topics | ||
spring.cloud.stream.kafka.streams.binder.brokers | ||
spring.cloud.stream.kafka.streams.binder.configuration | ||
spring.cloud.stream.kafka.streams.binder.consumer-properties | ||
spring.cloud.stream.kafka.streams.binder.fetch-size | ||
spring.cloud.stream.kafka.streams.binder.header-mapper-bean-name | ||
spring.cloud.stream.kafka.streams.binder.headers | ||
spring.cloud.stream.kafka.streams.binder.health-timeout | ||
spring.cloud.stream.kafka.streams.binder.jaas | ||
spring.cloud.stream.kafka.streams.binder.max-wait | ||
spring.cloud.stream.kafka.streams.binder.min-partition-count | ||
spring.cloud.stream.kafka.streams.binder.offset-update-count | ||
spring.cloud.stream.kafka.streams.binder.offset-update-shutdown-timeout | ||
spring.cloud.stream.kafka.streams.binder.offset-update-time-window | ||
spring.cloud.stream.kafka.streams.binder.producer-properties | ||
spring.cloud.stream.kafka.streams.binder.queue-size | ||
spring.cloud.stream.kafka.streams.binder.replication-factor | ||
spring.cloud.stream.kafka.streams.binder.required-acks | ||
spring.cloud.stream.kafka.streams.binder.serde-error | {@link org.apache.kafka.streams.errors.DeserializationExceptionHandler} to use when there is a Serde error. {@link KafkaStreamsBinderConfigurationProperties.SerdeError} values are used to provide the exception handler on consumer binding. | |
spring.cloud.stream.kafka.streams.binder.socket-buffer-size | ||
spring.cloud.stream.kafka.streams.binder.zk-connection-timeout | ||
spring.cloud.stream.kafka.streams.binder.zk-nodes | ||
spring.cloud.stream.kafka.streams.binder.zk-session-timeout | ||
spring.cloud.stream.kafka.streams.bindings | ||
spring.cloud.stream.kafka.streams.time-window.advance-by | 0 | |
spring.cloud.stream.kafka.streams.time-window.length | 0 | |
spring.cloud.stream.metrics.export-properties | List of properties that are going to be appended to each message. This gets populate by onApplicationEvent, once the context refreshes to avoid overhead of doing per message basis. | |
spring.cloud.stream.metrics.key | The name of the metric being emitted. Should be an unique value per application. Defaults to: ${spring.application.name:${vcap.application.name:${spring.config.name:application}}}. | |
spring.cloud.stream.metrics.meter-filter | Pattern to control the 'meters' one wants to capture. By default all 'meters' will be captured. For example, 'spring.integration.*' will only capture metric information for meters whose name starts with 'spring.integration'. | |
spring.cloud.stream.metrics.properties | Application properties that should be added to the metrics payload For example: | |
spring.cloud.stream.metrics.schedule-interval | 60s | Interval expressed as Duration for scheduling metrics snapshots publishing. Defaults to 60 seconds |
spring.cloud.stream.override-cloud-connectors | false | This property is only applicable when the cloud profile is active and Spring Cloud Connectors are provided with the application. If the property is false (the default), the binder detects a suitable bound service (for example, a RabbitMQ service bound in Cloud Foundry for the RabbitMQ binder) and uses it for creating connections (usually through Spring Cloud Connectors). When set to true, this property instructs binders to completely ignore the bound services and rely on Spring Boot properties (for example, relying on the spring.rabbitmq.* properties provided in the environment for the RabbitMQ binder). The typical usage of this property is to be nested in a customized environment when connecting to multiple systems. |
spring.cloud.stream.rabbit.binder.admin-addresses | [] | Urls for management plugins; only needed for queue affinity. |
spring.cloud.stream.rabbit.binder.admin-adresses | ||
spring.cloud.stream.rabbit.binder.compression-level | 0 | Compression level for compressed bindings; see 'java.util.zip.Deflator'. |
spring.cloud.stream.rabbit.binder.connection-name-prefix | Prefix for connection names from this binder. | |
spring.cloud.stream.rabbit.binder.nodes | [] | Cluster member node names; only needed for queue affinity. |
spring.cloud.stream.rabbit.bindings | ||
spring.cloud.stream.schema-registry-client.cached | false | |
spring.cloud.stream.schema-registry-client.endpoint | ||
spring.cloud.stream.schema.avro.dynamic-schema-generation-enabled | false | |
spring.cloud.stream.schema.avro.prefix | vnd | |
spring.cloud.stream.schema.avro.reader-schema | ||
spring.cloud.stream.schema.avro.schema-imports | A list of files or directories that should be loaded first thus making them importable by subsequent schemas. Note that imported files should not reference each other. @parameter | |
spring.cloud.stream.schema.avro.schema-locations | The source directory of Apache Avro schema. This schema is used by this converter. If this schema depends on other schemas consider defining those those dependent ones in the {@link #schemaImports} @parameter | |
spring.cloud.stream.schema.server.allow-schema-deletion | false | Boolean flag to enable/disable schema deletion. |
spring.cloud.stream.schema.server.path | Prefix for configuration resource paths (default is empty). Useful when embedding in another application when you don’t want to change the context path or servlet path. | |
spring.cloud.task.batch.command-line-runner-order | 0 | The order for the {@code CommandLineRunner} used to run batch jobs when {@code spring.cloud.task.batch.fail-on-job-failure=true}. Defaults to 0 (same as the {@link org.springframework.boot.autoconfigure.batch.JobLauncherCommandLineRunner}). |
spring.cloud.task.batch.events.chunk-order | Properties for chunk listener order | |
spring.cloud.task.batch.events.chunk.enabled | true | This property is used to determine if a task should listen for batch chunk events. |
spring.cloud.task.batch.events.enabled | true | This property is used to determine if a task should listen for batch events. |
spring.cloud.task.batch.events.item-process-order | Properties for itemProcess listener order | |
spring.cloud.task.batch.events.item-process.enabled | true | This property is used to determine if a task should listen for batch item processed events. |
spring.cloud.task.batch.events.item-read-order | Properties for itemRead listener order | |
spring.cloud.task.batch.events.item-read.enabled | true | This property is used to determine if a task should listen for batch item read events. |
spring.cloud.task.batch.events.item-write-order | Properties for itemWrite listener order | |
spring.cloud.task.batch.events.item-write.enabled | true | This property is used to determine if a task should listen for batch item write events. |
spring.cloud.task.batch.events.job-execution-order | Properties for jobExecution listener order | |
spring.cloud.task.batch.events.job-execution.enabled | true | This property is used to determine if a task should listen for batch job execution events. |
spring.cloud.task.batch.events.skip-order | Properties for skip listener order | |
spring.cloud.task.batch.events.skip.enabled | true | This property is used to determine if a task should listen for batch skip events. |
spring.cloud.task.batch.events.step-execution-order | Properties for stepExecution listener order | |
spring.cloud.task.batch.events.step-execution.enabled | true | This property is used to determine if a task should listen for batch step execution events. |
spring.cloud.task.batch.fail-on-job-failure | false | This property is used to determine if a task app should return with a non zero exit code if a batch job fails. |
spring.cloud.task.batch.fail-on-job-failure-poll-interval | 5000 | Fixed delay in milliseconds that Spring Cloud Task will wait when checking if {@link org.springframework.batch.core.JobExecution}s have completed, when spring.cloud.task.batch.failOnJobFailure is set to true. Defaults to 5000. |
spring.cloud.task.batch.job-names | Comma-separated list of job names to execute on startup (for instance, | |
spring.cloud.task.batch.listener.enabled | true | This property is used to determine if a task will be linked to the batch jobs that are run. |
spring.cloud.task.closecontext-enabled | false | When set to true the context is closed at the end of the task. Else the context remains open. |
spring.cloud.task.events.enabled | true | This property is used to determine if a task app should emit task events. |
spring.cloud.task.executionid | An id that will be used by the task when updating the task execution. | |
spring.cloud.task.external-execution-id | An id that can be associated with a task. | |
spring.cloud.task.parent-execution-id | The id of the parent task execution id that launched this task execution. Defaults to null if task execution had no parent. | |
spring.cloud.task.single-instance-enabled | false | This property is used to determine if a task will execute if another task with the same app name is running. |
spring.cloud.task.single-instance-lock-check-interval | 500 | Declares the time (in millis) that a task execution will wait between checks. Default time is: 500 millis. |
spring.cloud.task.single-instance-lock-ttl | Declares the maximum amount of time (in millis) that a task execution can hold a lock to prevent another task from executing with a specific task name when the single-instance-enabled is set to true. Default time is: Integer.MAX_VALUE. | |
spring.cloud.task.table-prefix | TASK_ | The prefix to append to the table names created by Spring Cloud Task. |
spring.cloud.util.enabled | true | Enables creation of Spring Cloud utility beans. |
spring.cloud.vault.app-id.app-id-path | app-id | Mount path of the AppId authentication backend. |
spring.cloud.vault.app-id.network-interface | Network interface hint for the "MAC_ADDRESS" UserId mechanism. | |
spring.cloud.vault.app-id.user-id | MAC_ADDRESS | UserId mechanism. Can be either "MAC_ADDRESS", "IP_ADDRESS", a string or a class name. |
spring.cloud.vault.app-role.app-role-path | approle | Mount path of the AppRole authentication backend. |
spring.cloud.vault.app-role.role | Name of the role, optional, used for pull-mode. | |
spring.cloud.vault.app-role.role-id | The RoleId. | |
spring.cloud.vault.app-role.secret-id | The SecretId. | |
spring.cloud.vault.application-name | application | Application name for AppId authentication. |
spring.cloud.vault.authentication | ||
spring.cloud.vault.aws-ec2.aws-ec2-path | aws-ec2 | Mount path of the AWS-EC2 authentication backend. |
spring.cloud.vault.aws-ec2.identity-document | http://169.254.169.254/latest/dynamic/instance-identity/pkcs7 | URL of the AWS-EC2 PKCS7 identity document. |
spring.cloud.vault.aws-ec2.nonce | Nonce used for AWS-EC2 authentication. An empty nonce defaults to nonce generation. | |
spring.cloud.vault.aws-ec2.role | Name of the role, optional. | |
spring.cloud.vault.aws-iam.aws-path | aws | Mount path of the AWS authentication backend. |
spring.cloud.vault.aws-iam.role | Name of the role, optional. Defaults to the friendly IAM name if not set. | |
spring.cloud.vault.aws-iam.server-name | Name of the server used to set {@code X-Vault-AWS-IAM-Server-ID} header in the headers of login requests. | |
spring.cloud.vault.aws.access-key-property | cloud.aws.credentials.accessKey | Target property for the obtained access key. |
spring.cloud.vault.aws.backend | aws | aws backend path. |
spring.cloud.vault.aws.enabled | false | Enable aws backend usage. |
spring.cloud.vault.aws.role | Role name for credentials. | |
spring.cloud.vault.aws.secret-key-property | cloud.aws.credentials.secretKey | Target property for the obtained secret key. |
spring.cloud.vault.azure-msi.azure-path | azure | Mount path of the Azure MSI authentication backend. |
spring.cloud.vault.azure-msi.role | Name of the role. | |
spring.cloud.vault.cassandra.backend | cassandra | Cassandra backend path. |
spring.cloud.vault.cassandra.enabled | false | Enable cassandra backend usage. |
spring.cloud.vault.cassandra.password-property | spring.data.cassandra.password | Target property for the obtained password. |
spring.cloud.vault.cassandra.role | Role name for credentials. | |
spring.cloud.vault.cassandra.username-property | spring.data.cassandra.username | Target property for the obtained username. |
spring.cloud.vault.config.lifecycle.enabled | true | Enable lifecycle management. |
spring.cloud.vault.config.order | 0 | Used to set a {@link org.springframework.core.env.PropertySource} priority. This is useful to use Vault as an override on other property sources. @see org.springframework.core.PriorityOrdered |
spring.cloud.vault.connection-timeout | 5000 | Connection timeout. |
spring.cloud.vault.consul.backend | consul | Consul backend path. |
spring.cloud.vault.consul.enabled | false | Enable consul backend usage. |
spring.cloud.vault.consul.role | Role name for credentials. | |
spring.cloud.vault.consul.token-property | spring.cloud.consul.token | Target property for the obtained token. |
spring.cloud.vault.database.backend | database | Database backend path. |
spring.cloud.vault.database.enabled | false | Enable database backend usage. |
spring.cloud.vault.database.password-property | spring.datasource.password | Target property for the obtained password. |
spring.cloud.vault.database.role | Role name for credentials. | |
spring.cloud.vault.database.username-property | spring.datasource.username | Target property for the obtained username. |
spring.cloud.vault.discovery.enabled | false | Flag to indicate that Vault server discovery is enabled (vault server URL will be looked up via discovery). |
spring.cloud.vault.discovery.service-id | vault | Service id to locate Vault. |
spring.cloud.vault.enabled | true | Enable Vault config server. |
spring.cloud.vault.fail-fast | false | Fail fast if data cannot be obtained from Vault. |
spring.cloud.vault.gcp-gce.gcp-path | gcp | Mount path of the Kubernetes authentication backend. |
spring.cloud.vault.gcp-gce.role | Name of the role against which the login is being attempted. | |
spring.cloud.vault.gcp-gce.service-account | Optional service account id. Using the default id if left unconfigured. | |
spring.cloud.vault.gcp-iam.credentials.encoded-key | The base64 encoded contents of an OAuth2 account private key in JSON format. | |
spring.cloud.vault.gcp-iam.credentials.location | Location of the OAuth2 credentials private key. <p> Since this is a Resource, the private key can be in a multitude of locations, such as a local file system, classpath, URL, etc. | |
spring.cloud.vault.gcp-iam.gcp-path | gcp | Mount path of the Kubernetes authentication backend. |
spring.cloud.vault.gcp-iam.jwt-validity | 15m | Validity of the JWT token. |
spring.cloud.vault.gcp-iam.project-id | Overrides the GCP project Id. | |
spring.cloud.vault.gcp-iam.role | Name of the role against which the login is being attempted. | |
spring.cloud.vault.gcp-iam.service-account-id | Overrides the GCP service account Id. | |
spring.cloud.vault.generic.application-name | application | Application name to be used for the context. |
spring.cloud.vault.generic.backend | secret | Name of the default backend. |
spring.cloud.vault.generic.default-context | application | Name of the default context. |
spring.cloud.vault.generic.enabled | true | Enable the generic backend. |
spring.cloud.vault.generic.profile-separator | / | Profile-separator to combine application name and profile. |
spring.cloud.vault.host | localhost | Vault server host. |
spring.cloud.vault.kubernetes.kubernetes-path | kubernetes | Mount path of the Kubernetes authentication backend. |
spring.cloud.vault.kubernetes.role | Name of the role against which the login is being attempted. | |
spring.cloud.vault.kubernetes.service-account-token-file | /var/run/secrets/kubernetes.io/serviceaccount/token | Path to the service account token file. |
spring.cloud.vault.kv.application-name | application | Application name to be used for the context. |
spring.cloud.vault.kv.backend | secret | Name of the default backend. |
spring.cloud.vault.kv.backend-version | 2 | Key-Value backend version. Currently supported versions are: <ul> <li>Version 1 (unversioned key-value backend).</li> <li>Version 2 (versioned key-value backend).</li> </ul> |
spring.cloud.vault.kv.default-context | application | Name of the default context. |
spring.cloud.vault.kv.enabled | false | Enable the kev-value backend. |
spring.cloud.vault.kv.profile-separator | / | Profile-separator to combine application name and profile. |
spring.cloud.vault.mongodb.backend | mongodb | Cassandra backend path. |
spring.cloud.vault.mongodb.enabled | false | Enable mongodb backend usage. |
spring.cloud.vault.mongodb.password-property | spring.data.mongodb.password | Target property for the obtained password. |
spring.cloud.vault.mongodb.role | Role name for credentials. | |
spring.cloud.vault.mongodb.username-property | spring.data.mongodb.username | Target property for the obtained username. |
spring.cloud.vault.mysql.backend | mysql | mysql backend path. |
spring.cloud.vault.mysql.enabled | false | Enable mysql backend usage. |
spring.cloud.vault.mysql.password-property | spring.datasource.password | Target property for the obtained username. |
spring.cloud.vault.mysql.role | Role name for credentials. | |
spring.cloud.vault.mysql.username-property | spring.datasource.username | Target property for the obtained username. |
spring.cloud.vault.port | 8200 | Vault server port. |
spring.cloud.vault.postgresql.backend | postgresql | postgresql backend path. |
spring.cloud.vault.postgresql.enabled | false | Enable postgresql backend usage. |
spring.cloud.vault.postgresql.password-property | spring.datasource.password | Target property for the obtained username. |
spring.cloud.vault.postgresql.role | Role name for credentials. | |
spring.cloud.vault.postgresql.username-property | spring.datasource.username | Target property for the obtained username. |
spring.cloud.vault.rabbitmq.backend | rabbitmq | rabbitmq backend path. |
spring.cloud.vault.rabbitmq.enabled | false | Enable rabbitmq backend usage. |
spring.cloud.vault.rabbitmq.password-property | spring.rabbitmq.password | Target property for the obtained password. |
spring.cloud.vault.rabbitmq.role | Role name for credentials. | |
spring.cloud.vault.rabbitmq.username-property | spring.rabbitmq.username | Target property for the obtained username. |
spring.cloud.vault.read-timeout | 15000 | Read timeout. |
spring.cloud.vault.scheme | https | Protocol scheme. Can be either "http" or "https". |
spring.cloud.vault.ssl.cert-auth-path | cert | Mount path of the TLS cert authentication backend. |
spring.cloud.vault.ssl.key-store | Trust store that holds certificates and private keys. | |
spring.cloud.vault.ssl.key-store-password | Password used to access the key store. | |
spring.cloud.vault.ssl.trust-store | Trust store that holds SSL certificates. | |
spring.cloud.vault.ssl.trust-store-password | Password used to access the trust store. | |
spring.cloud.vault.token | Static vault token. Required if {@link #authentication} is {@code TOKEN}. | |
spring.cloud.vault.uri | Vault URI. Can be set with scheme, host and port. | |
spring.cloud.zookeeper.base-sleep-time-ms | 50 | Initial amount of time to wait between retries. |
spring.cloud.zookeeper.block-until-connected-unit | The unit of time related to blocking on connection to Zookeeper. | |
spring.cloud.zookeeper.block-until-connected-wait | 10 | Wait time to block on connection to Zookeeper. |
spring.cloud.zookeeper.connect-string | localhost:2181 | Connection string to the Zookeeper cluster. |
spring.cloud.zookeeper.default-health-endpoint | Default health endpoint that will be checked to verify that a dependency is alive. | |
spring.cloud.zookeeper.dependencies | Mapping of alias to ZookeeperDependency. From Ribbon perspective the alias is actually serviceID since Ribbon can’t accept nested structures in serviceID. | |
spring.cloud.zookeeper.dependency-configurations | ||
spring.cloud.zookeeper.dependency-names | ||
spring.cloud.zookeeper.discovery.enabled | true | |
spring.cloud.zookeeper.discovery.initial-status | The initial status of this instance (defaults to {@link StatusConstants#STATUS_UP}). | |
spring.cloud.zookeeper.discovery.instance-host | Predefined host with which a service can register itself in Zookeeper. Corresponds to the {code address} from the URI spec. | |
spring.cloud.zookeeper.discovery.instance-id | Id used to register with zookeeper. Defaults to a random UUID. | |
spring.cloud.zookeeper.discovery.instance-port | Port to register the service under (defaults to listening port). | |
spring.cloud.zookeeper.discovery.instance-ssl-port | Ssl port of the registered service. | |
spring.cloud.zookeeper.discovery.metadata | Gets the metadata name/value pairs associated with this instance. This information is sent to zookeeper and can be used by other instances. | |
spring.cloud.zookeeper.discovery.order | 0 | Order of the discovery client used by |
spring.cloud.zookeeper.discovery.register | true | Register as a service in zookeeper. |
spring.cloud.zookeeper.discovery.root | /services | Root Zookeeper folder in which all instances are registered. |
spring.cloud.zookeeper.discovery.uri-spec | {scheme}://{address}:{port} | The URI specification to resolve during service registration in Zookeeper. |
spring.cloud.zookeeper.enabled | true | Is Zookeeper enabled. |
spring.cloud.zookeeper.max-retries | 10 | Max number of times to retry. |
spring.cloud.zookeeper.max-sleep-ms | 500 | Max time in ms to sleep on each retry. |
spring.cloud.zookeeper.prefix | Common prefix that will be applied to all Zookeeper dependencies' paths. | |
spring.integration.poller.fixed-delay | 1000 | Fixed delay for default poller. |
spring.integration.poller.max-messages-per-poll | 1 | Maximum messages per poll for the default poller. |
spring.sleuth.annotation.enabled | true | |
spring.sleuth.async.configurer.enabled | true | Enable default AsyncConfigurer. |
spring.sleuth.async.enabled | true | Enable instrumenting async related components so that the tracing information is passed between threads. |
spring.sleuth.async.ignored-beans | List of {@link java.util.concurrent.Executor} bean names that should be ignored and not wrapped in a trace representation. | |
spring.sleuth.baggage-keys | List of baggage key names that should be propagated out of process. These keys will be prefixed with | |
spring.sleuth.enabled | true | |
spring.sleuth.feign.enabled | true | Enable span information propagation when using Feign. |
spring.sleuth.feign.processor.enabled | true | Enable post processor that wraps Feign Context in its tracing representations. |
spring.sleuth.grpc.enabled | true | Enable span information propagation when using GRPC. |
spring.sleuth.http.enabled | true | |
spring.sleuth.http.legacy.enabled | false | |
spring.sleuth.hystrix.strategy.enabled | true | Enable custom HystrixConcurrencyStrategy that wraps all Callable instances into their Sleuth representative - the TraceCallable. |
spring.sleuth.integration.enabled | true | Enable Spring Integration sleuth instrumentation. |
spring.sleuth.integration.patterns | [!hystrixStreamOutput*, *] | An array of patterns against which channel names will be matched. @see org.springframework.integration.config.GlobalChannelInterceptor#patterns() Defaults to any channel name not matching the Hystrix Stream channel name. |
spring.sleuth.integration.websockets.enabled | true | Enable tracing for WebSockets. |
spring.sleuth.keys.http.headers | Additional headers that should be added as tags if they exist. If the header value is multi-valued, the tag value will be a comma-separated, single-quoted list. | |
spring.sleuth.keys.http.prefix | http. | Prefix for header names if they are added as tags. |
spring.sleuth.log.slf4j.enabled | true | Enable a {@link Slf4jScopeDecorator} that prints tracing information in the logs. |
spring.sleuth.log.slf4j.whitelisted-mdc-keys | A list of keys to be put from baggage to MDC. | |
spring.sleuth.messaging.enabled | false | Should messaging be turned on. |
spring.sleuth.messaging.jms.enabled | false | |
spring.sleuth.messaging.jms.remote-service-name | jms | |
spring.sleuth.messaging.kafka.enabled | false | |
spring.sleuth.messaging.kafka.remote-service-name | kafka | |
spring.sleuth.messaging.rabbit.enabled | false | |
spring.sleuth.messaging.rabbit.remote-service-name | rabbitmq | |
spring.sleuth.opentracing.enabled | true | |
spring.sleuth.propagation-keys | List of fields that are referenced the same in-process as it is on the wire. For example, the name "x-vcap-request-id" would be set as-is including the prefix. <p> Note: {@code fieldName} will be implicitly lower-cased. @see brave.propagation.ExtraFieldPropagation.FactoryBuilder#addField(String) | |
spring.sleuth.propagation.tag.enabled | true | Enables a {@link TagPropagationFinishedSpanHandler} that adds extra propagated fields to span tags. |
spring.sleuth.propagation.tag.whitelisted-keys | A list of keys to be put from extra propagation fields to span tags. | |
spring.sleuth.reactor.enabled.enabled | true | When true enables instrumentation for reactor. |
spring.sleuth.rxjava.schedulers.hook.enabled | true | Enable support for RxJava via RxJavaSchedulersHook. |
spring.sleuth.rxjava.schedulers.ignoredthreads | [HystrixMetricPoller, ^RxComputation.*$] | Thread names for which spans will not be sampled. |
spring.sleuth.sampler.probability | 0.1 | Probability of requests that should be sampled. E.g. 1.0 - 100% requests should be sampled. The precision is whole-numbers only (i.e. there’s no support for 0.1% of the traces). |
spring.sleuth.sampler.rate | A rate per second can be a nice choice for low-traffic endpoints as it allows you surge protection. For example, you may never expect the endpoint to get more than 50 requests per second. If there was a sudden surge of traffic, to 5000 requests per second, you would still end up with 50 traces per second. Conversely, if you had a percentage, like 10%, the same surge would end up with 500 traces per second, possibly overloading your storage. Amazon X-Ray includes a rate-limited sampler (named Reservoir) for this purpose. Brave has taken the same approach via the {@link brave.sampler.RateLimitingSampler}. | |
spring.sleuth.scheduled.enabled | true | Enable tracing for {@link org.springframework.scheduling.annotation.Scheduled}. |
spring.sleuth.scheduled.skip-pattern | org.springframework.cloud.netflix.hystrix.stream.HystrixStreamTask | Pattern for the fully qualified name of a class that should be skipped. |
spring.sleuth.supports-join | true | True means the tracing system supports sharing a span ID between a client and server. |
spring.sleuth.trace-id128 | false | When true, generate 128-bit trace IDs instead of 64-bit ones. |
spring.sleuth.web.additional-skip-pattern | Additional pattern for URLs that should be skipped in tracing. This will be appended to the {@link SleuthWebProperties#skipPattern}. | |
spring.sleuth.web.client.enabled | true | Enable interceptor injecting into {@link org.springframework.web.client.RestTemplate}. |
spring.sleuth.web.client.skip-pattern | Pattern for URLs that should be skipped in client side tracing. | |
spring.sleuth.web.enabled | true | When true enables instrumentation for web applications. |
spring.sleuth.web.exception-logging-filter-enabled | true | Flag to toggle the presence of a filter that logs thrown exceptions. |
spring.sleuth.web.exception-throwing-filter-enabled | true | Flag to toggle the presence of a filter that logs thrown exceptions. @deprecated use {@link #exceptionLoggingFilterEnabled} |
spring.sleuth.web.filter-order | Order in which the tracing filters should be registered. Defaults to {@link TraceHttpAutoConfiguration#TRACING_FILTER_ORDER}. | |
spring.sleuth.web.ignore-auto-configured-skip-patterns | false | If set to true, auto-configured skip patterns will be ignored. @see TraceWebAutoConfiguration |
spring.sleuth.web.skip-pattern | /api-docs.|/swagger.|.\.png|.\.css|.\.js|.\.html|/favicon.ico|/hystrix.stream | Pattern for URLs that should be skipped in tracing. |
spring.sleuth.zuul.enabled | true | Enable span information propagation when using Zuul. |
spring.zipkin.base-url | URL of the zipkin query server instance. You can also provide the service id of the Zipkin server if Zipkin’s registered in service discovery (e.g. http://zipkinserver/). | |
spring.zipkin.compression.enabled | false | |
spring.zipkin.discovery-client-enabled | If set to {@code false}, will treat the {@link ZipkinProperties#baseUrl} as a URL always. | |
spring.zipkin.enabled | true | Enables sending spans to Zipkin. |
spring.zipkin.encoder | Encoding type of spans sent to Zipkin. Set to {@link SpanBytesEncoder#JSON_V1} if your server is not recent. | |
spring.zipkin.locator.discovery.enabled | false | Enabling of locating the host name via service discovery. |
spring.zipkin.message-timeout | 1 | Timeout in seconds before pending spans will be sent in batches to Zipkin. |
spring.zipkin.sender.type | Means of sending spans to Zipkin. | |
spring.zipkin.service.name | The name of the service, from which the Span was sent via HTTP, that should appear in Zipkin. | |
stubrunner.amqp.enabled | false | Whether to enable support for Stub Runner and AMQP. |
stubrunner.amqp.mockCOnnection | true | Whether to enable support for Stub Runner and AMQP mocked connection factory. |
stubrunner.classifier | stubs | The classifier to use by default in ivy co-ordinates for a stub. |
stubrunner.cloud.consul.enabled | true | Whether to enable stubs registration in Consul. |
stubrunner.cloud.delegate.enabled | true | Whether to enable DiscoveryClient’s Stub Runner implementation. |
stubrunner.cloud.enabled | true | Whether to enable Spring Cloud support for Stub Runner. |
stubrunner.cloud.eureka.enabled | true | Whether to enable stubs registration in Eureka. |
stubrunner.cloud.ribbon.enabled | true | Whether to enable Stub Runner’s Ribbon integration. |
stubrunner.cloud.stubbed.discovery.enabled | true | Whether Service Discovery should be stubbed for Stub Runner. If set to false, stubs will get registered in real service discovery. |
stubrunner.cloud.zookeeper.enabled | true | Whether to enable stubs registration in Zookeeper. |
stubrunner.consumer-name | You can override the default {@code spring.application.name} of this field by setting a value to this parameter. | |
stubrunner.delete-stubs-after-test | true | If set to {@code false} will NOT delete stubs from a temporary folder after running tests. |
stubrunner.http-server-stub-configurer | Configuration for an HTTP server stub. | |
stubrunner.ids | [] | The ids of the stubs to run in "ivy" notation ([groupId]:artifactId:[version]:[classifier][:port]). {@code groupId}, {@code classifier}, {@code version} and {@code port} can be optional. |
stubrunner.ids-to-service-ids | Mapping of Ivy notation based ids to serviceIds inside your application. Example "a:b" → "myService" "artifactId" → "myOtherService" | |
stubrunner.integration.enabled | true | Whether to enable Stub Runner integration with Spring Integration. |
stubrunner.mappings-output-folder | Dumps the mappings of each HTTP server to the selected folder. | |
stubrunner.max-port | 15000 | Max value of a port for the automatically started WireMock server. |
stubrunner.min-port | 10000 | Min value of a port for the automatically started WireMock server. |
stubrunner.password | Repository password. | |
stubrunner.properties | Map of properties that can be passed to custom {@link org.springframework.cloud.contract.stubrunner.StubDownloaderBuilder}. | |
stubrunner.proxy-host | Repository proxy host. | |
stubrunner.proxy-port | Repository proxy port. | |
stubrunner.stream.enabled | true | Whether to enable Stub Runner integration with Spring Cloud Stream. |
stubrunner.stubs-mode | Pick where the stubs should come from. | |
stubrunner.stubs-per-consumer | false | Should only stubs for this particular consumer get registered in HTTP server stub. |
stubrunner.username | Repository username. | |
wiremock.rest-template-ssl-enabled | false | |
wiremock.server.files | [] | |
wiremock.server.https-port | -1 | |
wiremock.server.https-port-dynamic | true | |
wiremock.server.port | 8080 | |
wiremock.server.port-dynamic | false | |
wiremock.server.stubs | [] |